Loading ...
Loading ...
Loading ...
LEVEL REFRIGERATOR
IMPORTANT: Level the refrigerator for proper operation and to avoid
cooling, frost and moisture problems that can occur if the doors do not
close completely.
1. Move the refrigerator to its final location. See “Move to Final Location.”
2. Place a carpenter's level on the top of the cabinet to check that the
refrigerator is level from side to side and tilted slightly downward
toward the back. If the refrigerator is not level, go to steps 3 and 4 to
adjust.
NOTE: The doors will close easier when the front of the refrigerator is
slightly higher than the back of the refrigerator.
3. Using two or more people, adjust the leveling feet (one foot located at
each of the two front corners of the refrigerator cabinet).
4. With one person pressing against the top front of the refrigerator to
take weight o the leveling feet, the other(s) can then turn the leveling
feet to adjust the height of each side.
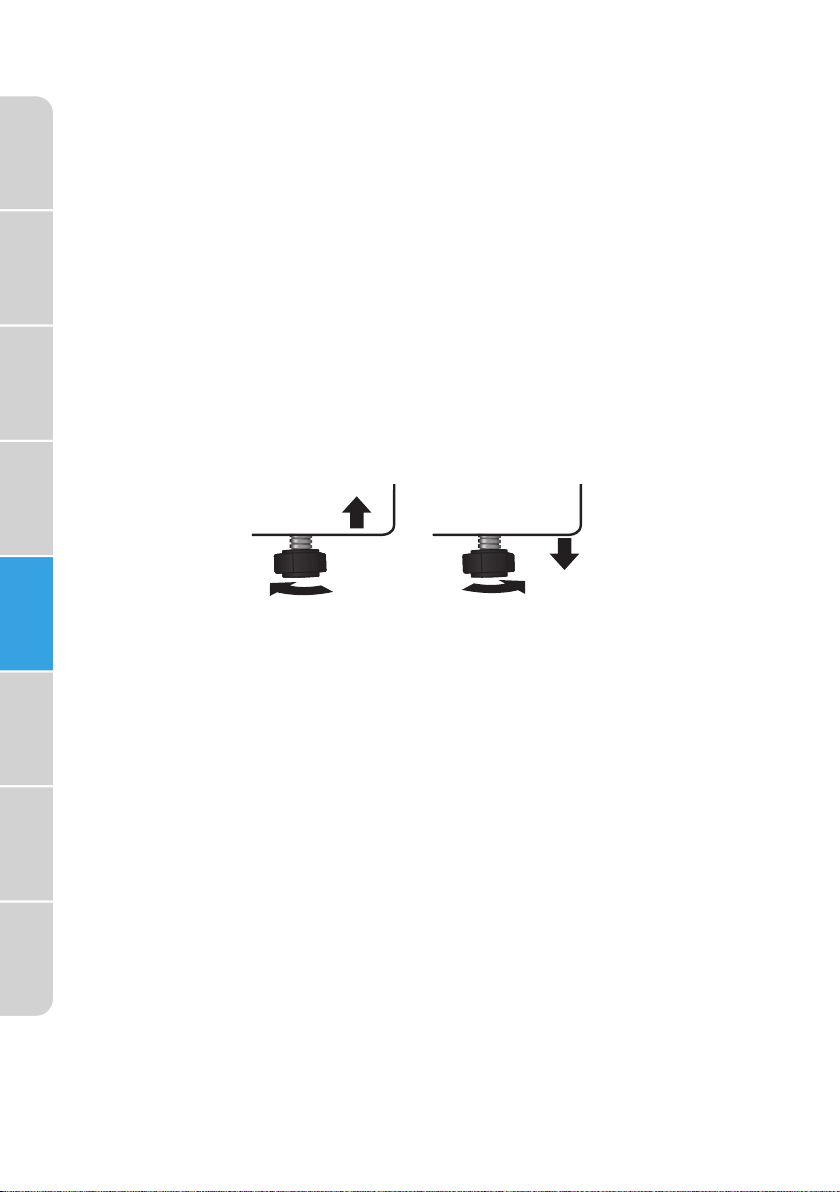
5. Use the carpenter's level to check the level and tilt.
To Raise - Turn the leveling feet clockwise.
To Lower - Turn the leveling feet counterclockwise.
BEFORE USE
WAITING PERIOD
•
Before plugging the refrigerator into a grounded 3-prong electrical
outlet, allow it to stand upright for approximately 2 hours.
NOTE: This reduces the possibility of a malfunction in the cooling
system caused by improper handling during transportation.
•
Allow the refrigerator to cool for 2 to 3 hours before adding food.
CLEANING
1. Wash the refrigerator interior using a soft cloth dampened with a
baking soda solution (2 tablespoons baking soda mixed with 1 quart of
warm water).
2. Using a soft cloth, thoroughly dry all surfaces.
16
Refrigerator
Safety
Operating
Requirements
Parts and
Features
Installation
Refrigerator
Use
Refrigerator
Care
Troubleshooting
Before
Use
Loading ...
Loading ...
Loading ...