Loading ...
Loading ...
Loading ...
STEP 5
Light the Pilots
(For models equipped with standing pilots. If the range
is an electronic ignition model, the burners are ignited by
electronic ignition which eliminates the need for standing
pilot lights.)
The range should be installed in its permanent position
before any pilots are lit or adjusted. Be sure to turn on
the main gas supply valve.
Light the Surface Burner Pilots
CAUTION: Make sure the surface burner
control knobs are in the OFF position before
att_m_,Jn= to ,_ t ,_ n' te
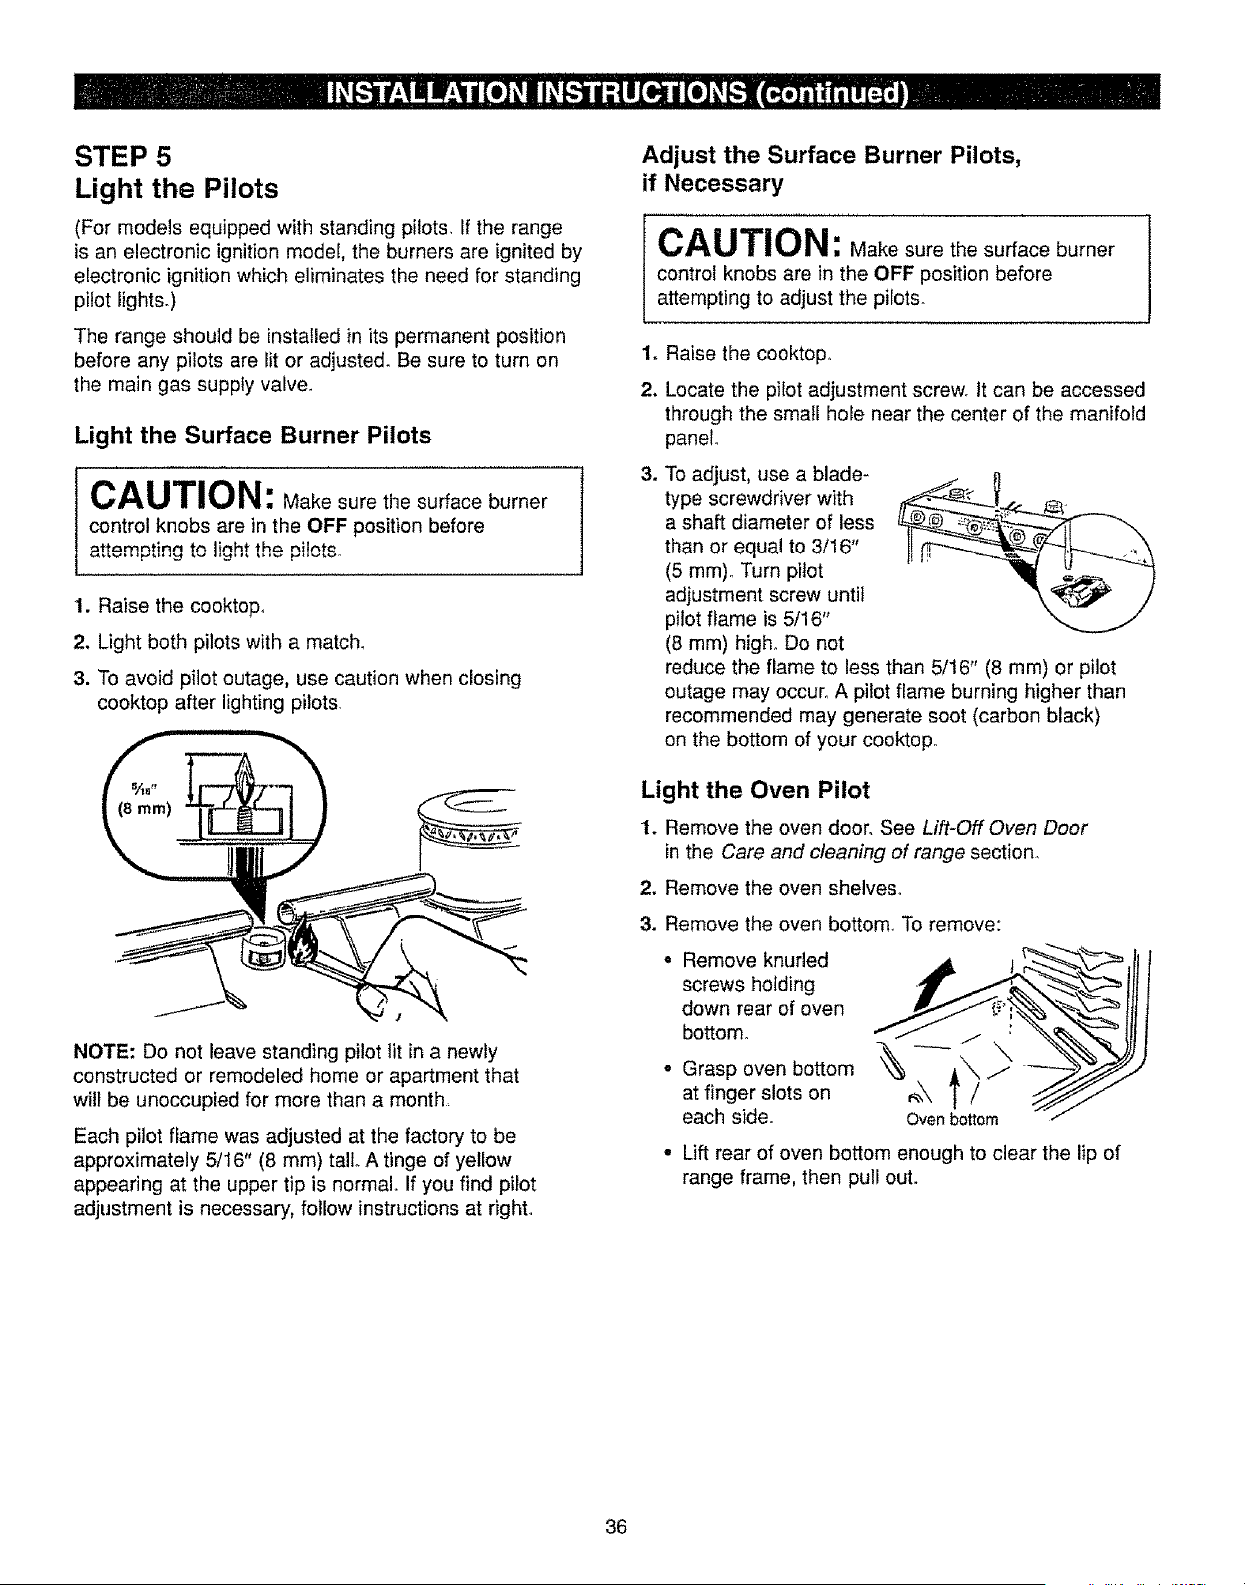
1. Raise the cooktop,
2. Light both pilots with a match,
3. To avoid pilot outage, use caution when closing
cooktop after lighting pilots
NOTE: Do not leave standing pilot tit in a newly
constructed or remodeled home or apartment that
will be unoccupied for more than a month
Each pilot flame was adjusted at the factory to be
approximately 5/t6" (8 mm) tall. A tinge of yellow
appearing at the upper tip is normal,. If you find pilot
adjustment is necessary, follow instructions at right.
Adjust the Surface Burner Pilots,
if Necessary
CAUTION: Make sure the surface burner
control knobs are in the OFF position before
attempting to adjust the pilots.
2.
=
Raise the cooktoF
Locate the pilot adjustment screw. It can be accessed
through the small hole near the center of the manifold
panel°
To adjust, use a blade-
type screwdriver with
a shaft diameter of less
than or equal to 3/16"
(5 mm)o Turn pilot
adjustment screw until
pilot flame is 5/16"
(8 mm) high_ Do not
reduce the flame to less than 5/16" (8 ram) or pilot
outage may occur. A pilot flame burning higher than
recommended may generate soot (carbon black)
on the bottom of your cooktop.
Light the Oven Pilot
1. Remove the oven door. See Lift-Off Oven Door
in the Care and cleaning of range section_
2. Remove the oven shelves,.
3. Remove the oven bottom.. To remove:
= Remove knuded _ !___
down rear of oven
bottom°
or,, oveo0o o
at finger slots on
each side. Ovenbottom
• Lift rear of oven bottom enough to clear the lip of
range frame, then pull out.
36
Loading ...
Loading ...
Loading ...