Loading ...
Loading ...
Loading ...
4
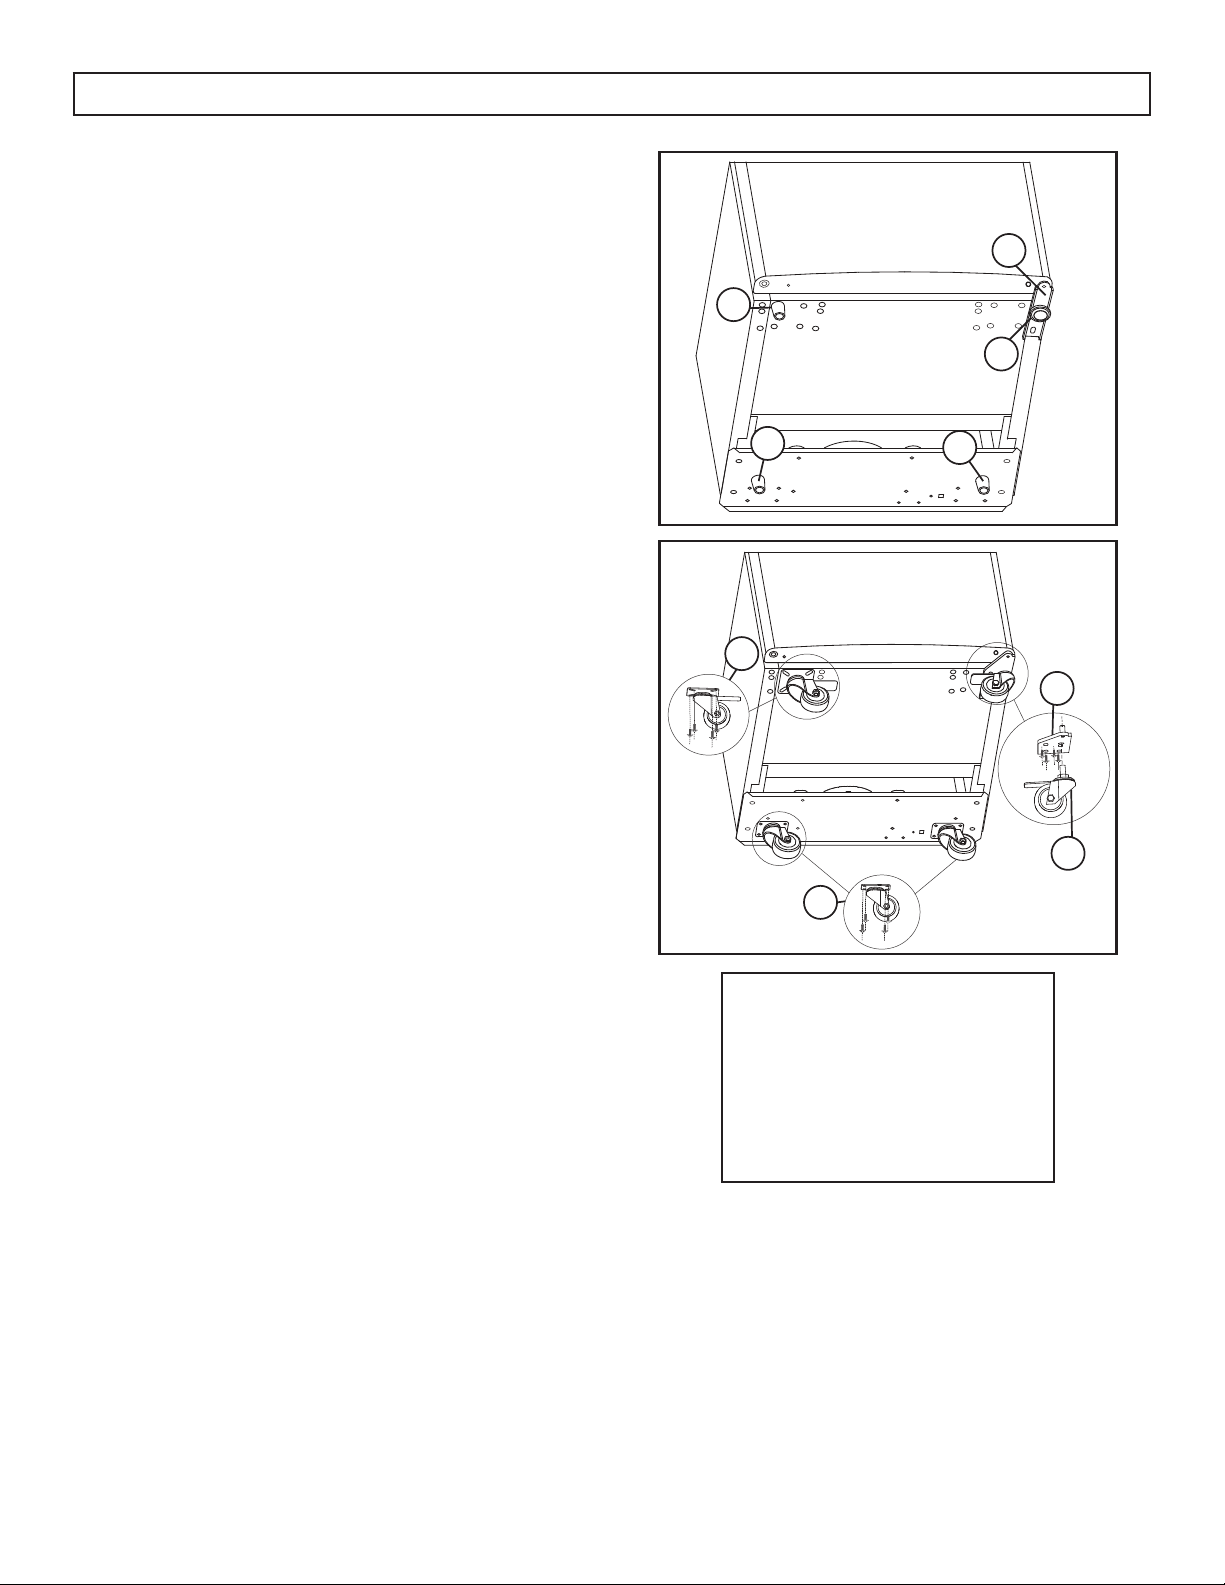
CASTER INSTALLATION
To reduce the risk of personal injury or property
damage, we recommend unplugging the appliance
and using two people to complete the caster
installation.
1. Place the appliance on its back. Protect the fl oor
and the back of the unit from damage by laying
the appliance on a towel or blanket.
2. Remove the three solid feet. Unscrew the
adjustable foot. Keep the solid feet and
adjustable foot for future use.
3. Install the non-locking casters on the back of the
appliance where the mounting holes are already
pre-drilled and threaded.
4. Install the larger locking caster at the front of the
appliance opposite the hinge.
5. Remove the hinge plate installed on the
appliance and replace it with the hinge plate
provided in the caster box.
6. Use the spanner provided in the caster box to
install the smaller locking caster into the pre-
drilled hole in the caster hinge plate.
7. Once completed, allow the unit to stand upright
for a minimum of 6 hours before plugging in to
avoid damage to internal components.
DIMENSIONS
This appliance has the following dimensions:
• 52 cm (20.5”) wide without the handle
• 52.7 cm (20.7”) wide with the handle.
• 84.1 cm (33.1”) high with the regular feet
• 89 cm (35.1”) with the casters
• 52.4 cm (20.6”) deep without the handle
• 58.2 cm (22.9”) deep with the handle
1
2
3
4
5
6
7
1
1
INSTALLATION INSTRUCTIONS
1. Solid feet
2. Adjustable foot
3. Adjustable foot hinge plate
4. Non-locking casters
5. Larger locking caster
6. Caster hinge plate
7. Smaller locking caster
Loading ...
Loading ...
Loading ...