30" Radiant Self-Cleaning
Electric Free=Standing
Range
Estufa El_ctrica
Radiante de 30" Tipo
"lndependiente" con Autolimpieza
Models, Modelos 9t!.95482, 95487, 95489
t11
0
m
m
Z_
0
t =
229C4020P208=6
(SR-10413)
Sears, Roebuck and Co.,
Hoffman Estates, IL 60179 U.S,A, vvv_.sears.com
SELFoCLEANINGRADIANT
FREE-STANDINGRANGE
Tableof Contents
Range Safety ......... 3-8
Anti-Tip Bracket ..... 3, 4
Features of Your Range ' 9
Removal of Packaging Tape .. 9
Cooking Zones ........... t0
Hot Cooktop indicator Lights 10
Cooking Utensils and Woks • 10
Home Canning Tips ....... 11
Checking Your Cookware. 11
Cookware Performance .... 11
Radiant Coils ......... t I
Temperature Lirniter. . 11
Control Settings ......... 12
HourlMinule Arrow Pad ........ 13
Temp Recall .......... 13
Display .............. i3
Oven Light Swilch ........... 13
Indicator Lights ................. 13
To Black Out The Display ..... 13
F-Codes ........... 13
PF Code ......... t4
Automatic Oven Shutoff .. 14
To Set The Clock ..... 15
To Set The Timer .............. 15
To Reset The Timer ....... 15
To Cancel The Timer ....... 15
Baking .... 16-17
Oven Cooking Tips . 18-20
Strong Smell or Odor ........ 18
Aluminum Foi! ..... 18
Oven Vent .............. 18
Peeking ...... 18
Preheating ............. t8
Oven Light ...................... I8
Baking With Margarine 18
Bakeware Placement .... 19
Bakeware . . 19
Element Cycling .................. 19
Oven Racks .............. 19
Oven Control .......... 20
Broiling ........... :.......... 21-22
Self-Cleaning Cycle ......... 23-24
Glass-Ceramic Cooktop
Cleaning .............. 25-26
Control Panel ........ 27
Broiler Pan and Grid ..... 27
Walls of the Oven .............. 27
Drawer and Sides of Range. 27
Oven Door Glass 27
Door Vent Trim ....... 27
Control Knobs .......... 28
Oven Light Bulb .................. 28
Oven Racks ........ 29
Oven Door ............ 29-30
Storage Drawer ...... 31
Before Calling for
Service .......... 32-34
Temperature Adjustment 20, 35
Warranty ................. 38
Consumer Service Numbers 76
For your convenience and future reference, please write down your model
and serial numbers in the space provided. They are located on the front
frame behind the storage drawer,
MODEL NUMBER:
SERIAL NUMBER:
© Sears, Roebuck and Co.
2

IMFORTANTSAFETY
INSTRUCTIONS
SAVE THESE |NSTRUCTIOHS
Read all instructions before using this appliance. When using gas
or electrical appliances, basic safety precautions should be followed,
including the following:
Injury to Persons ::"
Could Result ,.:
Install Anti-Tip
Device Packed _:_!
With Range ;.
See Installation _
Instructions
These ANTI-TIP bracket installation
instructions are for wood or concrete
floors and walls Any other type of
construclion may require special
installation techniques to provide
adequate fastening of the ANTI-TIP
bracket to the floor and wal!
The use of this bracket does not
prevent tipping of the range when
bracket is not properly installed
NOTE: The installation of the
ANTI-TIP bracket must meet all
local codes for securing appliance
Step I
Locating the bracket
A, Locate the bracket against the rear
waft and either the right or left
cabinet If the countertop
overhangs the cabinel, offset the
bracket from the cabinet by the
amount of overhang If there is no
adjacent cabinet, position the edge
of the bracket at the desired
location of the range side panel
3
B. Use the bracket as a template
and mark 2 hole positions on the
wall and 2 hole positions on the
floor Use either the wood or
concrete floor set of positions,
depending on your floor type
See Fig. 1
Adjacent Cabinet or
Final Location of Range
Side Panel
Wood ,i ii:!i:I! ;i il
Bracket _,:;i_X_;j "_
Rear / ..... <
....
:"
Leveling Leg
Wall
Holes
":_ Concrete
Floor
Holes
Fig. 1
continued on next page
/N/PORTANTSAFETY
INSTRUCTIONS
Anti-Tip Bracket (contd.)
Step 2
Anti-tip bracket installation
A. Wood Construction:
1. Floor: Drill a Vs"pilot hole in
the center of each pre-marked
wood floor hole position (a nail
or awl may be used if a drill is
not available),
AND
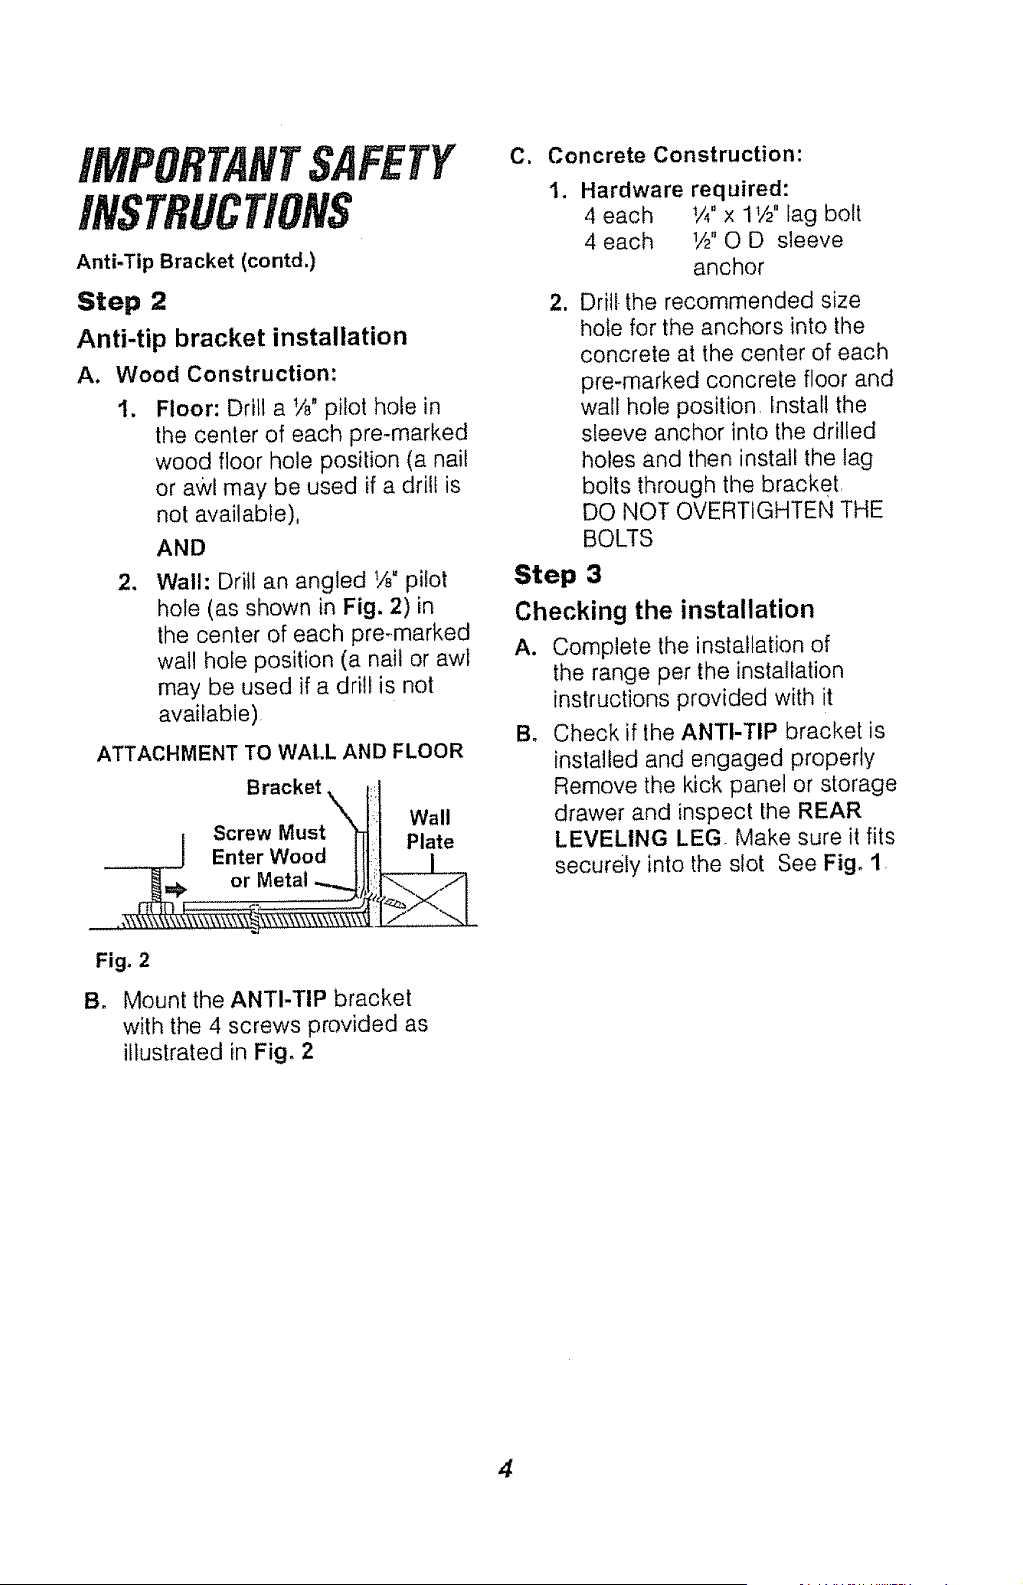
2. Wail: Drill an angled W pilot
hole (as shown in Fig. 2) in
the center of each pre-marked
wall hole position (a nail or awl
may be used if a drill is not
available)
ATTACHMENT TO WALL AND FLOOR
Bracket. _:1
:i Wall
i ScrewMust ]_:, Plate
_ J EnterWood I fH =
.................+, ++r++.+,><(
Fig. 2
B, Mount the ANTI-TIP bracket
with the 4 screws provided as
illustrated in Fig, 2
C. Concrete Construction:
Hardware required:
4 each +/+"x 11/2"lag bolt
4 each 1/a"O D sleeve
anchor
2, Drill-the recommended size
hole for the anchors into the
concrete at the center of each
pre-marked concrete floor and
wall hole position Install the
sleeve anchor into the drilled
holes and then install the lag
bolts through the bracket
DO NOT OVERTIGHTEN THE
BOLTS
Step 3
Checking the installation
A+
a_
Complete the installation of
the range per the installation
instructions provided with it
Check if the ANTI,TIP bracket is
installed and engaged properly
Remove the kick panel or storage
drawer and inspect the REAR
LEVELING LEG. Make sure it fits
securely into the slot See Fig, 1.
IMPORTANTSAFETY
INSTRUCTIONS
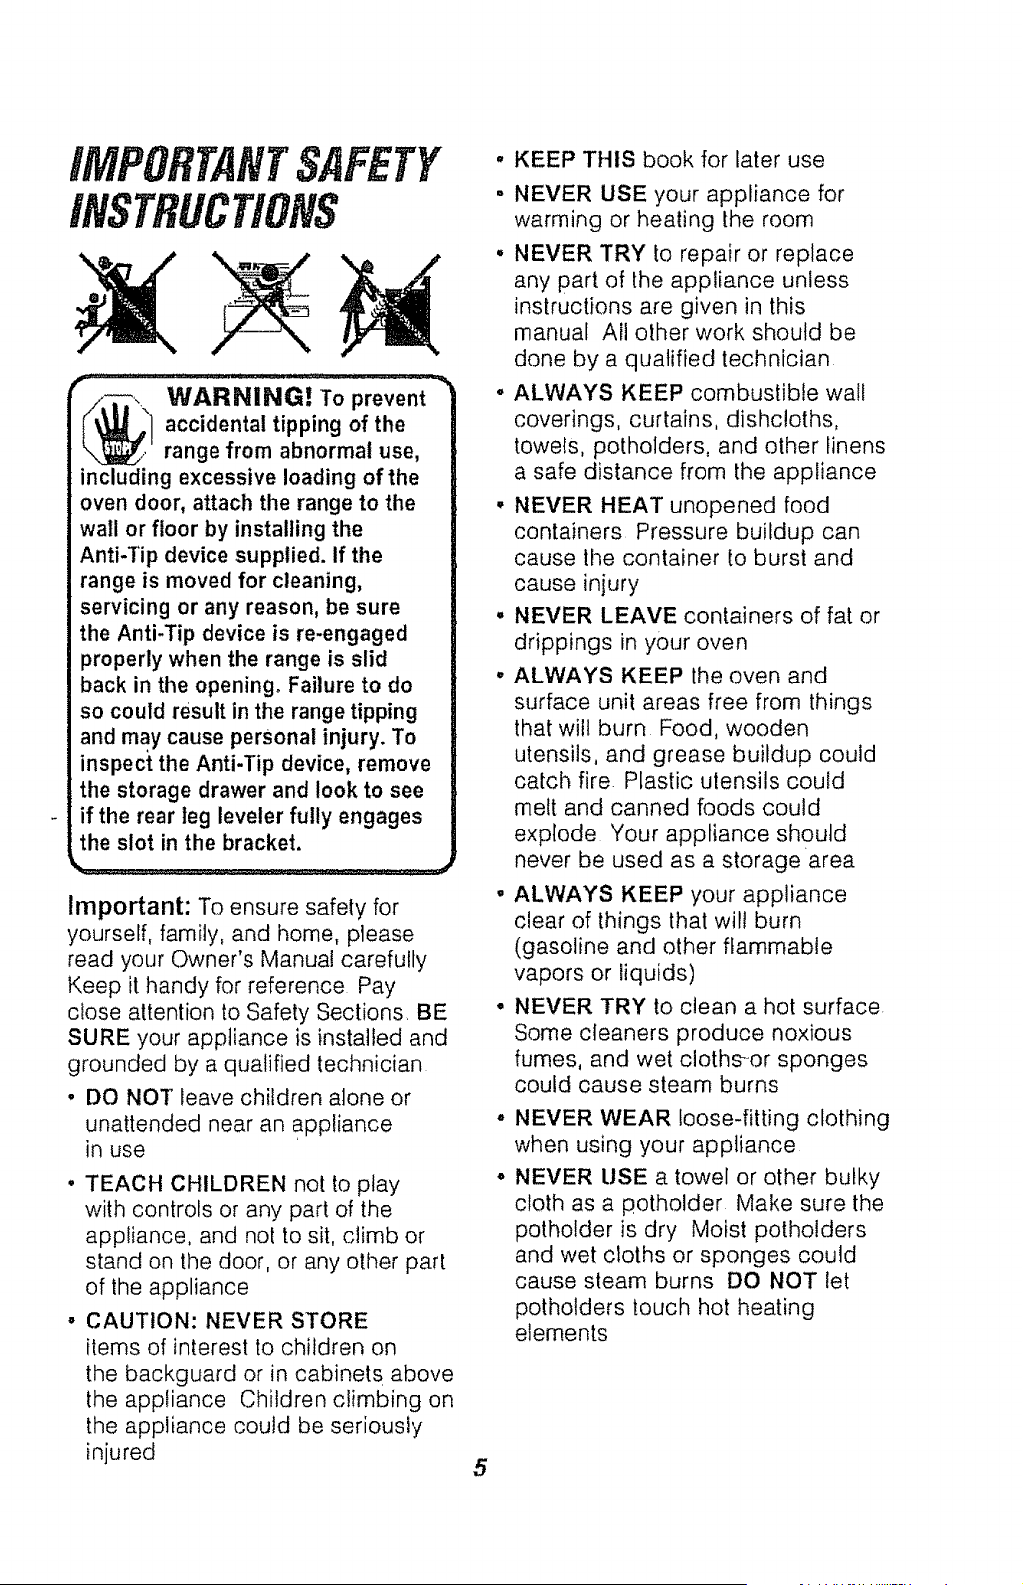
_! ARNING! To prevent
accidental tipping of the
range from abnormal use,
including excessive loading of the
oven door, attach the range to the
wall or floor by installing the
Anti-Tip device supplied. If the
range is moved for cleaning,
servicing or any reason, be sure
the Anti-Tip device is re-engaged
properly when the range is slid
back in the opening. Failure to do
so could result in the range tipping
and may cause personal injury. To
inspect the Anti-Tip device, remove
the storage drawer and look to see
if the rear leg leveler fully engages
the slot in the bracket.
Important: To ensure safety for
yourself, family, and home, please
read your Owner's Manual carefully
Keep it handy for reference Pay
close attention to Safety Sections, BE
SURE your appliance is installed and
grounded by a qualified technician
• DO NOT leave children alone or
unattended near an appliance
in use
• TEACH CHILDREN not to play
with controls or any part of the
appliance, and not to sit, climb or
stand on the door, or any other part
of the appliance
• CAUTION: NEVER STORE
items of interest to children on
the backguard or in cabinets above
the appliance Children climbing on
the appliance could be seriously
injured
5
• KEEP THIS book for later use
- NEVER USE your appliance for
warming or heating the room
, NEVER TRY 1o repair or replace
any part of the appliance unless
instructions are given in this
manual All other work should be
done by a qualified technician
, ALWAYS KEEP combustible walt
coverings, curtains, dishcloths,
towels, potholders, and other linens
a safe distance from the appliance
° NEVER HEAT unopened food
containers Pressure buildup can
cause the container to burst and
cause injury
° NEVER LEAVE containers of fat or
drippings in your oven
° ALWAYS KEEP the oven and
surface unit areas free from things
that wilt burn Food, wooden
utensils, and grease buildup could
catch fire. Plastic utensils could
melt and canned foods could
explode Your appliance should
never be used as a storagearea
• ALWAYS KEEP your appliance
clear of things that will burn
(gasoline and other flammable
vapors or liquids)
° NEVER TRY to clean a hot surface.
Some cleaners produce noxious
fumes, and wet cloths-or sponges
could cause steam burns
• NEVER WEAR loose-fitting clothing
when using your appliance
° NEVER USE a towel or other bulky
cloth as a potholder Make sure the
pothotder is dry Moist potholders
and wet cloths or sponges could
cause steam burns DO NOT let
potholders touch hot heating
elements
/MFORTAflTSAFETY
INSTRUCTIONS
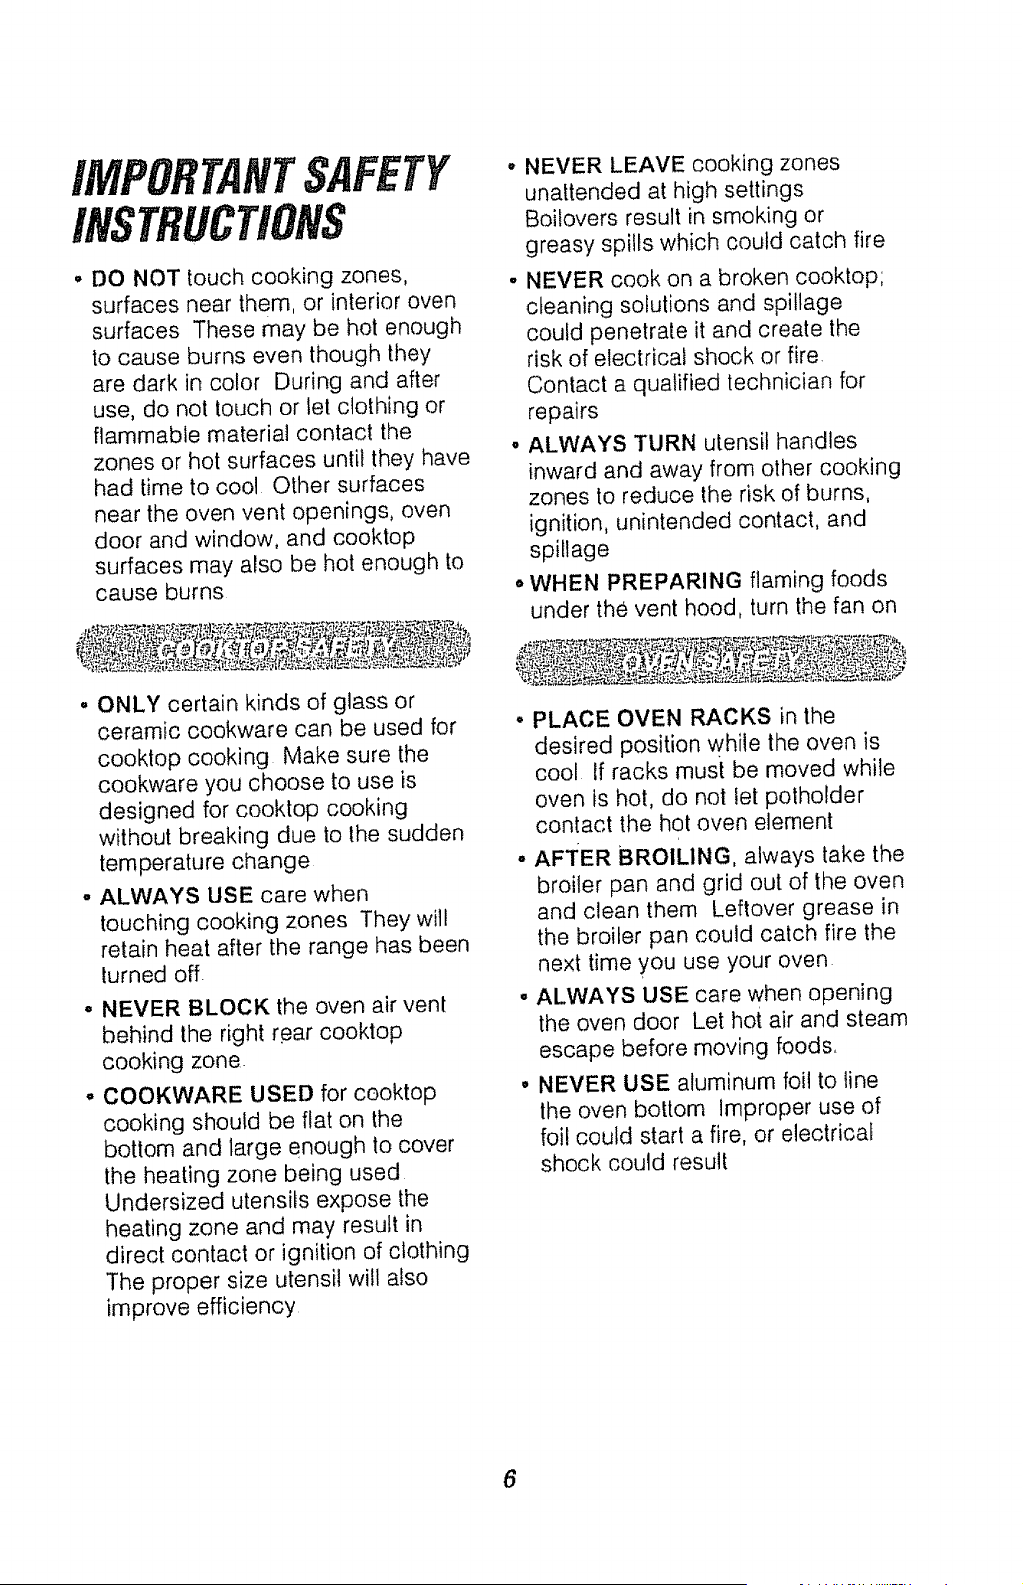
• DO NOT touch cooking zones,
surfaces near them, or interior oven
surfaces These may be hot enough
to cause burns even though they
are dark in color During and after
use, do not touch or let clothing or
flammable material contact the
zones or hot surfaces until they have
had time to cool Other surfaces
near the oven vent openings, oven
door and window, and cooktop
surfaces may also be hot enough to
cause burns
o ONLY certain kinds of glass or
ceramic cookware can be used for
cooktop cooking Make sure the
cookware you choose to use is
designed for cooktop cooking
without breaking due to the sudden
temperature change
• ALWAYS USE care when
touching cooking zones They will
retain heat after the range has been
turned off.
° NEVER BLOCK the oven air vent
behind the right rear cooktop
cooking zone.
, COOKWARE USED for cooktop
cooking should be flat on the
bottom and large enough to cover
the heating zone being used
Undersized utensils expose the
heating zone and may result in
direct contact or ignition of clothing
The proper size utensil will also
improve efficiency
NEVER LEAVE cooking zones
unattended at high settings
Boiiovers result in smoking or
greasy spills which could catch fire
° NEVER cook on a broken cooktop;
cleaning solutions and spillage
could penetrate it and create the
risk of electrical shock or fire.
Conlact a qualified technician for
repairs
° ALWAYS TURN utensil handles
inward and away from other cooking
zones to reduce the risk of burns,
ignition, unintended contact, and
spillage
,,,WHEN PREPARING flaming foods
under the vent hood, turn the fan on
,, PLACE OVEN RACKS in the
desired position while the oven is
cool If racks must be moved while
oven is hot, do not let potholder
contact the hot oven element
° AFTER BROILING, always take the
broiler pan and grid out of the oven
and clean them Leftover grease in
the broiler pan could catch fire the
next time you use your oven
ALWAYS USE care when opening
the oven door Let hot air and steam
escape before moving foods,
NEVER USE aluminum foil to line
the oven botlom Improper use of
foil could start a fire, or electrical
shock could result
6
/MPO A SAFETY
INSTRUCTIONS
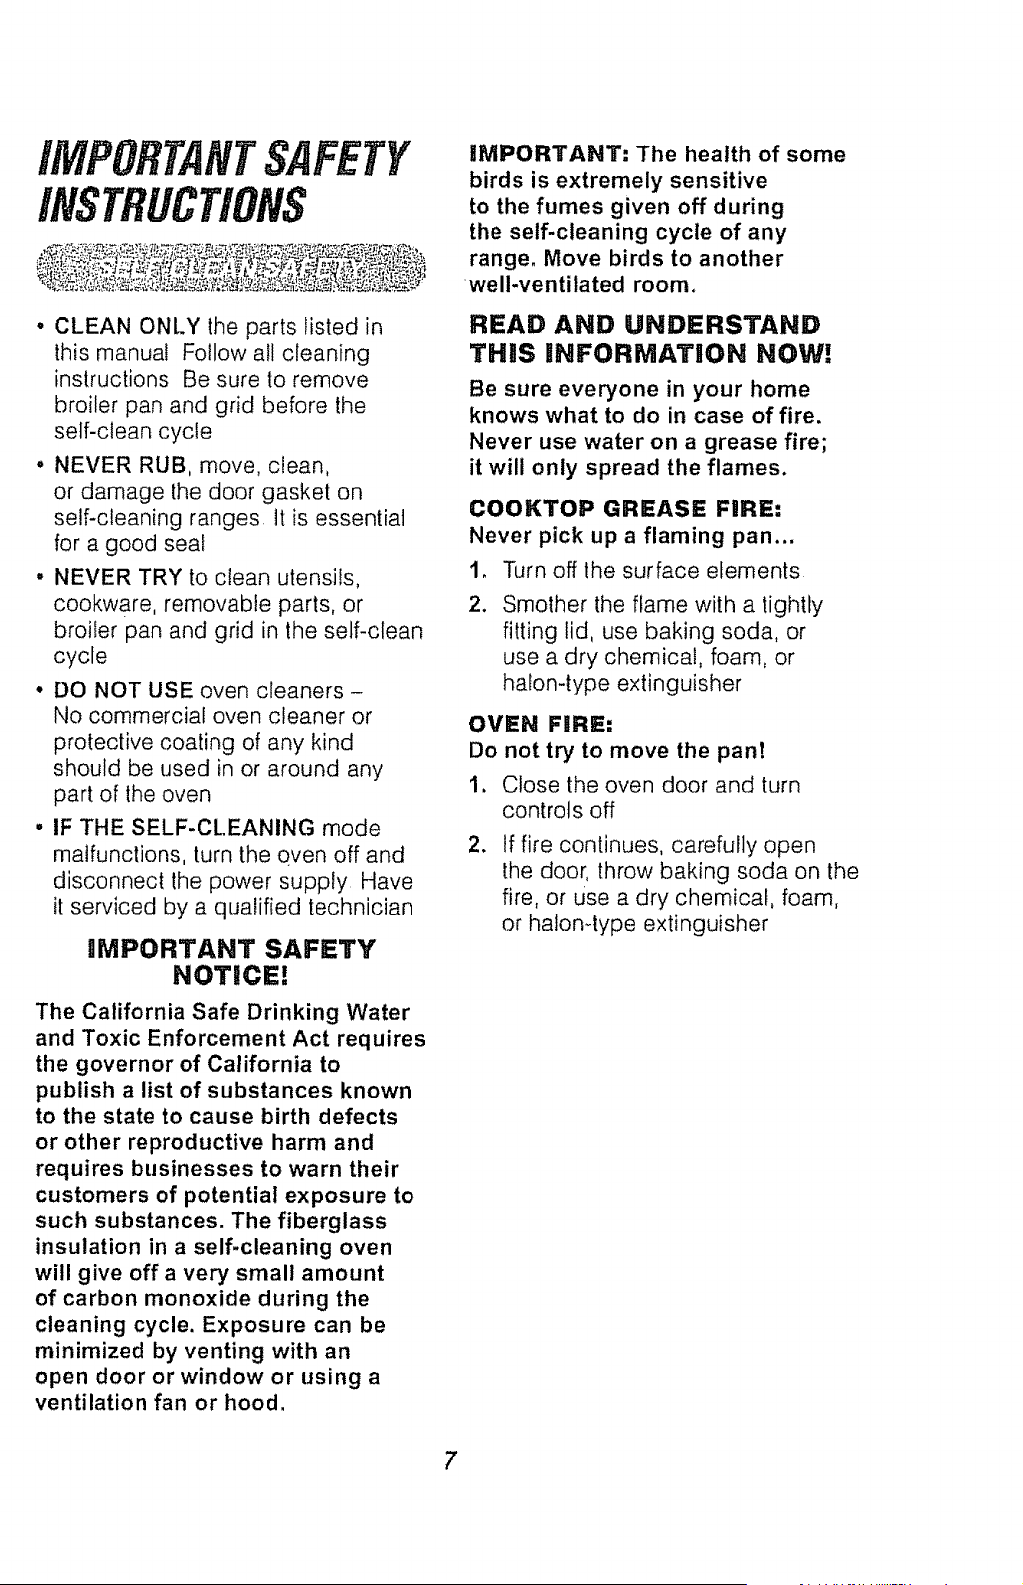
• CLEAN ONLY the parts listed in
this manual Follow all cleaning
instructions Be sure to remove
broiler pan and grid before the
self-clean cycle
• NEVER RUB, move, clean,
or damage the door gasket on
self-cleaning ranges It is essential
for a good seal
° NEVER TRY to clean utensils,
cookware, removable parts, or
broiler pan and grid in the self-clean
cycle
• DO NOT USE oven cleaners -
No commercial oven cleaner or
protective coating of any kind
should be used in or around any
part of the oven
• IF THE SELF.CLEANING mode
malfunclions, turn the oven off and
disconnect the power supply Have
it serviced by a qualified technician
! MPORTANT SAFETY
NOTICE!
The California Safe Drinking Water
and Toxic Enforcement Act requires
the governor of California to
publish a list of substances known
to the state to cause birth defects
or other reproductive harm and
requires businesses to warn their
customers of potential exposure to
such substances. The fiberglass
insulation in a self-cleaning oven
will give off a very small amount
of carbon monoxide during the
cleaning cycle. Exposure can be
minimized by venting with an
open door or window or using a
ventilation fan or hood.
IMPORTANT: The health of some
birds is extremely sensitive
to the fumes given off during
the self-cleaning cycle of any
range, Move birds to another
well-ventilated room.
READ AND UNDERSTAND
THIS iNFORMATiON NOW!
Be sure everyone in your home
knows what to do in case of fire.
Never use water on a grease fire;
it will only spread the flames.
COOKTOP GREASE F|RE:
Never pick up a flaming pan...
1, Turn off the surface elements
2_
Smother the flame with a tightly
fitting lid, use baking soda, or
use a dry chemical, foam, or
halon-type extinguisher
OVEN F|RE:
Do not try to move the pant
1. Close the oven door and turn
controls off
2. tf fire continues, carefully open
the door, throw baking soda on the
fire, or use a dry chemical, foam,
or haton-type extinguisher
7

OPERATION
PROTECTIHGTHECOOKTOP
• DO NOT slide cookware across
your cooktop,
• DO NOT use a dishtowel or sponge
to clean or wipe your cooktop
* DO NOT use scouring powders or
plastic, nylon, or metal cleaning
pads on your cooktop
o DO NOT apply your cooktop
cleaning creme to the cooktop
surface if the surface is hot
• READ the instruction label on the
cooktop cleaning creme bottle
before attempting to clean the
surface of your cooktop
• AFTER cleaning the cooktop
surface, be sure to wipe off any
residue that may be left from the
creme with a dry paper towel
,, FOR MAJOR spills, turn the surface
control knob to OFF, Use a dry
paper towel to wipe up spill, then
use a razor scraper (held with a
potholder) at a 45 ° angle against
the surface of the cooktop to
scrape remaining spill from the
hot cooking zone,
• DO NOT cook directly on the
surface of the glass
• DO NOT use the cooktop as a
cutting board
, DO NOT use a knife or any sharp
object on the cooktop sea! around
the outer edge of the glass because
it wilt cut or damage it
8
(_j \'_ CAUTION. When
L._1 the surface controls
"._" are turned off, the Hot
Surface Indicator light will
remain lit until the cooktop
surface has cooled to
approximately 150°F° The
glass ceramic surface will
retain heat after the indicator
light goes out. Use caution
until the cooktop surface has
had time to cool.
Sugar spills (such as iellies, fudge,
candy syrups) or melted plastic can
cause pitting of the cooktop surface
unless the spill is removed while it is
still hot Special care should be taken
when removing hot substances
Follow these instructions carefully and
remove soil while spill is hot
t. Turn off the cooking zone affected
by the spill Remove the utensifs
2. Wearing an oven mitt, hold the
razor scraper at a 45° angle
against the cooktop and scrape
hot spill to a coot area outside the
cooking zone
3, With the spill in a cool area, use
a dry paper towel to remove the
spillover Any spill remaining
should be left until the surface of
the cooktop has cooled Do not
continue to use the soiled cooking
zone until all of the spiil has been
removed Follow the steps under
Heavy Soil to continue the
cleaning process
OPERATION
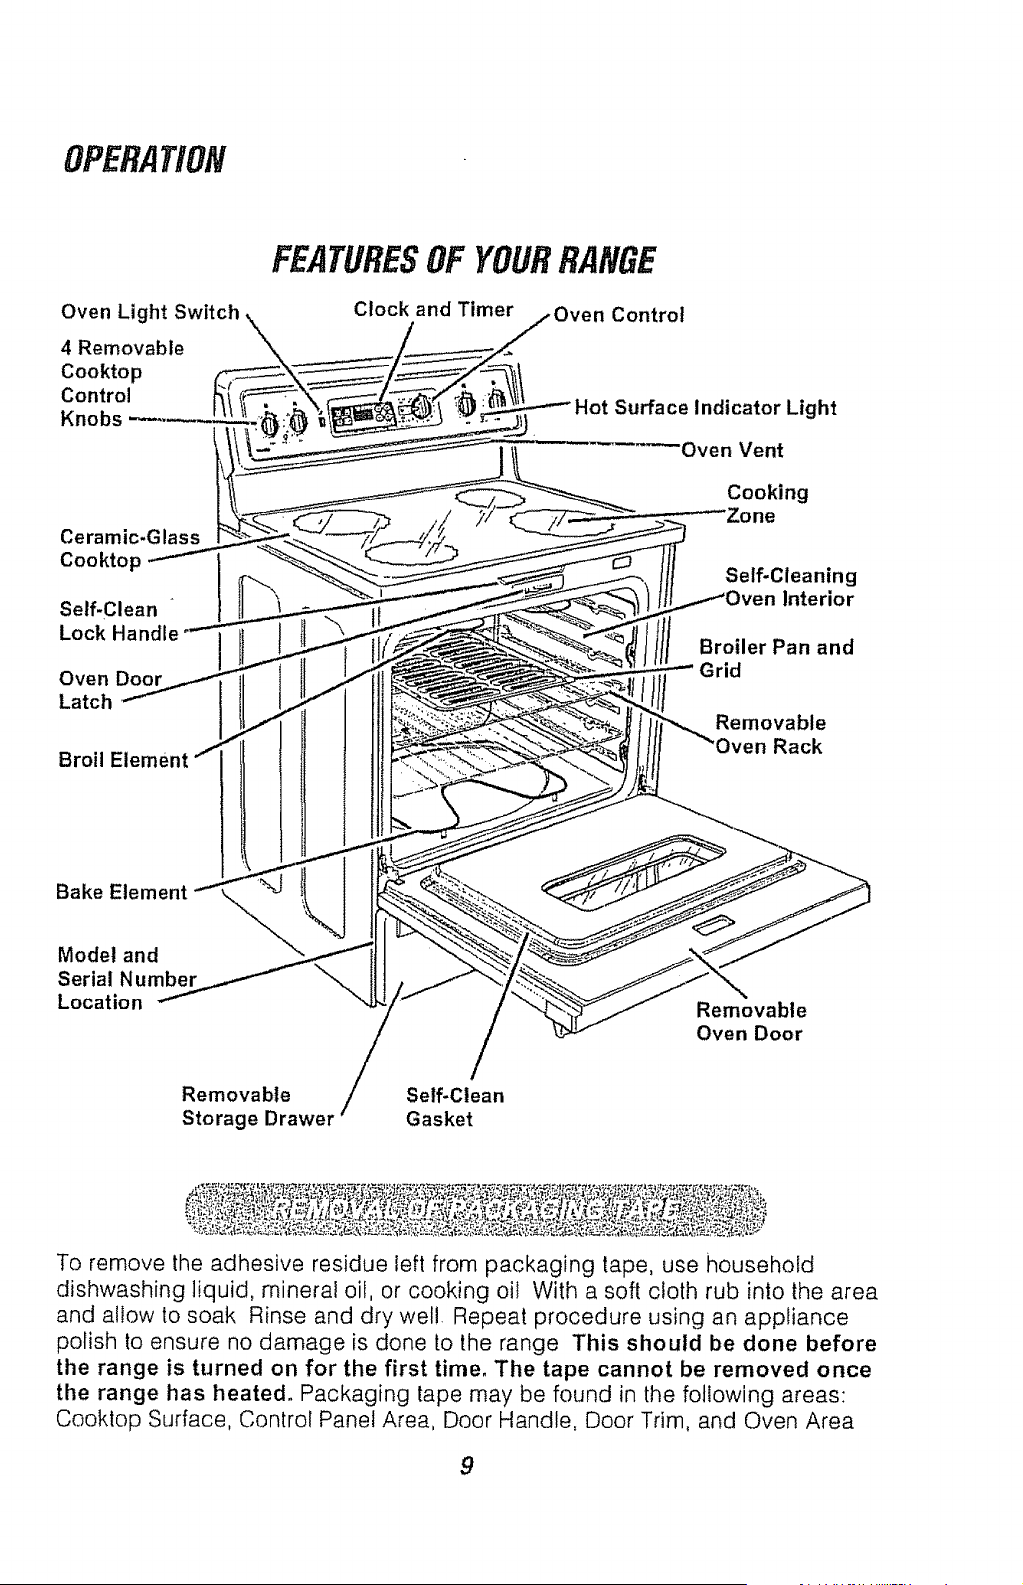
Oven Light Swltcf
4 Removable
Cooktop
Control
Knobs
Ceramic-Glass
Cooktop
Self-Clean
Lock
Oven Door
Latch
Broil Element
FEATURESOF YOURRANGE
Clock and Timer Control
Surface Indicator Light
Oven Vent
Cooking
Zone
Self-Cleaning
Interior
Broiler Pan and
Grid
Removable
en Rack
Bake Element
Model and
Serial Number
Location
Removable
Oven Door
Removable Self-Clean
Storage Drawm Gasket
To remove the adhesive residue left from packaging lape, use household
dishwashing liquid, mineral oi!, or cooking oil With a soft cloth rub into the area
and allow to soak Rinse and dry well. Repeat procedure using an appliance
polish to ensure no damage is done to the range This should be done before
the range is turned on for the first time, The tape cannot be removed once
the range has heated. Packaging tape may be found in the following areas:
Cooktop Surface, Control Panel Area, Door Handle, Door Trim, and Oven Area
9
OPERATION
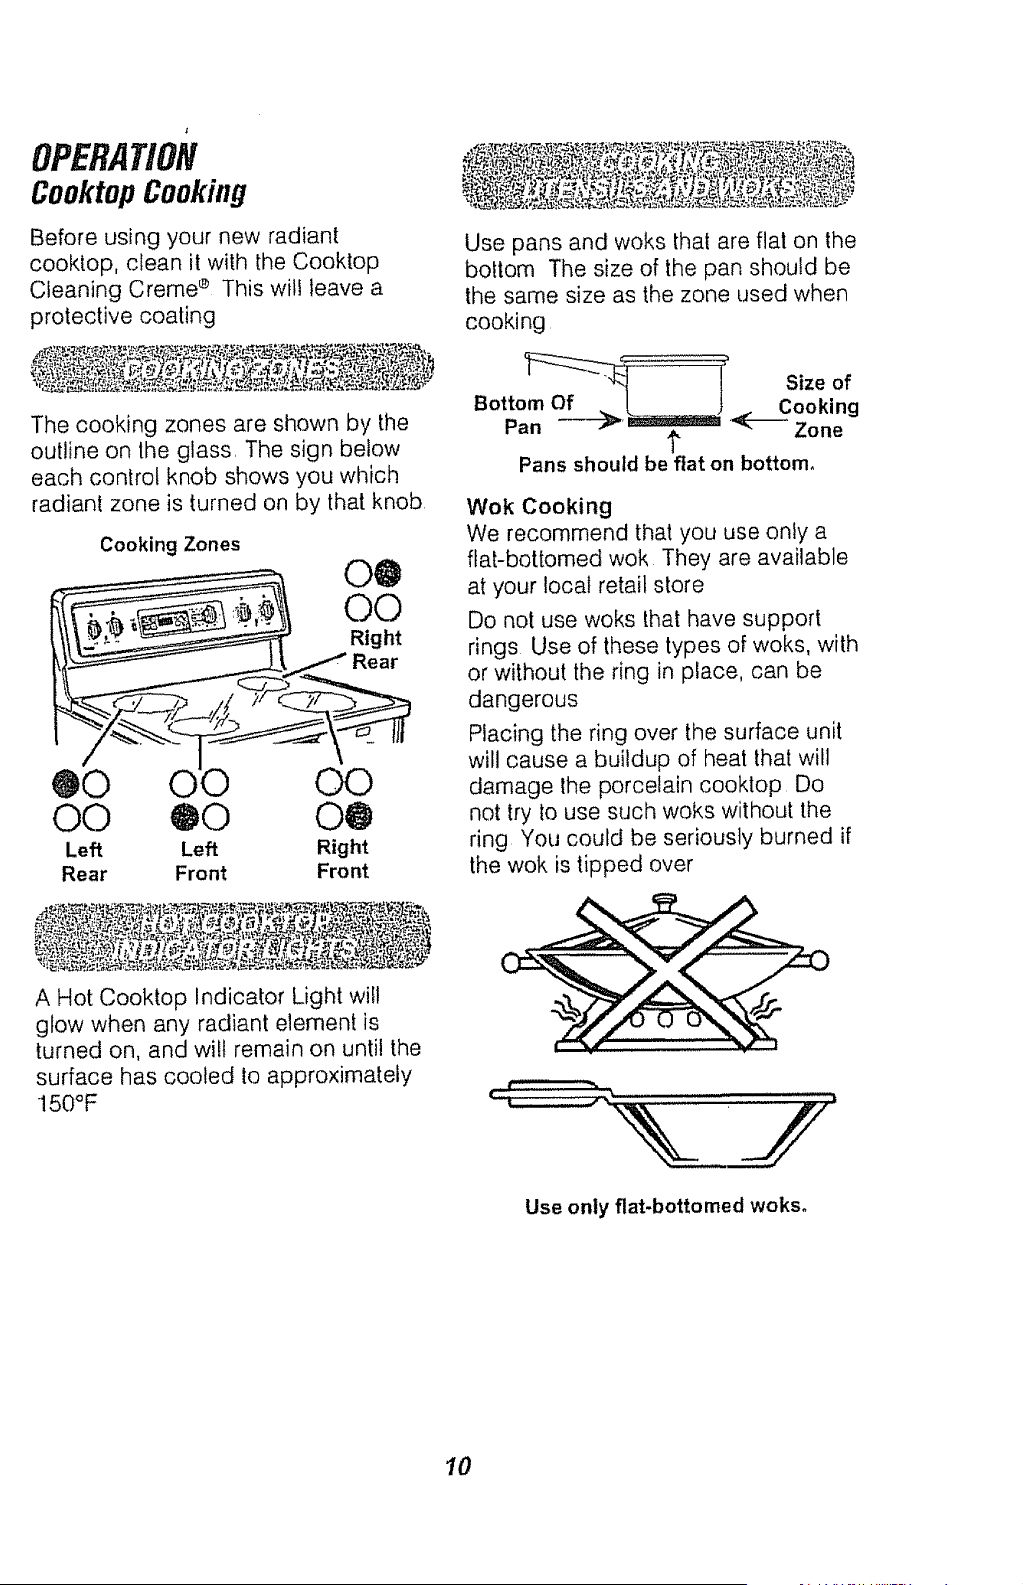
CooktopCooking
Before using your new radiant
cooktop, clean it with the Cooktop
Cleaning Creme ® This will leave a
protective coating
The cooking zones are shown by the
outline on lhe glass, The sign below
each control knob shows you which
radiant zone is turned on by that knob
Cooking Zones
O0 @0 O@
Left Left Right
Rear Front Front
A Hot Cooktop Indicator Light will
glow when any radiant element is
turned on, and wilt remain on until the
surface has cooled to approximately
150°F
Use pans and woks that are flat on the
bottom The size of the pan should be
the same size as the zone used when
cooking
1'
Pans should be flat on bottom,
Wok Cooking
We recommend that you use only a
flat-bottomed wok They are available
at your local retail store
Do not use woks that have support
rings Use of these types of woks, with
or without the ring in place, can be
dangerous
Placing the ring over the surface unit
will cause a buildup of heat that will
damage the porcelain cooktop Do
not try to use such woks without the
ring You could be seriously burned if
the wok is tipped over
Use only fiat.bottomed woks.
10

OPERAtiON
RadiantCooktopCooking
(cont.)
lw
2_
3_
.
Be sure the canner is centered
over the zones,
Make sure the canner is flat on the
bottom.
lJse recipes and procedures
from reputable sources These
are available from manufacturers
such as BalP and Kerr ®, or the
Department of Agriculture
Extension Service
Use caution, While canning, to
prevent burns from steam or heat
If you don't __
know if your
cookware is ............
flat on the
bottom, try this test Turn your pan
upside down on the countertop, and
place the edge of a ruler flat against
the surface of the pan Rotale the
ruler in a full circle, checking as you
turn for any space between the two
surfaces The bottom of the pan and
the edge of the ruler should fit flush
against each other all the way
across
Stainless Steel: Highly
recommended for use with your new
cooktop Especially good with a clad
bottom
Aluminum: Heavyweight aluminum
cookware recommended
Cast Iron: Cast-iron coot<ware that is
completely covered with porcelain
enamel is recommended Cast iron
that is not covered with porcelain
enamel may scratch the glass
ceramic surface of the cooktop
Copper Bottom: Has good
performance, but it can leave a
residue on the cooktop surface if
allowed to boil dry
Glass-Ceramic or Stoneware:
Usable Check for rough edges or
burrs, which may scratch the
cooklop surface
When the knobs are turned on, coils
beneath the glass radiate heat
through the glass to the cooking
utensil It will take a few moments for
the coils to heat, as they do, a red
glow can be seen below the surface
of the cooktop
Every radiant surface unit has a
temperature limiter
The temperature limiter protects the
glass cooktop from getting too hot
The temperature limiter may cycle the
units off for a time if.
o The pan boils dry
. The pan bottom is not flat
° The pan is off center
. There is no pan on the unit
11

OPERATION
RadiantCooktopCooking
(cont.)
H!
MED
LO
For quick starts, such as
bringing water to a boil
For slow boil and sauteing.
For steaming foods or keeping
cooked foods at serving
temperature
Push in to turn
the knob
, Set on or oF_
between marks for ._i"_'__o/--""
desired heat .. --I_;_. _.
The surface unit indicator light will
glow when any cooking zone is
activated
12
OPERATION
OvenCentre/,Clock,and Timer
@@
0 AUTOMATIC OVEN
HOUR MIN.
@@
TEMP
RECALL ,
",,""',,
0VENCLEANING- OMGVEDDORLATCHTORIGHT (:)TURNOVEhlKr.IOBTO"CLEAN',
OFF
OVEN ON O-_ T
(((
•_oo 450
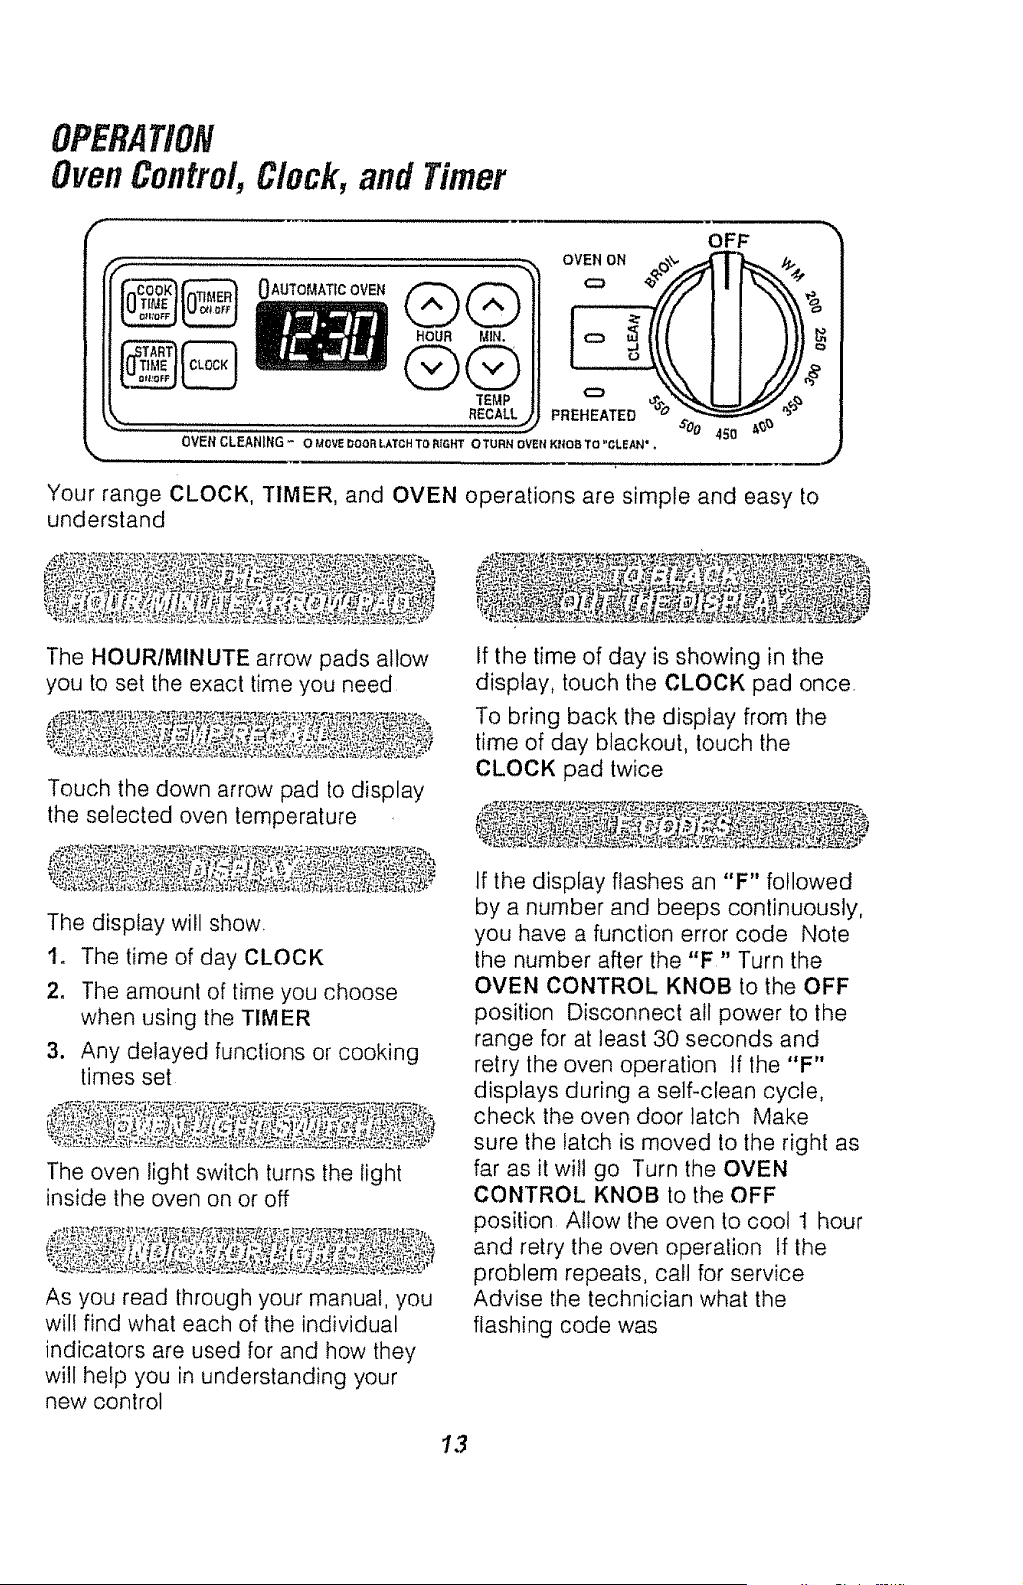
Your range CLOCK, TIMER, and OVEN operations are simple and easy to
understand
The HOUR/MINUTE arrow pads allow
you to set the exact time you need
Touch the down arrow pad to display
the selected oven temperature
The display will show.
If the time of day is showing in the
display, touch the CLOCK pad once.
To bring back the display from the
time of day blackout, touch the
CLOCK pad twice
2,
3_
The time of day CLOCK
The amount of time you choose
when using the TIMER
Any delayed functions or cooking
times set
The oven light switch turns the light
inside the oven on or off
As you read through your manual, you
wil! find what each of the individual
indicators are used for and how they
will help you in understanding your
new control
If the display flashes an "F" followed
by a number and beeps conlinuously,
you have a function error code Note
the number after the "F" Turn the
OVEN CONTROL KNOB to the OFF
position Disconnect all power to the
range for at least 30 seconds and
retry the oven operation tf the "F"
displays during a self-clean cycle,
check the oven door latch Make
sure the latch is moved to the right as
far as it will go Turn the OVEN
CONTROL KNOB to the OFF
position Allow the oven to cool 1 hour
and retry the oven operation if the
problem repeats, call for service
Advise the technician what the
flashing code was
13
OPERAtiON
OvenControl,Clock, and Timer
(cont,)
When the power to your range is
turned on for the first time, or if you
experience a power failure, the
display will flash "PF" By touching
the CLOCK pad, the display will flash
"12:00" Touch the CLOCK pad again
and follow the instructions to set the
clock. Any operation set before a
power failure will need to be reset.
The oven will automatioally shut off
if it has been left on for more than
t2 hours
To deactivate or reactivate the
automatic shutoff, touch and hold the
MIN UP and DOWN arrow pads for
about 4 seconds
14
OPERAT/ON
Clockand Timer
OFF _'
/lli@i=i o' I! fI])),,
I _:_;_,_'_................... ..... ......... _ ' ,", _,,_
t_ tlt1IIII" Illllilllllll ti_illlll#lt.
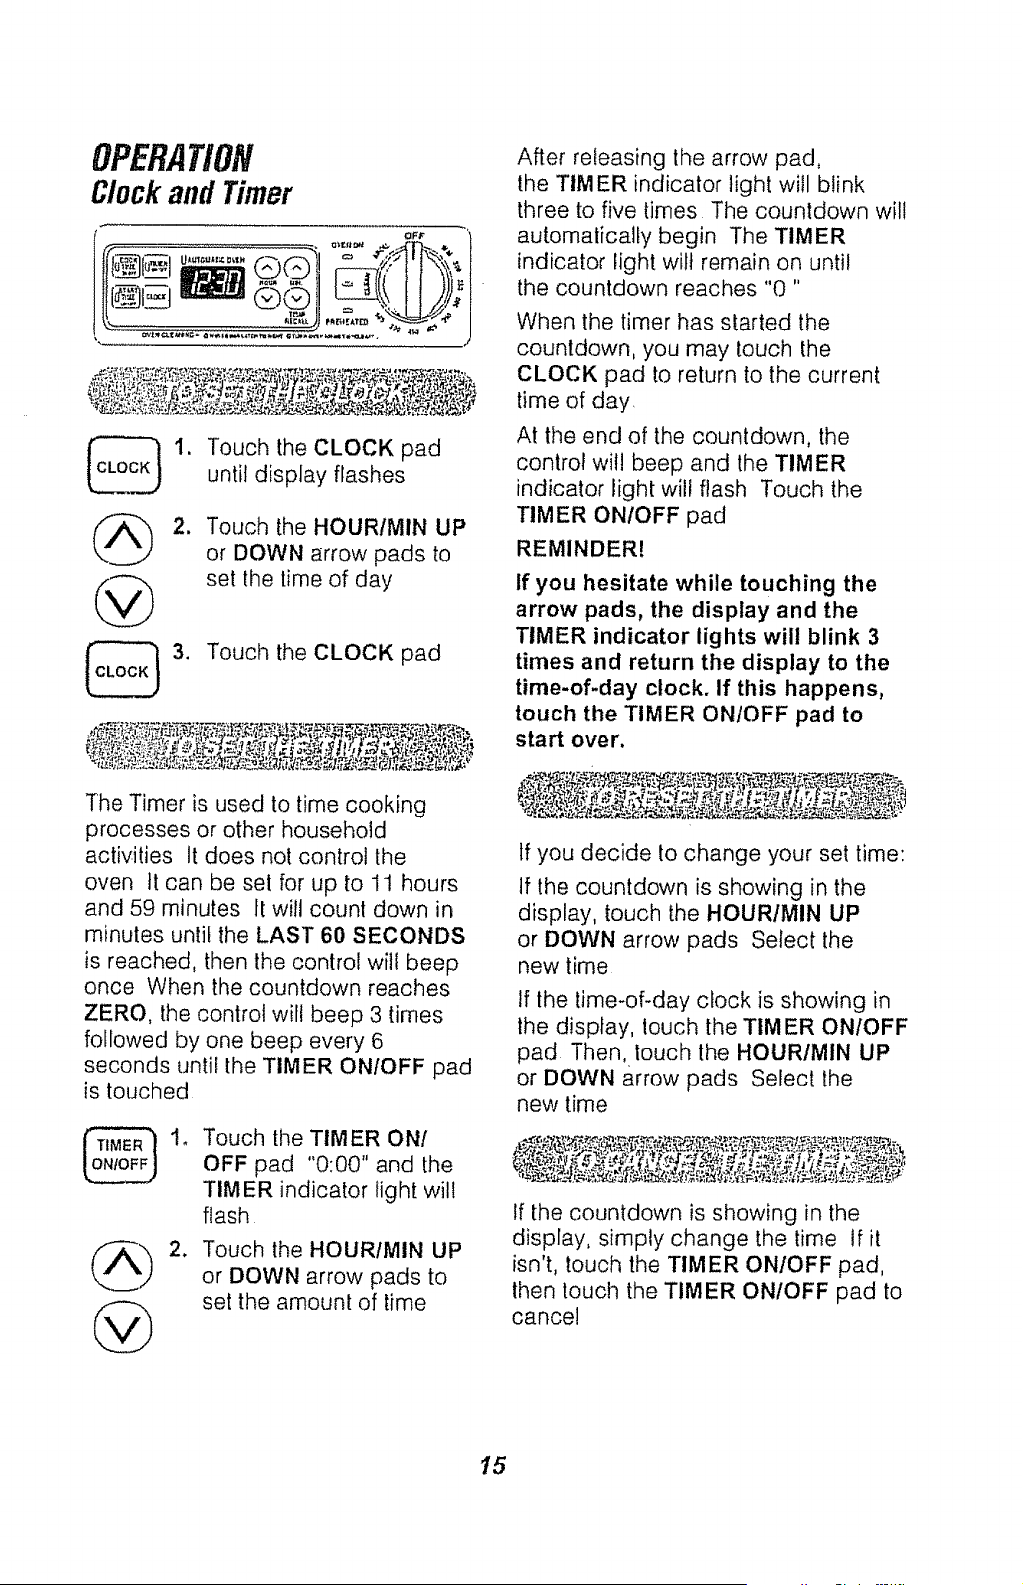
_ 1. Touch the CLOCK pad
until display flashes
@
2. Touch the HOUR/MIN UP
or DOWN arrow pads to
set the lime of day
3. Touch the CLOCK pad
The Timer is used to time cooking
processes or other household
activities It does not control the
oven tt can be set for up to 11 hours
and 59 minutes II will count down in
minutes untif the LAST 60 SECONDS
is reached, then the control will beep
once When the countdown reaches
ZERO, the control wilt beep 3 times
followed by one beep every 6
seconds until the TIMER ON/OFF pad
is touched
.
2_,
Touch the TIMER ON/
OFF pad "0:00" and the
TIMER indicator light wilt
flash
Touch the HOURIMIN UP
or DOWN arrow pads to
set the amount of time
After releasing lhe arrow pad,
the TIMER indicator light will blink
three to five times The countdown will
automatically begin The TIMER
indicator light wilt remain on until
the countdown reaches "0"
When the timer has started the
countdown, you may touch the
CLOCK pad to return to the current
time of day,
At the end of the countdown, the
control will beep and the TIMER
indicator Fight will flash Touch the
TIMER ONIOFF pad
REMINDER!
If you hesitate while touching the
arrow pads, the display and the
TIMER indicator lights will blink 3
times and return the display to the
time-of-day clock. If this happens,
touch the TIMER ON/OFF pad to
start over.
tf you decide to change your set time:
If the countdown is showing in the
display, touch the HOURIMIN UP
or DOWN arrow pads Select the
new time
tf the time-of-day clock is showing in
the display, touch the TIM ER ON/OFF
pad Then, touch the HOURIMIN UP
or DOWN arrow pads Select the
new time
If the countdown is showing in the
display, simply change the time tf it
isn't, touch the TIMER ON/OFF pad,
lhen touch the TIMER ONtOFF pad to
cancel
15
OPERAT/Ofl
Baking
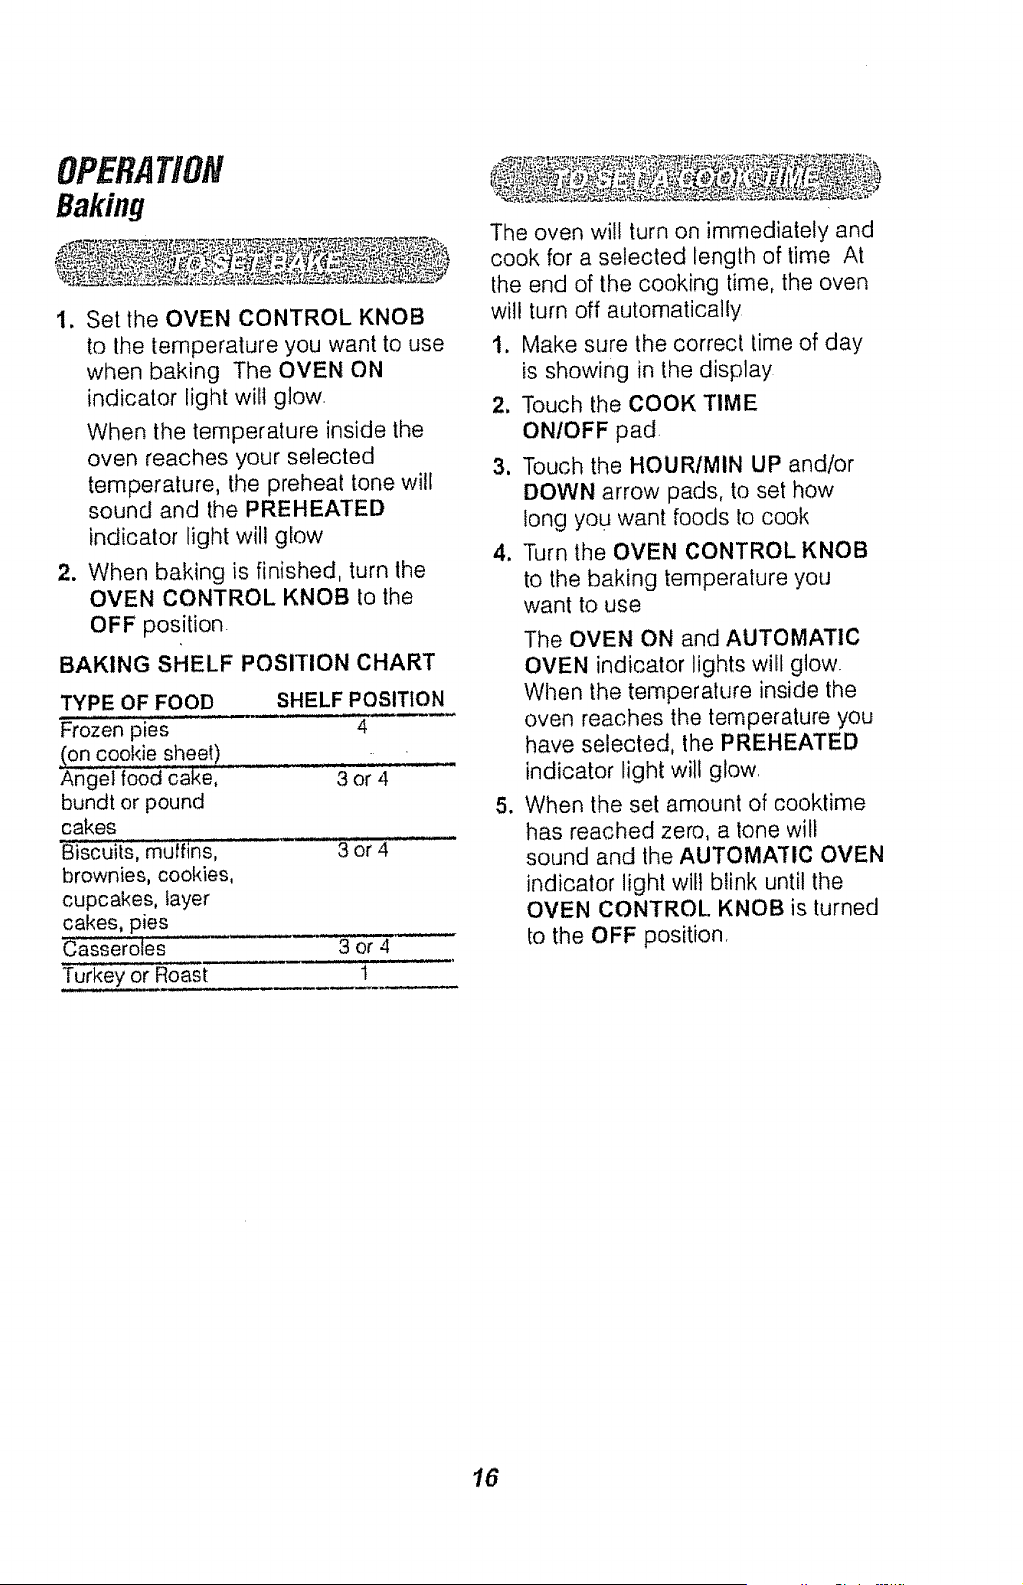
t. Set the OVEN CONTROL KNOB
to the temperature you want to use
when baking The OVEN ON
indicator light will glow
When the temperature inside the
oven reaches your selected
temperature, the preheat tone will
sound and the PREHEATED
indicator light will glow
2. When baking is finished, turn the
OVEN CONTROL KNOB to the
OFF position
BAKING SHELF POSITION CHART
TYPE OF FOOD SHELF POSITION
Frozen pies 4
(on cookie sheet)
Angel food cake, 3 or 4
bundt or pound
cakes
Biscuiis, muffinsl ..................' _3 or 4 .....
brownies, cookies,
cupcakes, layer
cakes, pies
Casseroles - 3 or 4
Turkey or Roast 1
The oven wil! turn on immediately and
cook for a selected length of time At
the end of the cooking time, the oven
will turn off automatically
1. Make sure the correct time of day
is showing in the display
2. Touch the COOK TIME
ON/OFF pad.
3, Touch the HOUR/MIN UP and!or
DOWN arrow pads, to set how
long you want foods to cook
4. Turn the OVEN CONTROL KNOB
to the baking temperature you
want to use
.
The OVEN ON and AUTOMATIC
OVEN indicator lights will glow.
When the temperature inside the
oven reaches the temperature you
have selected, the PREHEATED
indicator light will glow.
When the set amount of cooktime
has reached zero, a tone will
sound and the AUTOMATIC OVEN
indicalor light will blink until the
OVEN CONTROL KNOB is turned
to the OFF position.
16
OPERATION
Baking(cont.)
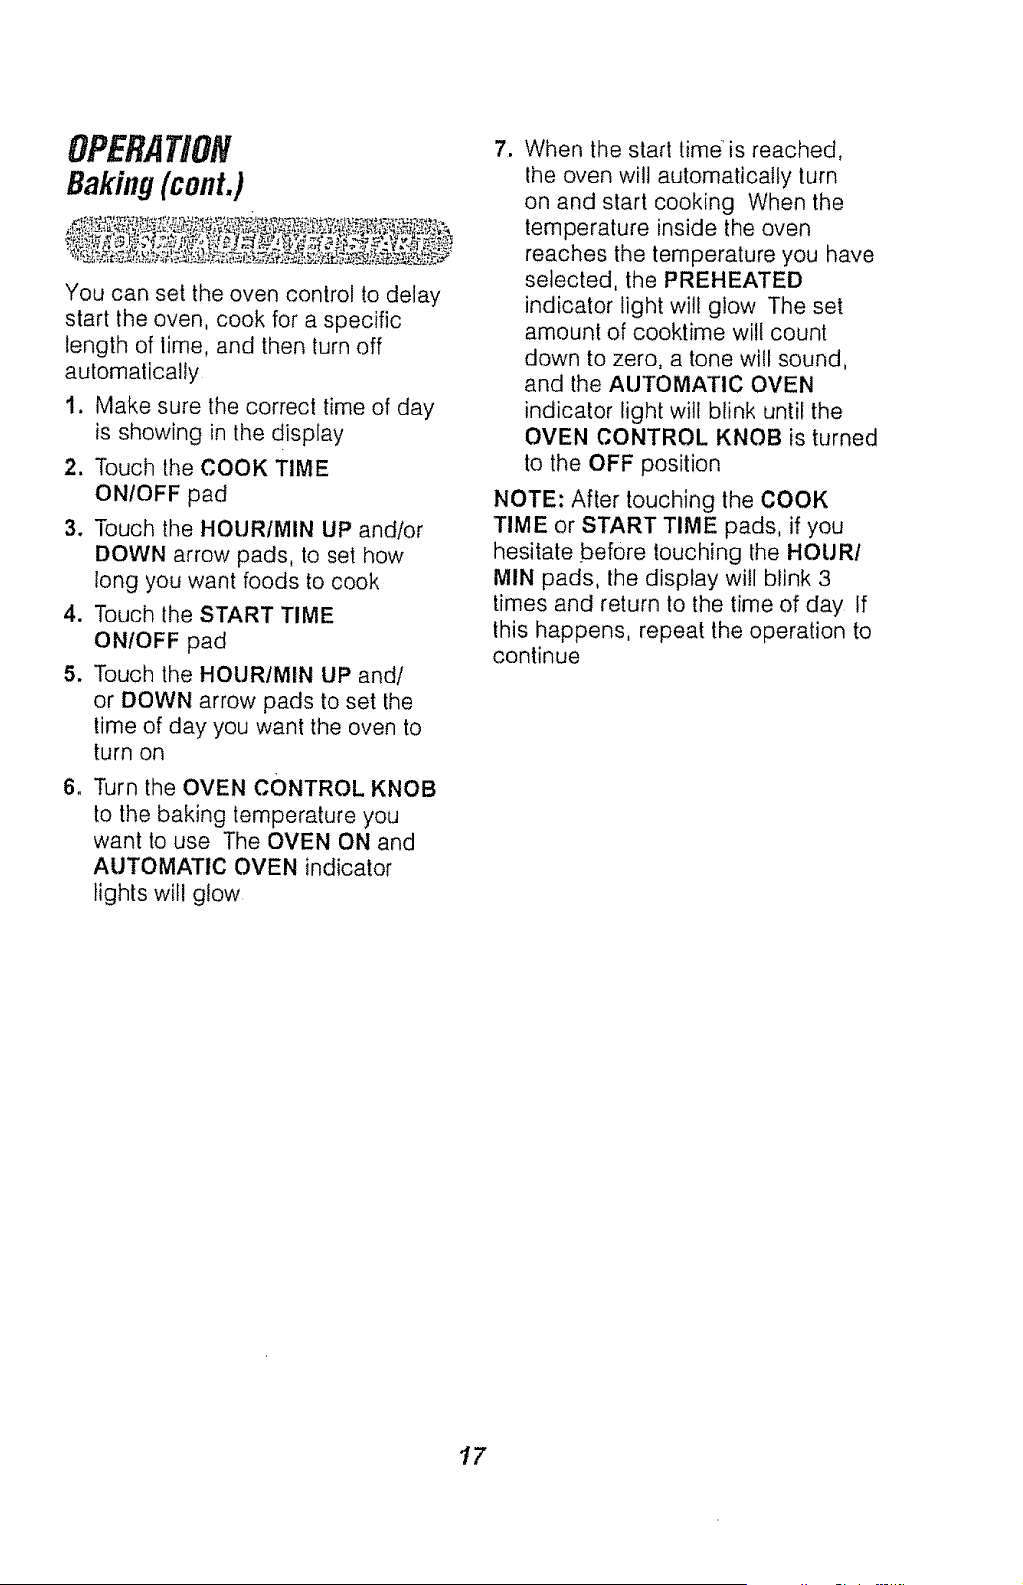
You can set the oven control to delay
start the oven, cook for a specific
length of lime, and then turn off
automatically
1. Make sure the correcl time of day
is showing in the display
2. Touch the COOK TIME
ON/OFF pad
3. Touch the HOUR/MIN UP andtor
DOWN arrow pads, to set how
long you want foods to cook
4. Touch the START TIME
ON/OFF pad
5, Touch the HOUR/MIN UP and/
or DOWN arrow pads to set the
time of day you want the oven to
turn on
6. Turn the OVEN CONTROL KNOB
to the baking temperature you
want to use The OVEN ON and
AUTOMATIC OVEN indicator
lights wil! glow
7. When the start time is reached,
the oven wil! automatically turn
on and start cooking When the
temperature inside the oven
reaches the temperature you have
selected, the PREHEATED
indicator light will glow The set
amount of cooktime will count
down to zero, a tone will sound,
and the AUTOMATIC OVEN
indicator light will blink until the
OVEN CONTROL KNOB is turned
to the OFF position
NOTE: After touching the COOK
TIME or START TIME pads, if you
hesitate before touching the HOURI
MIN pads, the display will blink 3
times and return to the time of day If
this happens, repeat the operation to
continue
"/7

OPERAtiON
Oven Cooking Tips
It is normal to have some odor when
using your oven for the first time To
help eliminate this odor, ventilate the
room by opening a window or using
a vent hood
IMPORTANT: Never cover the oven
bottom or oven rack with aluminum
foil Improper use can cause poor
heat flow, poor baking results, and
may damage the oven finish To
prevent staining from spillovers, you
may place a piece of aluminum foil_or
a cookie sheet on the rack below the
food which may spill over
Opening the door often to check
foods will cause heat loss and poor
baking results.
Preheating is bringing the
temperature up to the Iemperature
you will be using during baking Let
the oven preheat thoroughly when
recipes call for preheating
To prolong the life of your oven
light bulb, follow this helpful tip.
Always turn the light off when the
oven is not in use or during a clean
cycle if your oven light is left on for
an extended period of time, the oven
will be warm when the door is opened
due to the heat generated from the
oven light bulb
The oven vent is located behind the
right rear cooking zone This area
could become hot during oven use
tt is normal for steam to come out
of the vent andlor collect moisture
underneath when oven is in use
The vent is important for proper air
circulalion Never block this vent.
Most recipes for baking have been
developed using high-fat products
such as butter or margarine (80% fat
by weight--the federal requirement
for products labeled "margarine")
You wil! gel poor results if cakes, pies,
pastries, cookies, or candies are
made with low-fat spreads Low-fat
spreads contain less fat and more
water The high moisture content of
these spreads affects the texture and
flavor of favorite baked recipes The
lower the fat content of a spread
product, the more noticeable these
differences become To ensure best
results, use margarine, butter, or stick
spreads containing at least 70%
vegetable oil
18

OPEBAT/ON
OvenCookingTips(cont.)
Baking results will be better if baking
pans are centered in the oven as
much as possible If baking with
more than one pan, place the pans
so each has at least 1 to tW' of air
space around it If baking four cake
layers at the same time, place two
layers on rack 2 and two layers on
rack 4 Stagger pans on the rack so
one is not directly above the other
FLAT COOKIE SHEETS, without
sides, allow air to circulate all around
the cookies for even browning
SHINY PANS reflect heat and are
perfect for cakes and quick breads
that need a light brown crust
GLASS, DARK NON-STICK,
OR DARKENED-BY-AGE
BAKEWARE absorbs heat and can be
used for yeast breads, pie crust, or
foods that need a brown crust The
oven temperature should be reduced
by 25°F
19
The Oven Temperature Sensor
continuously senses and controls the
temperature inside the oven To keep
a constant set temperature, the
elements will cycle (turn on and off
during cooking)
The oven racks are designed wilh
stops, a convenience as well as a
safety precaution The guides have a
bump to prevent the racks from tilting
when they are pulled out of the oven
This design allows the racks to be
inserted in only one way+
Bump in
Rack Guide
Your oven has six (6) rack positions
The top position is only a guide It
cannot be used as a rack position
Guides
4 ¢'_._ #,- 4
Always place oven racks in the
proper position while oven is cool.
CAUTION: When you are using the rack
in the lowest position (!), you will need
to use caution when pulling the rack
out We recommend that you pull the
rack out several inches and then, using
two potholders, pull the rack out by
holding the sides of it The rack is low
and you could be burned if you place
your hand in the middle of the rack and
pull all the way out Be very careful not
to burn your hand on the door when
using a rack in the lowest position (1)
OPERATION
OvencookingTips(cont.)
You may fee! that your new oven
cooks differently than the oven it
replaced We recommend that you
use your new oven a few weeks to
become more familiar with it, following
the times given in your recipes as a
guide If you feet your oven is too hot
or too coot for your cooking prefer-
ence, see Do-it-Yourself Adjustment
in the back of this manual to make the
adjustment
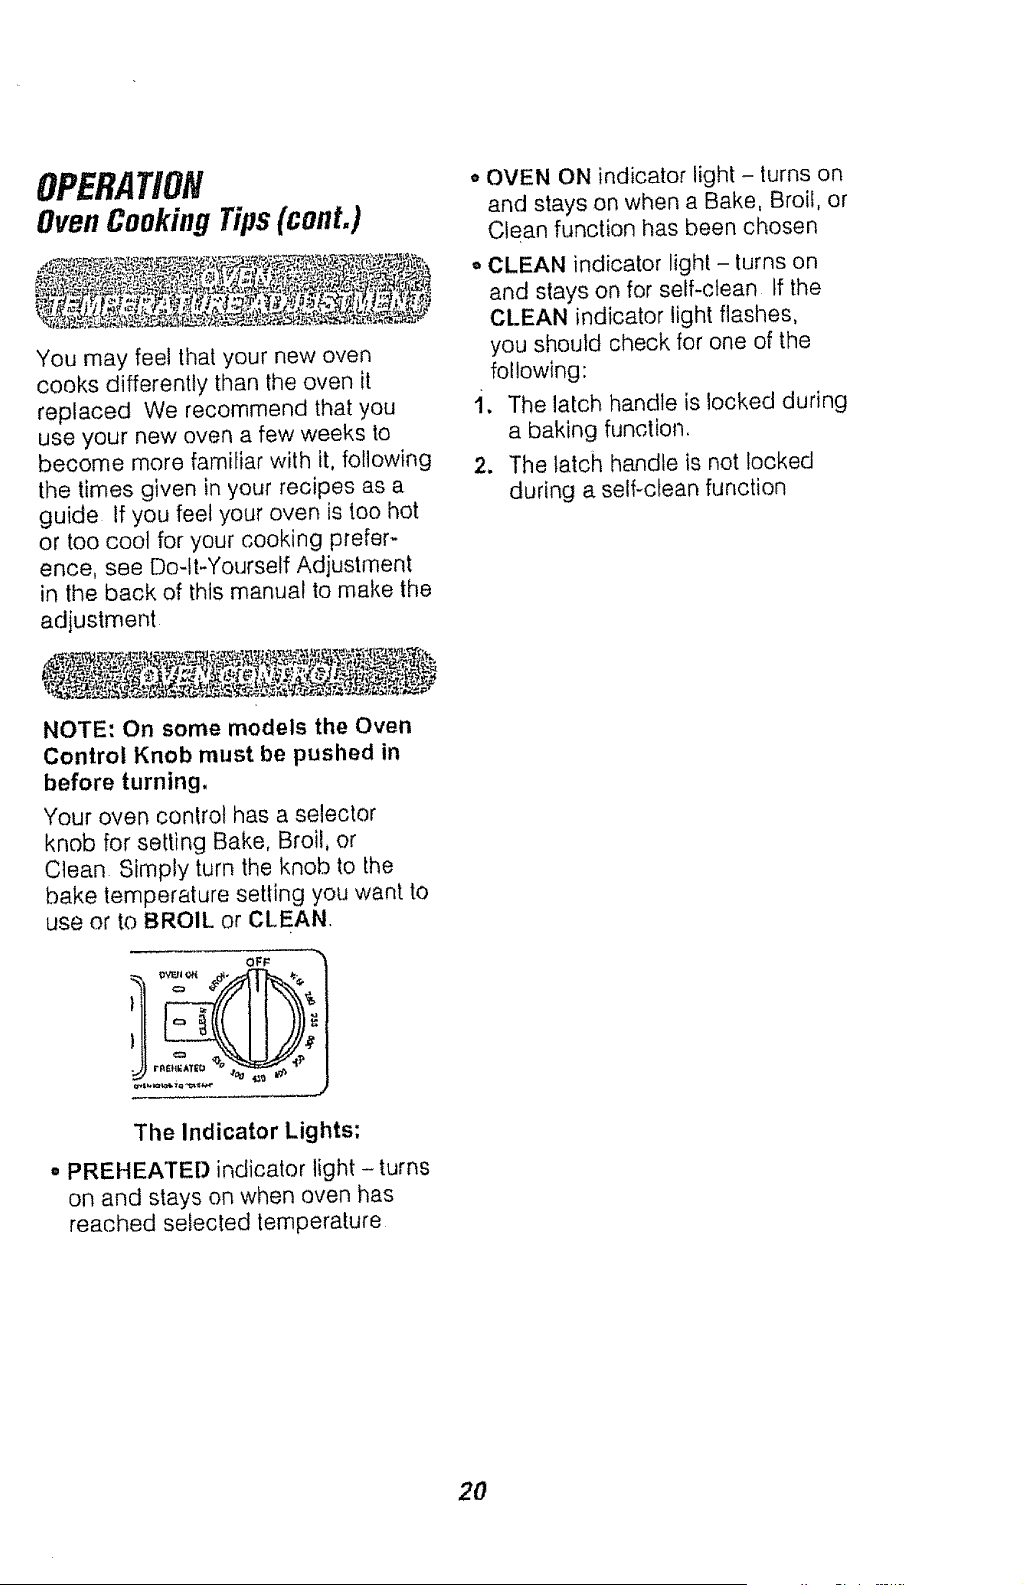
NOTE: On some models the Oven
Control Knob must be pushed in
before turning.
Your oven control has a selector
knob for setting Bake, Broil, or
Clean Simply turn the knob to the
bake temperature setting you want to
use or to BROIL or CLEAN,
, OFF _t
The Indicator Lights;
• PREHEATED indicator light - turns
on and stays on when oven has
reached selected temperature
o OVEN ON indicator light - turns on
and stays on when a Bake, Broil, or
Clean function has been chosen
_,CLEAN indicator light - turns on
and stays on for self-clean If the
CLEAN indicator light flashes,
you should check for one of the
following:
•1. The latch handle is locked during
a baking function,
2. The latch handle is not locked
during a self-clean function
2O
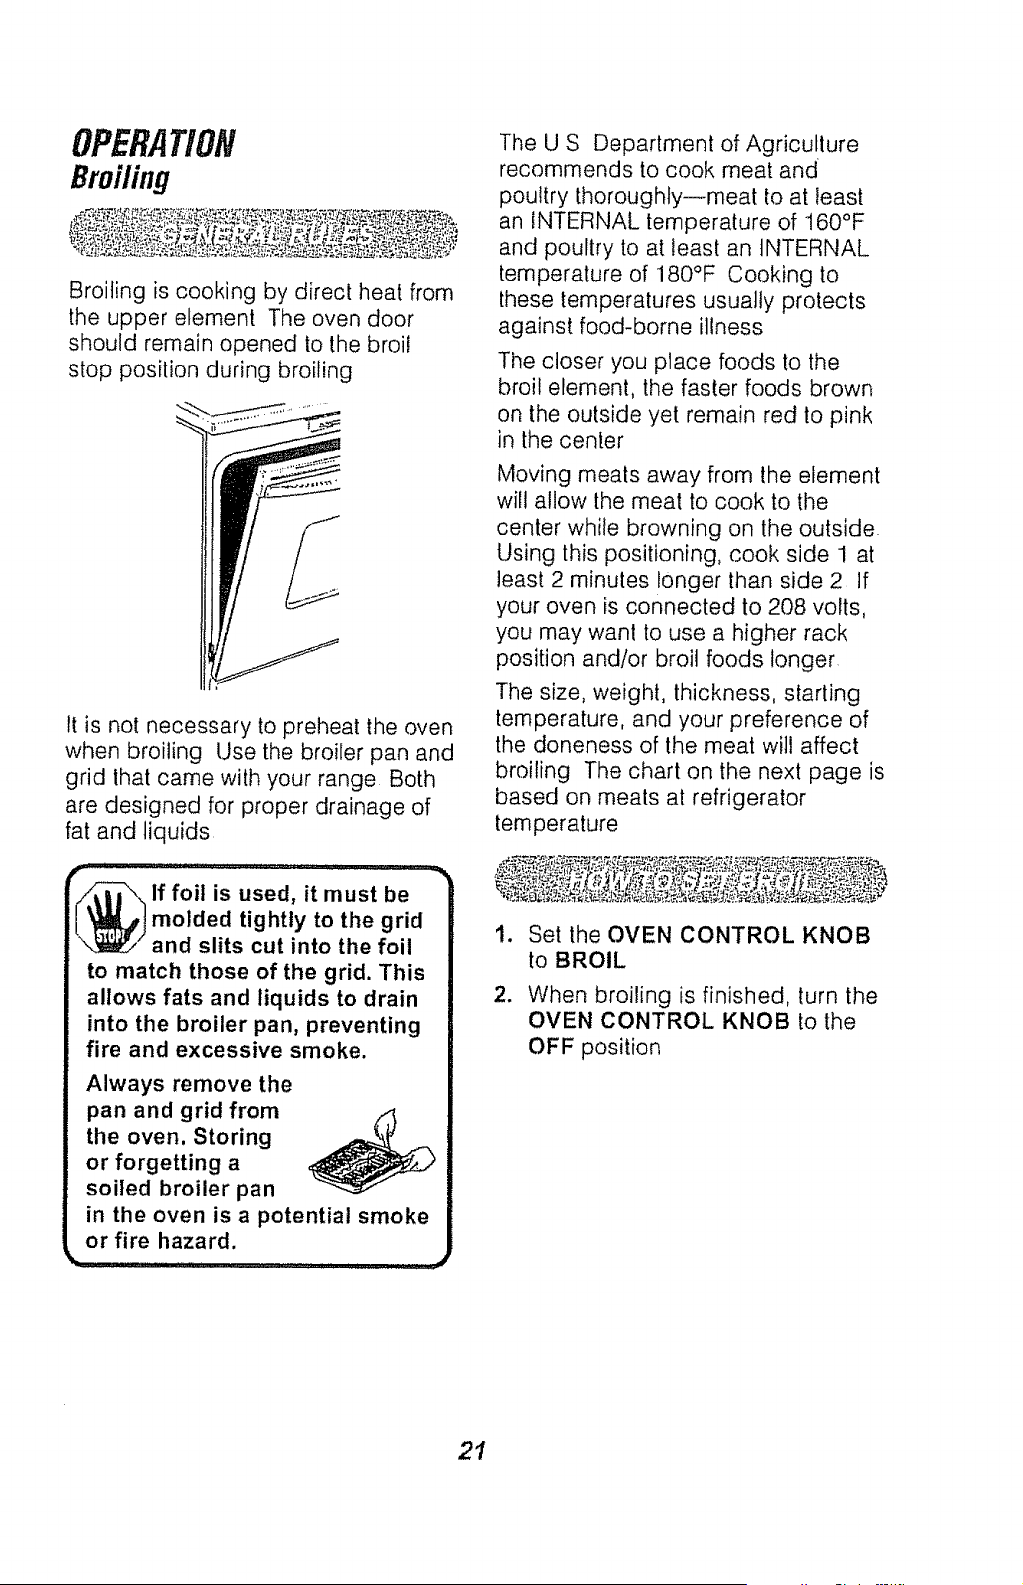
Broiling is cooking by direct heat from
the upper element The oven door
should remain opened to the broil
stop position during broiling
It is not necessary to preheat the oven
when broiling Use the broiler pan and
grid lhat came with your range Both
are designed for proper drainage of
fat and liquids
it_. II . " ............ 2t_ _'' _-z .... _.,
lf foil is used, it must be
molded tightly to the grid
and slits cut into the foil
to match those of the grid. This
allows fats and liquids to drain
into the broiler pan, preventing
fire and excessive smoke.
Always remove the
pan and grid from
the oven, Storing
or forgetting a
soiled broiler pan
in the oven is a potential smoke
or fire hazard.
The U S Department of Agriculture
recommends to cook meat and
poultry thoroughly--meat to at least
an INTERNAL temperature of 160°F
and poultry to at least an INTERNAL
temperature of 180°F Cooking to
these temperatures usually protects
against food-borne illness
The closer you place foods to the
broil element, the faster foods brown
on the outside yet remain red to pink
in the center
Moving meats away from the element
will allow the meat to cook to the
center while browning on the outside
Using this positioning, cook side 1 at
least 2 minutes longer than side 2 If
your oven is connected to 208 volts,
you may want to use a higher rack
position and!or broil foods longer
The size, weight, thickness, starting
temperature, and your preference of
the doneness of the meat will affect
broiling The chart on the next page is
based on meats at refrigerator
temperature
1. Set the OVEN CONTROL KNOB
to BROIL
2. When broiling is finished, turn the
OVEN CONTROL KNOB to the
OFF position
21
OPERATION
Broiling (cont.)
FOOD
GroundBeef
WeltDone
BeefSteaks
Raret
Medium
WeUDone
Rare1
Medium
WellDone
Chicken
Bakery
Products
Bread(Toast)
orEngtish
Muffins
Lobster
Tails
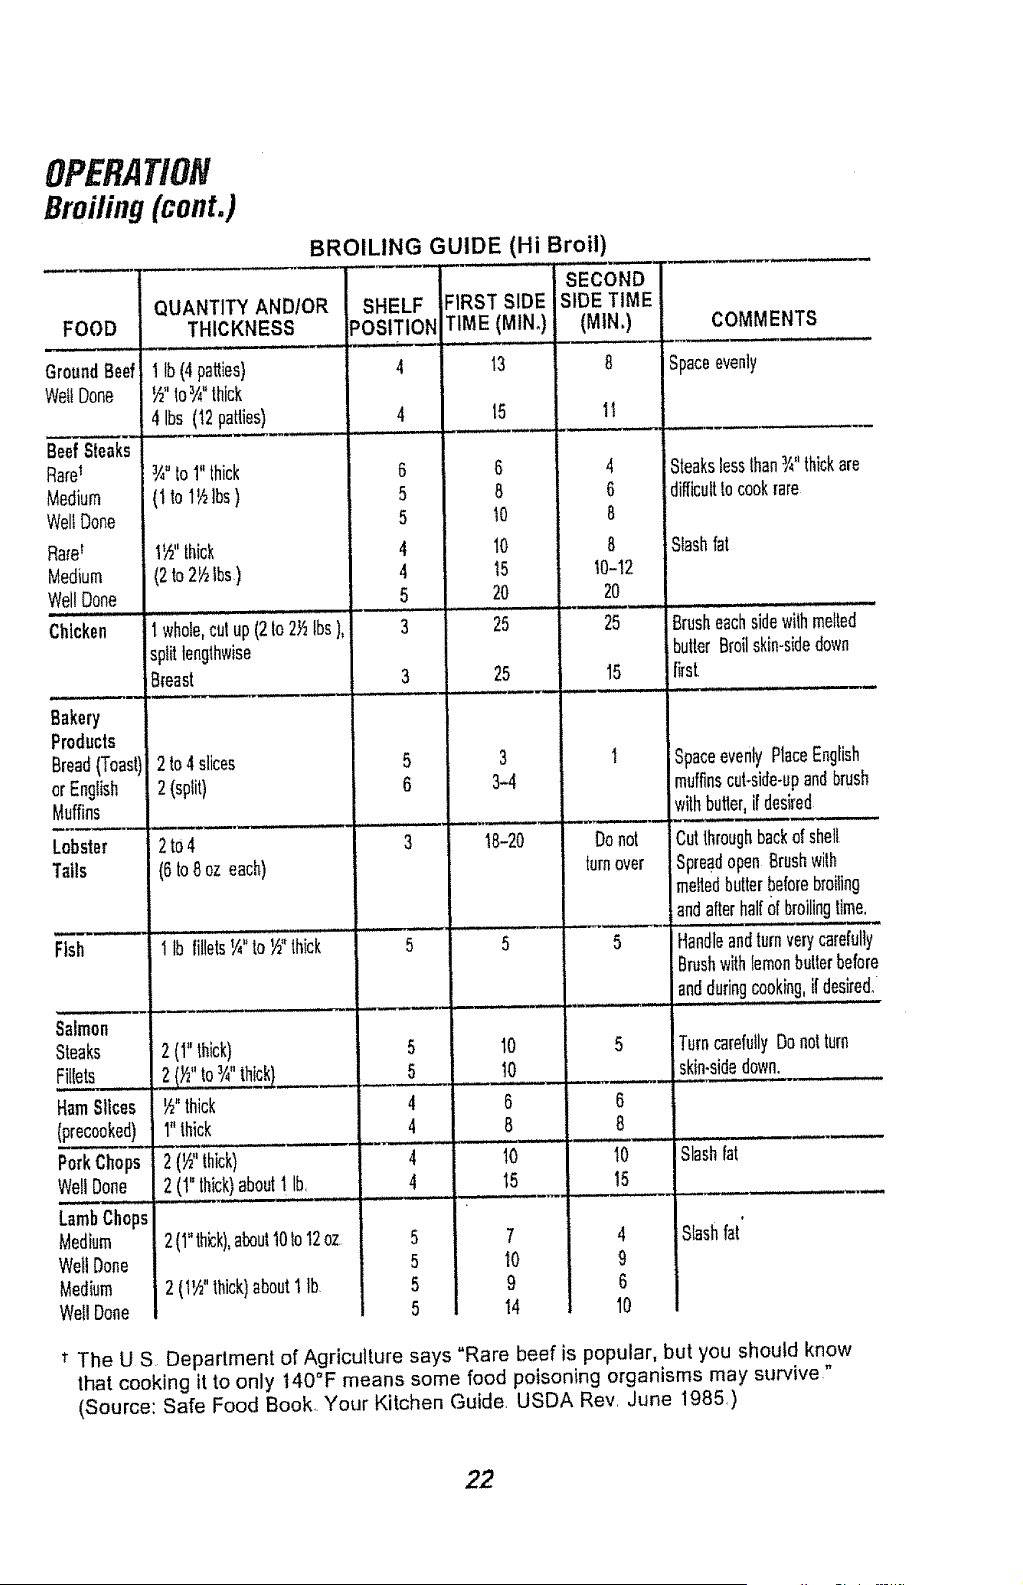
BROILING GUIDE (Hi Broil)
Ham Slices
(precooked)
PorkChops
WellDone
LambChops
Medium
WellDone
Medium
WellDone
QUANTITY AND/OR
THICKNESS
I lb(4 patties}
½"to_" thick
4 Ibs (12patUes)
¾" to1"thick
(t to1½lbs)
1½"thick
(2to 2½lbs)
I whole,culup(2io 2,_Ibs),
splitlengthwise
Breast
2to4 slices
2(split)
2to4
(6to8oz each)
SHELF
POSITION
6
5
5
4
4
5
: i .u
3
5
6
FIRST SIDE
TIME (MIND)
13
15
6
8
i0
10
15
2O
25
25
3
3-4
18-20
SECOND
SIDE TIME
(aiR,)
11
4
6
8
8
I0-12
2O
25
15
Do not
turnover
COMMENTS
Spaceevenly
Steakslessthan¾"thickare
difficult1ocookrare
Slashfat
Bru"h"achsidew)(hme) ed
butterBroilskin-sidedown
first
SpaceevenlyPlaceEnglish
muffinscut-side.upandbrush
wilhbutter,if desired
Fish 1(bfillets¼"to½"th(ck 5 5 5
Salmon
Steaks 2 (1"thick) 5 10 5 TurncarefullyDonotturn
Fillets 2{_" to3,4"thick) 5 10 skin.sidedown.
½"thick 4 6 6
1"thick 4 8 8
2(½"thick) 4 fO lO Slashfat
2 (1"thick)about! Ib, 4 15 15
t
Slashfat5
5
5
5
2(I"th(ck),about10to12oz
2 (l'h"lhlck)aboutIIb
4
9
6
10
Cutthroughbackofshell
SpreadopenBrushwilh
meltedbutte[beforebroiling
andafterhalfof broilingtime.
Handleandturnverycarefully
Brushwithlemonbutterbefore
andduringcooking,if desire&
7
I0
9
14
•r The US Department of Agriculture says "Rare beef is popular, but you should know
that cooking it to only t40°F means some food poisoning organisms may survive,"
(Source: Safe Food Book. Your Kitchen Guide. USDA Rev. June 1985,)
22

CAREANDCLEANING
Self-CleaningCycle
,
2_
Remove the broiler pan and grid,
oven racks, utensils, and any foil
that may be in the oven
Soil on the front frame and
outside the gasket on the door
liner will need to be cleaned
by hand
A
Front
Frame
L
,__" Door Gasket
_-_" Door Liner "_"_ \"
Clean these areas with hot water,
soap-filled steel-wool pads, or
cleansers such as Soft Scrub ® to
remove any soil Rinse well with clean
water and dry
3. Wipe up any heavy spitlovers on
the oven bottom
4_
Do not clean the gasket The
fiberglass material of the oven
door gasket cannot withstand
abrasion tt is essential for the
gasket to remain intact If you
notice it becoming worn or frayed,
it should be replaced
The gasket is designed to have a
5_-6 ' gap at the bottom of the door
This allows for proper air circulalion
Door Panel Gasket
Door Liner
It is normal for your oven door to give
the appearance of not having a good
seal against the range This is due to
the gasket The location of the gasket
on the door maintains a good seal
and prevents any heat loss
--_ tensils should never be
left in the oven during a
self-clean cycle.
The oven racks may be
cleaned during the self-clean
cycle, but will lose their luster
and become hard to slide. If you
choose to leave them in during
the cycle, wiping them down with
vegetable oil after the cycle will
help them slide easier.
For the first clean cycle, vent the
room with an opened window or
hood vent. This will reduce the
odor produced when heating
new parts.
23
CAREANDCLEAN/tVG
Self-CleaningCycle(cont.)
t. For best re_;ults, follow the steps
in PREPARING YOUR OVEN.
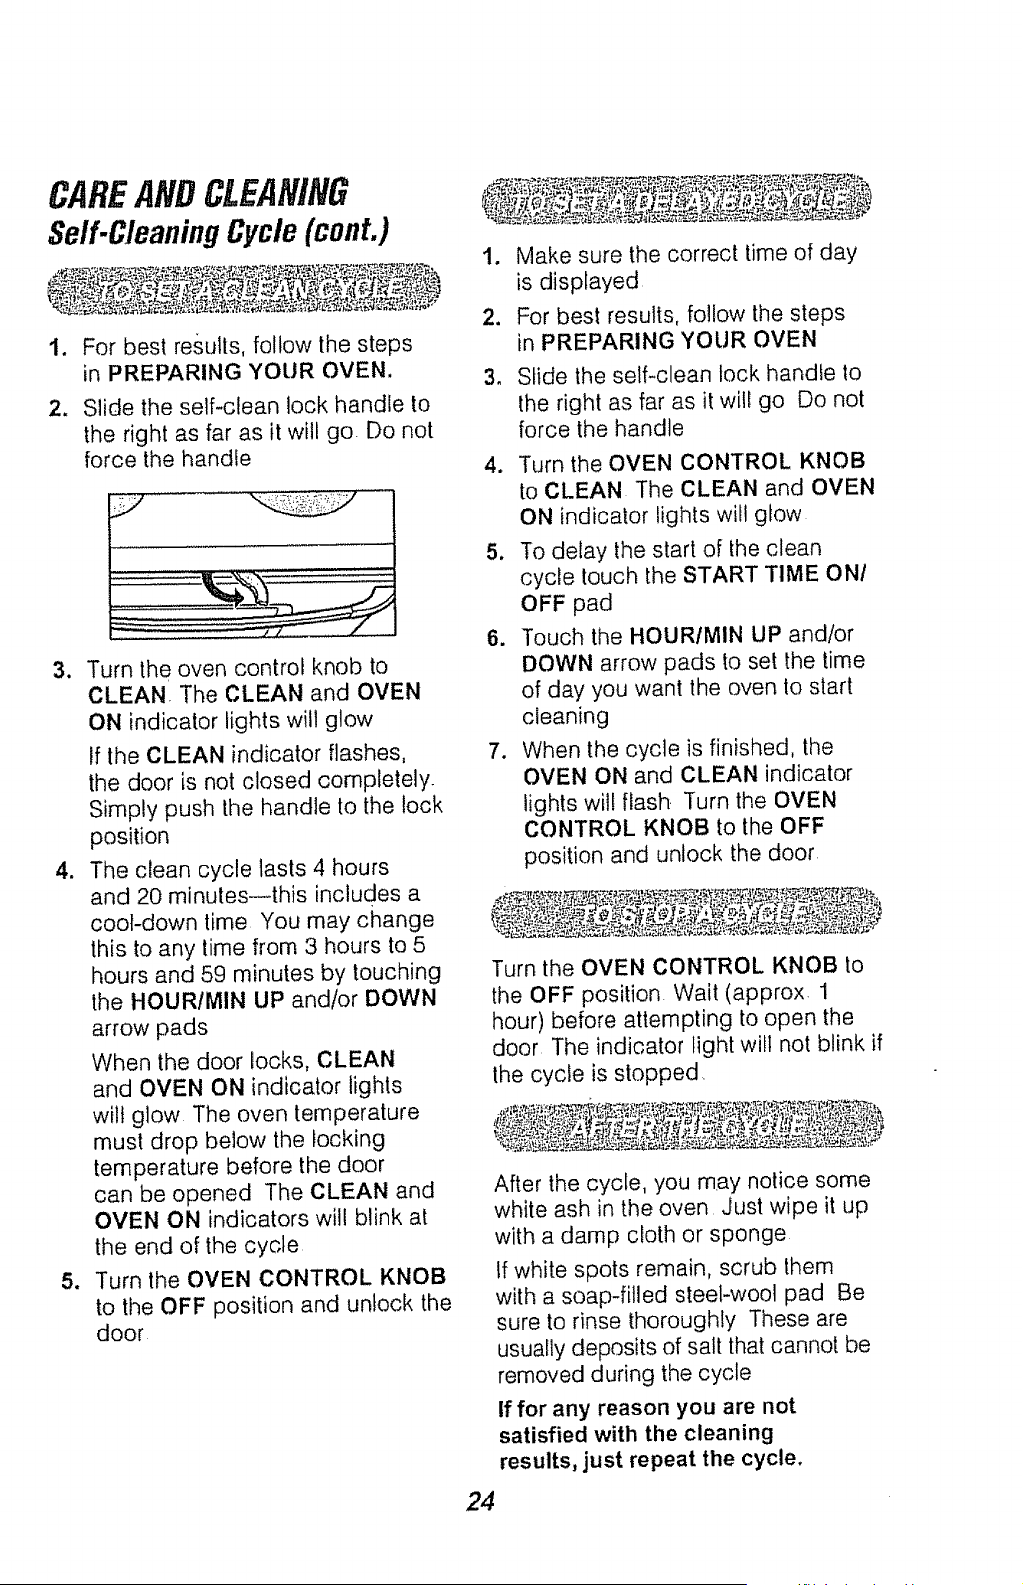
2. Slide the serf-clean lock handle to
the right as far as it will go Do not
force the handle
3. Turn the oven control knob to
CLEAN The CLEAN and OVEN
ON indicator lights will glow
If the CLEAN indicator flashes,
the door is not closed completely
Simply push Ihe handle to the lock
position
4. The clean cycle lasts 4 hours
and 20 minutes_this includes a
cool-down time You may change
this to any lime from 3 hours to 5
hours and 59 minutes by touching
the HOUR/MIN UP and/or DOWN
arrow pads
When the door locks, CLEAN
and OVEN ON indicator lights
wil! glow The oven temperature
must drop below the locking
temperature before the door
can be opened The CLEAN and
OVEN ON indicators will blink at
the end of the cycle
5. Turn the OVEN CONTROL KNOB
to the OFF position and unlock the
door
1. Make sure the correct time of day
is displayed
2. For best results, follow the steps
in PREPARING YOUR OVEN
3_ Slide the self-clean lock handle to
the right as far as it will go Do not
force the handle
4. Turn the OVEN CONTROL KNOB
to CLEAN The CLEAN and OVEN
ON indicator lights will glow
To delay the star! of the clean
cycle touch the START TIME ON/
OFF pad
6. Touch the HOUR/rv11N UP and/or
DOWN arrow pads to set the lime
of day you want the oven to start
cleaning
7. When the cycle is finished, the
OVEN ON and CLEAN indicator
lights will flash Turn the OVEN
CONTROL KNOB to the OFF
position and unlock the door
Turn the OVEN CONTROL KNOB to
the OFF position Wait (approx 1
hour) before attempting to open the
door The indicator light will not blink if
the cycle is stopped.
After the cycle, you may notice some
white ash in the oven Just wipe it up
with a damp cloth or sponge
If white spots remain, scrub them
with a soap-filled steel-wool pad Be
sure to rinse thoroughly These are
usually deposits of salt that cannot be
removed during the cycle
If for any reason you are not
satisfied with the cleaning
results, just repeat the cycle.
24
CAREANDCLEAN/NG
Glass-CeramicCooktop
Cleaning
Cleaning a glass-ceramic cooktop is
different from cleaning a standard
porcelain cooktop To maintain and
protect your glass-ceramic cooktop
follow these basic steps
Use only Cooktop Cleaning Creme®
on glass-ceramic
For normal, light soil:
1. Using a damp paper towel, rub a
few drops of creme onto soiled
area Wipe until all soil and creme
are removed
2_ Clean surface with creme after
each cooktop use Frequent
cleaning is essential in preventing
scratches and abrasions
For heavy, burned-on soil:
1. Apply a few drops of cleaning
creme to the cool, soiled area
Spread the creme across the
entire soiled area
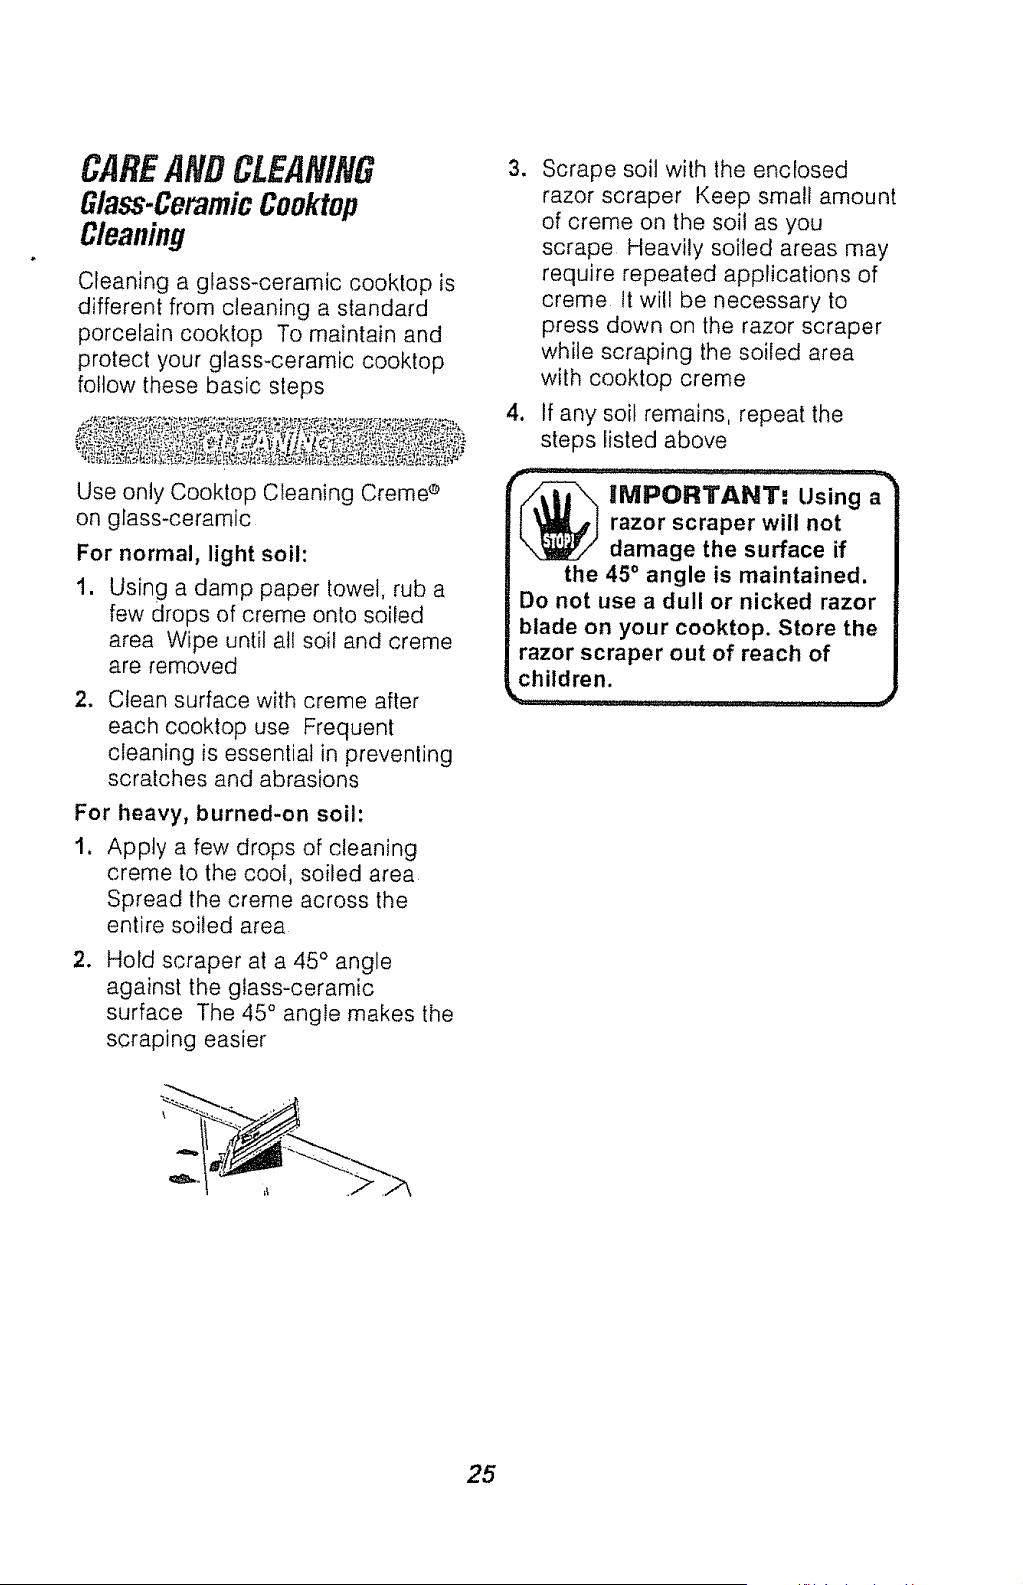
.
Hold scraper at a 45 ° angle
against the glass-ceramic
surface The 45 ° angle makes the
scraping easier
3,_
4_
Scrape soil with the enclosed
razor scraper Keep small amount
of creme on the soil as you
scrape Heavily soiled areas may
require repeated applications of
creme It will be necessary to
press down on the razor scraper
while scraping the soiled area
with cooktop creme
If any soil remains, repeat the
steps listed above
_ MPORTANT: Using a
razor scraper will not
damage the surface if
the 45° angle is maintained.
Do not use a dull or nicked razor
blade on your cooktop. Store the
razor scraper out of reach of
children.
25
As the Creme cleans, it leaves a
protective coating that helps prevent
buildup of mineral deposits (water
spots) and will make future cleaning
easier. Dishwashing detergent
removes the protective coating and
should not be used.
• Most cleaners contain ammonia, •
chemicals, and abrasives that
damage the surface of your
cooktop Use only the Cooktop
Cleaning Creme _ for proper
cleaning and protection of your
glass-ceramic surface
• If you slide aluminum or
copper-bottom cookware across
the surface of the cooktop, they
may leave metal markings which
appear as scratches. Use the razor
scraper and cookto p creme to
remove these marks Failure to
remove this residue immediately
may leave permanent marks,
° if pots with a thin overlay of
aluminum, copper, or enamel
boil dry, bonding with the
glass-ceramic surface of the
cooktop may occur, This black
discoloration should be removed
immediately or it could become
permanenL
° Use of glass cleaner may leave
an iridescent film on the cooktop.
Cleaning Creme will remove
this film
• Water stains (mineral deposits) are
removable using the creme or full
strength white vinegar
o Do not use a dul! or nicked razor
blade on your cooktop,
° Do not use abrasive cleaners or
abrasive scouring pads on your
cooktop
. Plastic mesh pads, such as Dobie ®,
may be used.
To order additional Cooktop Cleaning
Creme e, call your nearest Sears
Service Center or Retail Store and ask
for Stock No 40079,
26

CAREANDCLEAMHG
C/eaning
CLEANING MATERIALS
= Dishwashing detergent
,, Warm water
= Soft cloth
Do not use abrasive cleaners,
industrial cleaners, or bleach.
CLEANING MATERIALS
• Dishwashing detergent
. Warm water
• Soap-filled steel-wool pad
,, Commercial oven cleaner
TO CLEAN
Allow the pan to soak Sprinkle the
grid with dishwashing detergent and
cover with a damp cloth or paper
towel and let stand Scour as needed.
Wash, rinse, and dry well You may
also place both the pan and grid in
the dishwasher
Clean only as touch-up between
clean cycles Use dishwashing
liquid, warm water, or soap-filled
steel-woof pad Rinse well after
cleaning and dry
NEVER USE OVEN CLEANERS IN
OR AROUND ANY PART OF THE
OVEN.
When cleaning, be sure not to bend
or displace the temperature sensor,
located on the back wall of the oven
_!_"_!_,"_'_i;_ "_'_,-'_.* _1;"_"_ _'__";-"_"._'_.__i_';;°_",:," ;::.;¢:_,_-
CLEANING MATERIALS
o Dishwashing detergent
_,Warm water
° Paper towels
TO CLEAN
Do not use oven cleaners,
cleansing powder or harsh abrasives
If marinades, tomato sauce, basting
materials, etc. should spill, wipe up as
much as possible. When surfaces
have cooled, thoroughly clean
painted areas
TO CLEAN
For everyday cleaning, use glass
cleaner and a paper towel For
stubborn soil, use paste of baking
soda and water Rinse thoroughly
CLEANING MATERIALS
= Soft abrasive cleaner
,, Sponge scrubber
Do not use hard, abrasive cleaners,
industrial cleaners, or bleach.
27
CAREANDCLEANINQ
RemovableParts
CLEANING MATERIALS
,' Dishwashing detergent
• Warm water
,, Sofl clolh
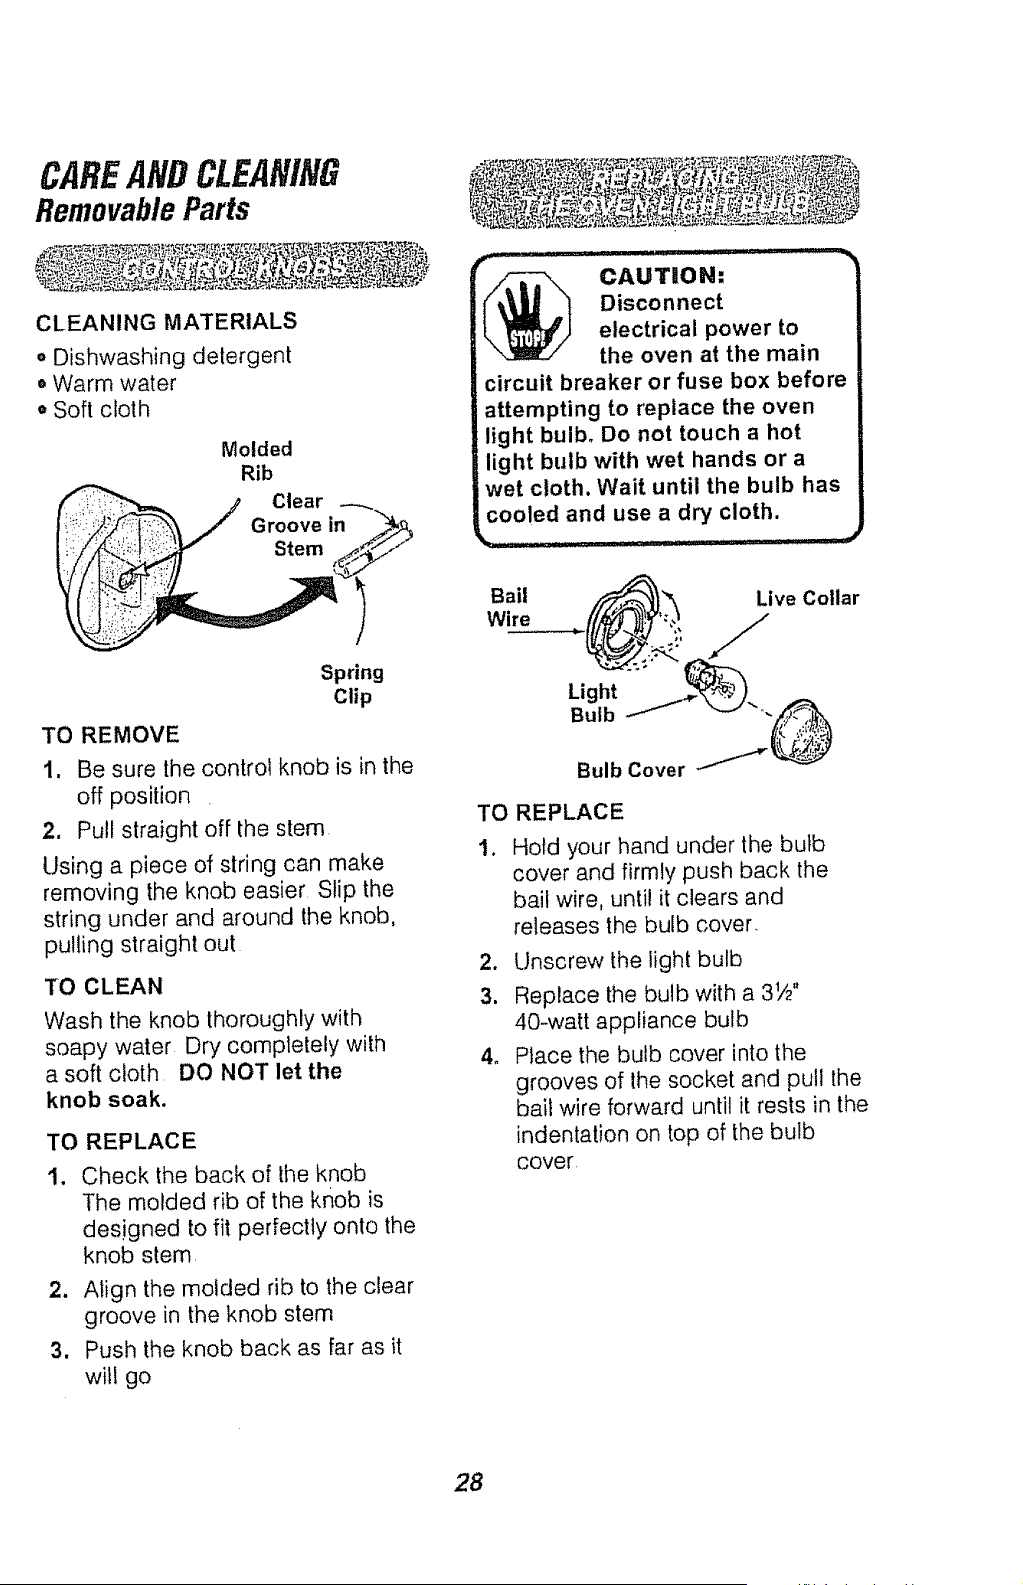
Molded
Rib
Clear
Groove in
Spring
Clip
TO REMOVE
1. Be sure the control knob is in the
off position
2. Pull straight off: the stem.
Using a piece of string can make
removing the knob easier Slip the
string under and around the knob,
pulling straight out
TO CLEAN
Wash the knob thoroughly with
soapy water Dry completely with
a soft cloth DO NOT let the
knob soak.
TO REPLACE
1. Check the back of the knob
The molded rib of the knob is
designed to fit perfectly onto the
knob stem
2. Align the molded rib to the clear
groove in the knob stem
3. Push the knob back as far as it
will go
........ ,, 4k
CAUTION"
Disconnect
electrical power to
the oven at the main
circuit breaker or fuse box before
attempting to replace the oven
light bulb. Do not touch a hot
light bulb with wet hands or a
wet cloth. Wait until the bulb has
cooled and use a dry cloth.
Bail !fz'_.} Live Collar
Wire _-
Light
Bulb /"
Bulb Cover
TO REPLACE
Hold your hand under the bulb
cover and firmly push back the
bail wire, until it clears and
releases the bulb cover.
2. Unscrew the light bulb
3. Replace the bulb with a 3W'
40-watt appliance bulb
4, Place the bulb cover into the
grooves of the socket and pull the
bail wire forward until it rests in the
indentation on top of the bulb
cover
28

CAREANDCLEANING
RemovableParts (cont,)
CLEANING MATERIALS
, Dishwashing detergent
',, Warm water
o Scouring pad or soap-filled
steel-wool pad
TO REMOVE
1, Fully open the Hinge Lock
door (Unlocked
2. Position)
Push the hinge
locks down
toward the door
frame, to the
unlocked
position Slot
This may
require a
fiat-blade
screwdriver.
L: :!
TO REMOVE
1. Pull the racks out to the stop lock
position
2. Pull up the front of the rack and
slide under the bump of the rack
guide
TO CLEAN
Clean with warm water and delergent
For hardqo-remove stains, gently
scrub wilh a scouring pad or a
soap-filled sleel-wool pad Rinse well
TO REPLACE
1. Place the raised back of the rack
onto the rack guides
2. Lift the front of the rack until the
raised back slides under the bump
of the rack guides
3. Slide the rack all the way back
3_
4_
5.
Hinge Arm
Firmly grasp both
sides of the door
at the top ,:-::,
Close door to the _,_,_,
door removal
position :_
Lift door up until :i!ii:i_:,i
the hinge arm is
clear of the slot
Removal Position
TO REPLACE
Firmly grasp both Bottom Hinge
sides of lhe door Edge of Arm
at the top Slot
2_ With the door at
the same angle
as the removal
position, seat the
indentation of the
hinge arm into
the bottom edge of
the hinge slot
Indentation
29

CAREANDCLEAN/#G
RemovableParts (conL)
Removable Oven Door (cont.)
3. Fully open the
door
4. Push the hinge
locks up against
the front frame of
the oven cavity, to
the locked
position
5. Close the oven
door
Locked
Position
Sealed Hinge
Arm
TO CLEAN OUTSIDE OF DOOR
Use soap and water to thoroughly
clean the top, sides, and front of the
oven door Rinse well You may also
use a glass cleaner to clean the
glass on the outside of the door. Do
not let water drip into the vent
openings
,, Spittage of marinades, fruit iuices,
tomato sauces, and basting
materials containing acids may
cause discoloration and should be
wiped up immediately When
surface is cool, clean and rinse
=,Do not use oven cleaners, cleaning
powders, or harsh abrasives on the
outside of the door.
= If any stain on the door vent trim is
pers!stent, use a soft abrasive
cleaner and a sponge scrubber for
best results
TO CLEAN INSIDE OF DOOR
. Because the area inside the gasket
is cleaned during the self-clean
cycle, you do not need to clean this
by hand
• The area outside the gasket and the
door liner can be cleaned with a
soap-filled steel-wool or plastic pad,
hot water, and detergent, Rinse welt
with a vinegar and water solution
30
CAREANDCLEANING
RemovableParts(cont.)
CLEANING MATERIALS
, Dishwashing detergent
- Damp cloth
o Warm water
TO REMOVE
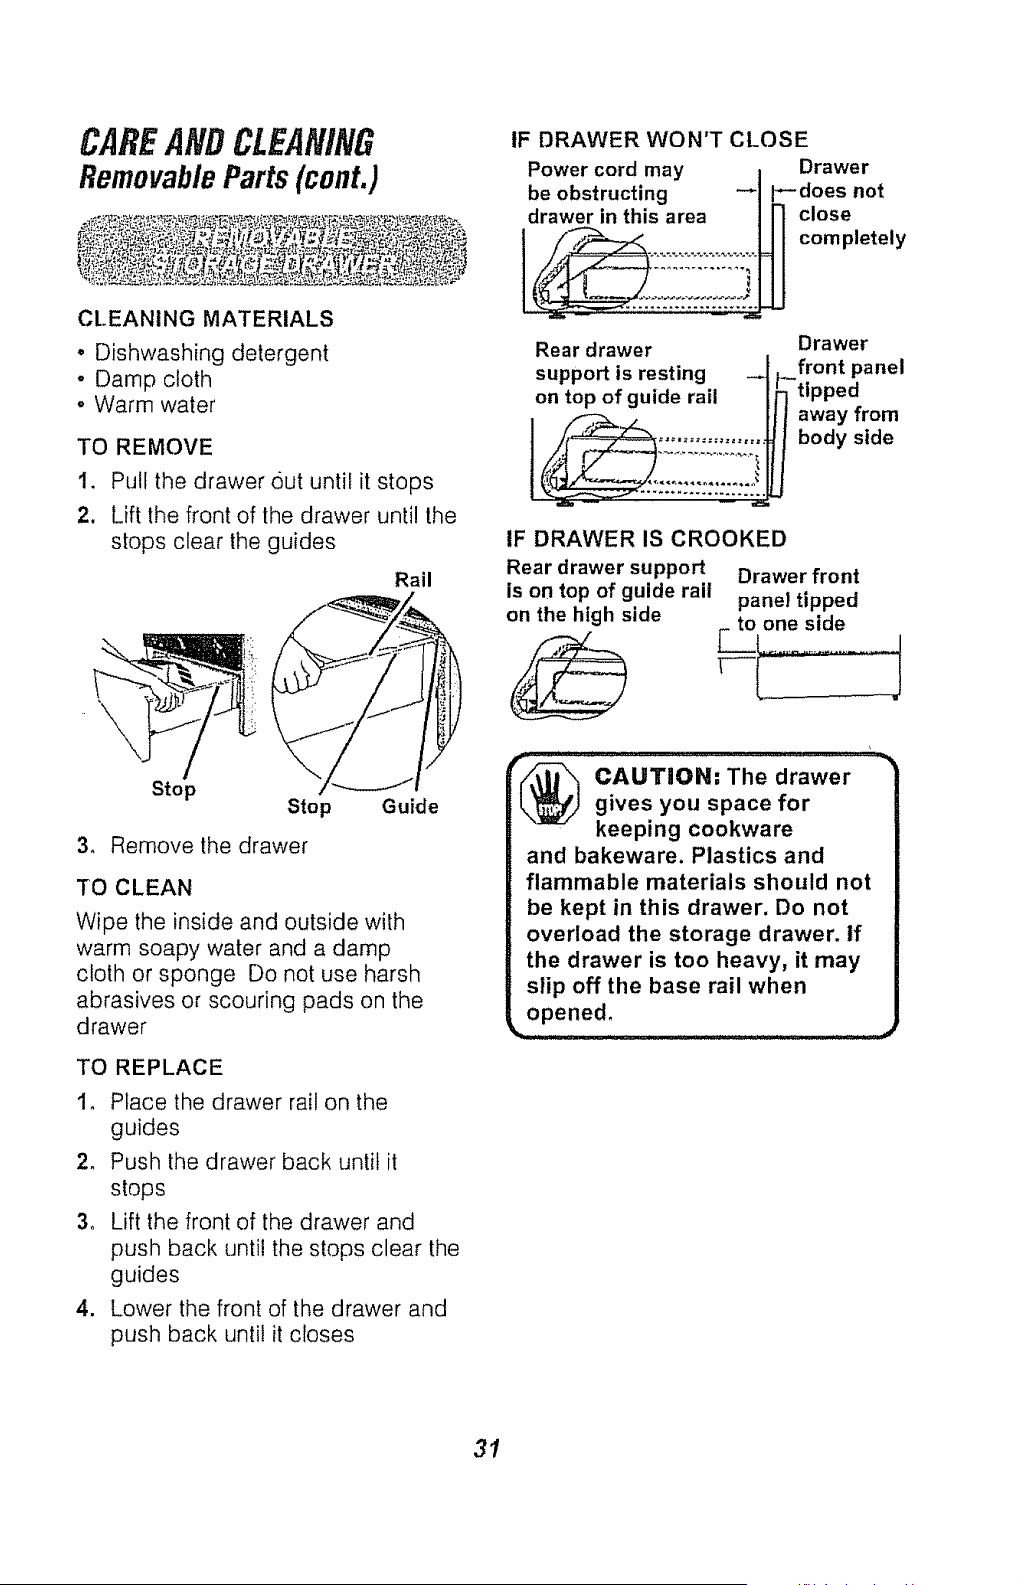
1. Pull the drawer 6ut until it stops
2. Lift the front of the drawer unti! the
stops clear the guides
Rail
Stop
Stop Guide
3. Remove the drawer
TO CLEAN
Wipe the inside and outside with
warm soapy water and a damp
cloth or sponge Do not use harsh
abrasives or scouring pads on the
drawer
TO REPLACE
1. Place the drawer rail on the
guides
2. Push the drawer back until it
stops
3o Lift the front of the drawer and
push back until the stops clear the
guides
4. Lower the front of the drawer and
push back until it closes
IF DRAWER WON'T CLOSE
Power cord may Drawer
be obstructing not
drawer in this area close
completely
Rear drawer
support is resting --
on top of guide rail
:2222222::222:2_
Drawer
_front panel
tipped
away from
body side
IF DRAWER IS CROOKED
Rear drawer support
is on top of guide rail
on the high side
Drawer front
panel tipped
31
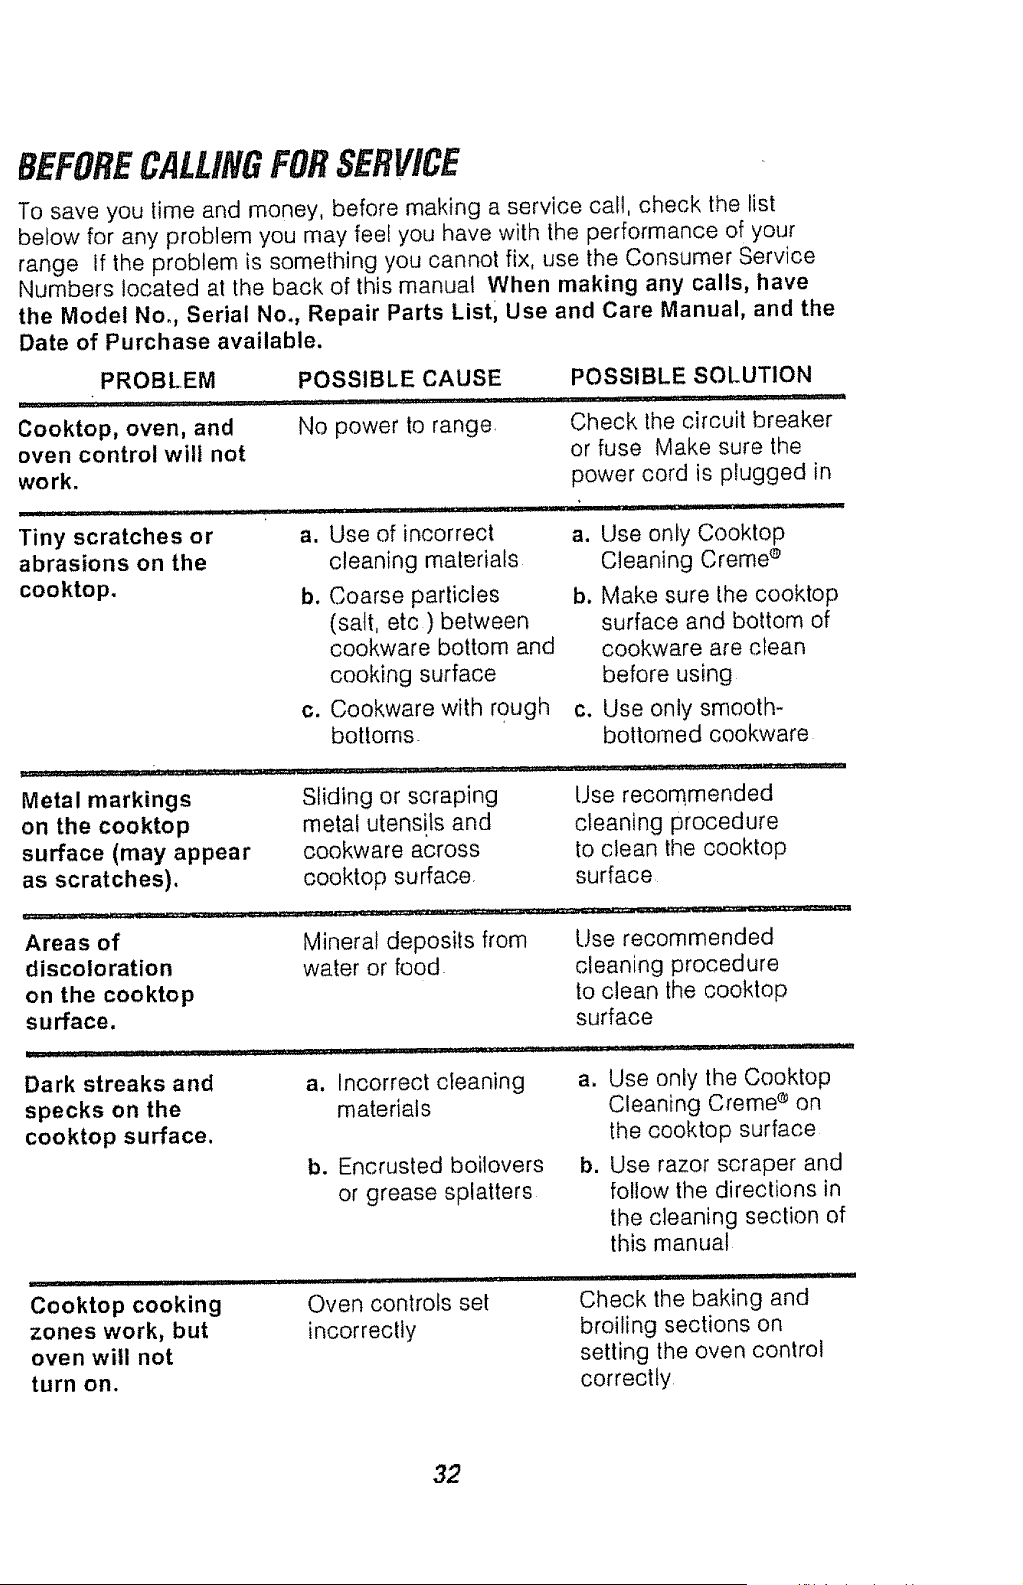
BEFORECALUNGFORSERVICE
To save you time and money, before making a service call, check the list
below for any problem you may feel you have with the performance of your
range If the problem is something you cannot fix, use the Consumer Service
Numbers located at the back of this manual When making any calls, have
the Model No., Serial No., Repair Parts List, Use and Care Manual, and the
Date of Purchase available.
PROBLEM POSSIBLE CAUSE POSSIBLE SOLUTION
Cooktop, oven, and No power to range. Check the circuit breaker
oven control will not or fuse Make sure the
work. power cord is plugged in
. ..... : _ : ............ : . :: : _ .................. 7,. , ,_,,,_
Tiny scratches or a. Use of incorrect a. Use only Cooktop
abrasions on the
cooktop.
cleaning materials
b. Coarse particles
(salt, etc ) between
cookware bottom and
cooking surface
c. Cookware with rough
bottoms.
Cleaning Creme e
b. Make sure the cooktop
surface and bottom of
cookware are clean
before using
c. Use only smooth-
bottomed cookware
Metal markings
on the cooktop
surface (may appear
as scratches).
Sliding or scraping
metal utensils and
cookware across
cooktop surface.
Use recommended
cleaning procedure
to clean the cooktop
surface
Areas of
discoloration
on the cooktop
surface.
Mineral deposits from
water or food
Use recommended
cleaning procedure
to clean the cooktop
surface
Dark streaks and
specks on the
cooktop surface.
a. Incorrect cleaning
materials
b. Encrusted boilovers
or grease splatters
a. Use only the Cooktop
Cleaning Creme e on
the cooktop surface
b. Use razor scraper and
follow the directions in
the cleaning section of
this manual
Cooktop cooking
zones work, but
oven will not
turn on.
.................................._ ii iiiiii ir , •
Oven controls set
incorrectly
Check the baking and
broiling sections on
setting the oven control
correctly
32
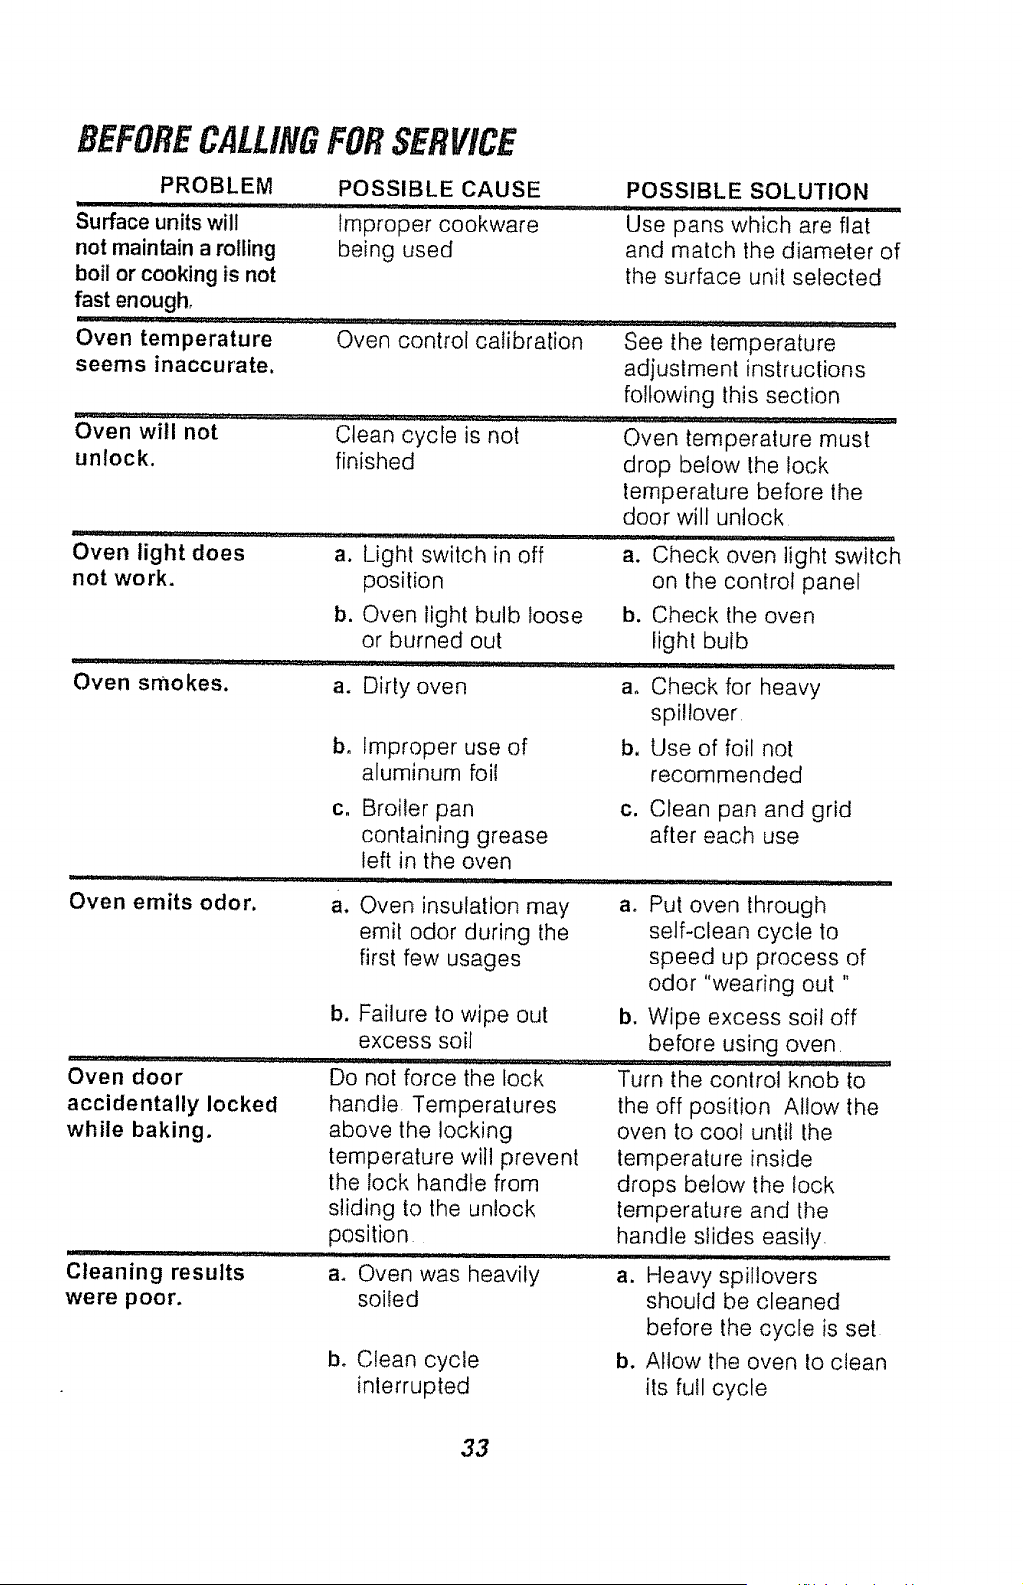
BEFORECALLINGFORSERVICE
PROBLEM
Surface units will
not maintain a rolling
boil or cooking is not
fast enough,
POSSIBLE CAUSE
Improper cookware
being used
Oven temperature Oven control calibration
seems inaccurate.
Oven will not Clean cycle is not
unlock, finished
.................. ...... Light .................
Oven light does a. switch in off
not work. position
POSSIBLE SOLUTION
,u,i, ,ll nl_J
.....Use pans which are flat
and match the diameter of
the surface unit selected
See the temperature
adjustment instructions
following this section
Oven temperature must
drop below the lock
temperature before the
door will unlock
.............. I ii ii'l_ _,
a. Check oven light switch
b. Oven light bulb loose
or burned out
_: i_,11I', ,11,,, I ii1,111...... :............. ........
Oven smokes, a. Dirty oven
b. Improper use of
aluminum foil
i iN luuu,ll,,ul
C.
Oven emits odor. a.
IPIL 1, lU_
.....
Oven door
accidentally locked
while baking.
Cleaning results
were poor.
Broiler pan
containing grease
left in the oven
Oven insulation may
emit odor during the
first few usages
b. Failure to wipe out
excess soil
Do not forCe_the lock .............
handle Temperatures
above the locking
temperature will prevent
the lock handle from
sliding to the unlock
position
a. Oven was heavily
soiled
bo Clean cycle
inlerrupted
on the control panel
b. Check the oven
light bulb
ao Check for heavy
spi!lover
b, Use of foil not
recommended
c. Clean pan and grid
after each use
a. Put oven through
self-clean cycle to
speed up process of
odor "wearing out "
b. Wipe excess soil off
before using oven
Turn control knob to
the off position Allow the
oven to coo! until the
temperature inside
drops below the lock
temperature and the
handle slides easily.
a. Heavy spiltovers
should be cleaned
before the cycle is set
b. Allow the oven Io clean
its full cycle
33

BEFORECALLINGFORSERVICE
Foods do not bake
properly_
PROBLEM POSSIBLE CAUSE
a. Oven was not
preheated long
enough
b. Improper rack or
pan ptacemenl
POSSIBLE SOLUTION
c, Oven vent blocked
or covered
a.
Be sure to preheat,
when recipe calls
for it
b. Maintain uniform air
space around pans
and utensils; see oven
cooking tips section
c. Keep vent clear
d. Improper use of foil
d. Use of foil not
recommended on
racks or oven bottom
e,
f_
_
h_
Improper
temperature setting
for utensil used
e. Reduce temperature
25 degrees for glass
or dull/darkened pans
Oven temperature
needs adjustment
f. Check oven
temperature
adjustment section
Range and oven
rack not level
g. Check the installation
for leveling.
Oven controls h. See the baking
improperly set section
Foods do not broil a, Improper rack a. Check broil pan
properly, position placement, see
broiling seclion
b. Oven preheated b.
c. Improper use of foil c.
Do not preheat when
broiling
Do not let foil cover slit
in the grid, this will
prevent grease
drainage
d. Oven door closed d,
during broiling
e. Low voltage (208) e.
f. Improper f.
broiling time
g, Oven controls g.
improperly set
Open door to broil
stop position; see
broiling section
Use higher rack
position
Check broiling chart in
broiling section
See the baking
section
34

"DO.IT-YOURSELF"
TEMPERATURE
ADJUSTMENT
You may feet that your new oven
cooks differently than the oven it
replaced We recommend thal you
use your new oven a few weeks to
become more familiar with it, following
the times given in your recipes as a
guide
if you think your new oven is too hot
(burning foods) or not hot enough
(foods are undercooked), you can
adjust the temperature yourself
The appearance and texture of foods
is a better indicator of oven accuracy
than an oven thermometer These
thermometers can vary by :bO-40
degrees from the true temperature of
the oven in addition, the oven door
must be opened to read these
thermometers Opening the door will
change the temperature of the oven
To decide how much to change
the temperature, set the oven
temperature 25 degrees higher
(if foods are undercooked) or
25 degrees lower (if foods are
burning) than the temperature in
your recipe, then bake The results
of this "test" should give you an idea
of how much the temperature should
be changed
1. Press and hold, at the same
time, the HOUR UP and DOWN
arrow pads until the display
shows a two-digit number.
2o Press the HOUR UP arrow pad to
increase the temperature, up to
+35°F hotter
or
Press the HOUR DOWN arrow
pad to decrease the temperature,
down to -35°F cooler
3. When this adjustment has been
made, the display will return to the
time of day
This adjustment wilt remain in memory
until these steps are repealed and a
new temperature is selected It will
remain in memory even after a power
failure
'This adjustmenl will not affect the Broil
or Clean temperatures
35

NOTES
36

NOTES
37

RADIANTFREE-STANDINGRANGE
WARRANTY
_ULL ONE-YEARWARRANTYONALLPARTS
If, wilhin oneyear[romlhe dateo[ inslaflalion,anypad failsIo funclionproperlydue Io a defeclin
malerialor workmanship,Searswilt repairor replaceit, alour option,freeof charge
LIMITEDWARRANTYONRADIANTGLASSANDRADIANTSURFACEUNITSFORSECOND
THROUGHFIFTH YEAR:
Forthe slarl of thesecondyear,fromthedaleof insla!lation,throughthefiflhyear,lrom thedateof
inslatlalion,Searswill repairor replace,al our oplion,Iheradianlglassor radianlsurfaceunils (you
will be responsible[or anylabor),if anyof thefollowingdeleclsoccur,
= Crackingof Iheradianlglasscooktopdue Io thermalshock
,,, Discoloralionoi theradiantglasscooklop
• Wear-oilof Ihe paUemonIhe radianlglasscooklop
o Crackingof Ihe rubbersealbetweentheradianlglasscooklopandIheporcelainedge
° Burnoulof anyof lhe radianlsurfaceunils
l! lhis productis subiecledto olher Ihanprivalefamilyuse,Iheabovewarrantiesareeifectivefor
only 90 days
WARRANTYSERVICEIS AVAILABLEBYCONTACTINGTHENEARESTSEARSSERVICECENTER1N
THEUNITEDSTATES
Thiswarranlygivesyou specificlegal righls,andyoumayalso haveolher righls whichvaryfrom
slate1oslate
SearsRoebuckand Co Depl 817WAHolfmanEslales,]L60179
,....J
To further add to the value of your Range,
Buy a Sears Maintenance Agreement.
Years of Ownership Coverage
t. Replacement of Defective Parts other
than Radiant Glass and Radiant
Surface Units
2. Radiant Glass and ::tiant Surface
Unit Parts
2nd Year
MA
3. Labor
4. Annual Preventive ntenance
1st Year
I w
W
w
MA
,..: Check atyou r request ._
W
MA
MA
3rd Year
MA
W. W'a'_r_,,_
W
MA - Maintenance Agreement
KenmoreAppliancesaredesigned,manulacluredandlesledlot yearsof dependableoperalionYel,
anyappliancemayrequireservicefromtime lo lime TheSearsMainlenanceAgreemenloffersyou
an oulstandingserviceprQgramforyourproducl
Thelane aboveshowsIheaddilionatbenefitsa SearsMaintenanceAgreementofferscomparedIo a
SearsWarranly,
Conlaclyour SearsSalesAssocialeor localSearsServiceCentertopurchaseaSearsMainlenance
Agreemenl
38
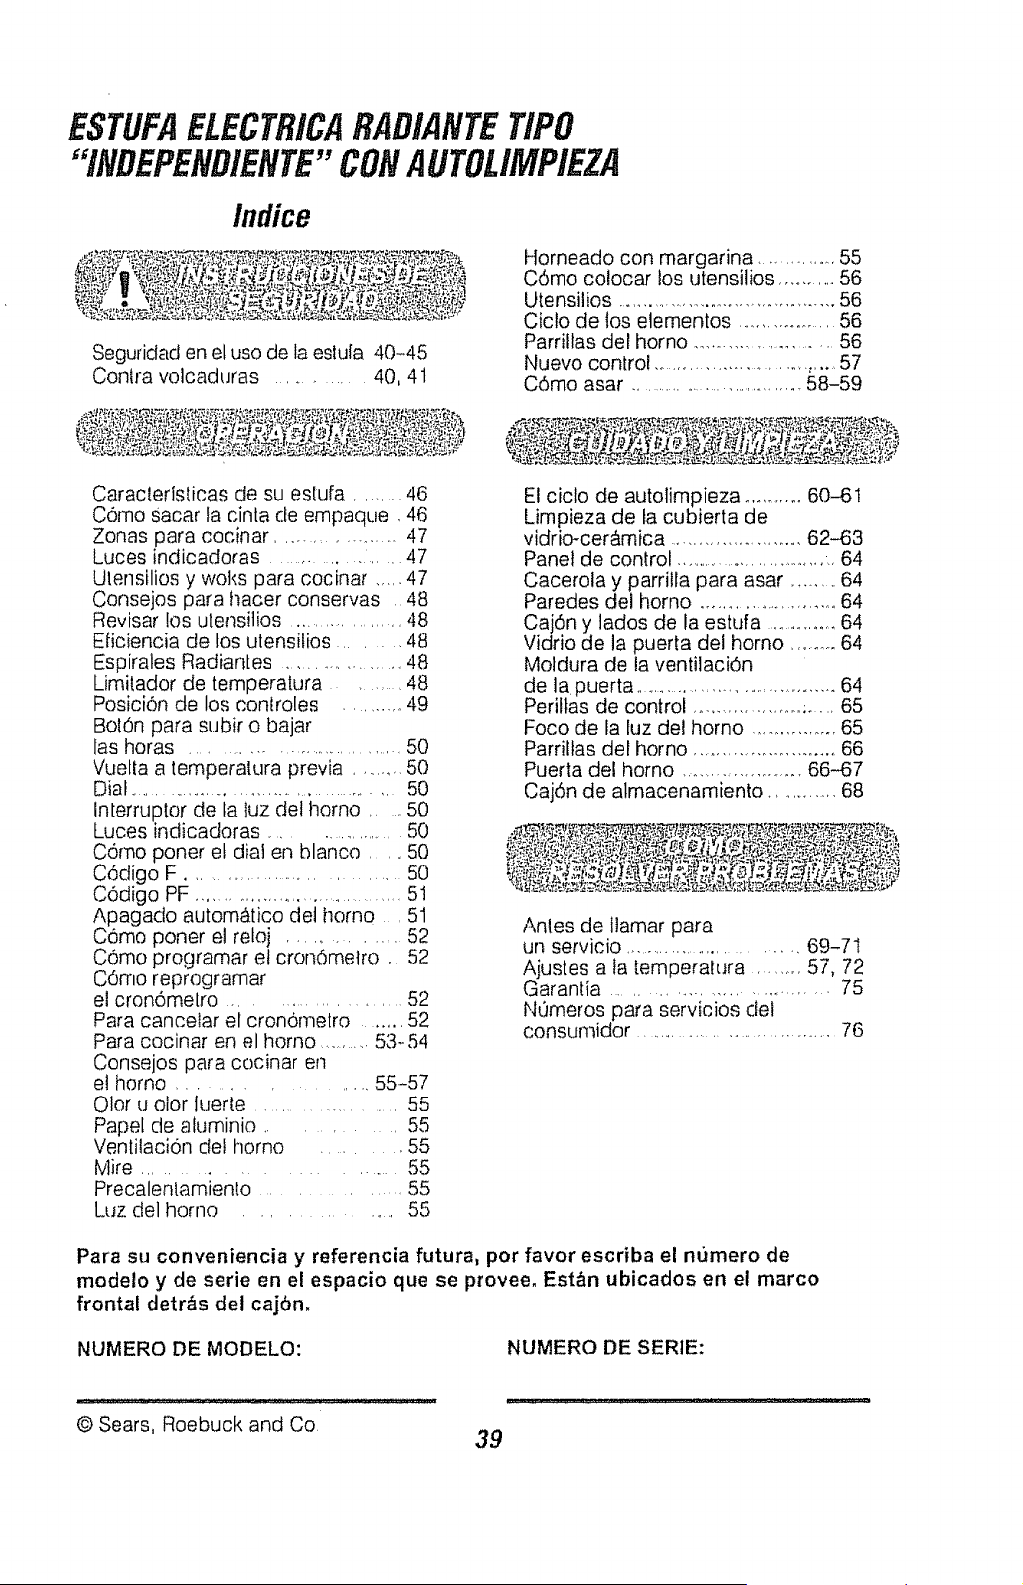
ESTUFAELECTRICARAD/AflTETIPO
"/NDEPEflDIENTE" COIlAUTOL/MPIEZA
Indice
Seguridad en el uso de la estufa 40-45
Conlra volcaduras ........... 40, 41
Horneado con margarina .............. 55
C6mo colocar los utensilios .......... 56
Utensilios ......................................... 56
Ciclo de los elementos ................. 56
Parrillas del horno ......................... 56
Nuevo control ............................. ,.....57
C6mo asar .................................. 58-59
Caraclerlsticas de su eslufa ........ 46
Como Sacar Ia cinta de empaque. 46
Zonas para cocinar ................... 47
Luces indicadoras ...................... 47
Utensilios y woks para cocinar ..... 47
Consejos para hacer conservas 48
Revisar los utensilios ..................... 48
Eiiciencia de los utensilios ........ 48
Espirales Radianles .................... 48
Limitador de temperatura ....... 48
PosiciOn de los conlroles ......... 49
BotOn para subir o bajar
las horas .................................. 50
Vuelta a temperatura previa ........ 50
Dial ................................................ 50
Interruptor de ta luz del homo ..... 50
Luces indicadoras ..................... 50
Corno poner et diat en blanco ..... 50
CSdigo F ............................. 50
C6digo PF .................................... 51
Apagado autom_tico det horno . 51
Como poner el reloj .............. 52
C6mo programar et cron0melro. 52
COrno reprogramar
el cron6melro ....................... 52
Para cancelar el cronOrnetro ........ 52
Para cocinar an el homo ......... 53-54
Consejos para cocinar en
et homo ............... 55-57
Olor u olor luerte ...................... 55
Papel de afuminio ....... 55
Ventilacion det horno .......... 55
Mire ........................... 55
Precalentamiento ................. 55
Luz del homo ................. 55
El ciclo de autolimpieza ........... 60---61
Limpieza de ta cubierta de
vidrio-cer&mica ........................ 62-63
Panel de control ..............................._.,64
Cacerola y parrilla para asar ......... 64
Paredes del homo .............................64
Caj6n y lados de la estufa ...............64
Vidrio de la puerta del homo ......... 64
Motdura de la ventilaciOn
de lapuerta ..................................... 64
Perittas de control ................... ..... 65
Foco de la luz del homo ................ 65
Parrillas del homo .......................... 66
Puerta del homo ....................... 66-67
CajSn de almacenamiento .............. 68
Antes de llamar para
un servicio ............................ 69-71
Ajustes a la temperalura ...........57, 72
Garantia ................................ 75
N0meros para servicios del
consumidor ...........................................76
Para su conveniencia y referencia futura, por favor escriba el nt_mero de
modelo y de serie en el espacio que se pmveeo Est&n ubicados en et marco
frontal detr_s det cajOn,
NUMERO DE MODELO:
NUMERO DE SERIE:
© Sears, Roebuck and Co.
39
INSTRUCCiONESDE
SEGURIDADIMPORTANTES
GUARDE ESTAS INSTRUCCIONES
Lea todas las instrucciones antes de usar esta estufa, Cuando use un aparato a
gas o el_ctrico, se debe seguir instrucciones de seguridad b&sicas, inctuyendo
Io siguiente:
g.
,ilji" -I-oda_ las
estufa_
_r
se pueden vofcar
Personas podrian
Instale e! dispositivo
contra volcaduras
empacado con la
estufa
Vea las instrucciones
de instalaciOn
Estas instrucciones para la instalaci6n de
la abrazadera CONTRA VOLCADURAS
son para madera o pisos y paredes de
concreto. Cualquier otro tipo de
construcci6n podria requerir tecnicas de
instalaci6n especiales para proveer un
anctado adecuado de la abrazadera
CONTRA VOLCADURAS al piso o a
ta pared,
El uso de esta abrazadera no evita que la
estufa se de vuefta cuando no est_ bien
instalada,
NOTA: La insta]aci6n de la abrazadera
CONTRA VOLGADURAS debe cumptir
con todas las ordenanzas locales para
asegurar ta estufa,
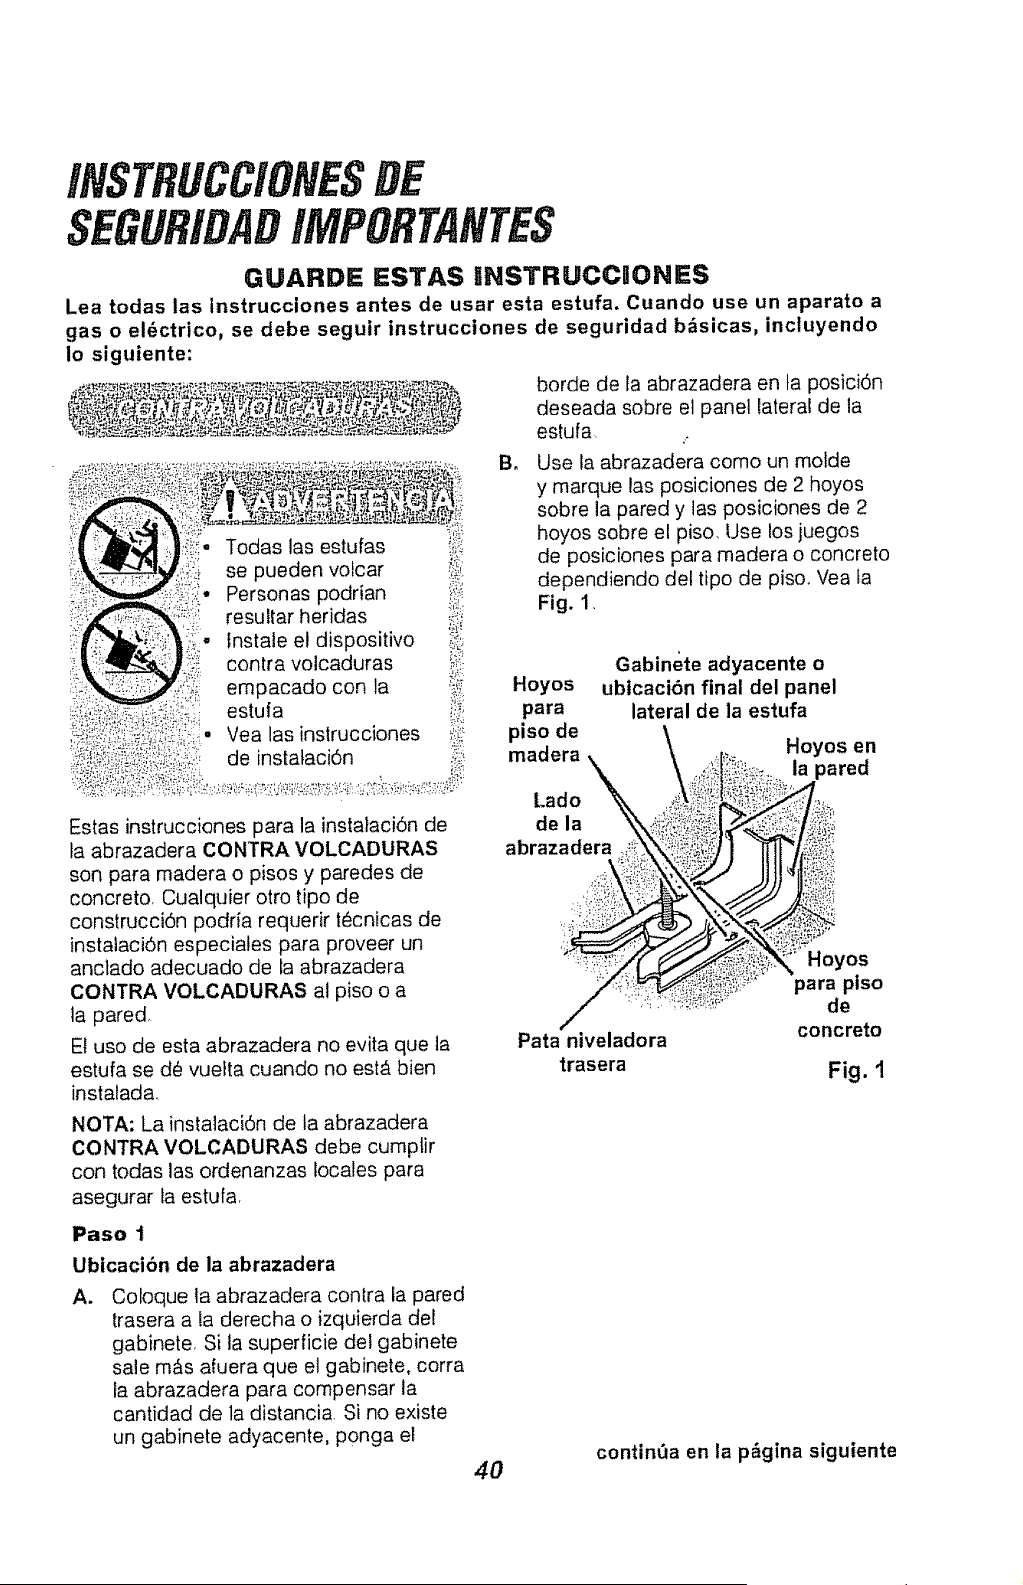
borde de la abrazadera en ta posici6n
deseada sobre el panel lateral de la
estufa.
Use la abrazadera como un molde
y marque las posiciones de 2 hoyos
sobre la pared y las posiciones de 2
hoyos sobre el piso, L,tse los juegos
de posiciones para madera o concreto
dependiendo del tipo de piso, Vea fa
Fig. 1,
Gabinete adyacente o
Hoyos ubicacibn final del panel
para lateral de la estufa
Pata niveladora
trasera
Hoyos en
;!i!(_!i_ii,_:i_:;_,.Ia ,ared
_" Hoyos
_'i:;'_'_:_'"para piso
de
concreto
Fig. t
Paso 1
Ubicacibn de la abrazadera
A.
Coloque la abrazadera contra la pared
trasera a la derecha o izquierda del
gabinete, Si la superficie del gabinete
sale m_s afuera que el gabinete, corra
la abrazadera para compensar la
cantidad de la distancia Si no existe
un gabinete adyacente, ponga el
4O
continua en la p_gina siguiente

/NSTRUCC/ONESDE
SEGURIDAD
/MPORTANTES
Dispositivo de estabilidad (cont.)
Paso 2
Instalacibn de la abrazadera contra
volcaduras
A. Construccibn de madera:
Piso: Haga un hoyo piloto de I/_,
en e! centro de cada posicidn de
hoyo premarcada sobre el piso de
madera (un clavo o una lezna se
puede usar si no tiene un tatadro),
Y
=
Pared; Haga un hoyo piloto de Vs"
en &ngulo (como se muestra en la
Fig, 2) en el centro de cada
posici6n de hoyo premarcada en
ta pared (un ctavo o una lezna se
puede usar si no tiene un taladro).
INSTALACION SOBRE LA PARED Y PISO
Abrazadera _ t Placa
EItornillo \ J=I de la
I debe penetrarta [_] pared
]_ '_Madera o eIMetal II1,1, ! ,
Fig. 2
e. instate ta abrazadera CONTRA
VOLCADURAS con los 4 tornilEos
que se proveen como se ilustra en
ta Fig. 2,
C. Concreto Construcci6n:
1o Materiales requeridos:
4 de cada Perno "lag" de
uno 1/4"x t W
2_
4 de cada Manga para
uno anctar O. D. de _,4'
Haga ef hoyo del tama_5o
recomendado para tas anclas
sobre el concreto en el centro de
cada hoyo premarcado sobre el
piso de concreto y sobre ta pared.
instale la manga det ancla dentro
del hoyo y luego instale los pemos
a traves de la abrazadera. NO
APRIETE LOS PERNOS
DEMASIADO,
Paso 3
Revise la Instalaci6n
A,
B,
Complete la instalaci6n de la estufa
de acuerdo alas instrucciones de
instalaci6n que se proveen con ella,
Revise para asegurarse que la
abrazadera CONTRA VOLCADURAS
est_ instalada y enganchada
correctamente Saque el panel de
abajo o el caj6n e inspeccione la
PATA NIVELADORA TRASERA
Aseg0rese que est_ firmemente bien
colocada dentro de la ranura. Yea la
Fig. t,
41

INSTRUCCIONESDE
SEGUR/DAD
IMPORTANTES
Para prevenir que la estufa
se vuelque accidentalmente
debido a un uso anormal,
incluyendo una carga excesiva sobre
la puerta, engbnche la estufa a la
pared o al suelo instalando el
dispositivo contra volcaduras que se
provee. Si la estufa se mueve para
limpiarla, para hacerle servicio o
cualquier raz6n, asegt_rese que el
dispositivo contra volcaduras sea
enganchado nuevamente cuando la
estufa se coloque de vuelta en la
abertura. No hacerlo podria resuitar
en que la estufa se vuelque y podria
causar heridas personales. Para
inspeccionar el dispositivo contra
volcaduras, saque el cajon y mire para
asegurarse que el nivelador de ia pata
trasero est_ bien enganchado en la
ranura de la abrazadera.
lmportante; Para garantizar su seguridad,
la de su familia y la de su hogar, por
favor lea su Manual del Consumidor
cuidadosamente. Mant_ngalo a la mano
para referencias. Ponga mucha atenci6n a
las secciones de seguridad ASEGURESE
que su estufa sea instalada por un tecnico
especializado y que haga tierra
adecuadamenteo
• NO DEJE a los niSos sin vigilancia cerca
de una estufa que se est_ usando,
• ENSENEA LOS NI£OS A nojugar con
los controles o cualquier parte de la
estufa y a no sentarse, subirse, o
pararse sobre la puerta
• IPREGAUGIONI NUNCA GUARDE cosas
de inter4,s para los ni#,os sobre el respaido
de la estufa o en los gabinetes que
o
#
42
quedan por sobre la estufa. Los niSos que
se suban sobre la eslufa podrian resultar
gravemente heridos
GUARDE ESTE tibro para un uso futuro
NUNCA USE su estufa para entibiar o
calentar una habitackSn
• NUNCA TRATE de reparar o reemptazar
una parte de la estufa a menos que las
instrucciones se den en este manual, Todo
otto trabajo deber{a ser hecho por un
t@cnico especializado,
• SlEMPRE MANTENGA los revestimientos
combustibles de las paredes, cortinas y
otrospaSos a una distancia prudente de
la estufa.
NUNCA CALIENTE contenedores de
atimenlos cerrados El aumento de la
presi6n podrfa causar que el contenedor
explote y cause heridas,
NUNCA DEJE contenedores de grasa o
goteaduras sobre o cerca de la estufa
SIEMPRE MANTENGA el _rea de la
estufa despejada de cosas que se podrfan
quemar La acumulaci6n de comida y
grasa y los utensilios de madera se
podrian incendiar_ Los utensilios de
pt_stico se podrian derretir y las comidas
en conservas podrfan exp!otar Su homo
nunca se debeda usar para almacenar
cosasr
• SIEMPRE MANTENGA la estufa
despejada de cosas que se podrian
quemar (gasolina y otros vapores o
liquidos inflamables)
° NUNCA TRATE de limpiar 1assuperficies
calientes, Algunos limpiadores producen
vapores nocivos y los paSos y las
esponjas mojadas podrian causar
quemaduras pot vapor,
• NUNCA USE ropa suelta cuando use
ta estufa,
NUNCA USE una toatla u otto paNo
abultado como agarradera Aseg0rese
que la agarradera est_ seca Las
agarraderas h0medas y las patios y
esponjas mojadas podrian causar
quemaduras pot vapor. NO permita que
las agarraderas toquen los elementos
para calentar.
/NSTRUCCIONESDE
SEGURIDAD
/MPORTANTES
. NO TOQUE tas superficies para
calentar, las superficies cerca de elias o
las superficies interiores. Estas podrian
estar suficientemente catientes para
quemar aunque se vean de color oscuro,
Durante y despu_s del uso, no toque o
permita que la ropa o materiales
inflamabfes hagan contaclo con Ins
superficies catientes hasta que hayan
tenido tiempo de enfriarse. Las otras
superficies cerca de tas ventaniltas de
ventilaci6n del homo, puertas, ventanas y
Ins superficies para cocinar tambien
podrian estar suficientemente calientes
para causar quemaduras.
, SOLO cierta clases de utensitios de
vidrio o cer_mica se pueden usar para
cocinar en ta cubierta, AsegOrese que
los utensilios que seleccione est_n
diser3ados para cocinar sobre la
cubierta sin quebrarse debido a los
s,bbitos cambios de ternperatura
• SlEMPRE TENGA cuidado cuando
toque los elementos de la cubierta
Retendr_n calor despues de que la
estufa se haya apagado
• NUNCA OBSTRUYA la ventilaci6n del
homo detr_s de ta zona para cocinar
posterior derecha
• LAS OLLAS QUE SE USEN para
cocinar en la cubierta deberian set de
fondo piano y to suficientemenfe
grandes para cubrir el &rea que se est&
utilizando Los utensilios que son
dernasiado pequeSos exponen el
etemenlo catentador y podria causar un
contacto directo o el incendio de ia ropa,
El tamar3o correcto de los utensilios
tambi_n mejorar& la eficiencia
° NUNCA DEJE Ins unidades de
superficie sin vigilancia a temperaturas
altas. Los derrames podrian resultar en
humo o en derrarnes de grasa que se
podrian incendian
° NUNCA cocine sobre una cubierta para
cocinar quebrada. Las sotuciones para
la limpieza y los derrames podrian
penetrarla y crear un riesgo de corte de
corriente o de incendio. Llame aun
t_cnico calificado para tas reparaciones.
• SlEMPRE COLOQUE las agarraderas
(rnanillas) de Ins ottas hacia adentro y
lejos de las otras unidades de la
superficie para reducir el riesgo de
quemaduras, encendido, un contacto y
derrame accidental..
CUANDO PREPARE comidas a la llama
debajo de la campana de ventilaci6n,
encienda el venlilador
. COLOQUE LAS PARRILLAS DEL
HORNO en la posiciSn deseada
mientras el homo est_ frio. Si las
parritlas se deben mover mientras et
homo est,, caliente, no perrnita que la
agarradera haga contacto con el
quemador catiente del homo
• DESPUES DE ASAR A LA PARRILLA,
siempre saque la cacerola y la parriifa
para asar del homo y limpietas. Los
sobrados de grasa en ta cacerola para
asar podrian incendiarse la pr6xima vez
que usted use el homo.
• SIEMPRE TENGA cuidado cuando
abra la puerta del horno. Deje que el
aire catiente y el vapor escapen antes
de mover los alimentos
NUNCA USE papet de aluminio para
cubrir el fondo del homo El uso
incorrecto del papef de aluminio podria
empezar un incendio, o podria resultar
en un golpe de corriente
43
/NSTflUCC/ONESDE
SEGURIDAD
IMPORTANTES
, LIMPIE SOLAMENTE las partes que se
@tan en este manual, Siga todas las
instrucciones para la limpieza Asegfirese
de sacar la cacerola y la parfilla para asar
antes del ciclo de autolimpieza.
, NUNCA FRIEGUE. mueva, limpie, o da_e
ef sello de ta puerta en las estufas con
autolimpieza_ Es esencial para un buen
setlado,
, NUNCA TRATE de limpiar los utensilios,
otlas, partes removibles o la cacerola y la
parrilta para asar en el ciclo de
autolimpieza
, NO USE timpiadores para hornos - No se
deberfa usar ninguna ctase de limpiador
para hornos o cremas protectoras dentro o
alrededor de cualquier parte del homo
• Sl LA FUNCION DE AUTOLIMPIEZA
falta, apague el horno y desconecte ta
electficidad H&gale un servicio por un
t6cnico calificado.
IADVERTIENCIA DE
SEGURIDAD IMPORTANTE!
California Safe Drinking Water and
Toxic Enforcement Act requlere qua el
gobernador de California publique una
lista de substancias que el estado sepa
que producen defectos de nacimiento u
otros dafios reproductlvos y requiere
que los hombres de negocios advlertan
a sus clientes del contacto potenclal a
tales substancias, El aislante de flbra de
vidrlo en el horno con autolimpieza
emitir_ una muy pequefia cantidad de
monbxido de carbono durante el ciclo
de autolimpieza. El contacto se puede
minimizar ventilando con una puerta o
ventana abierta o usando un ventilador
o una campana de ventilaci6n.
IMPORTANTE: La salud de algunos
p&jaros es extremadamente sensitiva a
los vapores producidos por el ciclo de
autolimpieza de cualquier homo, Ponga
los p&jaros en otra habitaci6n que est6
bien ventilada.
;LEA Y COMPRENDA
ESTA IlNFORMAC!ION AHORA!
Asegurese que todos en su hogar sepan
qu6 hacer en caso de incendio, Nunca
use agua sobre un incendio de grasa,
esto solamente extender& las llamas,
INCENDIO DE GRASA EN LA
CUBIERTA:
Nunca levante una ella en llamas,,,
1. Apague los elementos de la superficieo
2. Sofoque la llama con una tapa
apretada, soda para cocinar o con un
extintor quimico, a espuma o "halon"
FUEGO EN EL HORNO:
]No trate de mover la cacerolal
1. Cierre la puerta del homo y apague
los controls,
2. Si el incendio contin0a,
cuidadosamente abra la puerta y
arroje soda para cocinar sobre et
fuego, o use un extintor de quimico
seco, espuma o "halon"
44
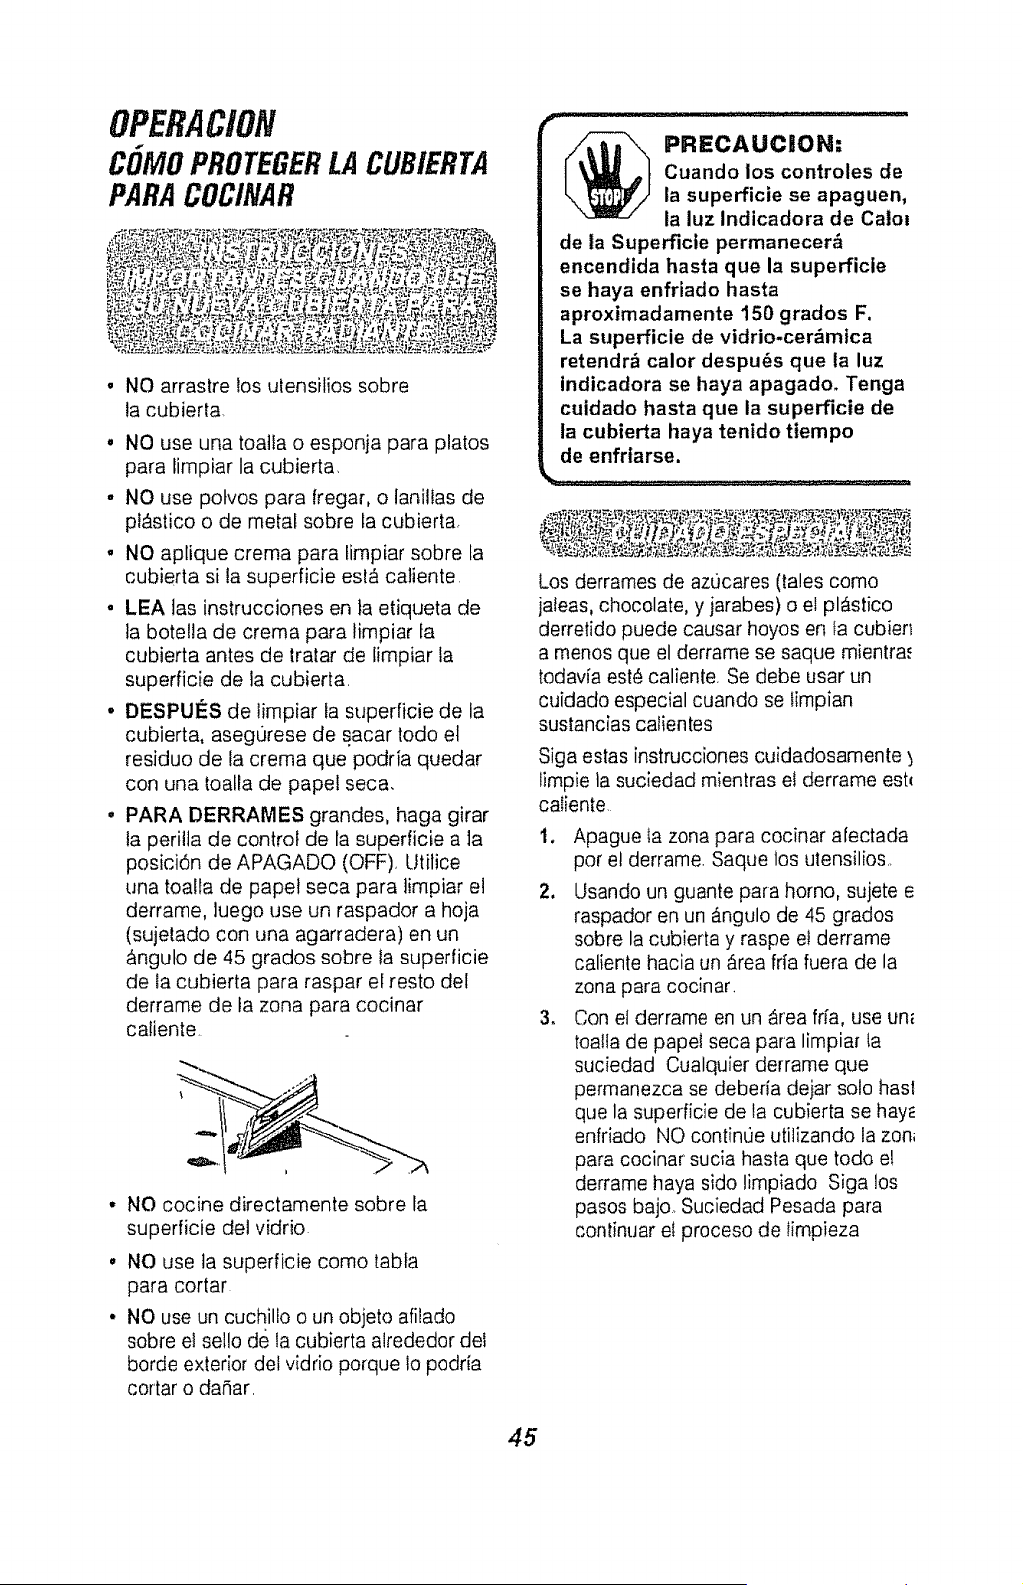
OPERAC/ON
COMOPROTEGERLA CUBIERTA
PARACOCINAR
• NO arrastre los utensilios sobre
la cubierta,
, NO use una toatla o esponja para platos
para limpiar la cubierta,
• NO use polvos para fregar, o lanilIas de
pl&stico o de metal sobre la cubiertao
• NO aplique crerna para timpiar sobre la
cubierta si la superficie esl& caliente
• LEA tas instrucciones en la etiqueta de
ta botella de crema para limpiar la
cubierta antes de tratar de limpiar la
superficie de la cubierta,
• DESPUlL'S de limpiar la superficie de la
cubierta, aseg0rese de sacar todo et
residuo de la crema que podria quedar
con una toalla de papel seca,
• PARA DERRAMES grandes, haga girar
ta perilla de control de la superficie a ]a
posici6n de APAGADO (OFF), LItilice
una toalfa de papel seca para ]impiar el
derrame, ]uego use un raspador a hoja
(sujetado con una agarradera) en un
,¢ngulo de 45 grados sobre la superficie
de ta cubierta para raspar el resto del
derrame de ta zona para cocinar
catiente
• NO cocine directamente sobre la
superficie del vidrio
. NO use la superficie como tabla
para cortar
• NO use un cuchillo o un objeto afilado
sobre el sel!o de la cubierta alrededor del
horde exterior det vidrio porque Io podria
cortar o daSar,
PRECAUCiON:
Cuando los controles de
la superficie se apaguen,
la luz Indicadora de Calm
de ia Superficie permanecer&
encendida hasta que la superficle
se haya enfriado hasta
aproximadamente 150 grados F.
La supefficie de vidrio-cer&mica
retendr_ calor despu6s que la luz
Indicadora se haya apagado. Tenga
cuidado hasta que la superficie de
ta cubierta haya tenido tiempo
de enfriarse.
If- .......
Los derrames de azucares (tales corno
jaleas, chocolate, y jarabes) o et pl_stico
derretido puede causar hoyos en ta cubien
a menos que el derrame se saque mientra,,
todavia est_ caliente Se debe usar un
cuidado especial cuando se limpian
sustancias calientes
Siga estas instrucciones cuidadosamente
limpie la sucledad mientras el derrame est_
catiente,
t,,,
,,*
3_
Apague la zona para cocinar afectada
por el derrame Saque los utensilios.,
Usando un guante para homo, sujete e
raspador en un __ngulode 45 grados
sobre la cubierta y raspe ei derrarne
caliente hacia un Area fria fuera de la
zona para cocinar.
Con et derrame en un &rea ffia, use un_
toalfa de papet seca para limpia_ la
suciedad Cualquier derrame que
permanezca se deberia de jar solo hasl
que la superficie de la cubierta se hay_
enfriado NO continue utilizando la zon_
para cocinar sucia hasta que todo el
derrame haya sido limpiado Siga los
pasos bajo. Suciedad Pesada para
continuar el proceso de limpieza
45
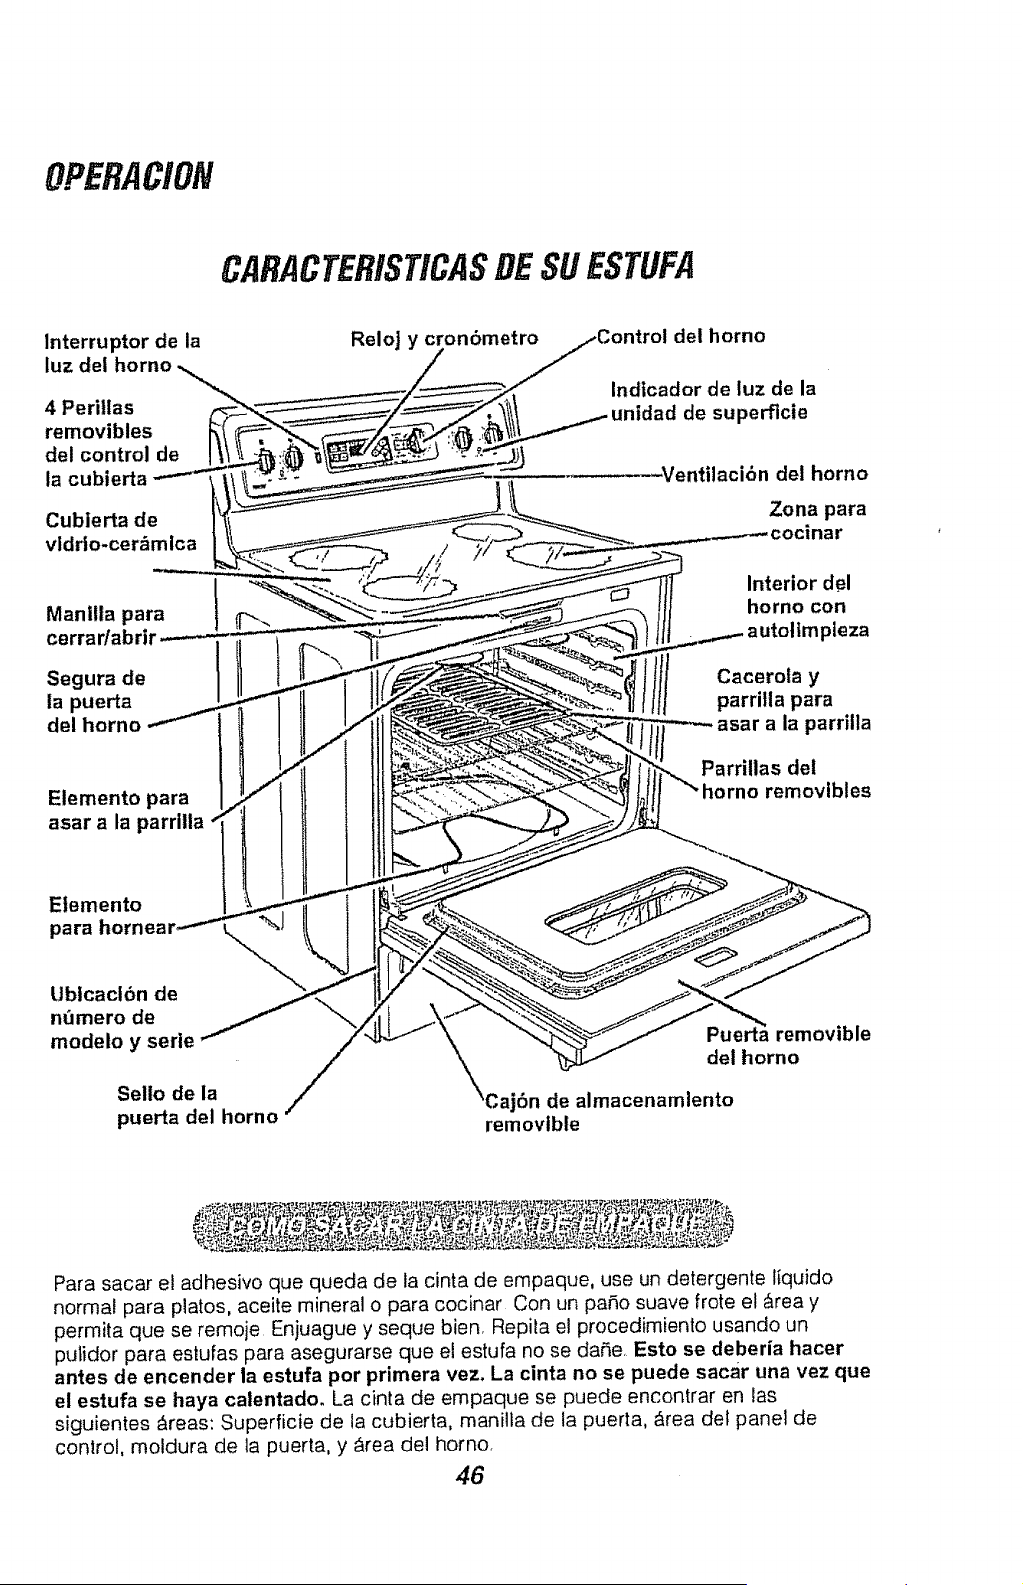
OPERAC/ON
CARACTERISTICASDESUESTUFA
Interruptor de la
luz del homo
4 Perillas
removibles
del control de
la cubi
Cubierta de
vldrto-cerz_mica
Manilla para
cerrar
Segura de
la puerta
del horno
Elemento para
asar a la parrilla
Reloj y cron6metro
del horno
Indtcador de luz de la
"dad de superficie
laci6n del horno
Zona para
Interior del
horno con
pleza
Cacerola y
parritla para
asar a la parriila
Parrillas del
horno removtbles
Etemento
para horn
Ubicaclbn de
n_mero de
modelo y serie
Sello de la
puerta del horno
Pue_a removible
dei homo
\Cajdn de almacenamlento
removible
Para sacar e! adhesivo que queda de la cinta de empaque, use un detergente liquido
normal para platos, aceite mineral o para cocinar Con un paso suave frote et Area y
permita que se remoje Enjuague y seque bien, Repila el procedimiento usando un
pulidor para estufas para asegurarse que el estufa no se daSe, Esto se deberia hacer
antes de encender la estufa per primera vez. La cinta no se puede sacar una vez que
el estufa se haya calentado. La cinta de empaque se puede encontrar en las
siguientes &reas: Superficie de la cubierta, manilta de la puerta, _rea del panel de
control, moldura de la puerta, y _rea del homo.
46
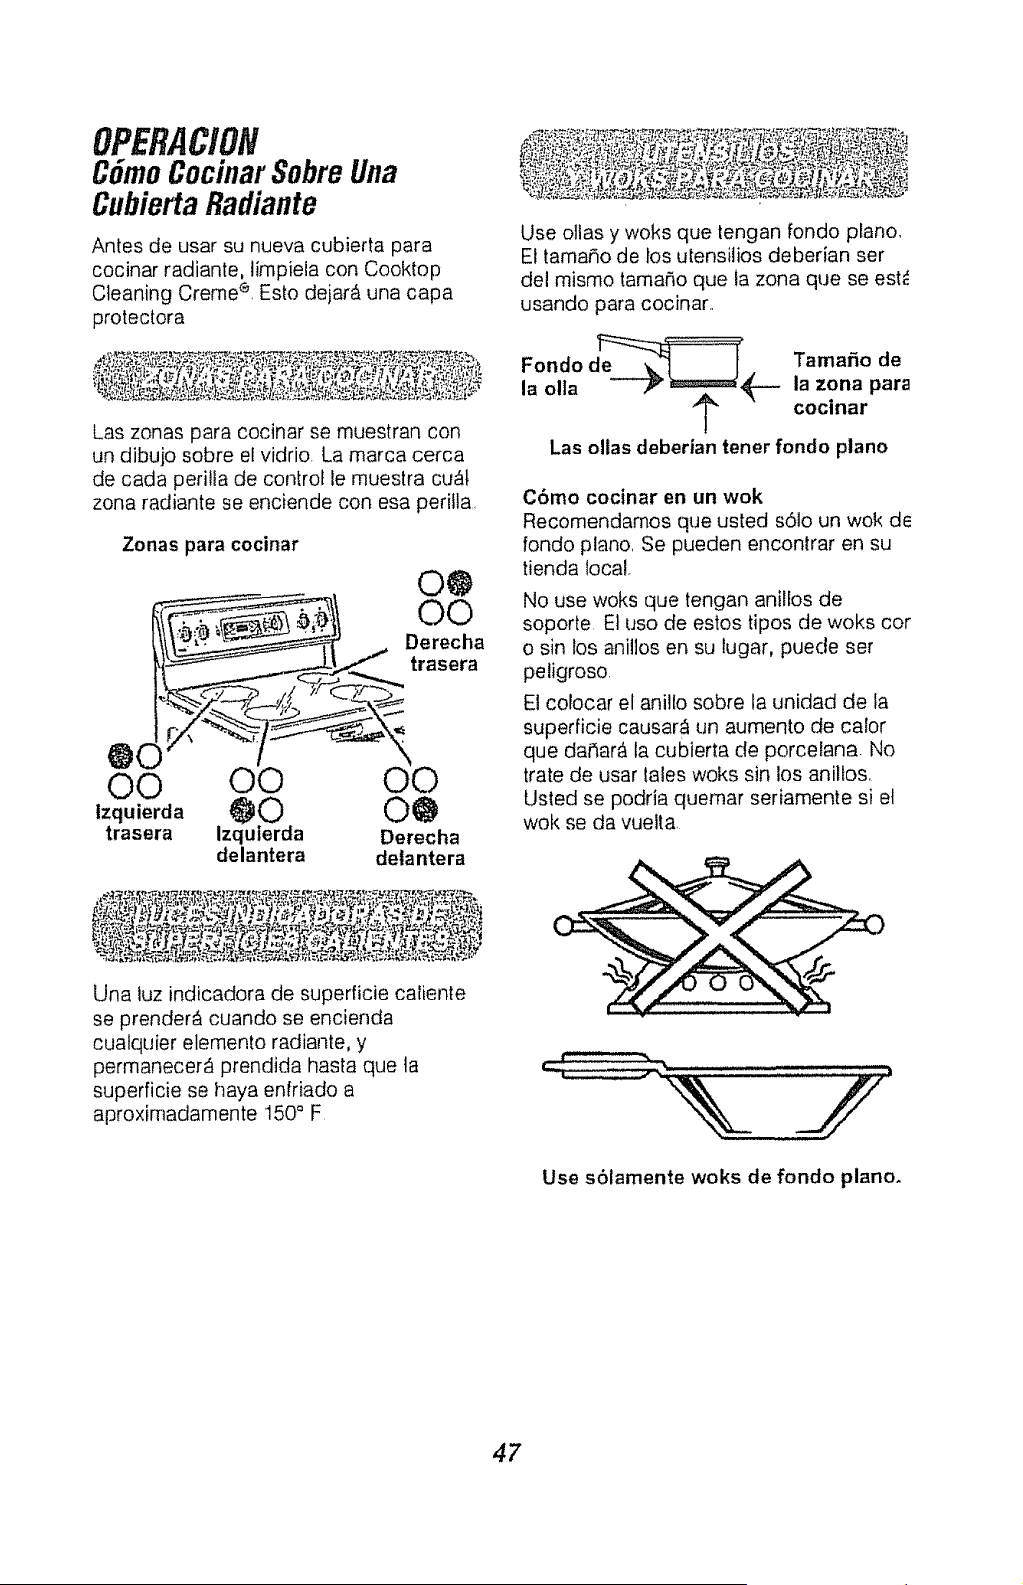
OPERAC/ON
CSmoCocinarSobreUna
CubiertaRadiante
Antes de usar su nueva cubierta para
cocinar radiante, limpieia con Cooktop
Cleaning Creme _', Esto deja4 una capa
protectora
Las zonas para cocinar se muestran con
un dibujo sobre el vidrio. La marca cerca
de cada perilta de control le muestra cu_t
zona radiante se enciende con esa peritla,
Zonas para cocinar
O@
@C
O0
tzquierda
trasera
¢,0 O@
izquterda Derecha
delantera delantera
Una tuz indicadora de superficie caiiente
se prender& cuando se encienda
cuafquier elemento radiante, y
permanece4 prendida hasta que la
superficie se haya enfriado a
aproximadamente 150° F
Use ollas y woks que tengan fondo plano,
El tamai5o de los utensilios deberian ser
del mismo tamar3o que ta zona que se est_
usando para cocinar,,
Fondo de___j_ Tamafio de
la olla la zona para
cocinar
Las ollas deberian tener fondo piano
C6mo cocinar en un wok
Recomendamos que usted sSIo un wok de
fondo piano, Se pueden encontrar en su
tienda local
No use woks que tengan anillos de
soporte Et uso de estos tipos de woks cor
o sin los anillos en su lugar, puede ser
peligroso,
El colocar el anillo sobre la unidad de la
superficie causar_ un aumento de calor
que dar_ar_ la cubierta de porcelana, No
trate de usar tales woks sin los anillos,
Usted se podria quemar seriamente si et
wok se da vuelta,
Use s61amente woks de rondo piano°
47

OPERAC/ON
CSmoCocinarSobreUna
CubiertaRadiante(cont.)
1. Asegurese que la olla est_ centrada
sobre el quemadoro
2. AsegSrese que ta olla sea de rondo
plano,
3. Use recetas y procedimientos de buenas
fuentes. Estas se encuentran disponibles
de fabricantes tales como Balle y Kerre y
el Servicio de Extensi6n del
Departamento de Agricultura,
4. Tenga cuidado, cuando haga conservas,
para prevenir quemaduras a causa de
vapor o calor,
tiene,nsiSisusUStedutenstliOSfondon°sabe __.!_,
piano, haga esta " .......'
prueba Invierta
la olla sobre la cubierta, coloque una
regla sobre la superficie de la oIla. Haga
girar ia regta en un circulo completo,
revisando mientras la da vuelta cualquier
espacio que podria existir entre las dos
superficies. El rondo de la olla y el tilo de
la regla deberian coincidir uno sobre'el
otro a tray,s de todo el largo.
Acero inoxidable. Altamente
recornendado para uso con su nueva
cubierta para cocinar. Especialmente
bueno con un rondo de tipo doble.
Aluminio: Se recomienda los utensilios
de aluminio pesado.
Hierro forjado" Las ollas de hierro forjado
que son comptetamente cubiertas con
porcelana son recomendadas Las ollas
de hierro forjado que no son cubiertas con
porcelana podrian rayar ta superficie de
vidrio cer_mica de la cubierta.
Fondo de cobre: Tiene buena eficiencia,
pero podria dejar un residuo sobre la
superficie de la cubierta
Vidrlo-cer_mica o piedra: Utilizable.
Verifique la existencia de bordes rugosos
o asperezas ya que podrian rayar la
superficie de la cubierta
Cuando las peritlas est_n encendidas, los
espiraIes bajo el vidrio irradian calor a
tray,s del vidrio hacia el utensitio para
cocinar. Tomar#_ varios unos pocos
momentos para que los espirales se
calienten; a medida que lo hacen se
puede ver una irradiaci6n roja sobre la
superficie de la cubierta para cocinar..
Cada unidad de superficie radiante tiene
un timitador de temperatura.
El limitador de temperatura protege la
cuhierta de vidrio para que no se ponga
demasiado caliente.
El limitador de lemperatura puede causar
que las unidades hagan un ciclo de
encendido y apagado pot un tiempo st:
• La olla se seca,
. El rondo de la otla no es piano
• La olta no est_ centrada
, No hay una ofla sobre la unidad,
48
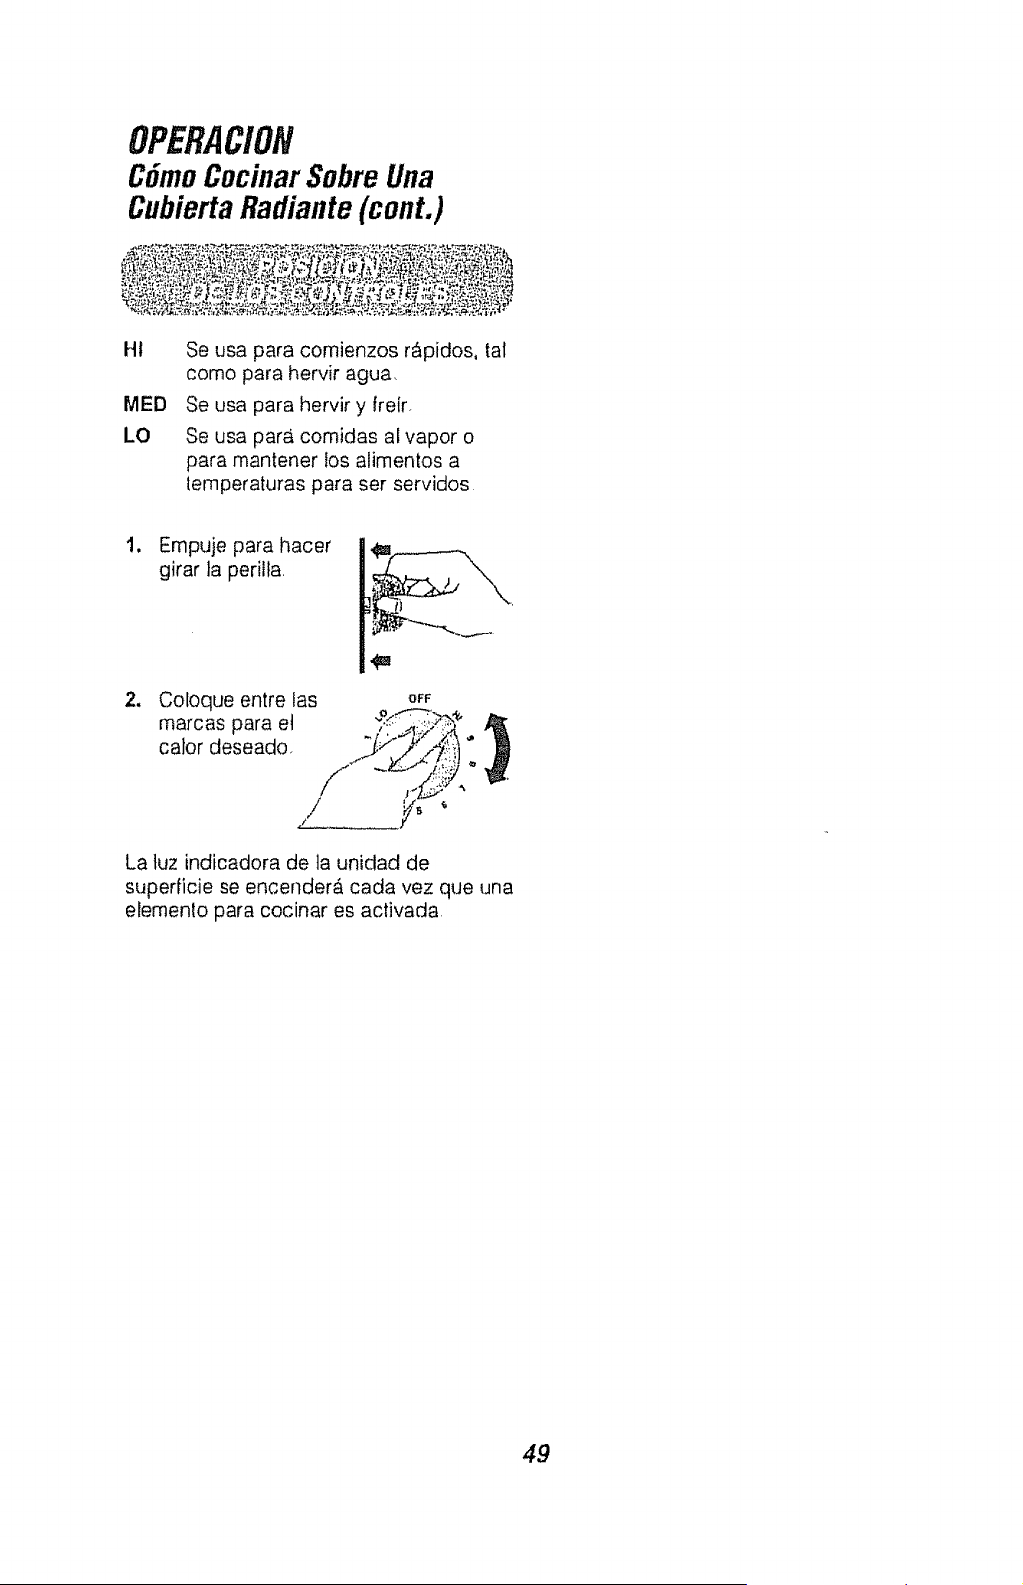
OPERACION
CSmoCocinarSobreUna
CubiertaRadiante(cont.)
HI
MED
LO
Se usa para comienzos r&pidos, tal
como para hervir agua,
Se usa para hervir y ireir.
Se usa para comidas al vapor o
para mantener los alimentos a
lernperaturas para ser servidos
.
,,.
Ernpuje para hacer
girar la peritla
Coloque entre tas o_F
marcas para el J:_7:2, ,,,
calor deseado ___._/i,_!ti),_
La tuz indicadora de ta unidad de
superficie se encenderA cada vez que una
elemenlo para cocinar es activada
49
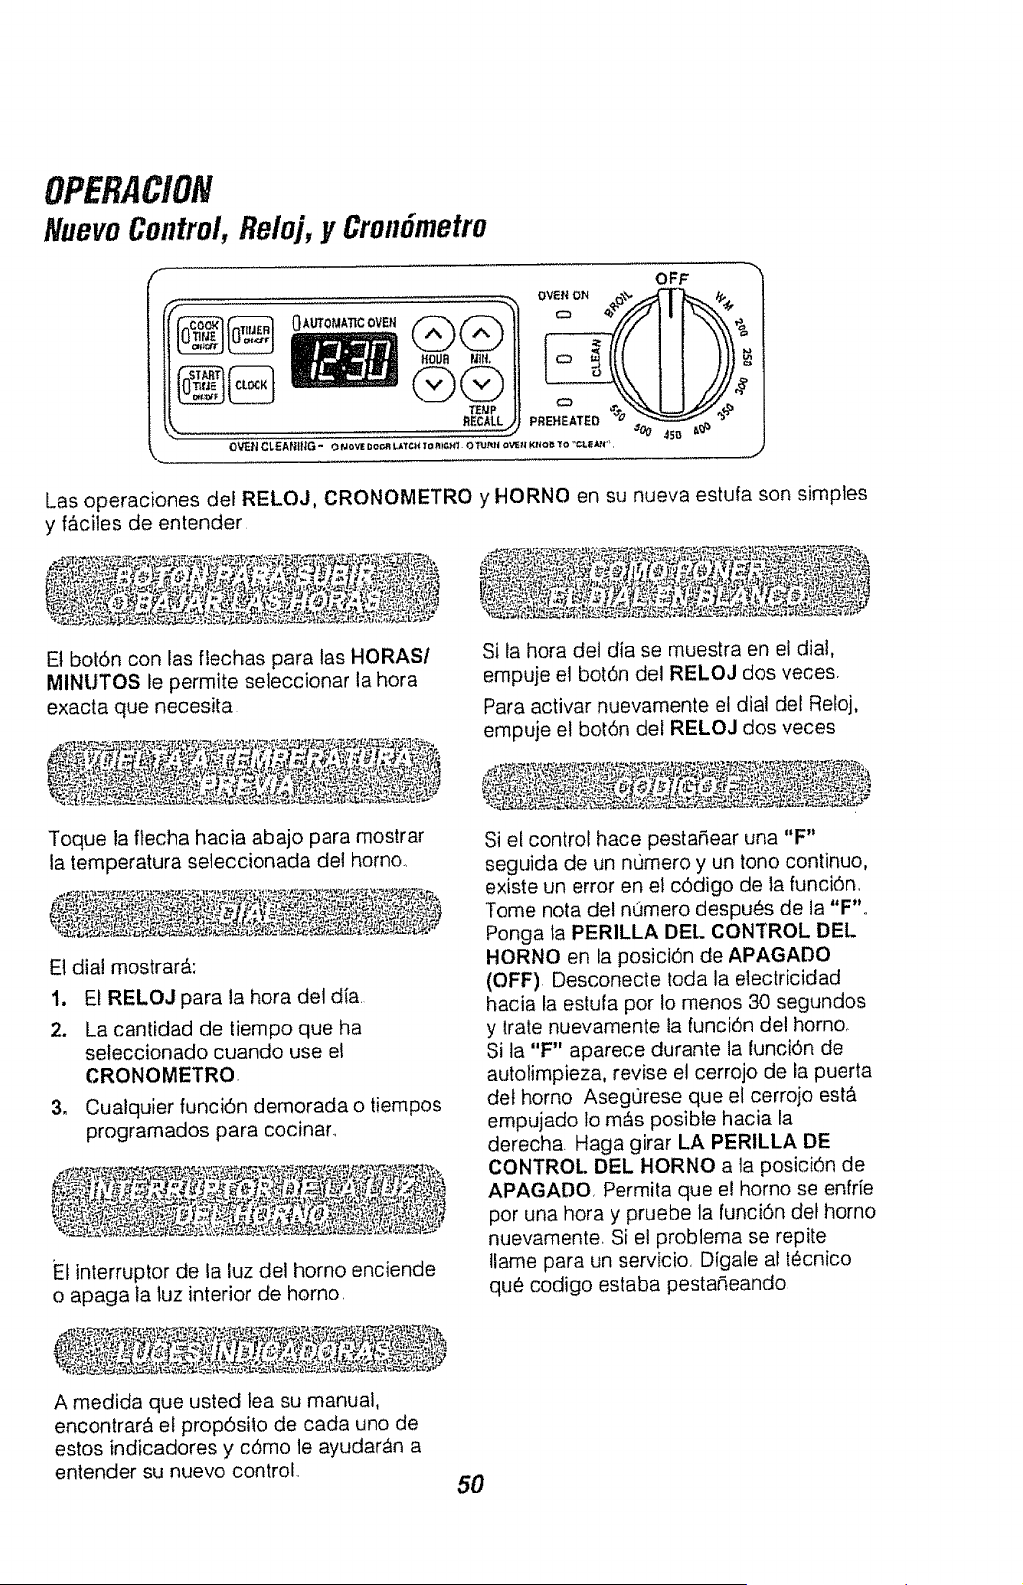
OPERACION
NuevoControl, Reloj, y CronSmetro
Las operaciones def RELOJ, CRONOMETRO
y f_ciles de entender
y HORNO en su nueva estufa son simples
Et botSn con las flechas para las HORAS/
MINUTOS le permite seleccionar la hora
exacta que necesita
Toque la flecha hacia abajo para mostrar
la temperatura seleccionada del homo,,
E1dia! mostrar_,:
1. El RELOJ para la hora det dia
2. La cant!dad de tiempo que ha
seteccionado cuando use el
CRONOMETRO.
3. Cualquier funci6n demorada o tiempos
programados para cocinar.,
El interruptor de la luz del homo enciende
o apaga la luz interior de homo,
Si la hora del dia se muestra en el dial,
empuje el boron del RELOJ dos veces.
Para act!vat nuevamente el dia! del Reloj,
empuje el hot6n del RELOJ dos veces
Si el control hace pesta_ear una "F"
seguida de un numero y un tono continuo,
existe un error en el c6digo de la funci6n,
Tome nota del numero despues de la "F",,
Ponga la PERILLA DEL CONTROL DEL
HORNO en la posiciOn de APAGADO
(OFF) Desconecte toda la electric!dad
hacia la estufa por Io menos 30 segundos
y trate nuevamente ia funciOn del homo,
Si ta "F" aparece durante la funciOn de
autolimpieza, revise el cerrojo de la puerta
det homo Asegurese que el cerroio est_
empujado 1om_s posibte hacia la
derecha Haga girar LA PERILLA DE
CONTROL DEL HORNO a la posici6n de
APAGADO Permita que el homo se enfrie
por una hora y pruebe la funci6n del homo
nuevamente Si el problema se repile
tlame para un servicio, Digale al t_cnico
que cod!go estaba pestaSeando
A medida que usted lea su manual,
encontrar& el prop6siio de cada uno de
estos indicadores y c6,mo le ayudar_n a
entender su nuevo control
5O

OPERACION
NuevoControl,Reloi,
y Cron6metro(cont.)
Cuando ta electricidad a la estufa se
prende por primera vez, o si ocurre un
corte de corriente, el dial har_. pesta_ear
"PF", Si empuja et botdn CLOCK
(RELOJ), et dial hat6, pesta_ear "12:00",
Empuje el bot6n CLOCK (RELOJ)
nuevamente y siga las instrucciones para
programar el reloj_ Cualquier operaci6n
programada antes del corte de corriente
lendr& que set reprogramada
Como medida de precauci6n este homo
se apagar_ autom_ticamente si se deja
prendido por m_s de 12 horas
Para activar o deactivar el apagado
autom_tico, toque y sujete los botches
con las llechas para SUBIR y BAJAR
los MINUTOS por 4 segundos
51

OPERACION
Relojy CronOmetro
J
3_
Empuje el bot6n para REt.OJ
(CLOCK) hasta que empiece
a pestadear
Empuje los botones con ta
flechas para SUBIR y/o
BAJAR LAS HORASt
MINUTOS para poner la hora
del dia
Toque ef botOn del RELOJ
(CLOCK)
El cron6metro se usa para medir el tiempo de
los procesos para cocinar u otras actividades
de la cocina. No controla el horno. Se puede
programar hasta 11 horas y 59 minutos
Contar__hacia atr&s en minutos hasta que
tlegue a los ULTIMOS 60 SEGUNDOS,
entonces e! control dar_ un pito Cuando la
cuenta llegue a CERO el control dar& 3 pitos
seguidos de un pito cada 6 segundos hasta
que el bot6n TIMER ONIOFF sea tocado.
@
!. Empuje el bot6n TIMER
ONIOFF (CRONOMETRO)
Mostrar_ "0:00" y la tuz
indicadora del CRONOMETRO
empezar_ a pestaSear
2. Empuje tos botenes con las
flechas para SUBIR y!o BAJAR
LAS HORASt MINUTOS para
programar los minutos exactos
que necesita usar
Despu_s de soltar los botones de MIN o
HR, la luz indicadora det CRONOMETRO
pestaF_ear& de tres a cinco veces La
cuenta hacia aires empezar_.
autom&ticamente. La fuz indicadora del
CRONOMETRO permanecer& encendida
hasta que la cuenta Ilegue a cero
Cuando et cron6metro empiece ia cuenta,
usted podria apretar el bot6n del RELOJ
para votver a la hora presente det dia
AI final de ta cuenta et control
empezar_ a sonar y la luz indicadora
de! CRONOMETRO empezar_ a
pestaSear, Empuje el bot6n TIMER ON/
OFF (BOTON DEL CRONOMETRO),
iRECUERDE!
Si usted vacila cuando est& empujando
los botones, las luces indicadoras del
dial y del CRONOMETRO pestafiear&n 3
veces y el dial voiver& a mostrar la hora
del dia. Si esto sucede, empuje el bot6n
TIMER ON/OFF para empezar
nuevamente.
Si usted decide cambiar la cantidad de
tiempo:
Si la cuenta se muestra en el dial, empuje
los botones con fas flechas para SUBIR o
BAJAR LAS HORAStMINUTOS
Seleccione un nuevo tiempo.
Si el reloj de la hora de! dia aparece en el
dial, empuje el bot6n TIMER ONIOFF.
Entonces empuje uno de los botones con
las flechas para SUBIR o BAJAR LAS
HORASI MINUTOS. Seleccione un nuevo
tiempo
Si la cuenta se ve en el dial, simplemente
cambie el tiempo Si no se ve, empuje el
bot6n TIMER ONIOFF, iuego empuje e!
bot6n TIMER ONIOFF para cancelar,
52
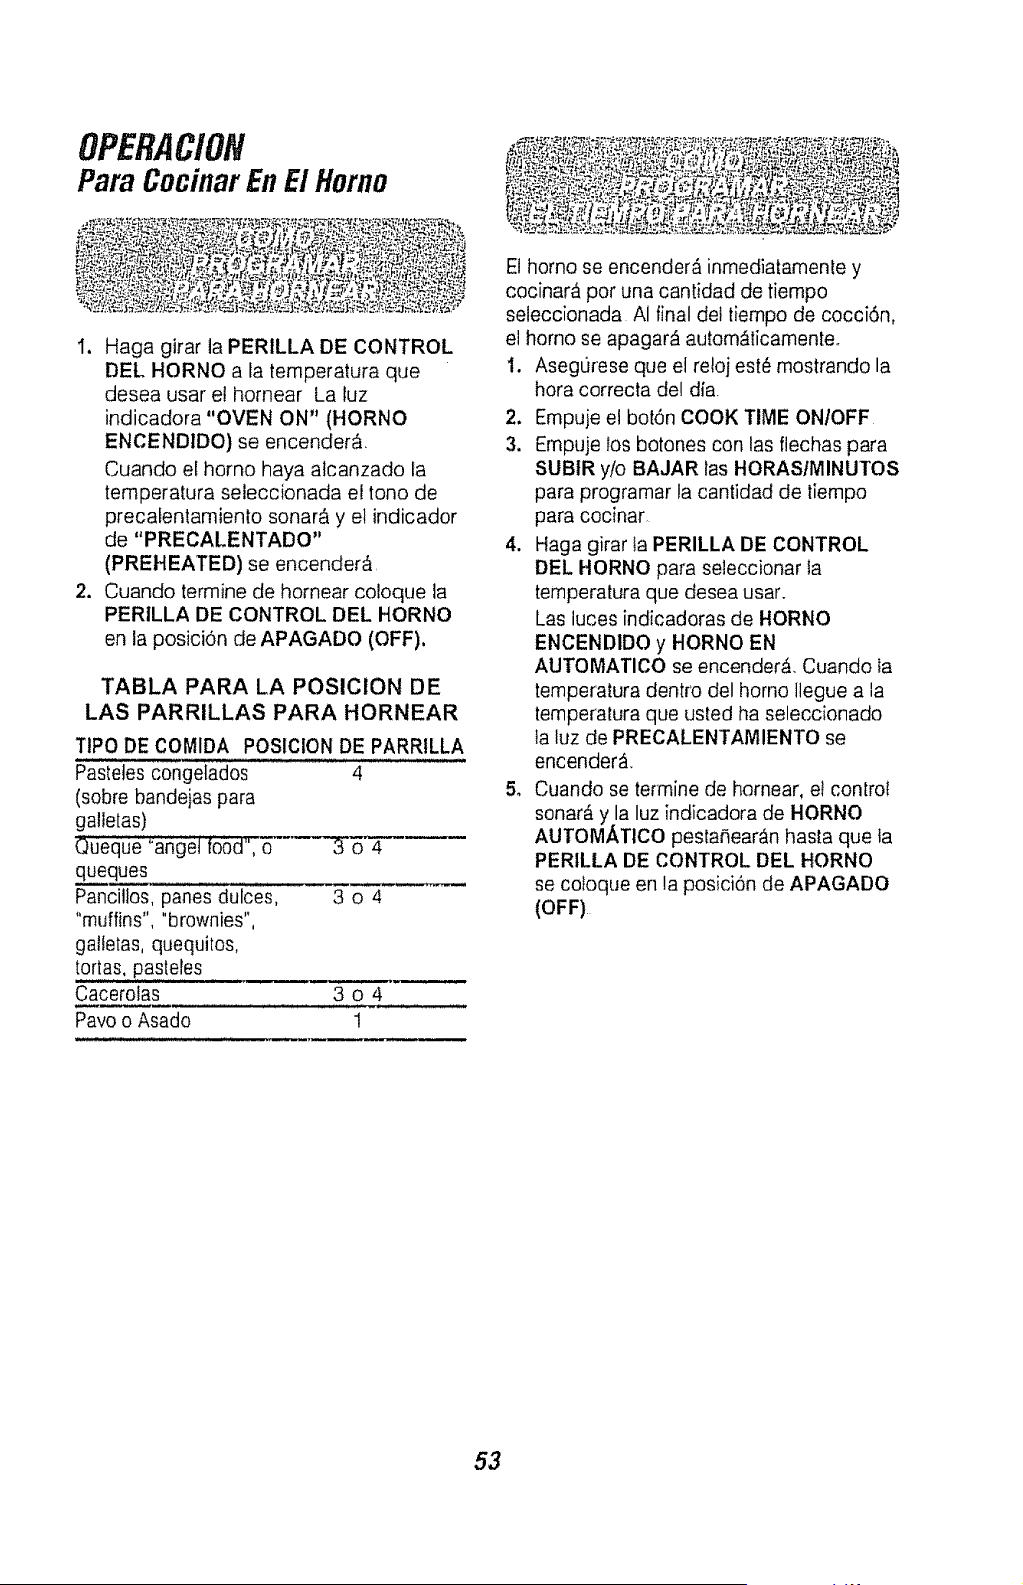
OPERAC/ON
Para CocinarEnE1Homo
1. Haga girar la PERILLA DE CONTROL
DEL HORNO a la temperatura que
desea usar el hornear La luz
indicadora "OVEN ON" (HORNO
ENCENDIDO) se encender_.
Cuando el homo haya alcanzado la
ternperatura seieccionada el tono de
precafentamiento sonar6 y el indicador
de "PRECALENTADO"
(PREHEATED) se encender6.
2. Cuando termine de hornear coloque la
PERILLA DE CONTROL DEL HORNO
en la posici6n de APAGADO (OFF).
TABLA PARA LA POSIClON DE
LAS PARRILLAS PARA HORNEAR
TIPO DE COMIDA
Pastetes congelados
(sobre bandejas para
galletas)
Queque "angei fosd", o "_ o 4
queques
Pancillos, panes dulces, 3 o 4
"muffins", "brownies",
galletas, quequitos,
tortas, pasteles
Cacerotas 3 o 4
Pavo o Asado 1
POSlClON DE PARRILLA
4
E1homo se encender6 inmediatamente y
cocinar6 por una cantidad de tiempo
seleccionada AI final det t}ernpo de cocci6n,
el homo se apagar_ autom_ticamente,,
1. Aseg0rese que el retoj est_ mostrando la
hora correcta del dia.
2. Empuje el bot6n COOK TIME ON/OFF
3. Fmpuje tos botones con las flechas para
SUBIR y/o BAJAR las HORAStMINUTOS
para programar ia cantidad de tiempo
para cocinar_
4. Haga girar ta PERILLA DE CONTROL
DEL HORNO para seteccionar ta
temperatura que desea usar.
Las iuces indicadoras de HORNO
ENCENDIDO y HORNO EN
AUTOMATICO se encender_. Cuando la
temperatura dentro del homo Ilegue a la
temperatura que usted ha seleccionado
la luz de PRECALENTAMIENTO se
encender6.
5. Cuando se termine de hornear, et controt
sonar_ y la luz indicadora de HORNO
AUTOMATICO pestaSear6n hasta que ta
PERILLA DE CONTROL DEL HORNO
se cotoque en la posici6n de APAGADO
(OFF).
53
OPERAC/ON
Para CocinarEnEl
Homo(cont.)
Usted puede programar el control del
homo para que e! homo comience en forma
demorada. Cocine por una cantidad de
iiempo especffica, y entonces se apague
autom_ticamer_teo
1. Asegurese que el reloj est@mostrando
la hora correcta del dfa,
2. Empuje et botCn COOK TIME ONIOFF.
3. Ernpuje los botones con las flechas
para SUBIR y/o BAJAR LAS HORASI
MtNUTOS para programar la cantidad
de tiempo para cocinar,
4. Empuje el botch START TIME
ONtOFF.
5. Empuje los botches con las ftechas
para SUBtR y/o BAJAR LAS HORAS/
MINUTOS para programar la hora del
d{a en que desea que el homo se
enciend&
,
Haga girar la PERILLA DE
CONTROL DEL HORNO para
seleccionar la temperatura que
desea usar. Las luces indicadoras de
HORNO ENCENDIDO y HORNO EN
AUTOMATICO se encender_
7. Cuando se Ilega a la hora
de comienzo, el homo se encender_
autom_ticamente y empezar& a
cocinar.. Cuando ia temperafura dentro
del homo Ilegue a la temperatura que
usted ha seleccionado la luz de
PRECALENTAMIENTO se encender&.
La cantidad de tiempo prograrnada
para cocinar contar,_ hasta cero y
sonar& un tono y luz indicadora
AUTOMATIC OVEN pestadear_, hasta
que la PERILLA DE CONTROL DEL
HORNO se coloque en posiciCn de
APAGADO (OFF)
NOTA: DespuCs que empuje los botones
COOK TIME y START TIME, si usted
vacila cuando est_ ernpujando los botones
con las fiechas para HORAS O MINUTOS,
el dial pestarSear_ 3 veces y volver& a la
hora del dta. Si esto pasa, repita la
operaciSn para confinuar.
54
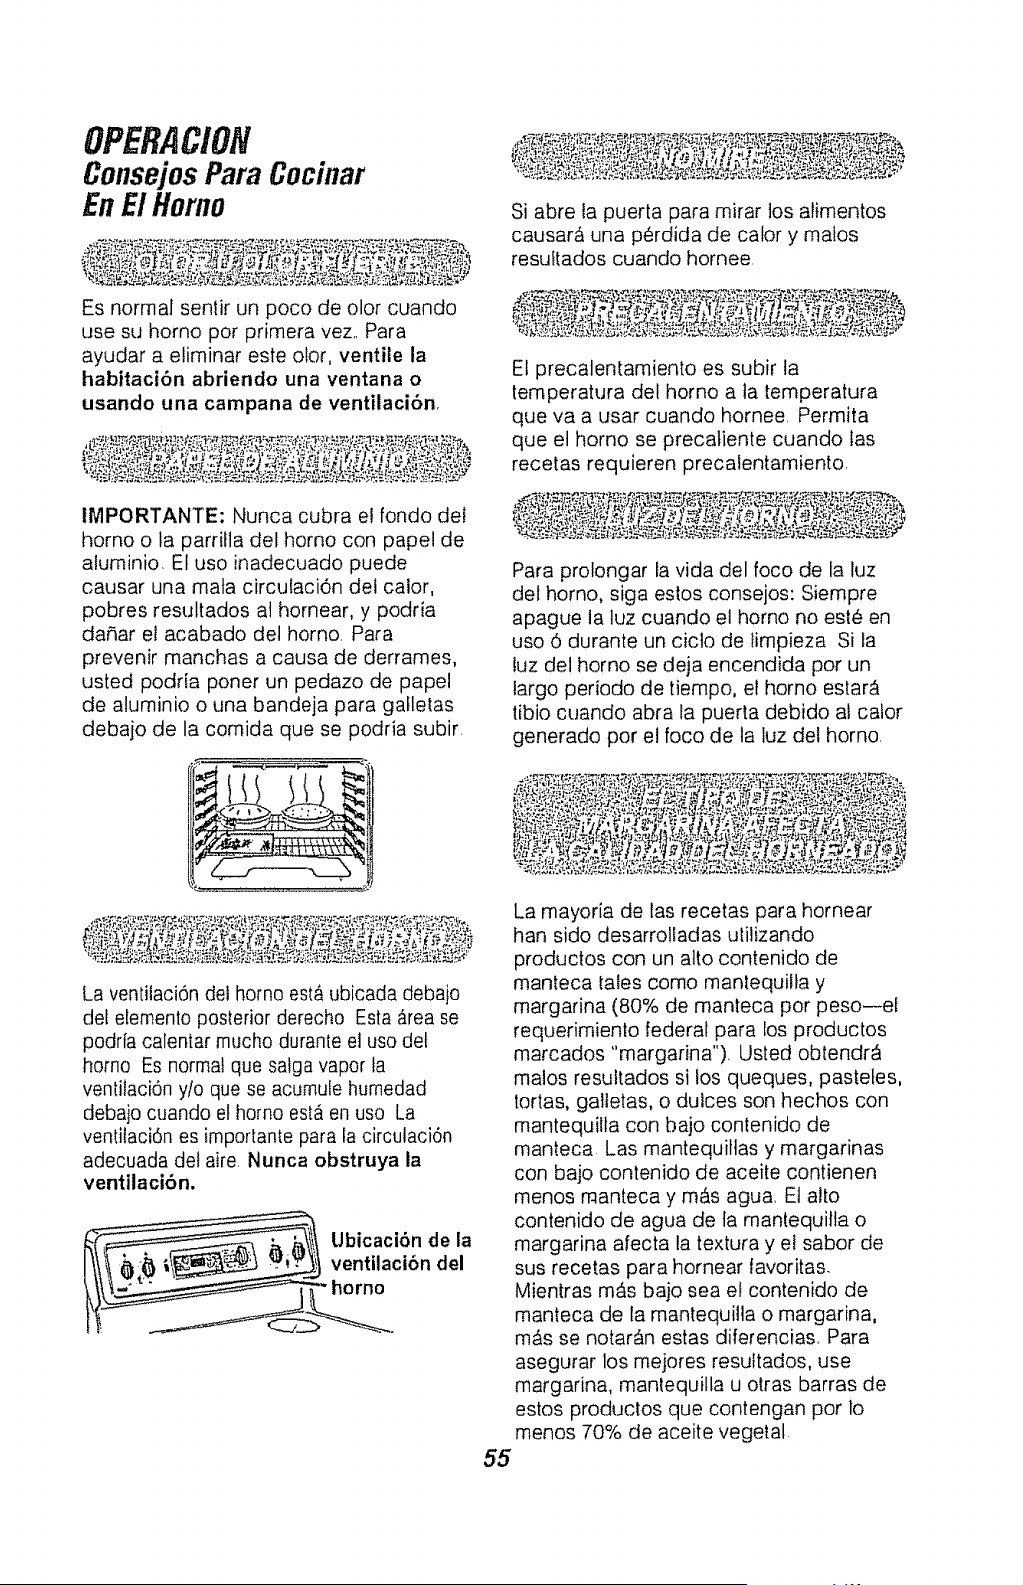
OPERACIO#
Consejo$ParaCocinar
EnE!Homo
Es normal senlir un poco de olor cuando
use su homo por primera vez,, Para
ayudar a eliminar este otor, ventile la
habitaci6n abriendo una ventana o
usando una campana de ventilaci6n,
IMPORTANTE: Nunca cubra et fondo dei
homo o la parrilla del homo con papel de
atuminio, El uso inadecuado puede
causar una mata circutaci6n det calor,
pobres resultados al hornear, y podria
da_ar el acabado del homo, Para
prevenir manchas a causa de derrames,
usted podria poner un pedazo de papel
de aluminio o una bandeja para gaflelas
debajo de la comida que se podria subir
Si abre la puerta para mirar los alimentos
causarfi una perdida de calory matos
resuftados cuando hornee,
El precalentamiento es subir la
temperatura del horno a ta temperatura
que va a usar cuando hornee, Permita
que el homo se precatiente cuando fas
recetas requieren precalentamiento,
Para prolongar la vida del foco de la luz
del homo, siga estos consejos: Siempre
apague la luz cuando el homo no est.. en
uso 6 durante un ciclo de limpieza Si ta
luz del homo se deja encendida por un
largo periodo de tiempo, el homo estar_
tibio cuando abra la puerta debido al calor
generado pot el foco de la luz del homo,
+,.++++_,-_ ++r++ _'+ +,++ _ +_, ,++|+_++++,_ .... ;.++'_'_..+,_ .w'+ .... +-+*+_++
La veniilaci6n del homo est_ ubicada debajo
del elemento posterior derecho Esta _rea se
podria calentar mucho durante el uso del
homo Es normal que satga vapor ta
ventilaci6n ylo que se acumule humedad
debajo cuando el homo esta en uso La
ventilacidn es importante para la circulaci6n
adecuada del aire, Nunca obstruya la
venfilaci6n.
La mayoria de las recetas para hornear
han sido desarrolladas ulilizando
productos con un alto contenido de
manteca tales como mantequilla y
margarina (80% de manteca por peso_el
requerimiento federal para los productos
marcados "margarina"). Usted obtendrd_
malos resuitados si los queques, pastetes,
tortas, galtetas, o dulces son hechos con
mantequitla con bajo contenido de
manteca Las mantequiltas y margarinas
con bajo contenido de aceite contienen
menos manteca y m_s agua, Et a!to
contenido de agua de fa mantequifta o
margarina afecta la textura y el sabor de
sus recetas para hornear iavoritas.
Mientras m_,s bajo sea et contenido de
manteca de la mantequilla o margarina,
m&s se notar_,n estas diferencias. Para
asegurar los mejores resuftados, use
margarina, mantequitta u otras barras de
estos productos que contengan por lo
menos 70% de aceite vegetal
55

OPERACION
Conse]os Para Cocinar
En El Homo(cont.)
Los resultados del horneado ser_ mejor si
las caceroias para hornear est&n centradas
en el homo to m_s posible. Si estA
horneando con m&s de un utensilio,
col6quelos de manera que cada uno
tenga por 1o menos de 1" a 1 1/¢de
espacio de aire a su alrededoro Coloque
los utensilios de manera que ninguno
quede directamente encima de otro.
BANDEJAS BAJAS PARA GALLETAS,
sin lados permiten que el aire circule
alrededor de las galletas para que se
doren en forma pareja
LOS UTENSlLIOS BRILLANTES reftejan
el cator y son perfectos para queques y
panecillos r_pidos que deben quedar
levemente doradoso
LOS UTENSILIOS DE VIDRIO,
CONTRAPEGADURAS O OSCURECIDO$
POR LA EDAD, absorben calor y pueden set
usados para panes con levadura, cortezas
para pasteles o alimentos que necesitan tener
una corteza de color caf_ La temperatura del
homo cuando use estos ulensitios deberia ser
reducida en 25" F
El Sensor de Temperatura del Homo
mide y controla conlinuamenle la
temperatura dentro del homo Para
mantener una temperatura programada
constante, los elemenlos har_n un ciclo
(se prenden y se apagan durante la
cocci6n)
Las parrillas de! homo est_n diseSadas
con topes, una conveniencia y tambien
una precaucidn de seguridad Las guias
tienen una tope para prevenir que las
parrillas se den vuelta, Este dise_5o
permite que las parrillas puedan ser
insertadas de sdlo una manera
56
Su homo tiene six (6) posiciones. La
posici6n de m&s arriba es solamente una
guia No puede ser usada como posici6n
para una parrilla,
Siempre coloque las parrillas del homo en ta
posici6n correcta cuando el horno est_ frio.
PRECAUCION: Cuando usted est6
usando la parrilla en la posici6n m&s baja
(I), necesitar& tener cuidado cuando
saque ta parritla Recornendamos que tire
la parriila varies pulgadas hacia afuera y
entonces, usando dos agarraderas, tire la
arrilla hacia afuera sujet,_ndola de los
dos, La parrilla est& baja y usted se
podria quemar si cotoca ia rnano en el
medio de la parrilla y la saca
cornpletamente hacia afuera Tenga
cuidado de no quemarse la mano en la
puerta cuando use una parritta en ta
posici6n m&s baja (1),
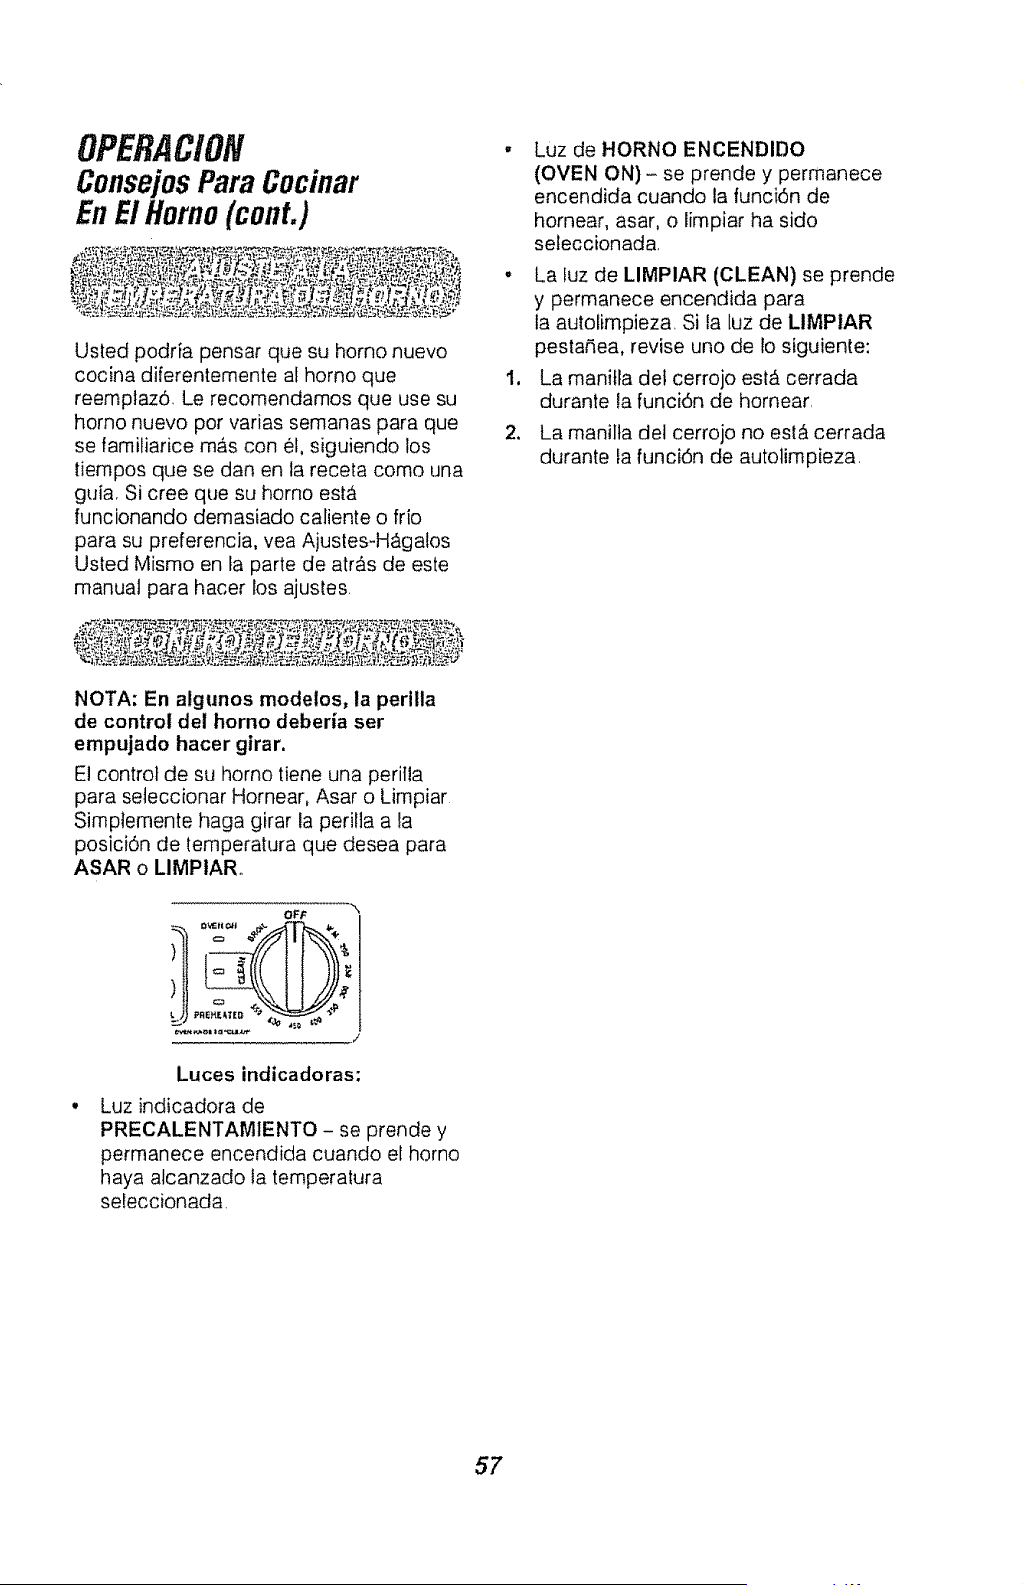
OPERAC/ON
ConsejosPara Cocinar
EnElHomo(cont.)
Usted podrla pensar que su homo nuevo
cocina diferentemente al homo que
reemptaz6, Le recornendamos que use su
homo nuevo pot varias semanas para que
se familiarice m#,s con 61,siguiendo los
tiempos que se dan en ta receta como una
guia, Si cree que su homo est&
funcionando demasiado caliente o frio
para su preferencia, vea Ajusles-H&galos
Usted Mismo en ta parle de arras de este
manual para hater los ajustes.
NOTA: En algunos modelos, la perilla
de control del horno deberia ser
empujado hacer girar.
El control de su homo tiene una perilla
para seteccionar Hornear, Asar o Lirnpiar
Simptemente haga girar la perilla a la
posici6n de ternperatura que desea para
ASAR o LIMPtARo
OFF "_
Luces indicadoras:
Luz indicadora de
PRECALENTAMIENTO - se prende y
permanece encendida cuando el homo
haya alcanzado ta temperatura
seleccionada,
2.
Luz de HORNO ENCENDIDO
(OVEN ON)- se prende y permanece
encendida cuando la funci6n de
hornear, asar, o lirnpiar ha sido
seteccionada,
La luz de LIMPIAR (CLEAN) se prende
y permanece encendida para
la autolirnpieza, Si fa luz de LIMPIAR
pestaSea, revise uno de lo siguiente:
La manifla det cerrojo est& cerrada
durante la funci6n de hornear,
La manilta det cerrojo no esi_ cerrada
durante la funci6n de autolirnpieza,
57
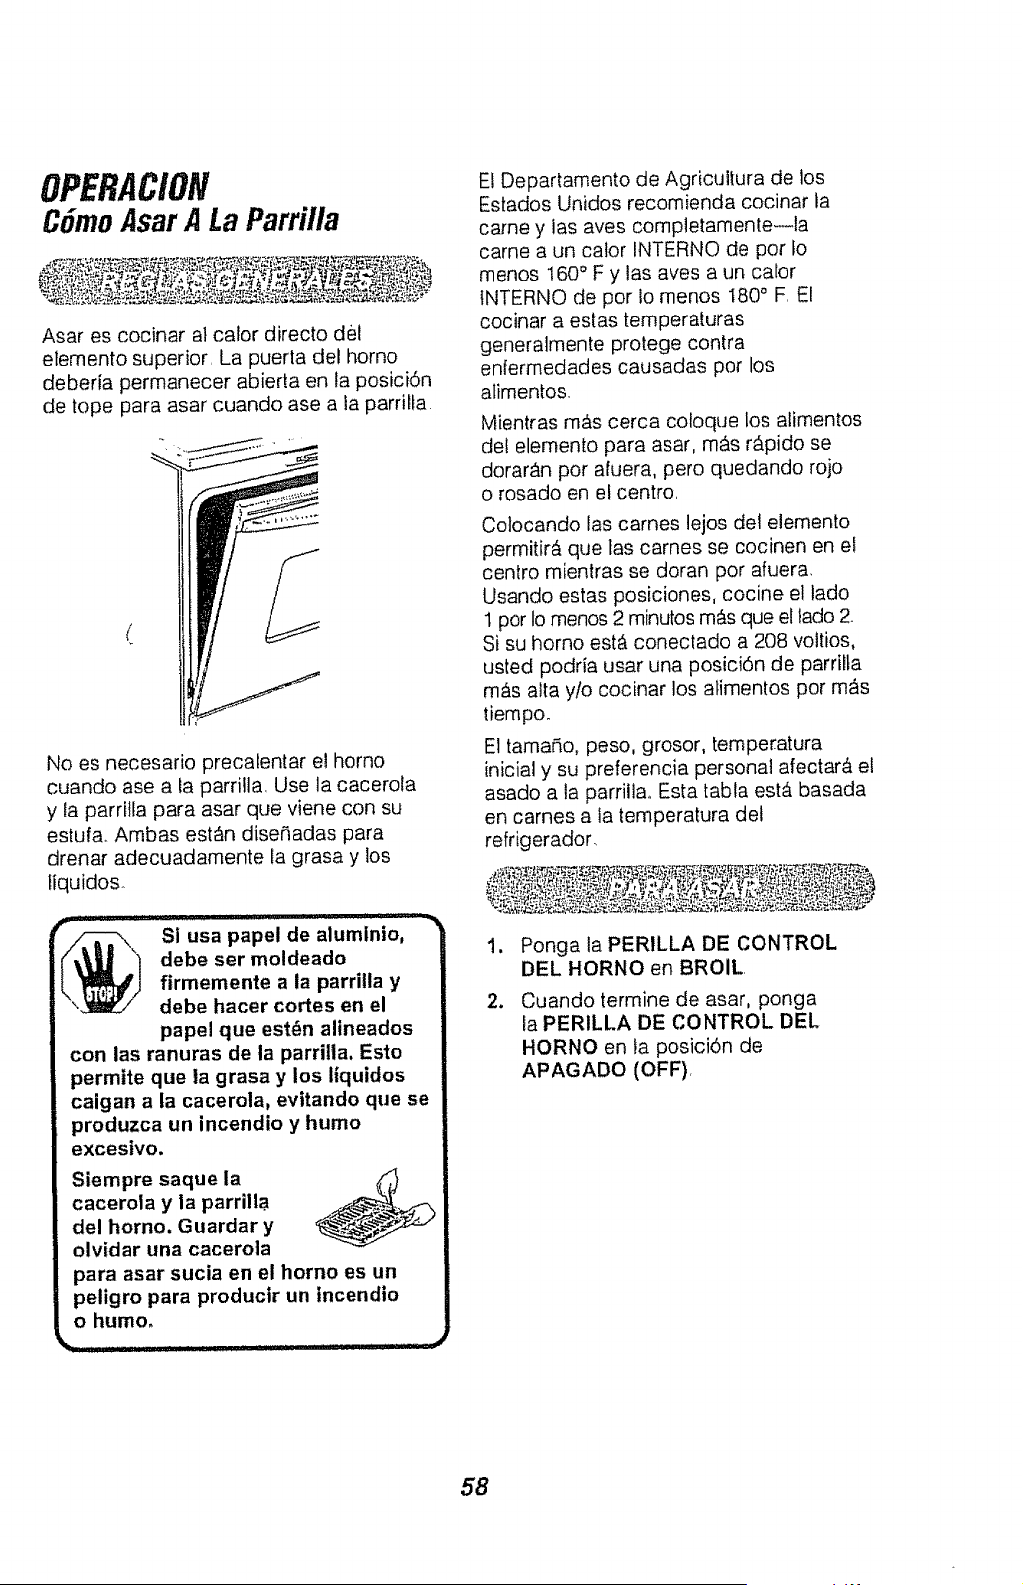
OPERACION
CSmoAsarA La Parrilla
Asar es cocinar al calor directo del
etemento superior, La puerta del horno
deberia permanecer abierta en la posicidn
de tope para asar cuando ase a la parritta
No es necesarto precatentar el homo
cuando ase a la parrilla. Use la cacerola
y la parrilla para asar que viene con su
estufa. Ambas est&n dise_adas para
drenar adecuadamente la grasa y los
liquidos
S] usa papel de aluminio,
debe ser moldeado
firmemente a la parrilla y
debe hacer cortes en el
papel que est_n alineados
con las ranuras de la parrilla. Esto
permite que la grasa y los I|quidos
caigan a la cacerola, evitando que se
produzca un incendio y humo
excesivo.
Slempre saque la
cacerola y la parril|a
del horno. Guardar y
olvidar una cacerola
para asar sucia en el horno es un
peligro para productr un |ncendio
o humo°
Et Departamento de Agricultura de los
Estados Unidos recomienda cocinar ta
came y las aves completamente--la
came a un cator INTERNO de por fo
menos 160° F y las ayes a un calor
iNTERNO de por 1omenos I80 ° F. El
cocinar a estas temperaturas
generalmente protege contra
enfermedades causadas por los
atimentos.
Mientras m&s cerca coloque los alimentos
det elemento para asar, mAs r_.pido se
dorar_n por afuera, pero quedando rojo
o rosado en el centro.
Cotocando las carnes lejos det elemento
permitir& que las carnes se cocinen en el
centro mienlras se doran por afuera.
Usando estas posiciones, cocine el lado
1 pot to menos 2 minutos m_s que el lado 2
Si su horno est& conectado a 208 voltios,
usted podria usar una posici6n de parritta
m_,s alta y/o cocinar los atimentos por m&s
tiempoo
El tama_io, peso, grosor, ternperatura
inicial y su preferencia personal afectar& el
asado a ta parriitao Esta tabla est& basada
en carnes a la temperatura del
refrigerador.
2.
Ponga la PERILLA DE CONTROL
DEL HORNO en BROIL,
Cuando term!he de asar, ponga
la PERILLA DE CONTROL DEL
HORNO en ta posici6n de
APAGADO (OFF}
58

OPERAC/ON
CSmoAsarA La Parrilla (cont.)
GUIA PARA ASAR (Hi Broil)
SEGUNDO
POSICION LADO
CANTIDAD Y/O DE TIEMPO
ALIMENTO GROSOR PARRiLLA
Biencacinadat _ a_" degrueso
......... ! 4 Ibs.(12todas) ..... 4 15 ....... !t........
Bistecs
Crudost
Medianos
Biencocidos
' Crudost
Medianos
B{encocidos
COMENTARIOS
Sep;_re{ospareiamente
6 6
5 8
5 I0
4 I0
4 !5
5 20
4
6
8
Losbistecsdemenosde3._,,son
diffcilesdecocinarcrudos
8 iCodela grasa
10-12
20
Polio
Productosde
_anadeda
Pan(tostado)
o pancillos
ingieses
€olasde
tangostas
Pescado
Salm6n....
Bistecs
Filetes
Tajadasde
jam6n
(precocinadas)
Chuletasde
cerdo
Biencoddas
Cholerasde
cordero
Med{anas
Biencocidas
Medianas
Biencocidas
I entero,cortado(2a2_
lbs),codea tolargo
Pechuga
2a 4tajadas
2(codados)
2a4
(6a8 oz_cadauna)
:IIbFiietesV,"a _" grueso
2 (1"grueso}
12(!/_"a_k"grueso)
1½"grueso
1"grueso
_l • • • _,_ _LJ _, ,,1_,__ u,
2 (_"grueso)
2 (1"grueso)aprox1Ib
2(1"grueso),aprox,10a 12oz
2 (I',_"grueso)aprox1 lb
3
3
5
6
" 3
5
5
4
4
4
4
25 25 Pongamantequiliaderretidaencada
IadoconunabrochaAseconb piel
25 15 haciaabajoprimero
3
3-4
i8-20
5
10
10
6
8
Io
15
SepareparejarnentePongalos
Ipancillosing{esesladoexteriorhada
'ardbay apliquem_ntequiHaconuna
brocha,si desea
Notasd_ Codeat[avesdelaparletraserade
vueita {aconcha,Abra Pongamantequilla
derrelidaconunabrochaantesde
asaryamedioasar
5 T6mebsy d_losvueltaconcuidado
PongamantequiIladeiim6nantesy
duranleelcocinado,si desea................
5 D6vueltacuidadosamenteNo
)ongala pielhaciaabajo
6
8
10 Codelagrasa
t5
5
5
5
5
4
9
6
10
Codelagrasa
t El Departamento de Agricuttura de Estados Unidos dice que "la came de res cruda es popular,
pero usted deberia saber que cocinarla a s61o140°F significa que algunos organismos que causan
envenenamiento por las comidas podrlan sobrevivir." (Fuente: Safe Food Book. Your Kitchen
Guide, USDA Rev June 1985 )
59
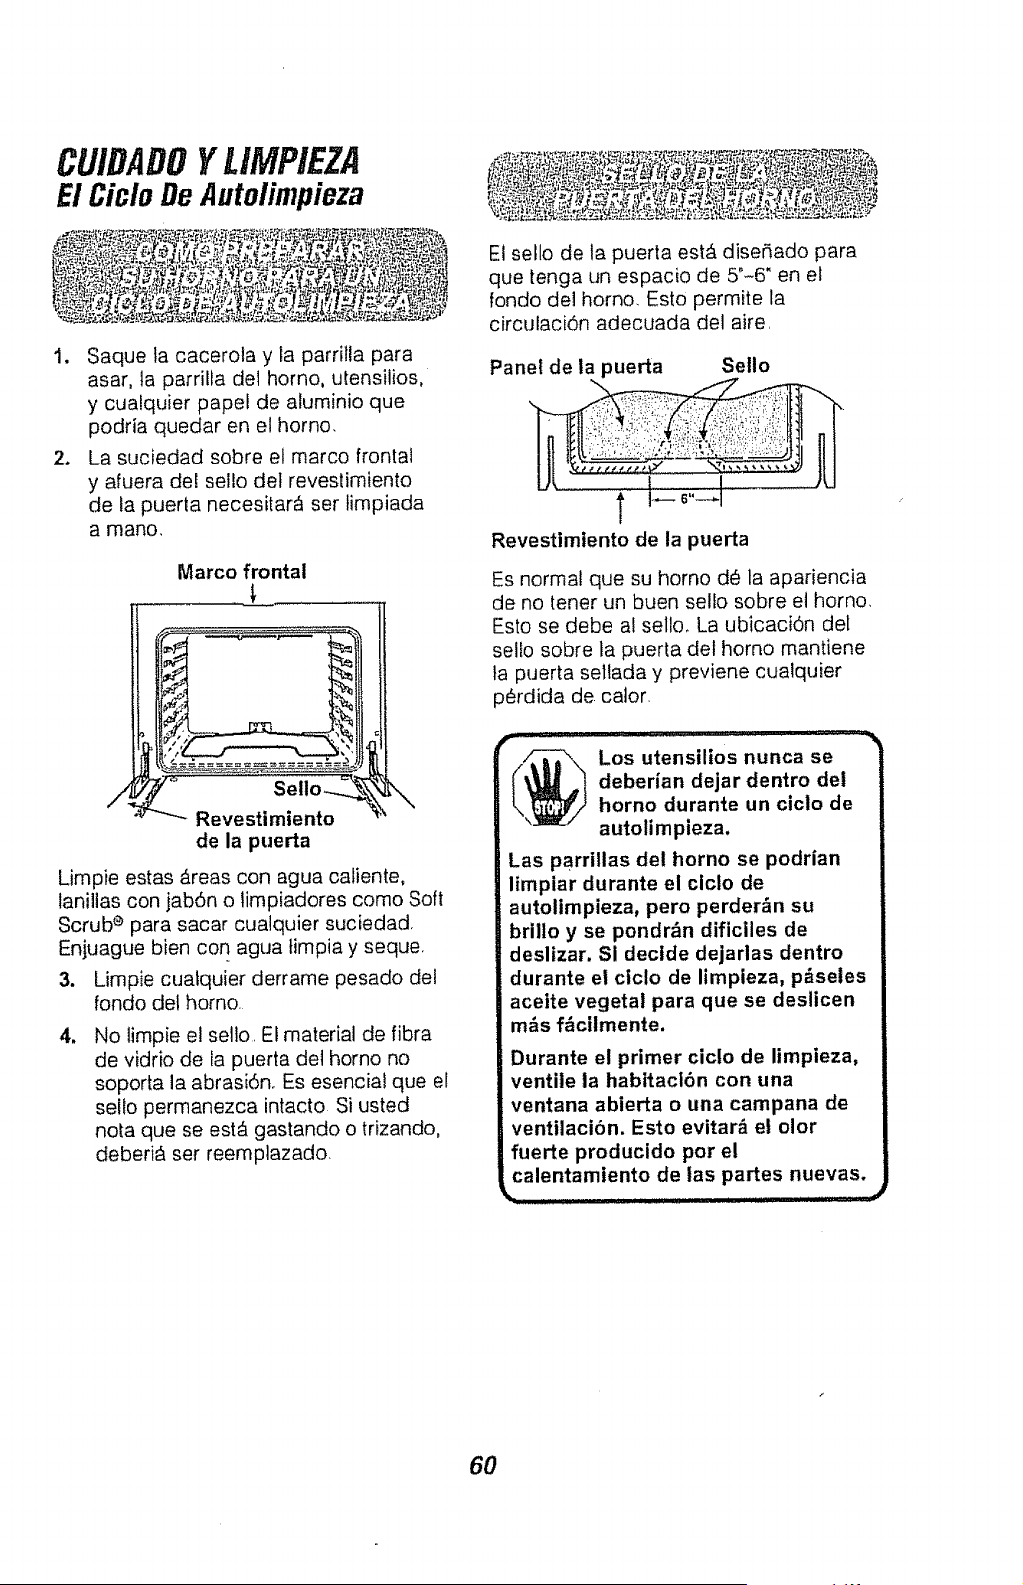
CUIDADOYLIMPIEZA
El Ciclo De Autolimpieza
1. Saque ta cacerola y la parrilla para
asar, la parrilta de1 homo, utensilios,
y cualquier papel de aluminio que
podria quedar en el homo.
2. La suciedad sobre el marco frontal
y afuera del seilo del revestimiento
de la puerta necesitar& set limpiada
a mano,
Marco frontal
±
se,0
Revestimiento
de la puerta
k,
Limpie estas _reas con agua caliente,
lanillas con jab6n o limpiadores como Soft
Scrub e para sacar cualquier suciedad
Enjuague bien con agua timpia y seque.
3. Limpie cuatquier derrame pesado del
fondo del homo.
.
No limpie el sello, El material de fibra
de vidrio de la puerta det homo no
soporta la abrasi6n+ Es esencial que el
sello permanezca intacto Si usted
nora que se est& gastando o trizando,
deberi& ser reemptazado.
El sello de la puerta est,, diseSado para
que tenga un espacio de 5"-6' en el
fondo del homo, Esto permite la
circulaci6n adecuada del aire,
Panel de ta puerta Sello
Revestimiento de la puerta
Es normal que su horno de la apariencia
de no tener un buen sello sobre et homo.
Esto se debe al sello+ La ubicaci6n del
selfo sobre la puerta del horno mantiene
la puerta sellada y previene cualquier
perdida de. calor,
Los utensilios nunca se
deberian dejar dentro del
homo durante un ciclo de
autolimpieza.
Las parrillas del homo se podrian
limpiar durante el clclo de
autolimpieza, pero perder_n su
brillo y se pondr&n dificiles de
deslizar. Si decide dejarlas dentro
durante el ciclo de limpieza, p_seles
aceite vegetal para que se deslicen
m_s f_cilmente.
Durante el primer ciclo de limpieza,
ventile la habitacl6n con una
ventana abierta o una campana de
ventilacibn. Esto evitar& el olor
fuerte producido pot el
calentamiento de las partes nuevas.
6O
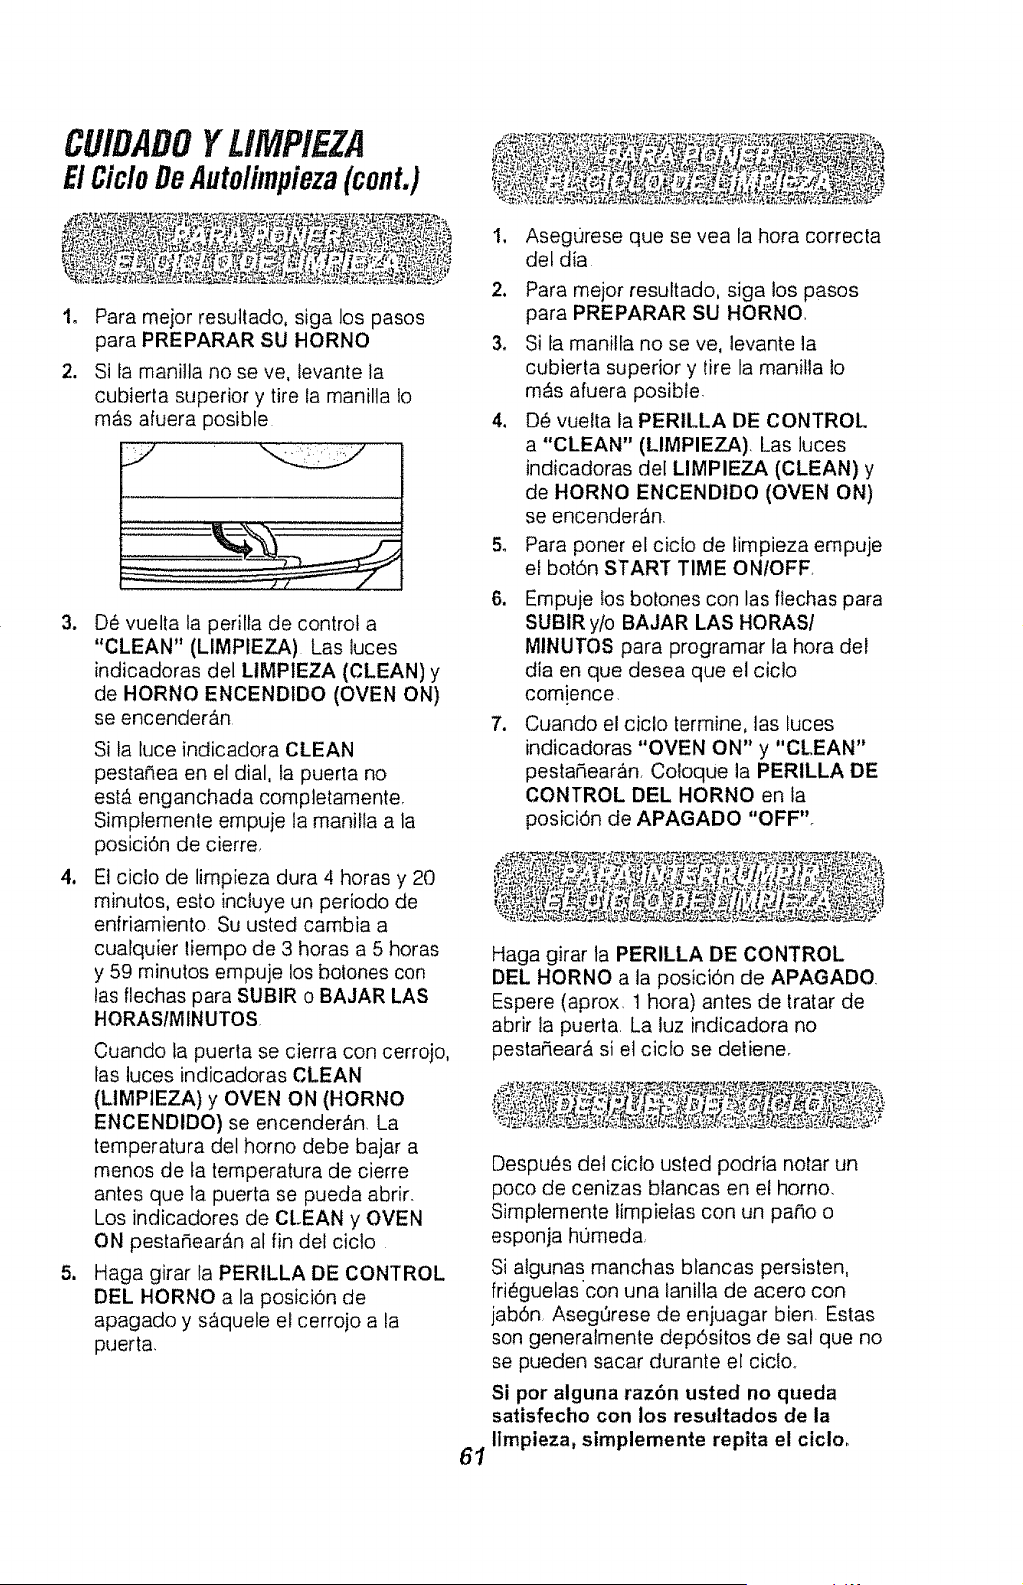
CUIDADOYUMP/EZA
ElgicloDeAuto/impieza(cont.)
1o Para mejor resultado, siga los pasos
para PREPARAR SU HORNO
2. Si Ia mani!ta no se ve, levante la
cubierta superior y tire ta manilla Io
m_s afuera posible
J
.
4,_
=
Dc_vuelta ta perilfa de control a
"CLEAN" (LIMPIEZA) Las luces
indicadoras del LtMPIEZA (CLEAN)y
de HORNO ENCENDIDO (OVEN ON)
se encender_n
Si ta luce indicadora CLEAN
pesta_ea en el dial, fa puerta no
estb, enganchada cornpletamente
Simplemente empuje la manilla a la
posici6n de cierre,
Et ciclo de limpieza dura 4 horas y 20
minutos, esto incluye un periodo de
enfriamiento Su usted cambia a
cualquier tiempo de 3 horas a 5 horas
y 59 minutos empuje los bolones con
tas flechas para SUBIR o BAJAR LAS
HORAS/MtNUTOS
Cuando ta puerta se cierra con cerrojo,
las luces indicadoras CLEAN
(LIMPIEZA) y OVEN ON (HORNO
ENCENDIDO) se encender_n. La
temperatura del homo debe bajar a
menos de ta temperatura de cierre
antes que la puerta se pueda abrir.
Los indicadores de CLEAN y OVEN
ON pestariear_n al fin del ciclo
Haga girar la PERILLA DE CONTROL
DEL HORNO a la posicion de
apagado y s&quele el cerrojo a la
puerta,
2.
3_
4_
5_
6.
.
Asegorese que se vea la hora correcta
det dia
Para mejor resultado, siga los pasos
para PREPARAR SU HORNO,
Si la manitfa no se ve, levante la
cubierta superior y tire la manilla !o
m_,s afuera posible.
D_ vuelta la PERILLA DE CONTROL
a "CLEAN" (LIMPIEZA) Las luces
indicadoras del LIMPIEZA (CLEAN) y
de HORNO ENCENDtDO (OVEN ON)
se encender&n.
Para poner el ciclo de fimpieza empuje
el botdn START TIME ON/OFF,
Empuje Ios botones con las flechas para
SUBIR y/o BAJAR LAS HORAS/
MINUTOS para programar la hora del
dia en que desea que el cicto
com!ence.
Cuando el ciclo termine, las tuces
indicadoras "OVEN ON" y "CLEAN"
pestad, ear&n. Coloque la PERILLA DE
CONTROL DEL HORNO en la
posiciOn de APAGADO "OFF".
Haga girar la PERILLA DE CONTROL
DEL HORNO a la posici6n de APAGADO.
Espere (aprox t hora) antes de tratar de
abrir la puerta La luz indicadora no
pestar_earA si el ciclo se detiene,
6i
Despu_s det ciclo usted podria notar un
poco de cenizas blancas en el homo,
Simplemente limpietas con un paRo o
esponja h0meda
Si algunas manchas blancas persisten,
frieguelas'con una lanilla de acero con
jab6n AsegQrese de enjuagar bien Estas
son generalmente depOsitos de sal que no
se pueden sacar durante el cic!o,,
Si por alguna raz6n usted no queda
satisfecho con los resuitados de la
Ilmpieza, simplemente repita el ciclo,
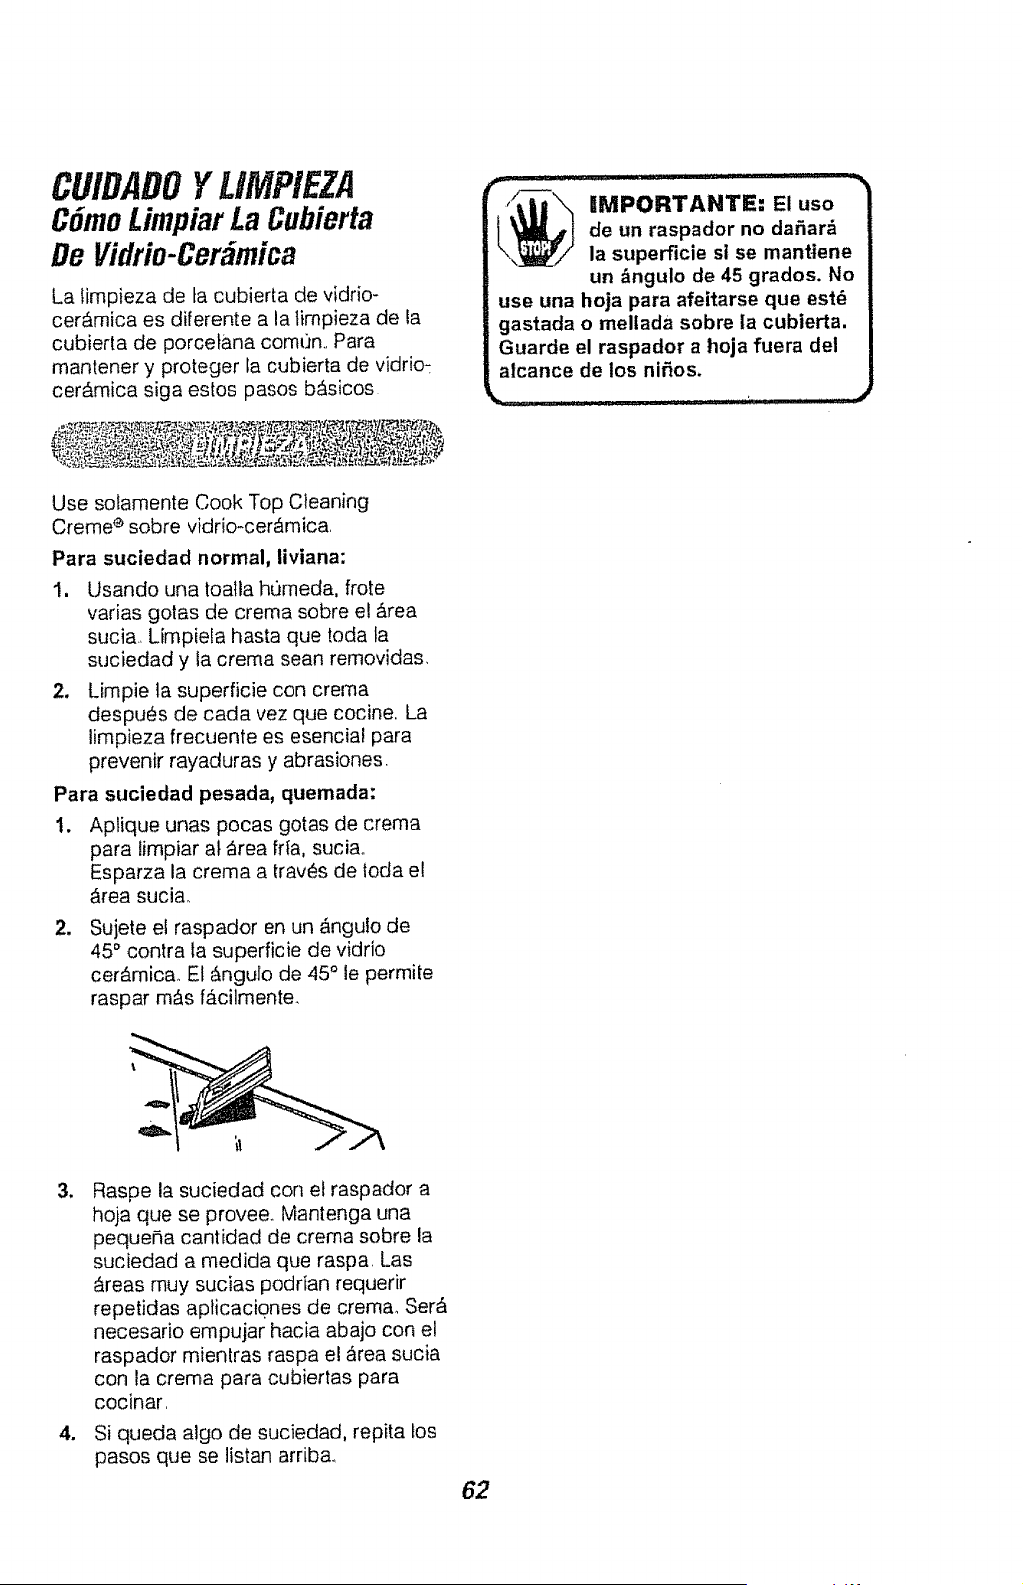
CUIDADOYUMPIEZA
CSmoLimpiarLa Cubierta
De Vidrio-Cer mica
La limpieza de ta cubierta de vidrio-
cerAmica es diferente a la limpieza de la
cubierta de porcetana comt]n., Para
mantener y proteger la cubierta de vidrio-
cerAmica siga estos pasos b_sicos
Use solamente Cook Top Cleaning
Creme e sobre vidrio-cerAmica.
Para suciedad normal, liviana:
1, LJsando una toalla humeda, frote
varias gotas de crema sobre el Area
sucia., Limpiela hasta que toda fa
suciedad y la crema sean removidas,
2. Limpie ia superficie con crema
despues de cada vez que cocine. La
limpieza frecuente es esencial para
prevenir rayaduras y abrasiones,
Para suciedad pesada, quemada:
Apiique unas pocas gotas de crema
para limpiar at Area fda, suciao
Esparza la crema a lraves de toda el
Area sucia.
2_
Sujete el raspador en un Angulo de
45° contra la superficie de vidrio
ceramic& El Angulo de 45 ° le permile
raspar m&s facilrnente,
,F:--- IIMPORTANTE¢ El uso
i_ e un raspador no da_ar_
la superficie si se mantiene
un _ngulo de 45 grados. No
use una hoja para afeitarse que est_
gastada o mellada sobre la cublerta.
Guarde el raspador a hoja fuera del
alcance de los nifios.
3_,
.
Raspe la suciedad con et raspador a
hoja que se proveeo Mantenga una
peque5a cantidad de crema sobre la
suciedad a medida que raspa. Las
&reas muy sucias podrian requerir
repetidas ap/icacio.nes de crema_ SerA
necesario empujar hacia abajo con e!
raspador mientras raspa e! _rea sucia
con la crema para cubiertas para
cocinar,
Si queda algo de suciedad, repita los
pasos que se listan arribao
62
CUIDADOYLIMPIEZA
CSmoLimpiarLa Cubierta
De Vidrio-Cer mica(cont.)
Para ordenar Cooktop Cleaning Creme e
adicional, llame a su Centro de Servicio o
tienda Sears m,_s cercana, pida el Stock
No. 40079.
A medida que la crema limpia, deja una
capa pro[ectora que ayuda a prevenir la
acumulaci6n de dep6silos minerales
(manchas de agua) y facilila la limpieza
futura E1detergente para lavar platos
etimina ta capa proteclora y no se deberia
utilizar
• La mayoria de los lirnpiadores contienen
amonia, quimicos y abrasivos que da_an
la superficie de su cubierta, Use
solamente Cooktop Cleaning Creme e
para una timpieza adecuada y para la
proteccidn de la suPerlicie de vidrio
cer_rnica,
• Si usted arrastra e! rondo de las ollas de
atuminio o cobre sobre la superficie de
la cubierta, podria dejar marcas de
metal en forma de rayaduras. Use el
raspador y la crema para ta superficie
para sacar estas marcas Si no saca
este residuo inmediatamente, podria
producir marcas permanentes.
• Si las ollas con un enchapado de
aluminio delgado, de cobre o de esmalte
hierven cuando est&n secas, se podrian
fundir con la superficie de ta cubierta
Esta descotoracidn negra deberia set
sacada inmediatamente o podria ser
permanente.
• El uso de limpiadores de vidrio podrian
dejar una capa irridescente sobre ta
cubierta La crerna para limpiar sacar&
esta capa
• Las manchas de agua (depdsitos
minerates) son removibtes usando
crema y vinagre blanco a toda fuerza
• No use un raspador con una hoja
gastada o meltada sobre la cubierta.
• No use limpiadores abrasivos o lani!las
abrasivas sobre ta cubierta
• Se puede usar laniltas de plb.sfico tat
como Dobie e,
63

CUIDADOYUMPIEZA
Limpieza
MATERIALES DE LIMPIEZA
• Detergente liquido para platos
. Agua tibia
, PaSo suave
No use limpiadores abrasivos,
Iimpiadores industriales, o
blanquedores (cloro).
MATERIALES DE LIMPIEZA
, Detergente liquido para platos
• Agua tibia
• Laniilas de acero con jab6n
, Limpiador comercial para hornos
COMO LIMPIAR
Permita que ta cacerola se remoje Ponga
detergente para platos sobre ta parrilla y
cubra con un patio o una toalla humeda
por un rato Friegue a medida que sea
necesario. Lave, enjuague, y seque bien
Usted tambi_n podria poner la cacerola y
la parrilta en la lavadora de platos.
Limpie solamente para retocarlas entre
ciclos de limpieza. Use detergentes
tiquidos para ptatos, agua tibia, o lanillas
de acero con jab6n. Enjuague bien
despues de limpiar y seque,
NUNCA USE LIMPIADORES PARA
HORNOS DEN'FRO O ALREDEDOR DE
CUALQUIER PARTE DEL HORNO.
Cuando limpie, asegurese de no doblar
o mover el sensor de la temperatura
ubicado en la pared trasera del homo,
MATERIALES DE LIMPIEZA
o Detergente liquido para platos
• Agua tibia
• Toa]las de papel
COMO LIMPIAR
No use limpiadores para homos, polvos
para limpiar, o abrasivos fuertes Si salsas
para sasonar, salsa de tomates, materiales
para batidos, etc., se derraman, limpielos
Io m,Csposibte, Cuando las superficies se
enfrien limpie bien las superficies
pintadas_
PARA LIMPIAR
Para limpieza diaria, use un iimpiador
para vidrios y una toalla de papel. Para
suciedad pesada, use una pasta de soda
para hornear y agua, Enjuague bien.
MATERIALES DE LIMPIEZA
, Limpiador abrasivo suave
• Esponja-fregador
No use limpiadores abrasivos fuertes,
limpiadores industriales, o cloro.
64
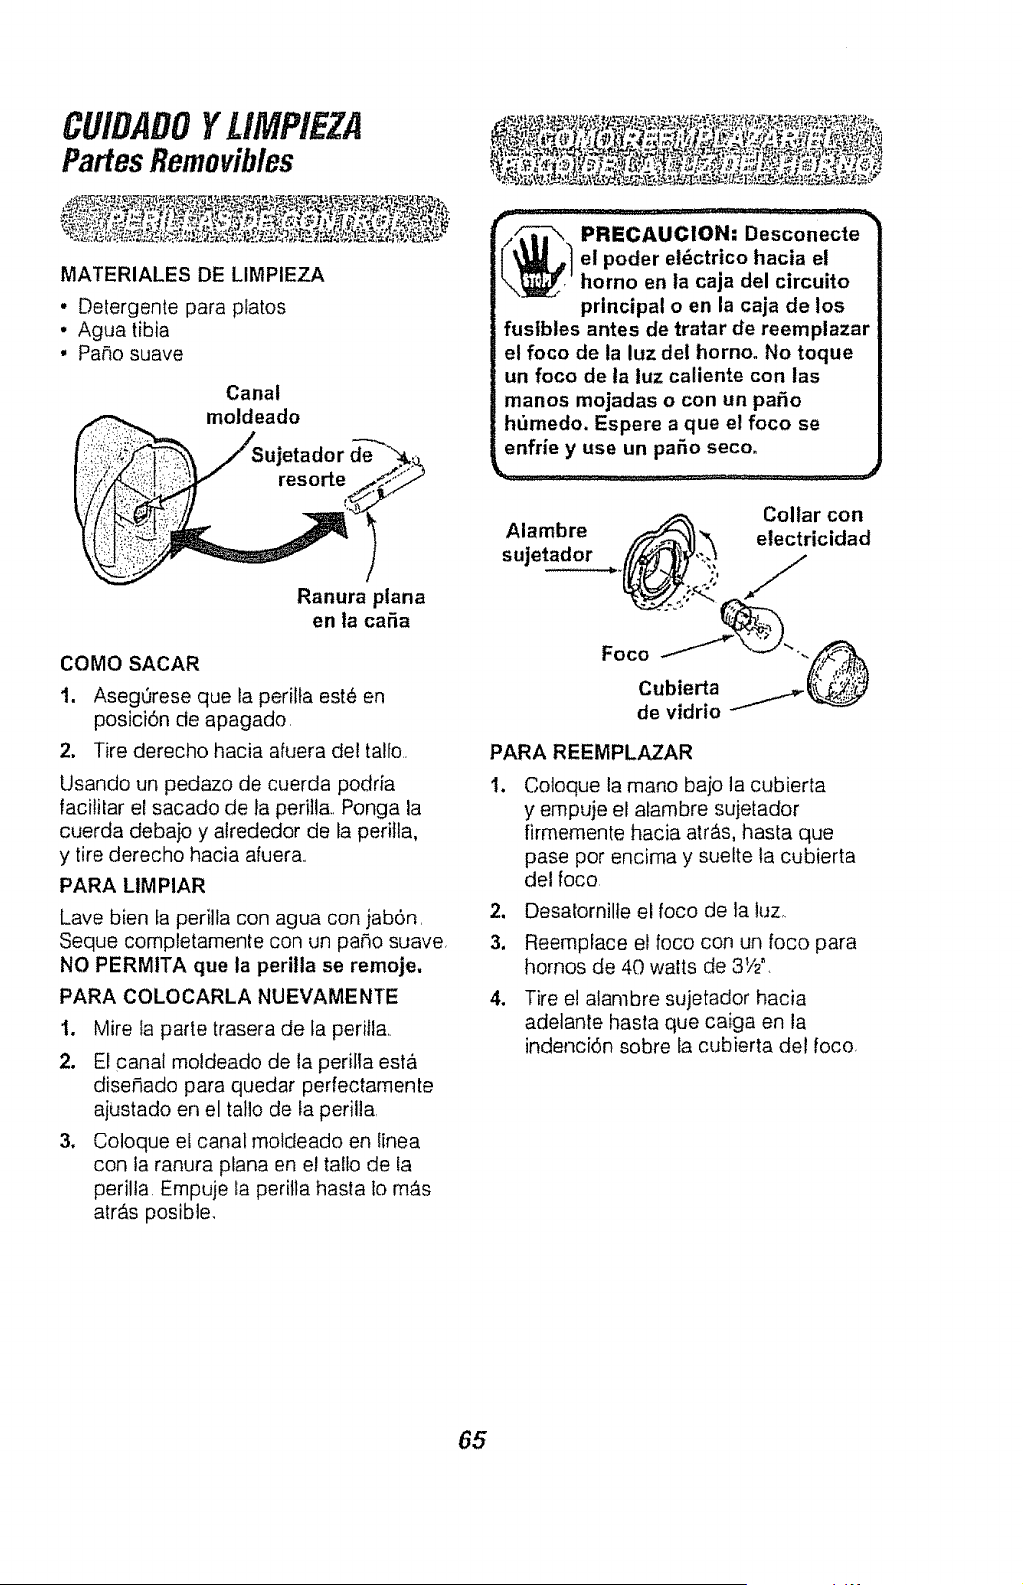
CUIDADOYUMP/EZA
PartesRemovibles
MATERIALES DE LIMPIEZA
• Detergente para platos
• Agua tibia
, Pa+_osuave
Canal
__ moldeado
(_, .,/_S ujeta d or d--e"'_. :&
Ranura plana
en la caSa
COMO SACAR
1. Aseg0rese que la perilfa est6 en
posici6n de apagado
2. Tire derecho hacia afuera del talfo
Usando un pedazo de cuerda podria
facililar el sacado de la perilla Ponga la
cuerda debajo y alrededor de la peritla,
y tire derecho hacia afuera
PARA LIMPIAR
Lave bien fa perilfa con agua con jab6n.
Seque completamente con un paso suave,
NO PERMITA que la peritla se remoje,
PARA COLOCARLA NUEVAMENTE
2.
+
Mire la parte trasera de ta perifl&
El canal moldeado de la perilla esta
dise¢_ado para quedar perfectamente
ajustado en el tatlo de la perilla.
Coloque e! canal motdeado en linea
con la ranura plana en el talfo de la
perilta Empuje la perilla hasta to m_.s
atr_,s posible.
_] RECAUCION: Desconecte
el poder el_ctrico hacia el
homo en la caja del circuito
principal o en la caja de los
fustbles antes de tratar de reemplazar
el foco de la luz del homo° No toque
un foco de la iuz caliente con las
manos mojadas o con un pa5o
humedo. Espere a que el foco se
enfrie y use un paso seco.
.%%;
PARA REEMPLAZAR
+
2_
3.
Cotoque la mano bajo la cubierta
y empuje el alambre sujetador
firmernente hacia air&s, hasta que
pase por encima y suelte la cubierta
del foco.
Desatornilfe el foco de la luz.
Reemplace el foco con un foco para
hornos de 40 watts de 3V_"
4. Tire e! atambre sujetador hacia
adetante hasta que caiga en la
indenci6n sobre la cubierta del foco,
65

CUIDADOYLIMPIEZA
Partes Removibles(cont.)
MATERIALES DE LIMPIEZA
• Detergente para platos
, Agua tibia
• Lanas para fregar o lanilla de acero
con jab6n
Tope en
la guia
Parte trasera
levantada de
la parrilla
COMO SACAR
1. Tire las perrillas hasta la posici6n de
tope.
2. Levante el frente de la parrilla y
deslfcefa bajo el tope de ta guia para
las parritlas.
PARA LIMPIAR
Limpie con agua tibia y detergente. Para
sacar manchas duras, triegue levemente
con fana para fregar o con una fanilla de
acero con jab6n. Enjuague bien,
PARA COLOCAR NUEVAMENTE
1. Coloque la parte levantada de atr&s
de la parrilla sobre las gutaso
2, Levante el frente de la parri!la hasta
que la parle levantada de atrAs se
deslice por debajo del tope de las
guias.
3. Deslice ta parri!ta hasta atr&s.
COMO SACAR
2.
Abra la puerta
completamente.
Empuje los topes
de las bisagras
hacia abajo hacia
el marco de la
puerta, a la
posici6n de Saiga
abierto,
Esto podria
requerir un
destornillador de
cabeza plana,
Cerradura de
bisagra
(Posici6n
abierta)
_;_,__r_,_
Brazo de la
Bisagra
3_
4_
5_
Tome firmemente
los tados de la
puerta de arriba.
Cierre la puerta a la
posici6n de saque.
Levante la puerta
hasta que el brazo
de la bi£agra satga
de la ranura.
COMO PONERLA
NUEVAMEN'T'E
1, Tome firmemente
los dos lados de la
puerta de arriba,
2. Con la puerta en
el mismo _nguto de
saque, coloque ia
indenci6n del brazo
de la bisagra dentro
del borde del fondo
de la ranura de la
bisagra.
Posici6n
de saque
Ranura Brazo
del Borde de la
del Eondo Bisagra
Indencibn
66
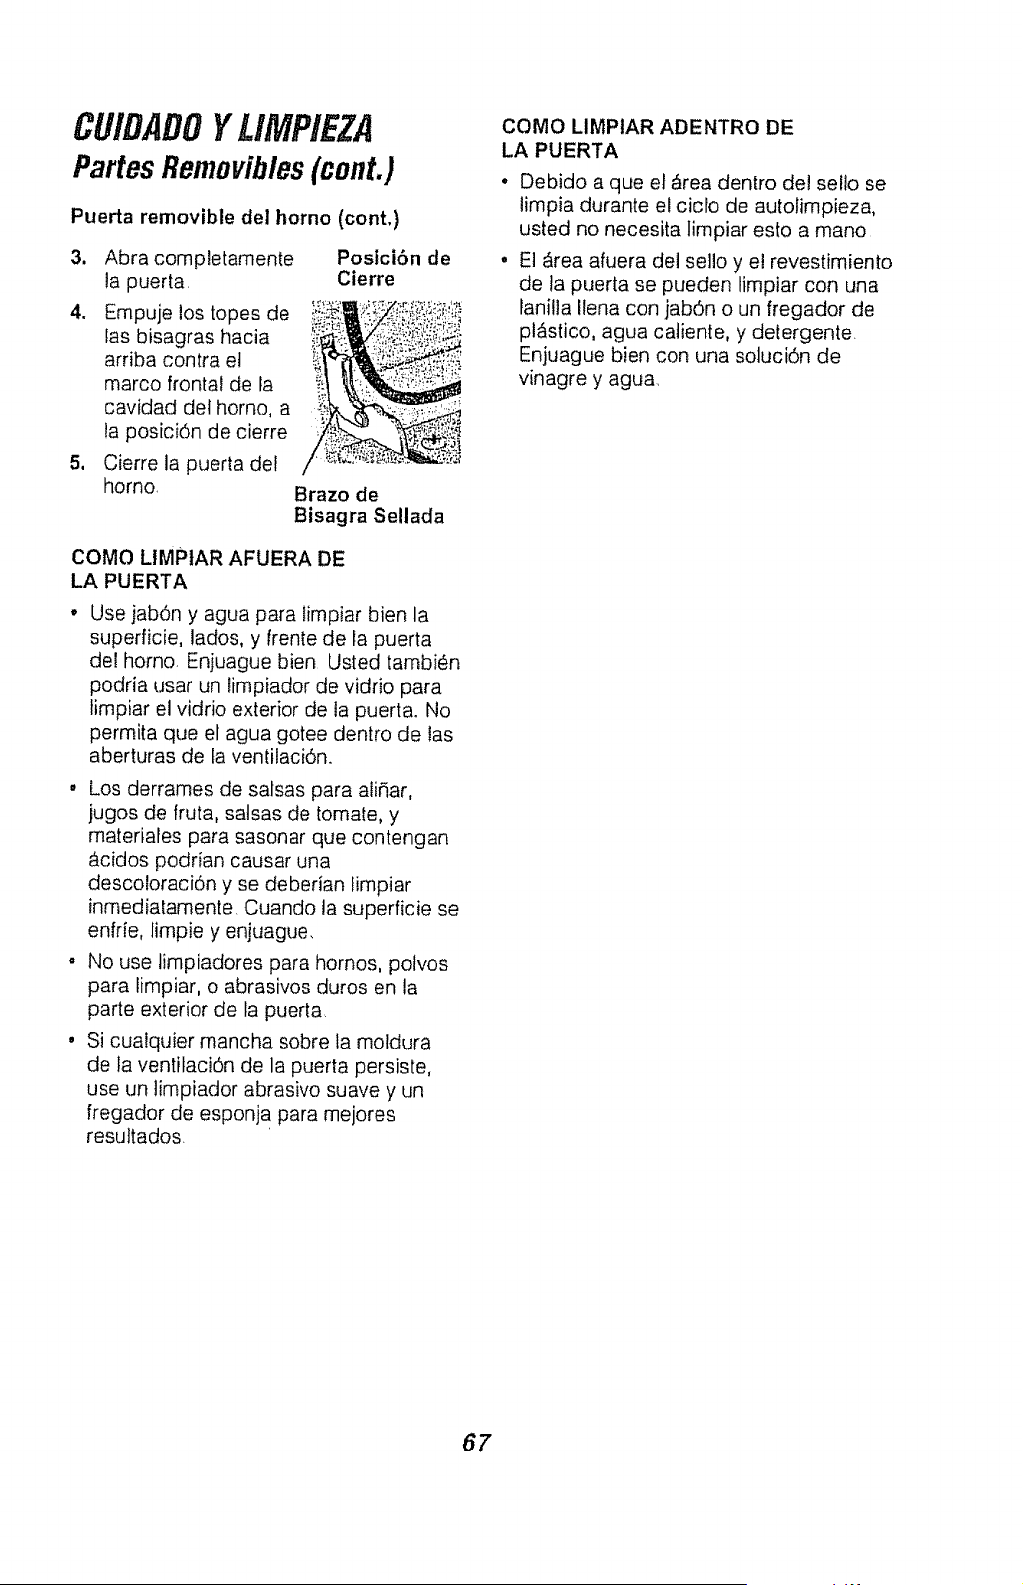
CU/DADOYUMPIEZA
PartesRemovibles(cont.)
Puerta removible dei horno (cont,)
1
3, Abra completamente Posici6n de
la puerta, Cierre
4. Empuje los topes de
Ias bisagras hacia
arriba contra et
marco frontal de ta
cavidad def homo, a
ta posicidn de cierre
Cierre la puerta det
homo, Brazo de
Bisagra Sellada
COMO LIMPIAR AFUERA DE
LA PUERTA
Use jab6n y agua para timpiar bien la
superficie, lados, y frente de la puerta
del homo. Enjuague bien Usted tambi_n
podria usar un limpiador de vidrio para
limpiar el vidrio exterior de la puerta. No
permita que el agua gotee dentro de las
aberturas de ta venlilaci6n.
, Los derrames de salsas para aliSar,
jugos de fruta, satsas de tomate, y
materiales para sasonar que contengan
&cidos podrian causar una
descoloraci6n y se deberian timpiar
inmediatamente, Cuando ta superficie se
enfrie, limpie y enjuague,
• No use limpiadores para homos, polvos
para timpiar, o abrasivos duros en la
parte exterior de ta puerta
, Si cualquier mancha sobre la moldura
de la ventitaci6n de la puerta persiste,
use un timpiador abrasivo suave y un
fregador de esponja para mejores
resuttados.
COMO LIMPIAR ADENTRO DE
LA PUERTA
• Debido a que et &rea dentro del selto se
limpia durante el ciclo de autolimpieza,
usted no necesita limpiar esto a mano
• El Area afuera del se]lo y el revestimiento
de la puerta se pueden limpiar con una
lanilla Itena con jab6n o un fregador de
pl_stico, agua catiente, y detergente
Enjuague bien con una solucidn de
vinagre y agua.
67
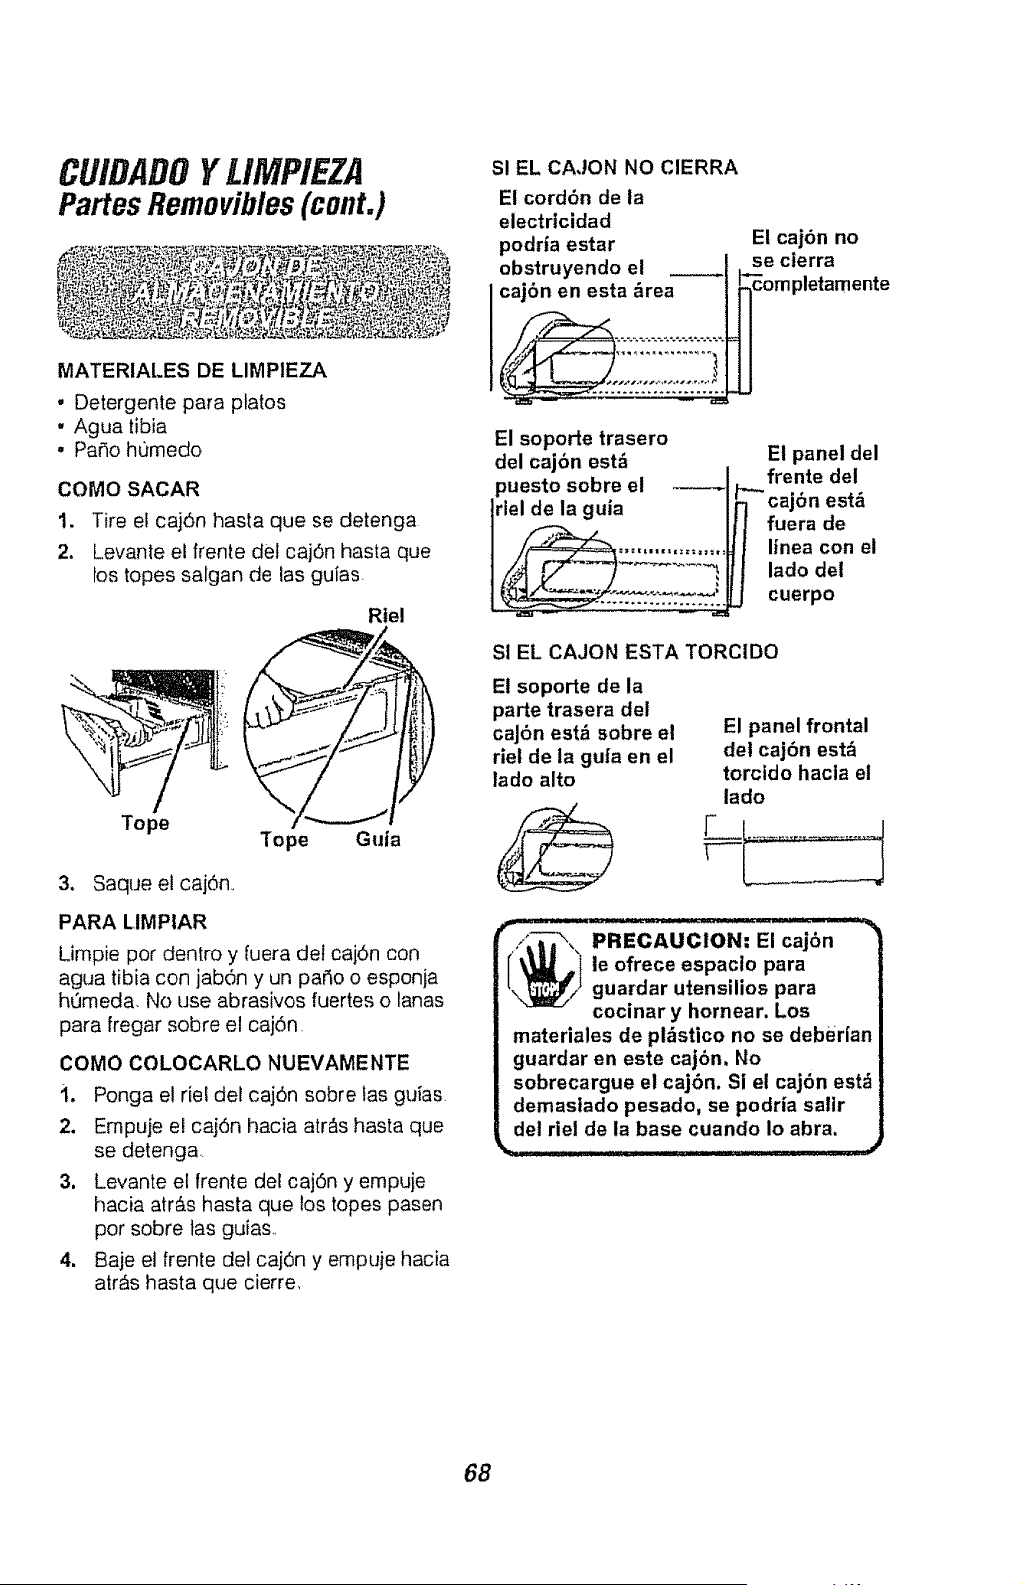
CUIDADDY LiMPIEZA
PartesRemovibles(cont.)
MATERIALES DE LIMPIEZA
• Detergente para platos
• Agua tibia
° PaSo humedo
COMO SACAR
1. Tire el cajSn hasta que se detenga
2. Levante el frente del caj6n hasta que
los topes salgan de ias guias
Rtel
To te
Tope Guia
3, Saque el caj6n
PARA LIMPIAR
Limpie por dentro y fuera det cajSn con
agua tibia con jab6n y un patio o esponja
hOmeda. No use abrasivos fuertes o lanas
para fregar sobre el caj6n
COMO COLOCARLO NUEVAMENTE
i. Ponga el rie! del caj6n sobre tas guias
2. Empuje el caj6n hacia arras hasta que
se detenga
3, Levante el frente del caj6n y empuje
hacia atrAs hasta que los topes pasen
por sobre las guias
4. Baje el frente del caj6n y empuje hacia
atr;_s hasta que cierre,
Sl EL CAJON NO CIERRA
E! cordbn de la
electricidad
podria ester
obstruyendo el _--_i
cajbn en esta _rea
E! caj6n no
se cierra
pletamente
El soporte trasero
del cajSn est_
puesto sobre el
rlel de la guia
El panel del
frente del
cajbn est_
fuera de
linea con el
lado del
cuerpo
Si EL CAJON ESTA TORClDO
El soporte de la
parte trasera del
caj6n est_ sobre el
riet de la guia en el
lado alto
El panel frontal
del cajbn est_
torcido hacla el
lado
aI .........-1
/ _-:-'-, PRECAUCION: El cajbn
.,'-i I R',,
[ _J ,,l le ofrece espacto para
guardar utensilios para
cocinar y hornear. Los
materiales de plz_stico no se deberian
guarder en este caj6n, No
sobrecargue el caj6n. Si el cajbn est_
demastado pesado, se podria salir
del riel de ta base cuando Io abra.
68

ANTESBELLAMARPARA
UflSERV/C/O
Para ahorrar tiempo y dinero, antes de Ilamar para un servicio, revise ta lista de m_.s abaj_
para cualquier problema que usted crea que tiene con el funcionamiento de su estufa.
Si el problema es algo que usted no puede reparar, use los Nomeros de Servicio para el
Consumidor que se encuenlran al final de este manual, Cuando haga un Ilamado, tenga
disponible et n_mero de modelo, nemero de serle, llsta de partes para reparaciones,
manual de uso y cuidado y ta fecha de compra,
PROBLEMA POSIBLE CAUSA POSIBLE SOLUCION
Los controles de la No pasa etectricidad a Revise el circuito principal o
cubierta, homo y control la estufa los fusibles, Asegurese que e
del homo no funcionan, cord6n est_ enchufado
PequeSas rayaduras o
abrastones sobre la
cubterta.
a, Uso de materiales de
iimpieza incorrectos
b. Particulas _speras (sal,
etc,) entre el rondo de las
ollas y la superficie para
cocinar,
c. Utensitios con rondos
&speros.
a. Use sofamenle Cooklop
Cleaning Creme _.
b. Asegurese que la
superficie de ta cubierta y
el fondo de las ollas est_n
limpias antes de usarfas.
c. Use s61o ollas de rondo
suave.
Marcas de metal en la Arrastrar o raspar los Use el procedimiento
superficie de la cubierta utensilios sobre ta recomendado para limpiar la
(pueden verse como superficie de la cubierta superficie de la cubierta.
rayaduras).
Areas de descoloraci6n Dep6sitos de minerates Use procedimientos de
sobre la superficle de agua o afimentos limpieza recomendados para
de la cubierta, timpiar la superficie de ta
cubierta
Bandas y manchas
oscuras sobre la
superficle de la
cubierta.
a. Derrames o a,
salpicaduras de
grasa incrusladas
Use un raspador a hoja y
siga las direcciones en ta
seccion para la limpieza
de este manual
b. Uso de materiales
de limpieza
incorrectos
b, Use solamente Cooktop
Cleaning Creme e sobre ta
superficie de la cubiert&
Las zonas para cocinar Controles del homo Revise la secci6fi de c6mo
de la cubierta funcionan, puestos cocinar en et homo y c6mo
pero el homo no incorrectamente, colocar el control del homo
enclende, correctamente,
69
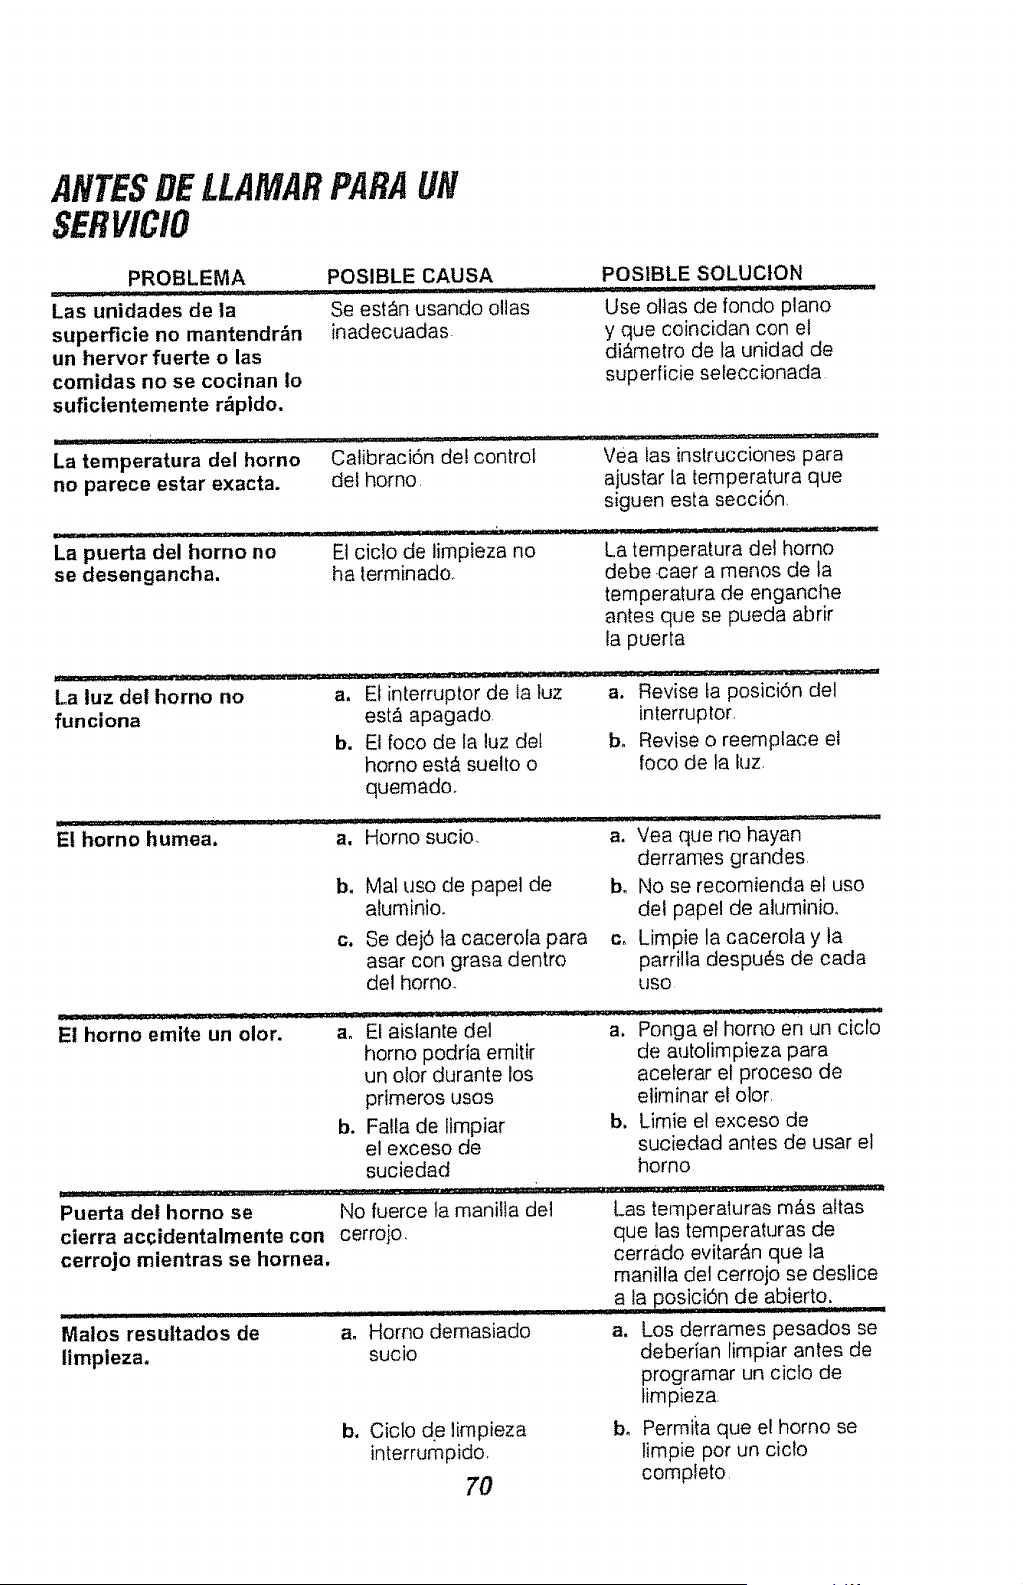
ANTESBELLAMARPARAUN
SERVIC/O
PROBLEMA
........... ..................... lr
Las unidades de la
superficie no mantendr_n
un hervor fuerte o las
comidas no se cocinan Io
sufictentemente r_pldo.
POSIBLE CAUSA POSIBLE SOLUCtON
: _ .;.z .
i ,u i .....
Se est_n usando oltas Use oltas de fondo piano
inadecuadas y que coincidan con et
di,Cmetro de la unidad de
superficie seleccionada
La temperatura del homo
no parece estar exacta.
La puerta del homo no
se desengancha.
......... i I I1' i I1
Calibraci6n de! control
del horno.
Vea tas instrucciones para
ajustar fa temperatura que
siguen esta secci6n,
Et ciclo de limpieza no La temperatura del homo
ha terminado_ debe caer a menos de la
temperatura de enganche
antes que se pueda abrir
la puerta
=
La luz del horno no a. El interruptor de la luz a, Revise ta posici6n del
funciona estA apagado interruplor,
b. El foco de ta luz det b, Revise o reemplace el
homo est& suelto o foco de ta luz
quemadoo
E! homo humea, a, Homo suci0,
b. Mat uso de papel de
aluminio,
C_
Se dej6 ta cacerola para
asar con grasa dentro
del homo.
a. Vea que no hayan
derrames grandes
b, No se recornienda el uso
del papel de aluminio,
c, Limpie la cacerola y la
parrilia despu@s de cada
lJSO
i_ ........ i 4 1$1::z ::..z:z .:T T_. : 1 .......... : z _t.. : _ :: 2 . . _._ ; _: •.. : T
El homo emite un olor. a, El aislante del a. Ponga el homo en un ciclo
b_
horno podria emitir
un olor durante los
prlmeros usos
Fa!la de limpiar
el exceso de
suciedad
de autolimpieza para
aceierar el proceso de
eliminar el olor,
b. Limie el exceso de
suciedad antes de usar el
homo
Puerta del homo se No fuerce ta manilla del Las temperaluras m_s altas
clerra accidentalmente con cerrojo, que las temperaturas de
cerrojo mientras se hornea, cerrado evitar_.n que la
manilla del cerrojo se deslice
a ta POSici6n de abierto. _
............................. , , u I IZ _ IIIIII II I
Malos resultados de
limpleza,
a, Homo demasiado
sucio
b, Ciclo de limpieza
interrumpido,
70
a, Los derrames pesados se
deberian limpiar antes de
programar un cicto de
timpieza,
b, Permiia que el homo se
limpie por un ciclo
completo.

ANTESDELLAMARPARA
UNSERV/C/O
PROBLEMA
Los alimentos
no se hornean
adecuadamente.
POSlBLE CAUSA
POSIBLE SOLUCION
a. E! homo no se
precalent6 Io
suficienle
b, Posici6n incorrecta
de ia parritta o la
cacerola
Cl La ventilaci6n del
homo est& obstruida o
cubierta
a, AsegOrese de precafentar
cuando la receta 1o
requiera
b. Mantenga un espacio de
aire uniforme alrededor de
las ollas y utensilios, Vea
ta secci6n para consejos
para cocinar en et homo,
c. Mantenga la ventilaci6n
despejada
d. Uso incorrecto del
papel de aluminio
e. Temperatura
incorrecta para el
utensilio usado
f_
gp
La temperatura det
homo necesita ajuste,
La estula o la parri!la
del homo no est&n
niveladas,
d. No cuhra las parrittas
cuando hornee
e, Reduzca la ternperatura
en 25 grados para
utensilios de vidrio,
oscuros u opacos.
f, Revise la seccidn de
ajustes a la ternperatura
que sigue esta secci6no
g, Vea las instrucciones de
instalaci6n para la
nivelaci6n
h, Controles del homo
real puestos
h, Vea la secciOn para
hornear
Los alimentos no se
asan adecuadamente a
la parrilla.
a. Posici6n incorrecta de
la parriffa
b. El homo se precalent6
c. Mal uso de papel de
atuminio,
d, La puerta del homo se
cerr6 durante el asado
a fa parrilla
e. Vollaje bajo (208
Vottios)
f. Cantidad de tiempo
incorrecta para asar
g, Controles del homo
real puestos
a, Revise la posici6n de tas
cacerolas; vea la secci6n
para asar a la parrilla
b. No precaliente cuando
ase a la parrilla
c, Lea la secci6n para asar
a la parrilta
d. Abra la puerta a ta
posici6n de tope para
asar; vea la secci6n de
c6mo asar a ta parrilla,
e, Use posici6n de parrilta
m_.s alta yto ase por m_s
tiempo.
f. Vea ta tabla para asar en
la secciOn de c6mo asar a
la parrilla
g. Vea la secci6n para asar_
71

AJUSTESDE
TEMPERATURA-
"HAGALOSlISTEDMISMO"
Usted podria pensar que su nuevo homo
cocina diferentemente aI homo que
reemplaz6. Recomendamos que use su
horno nuevo unas pocas semanas para
que se famitiarice con _1, siguiendo los
tiernpos que se dan en las recetas como
una guia.
Si cree que su nuevo homo est&
funcionando demasiado caliente (querna
ta cornida) o no calienta Io suficiente
(ia comida no queda bien cocida) usled
mismo puede ajustar la temperatura. La
apariencia y la textura de los alimentos
son rnejores indicadores de la exactitud
de un homo que un termOmetro. Estos
termOmelros pueden varlet en 20-40
grados de la verdadera temperatura det
homo. Adem&s, la puerta se tiene que
abrir para leer eslos term6metros. Abrir la
puerta cambiarA ia temperatura del homo.
Para decidir en cu&nto carnbiar la
temperatura, suba la temperatura del
homo en 25 grados (si los alimentos no
quedan bien cocidos) o baje la
temperatura en 25 grados (si la cornida se
quema) de la temperatura de la receta,
luego hornee. Los resultados de esta
"prueba" le deberian dar una idea de
cu&nto se deberia carnbiar la temperatura.
2_
o
3_
Empuje y sujete, a la misma vez, los
botones con tas flechas para SUBIR y
BAJAR LA HORA hasta que el dial
rnueste un n_Jmero de dos digilos
Empuje el bot6n con la flecha para
SUBIR LA HORA para aumentar ta
temperatura en 35 ° F
Empuje el bot6n con la flecha para
BAJAR LA HORA para disminuir la
temperatura en 35 ° F.
Cuando este ajuste haya sido hecho el
dial volver_, a ta hora del dia
Este ajuste permanecer_, en ta memoria
hasta que estos pasos sean repetidos y
una nueva temperatura sea sefeccionada
Permanecer_ en la memoria incluso
despues de un corte de c0rriente.
Estos ajustes no afectar_n tas
temperaturas para Asar y Limpiar.
72

NOTAS
73

NOTAS
74
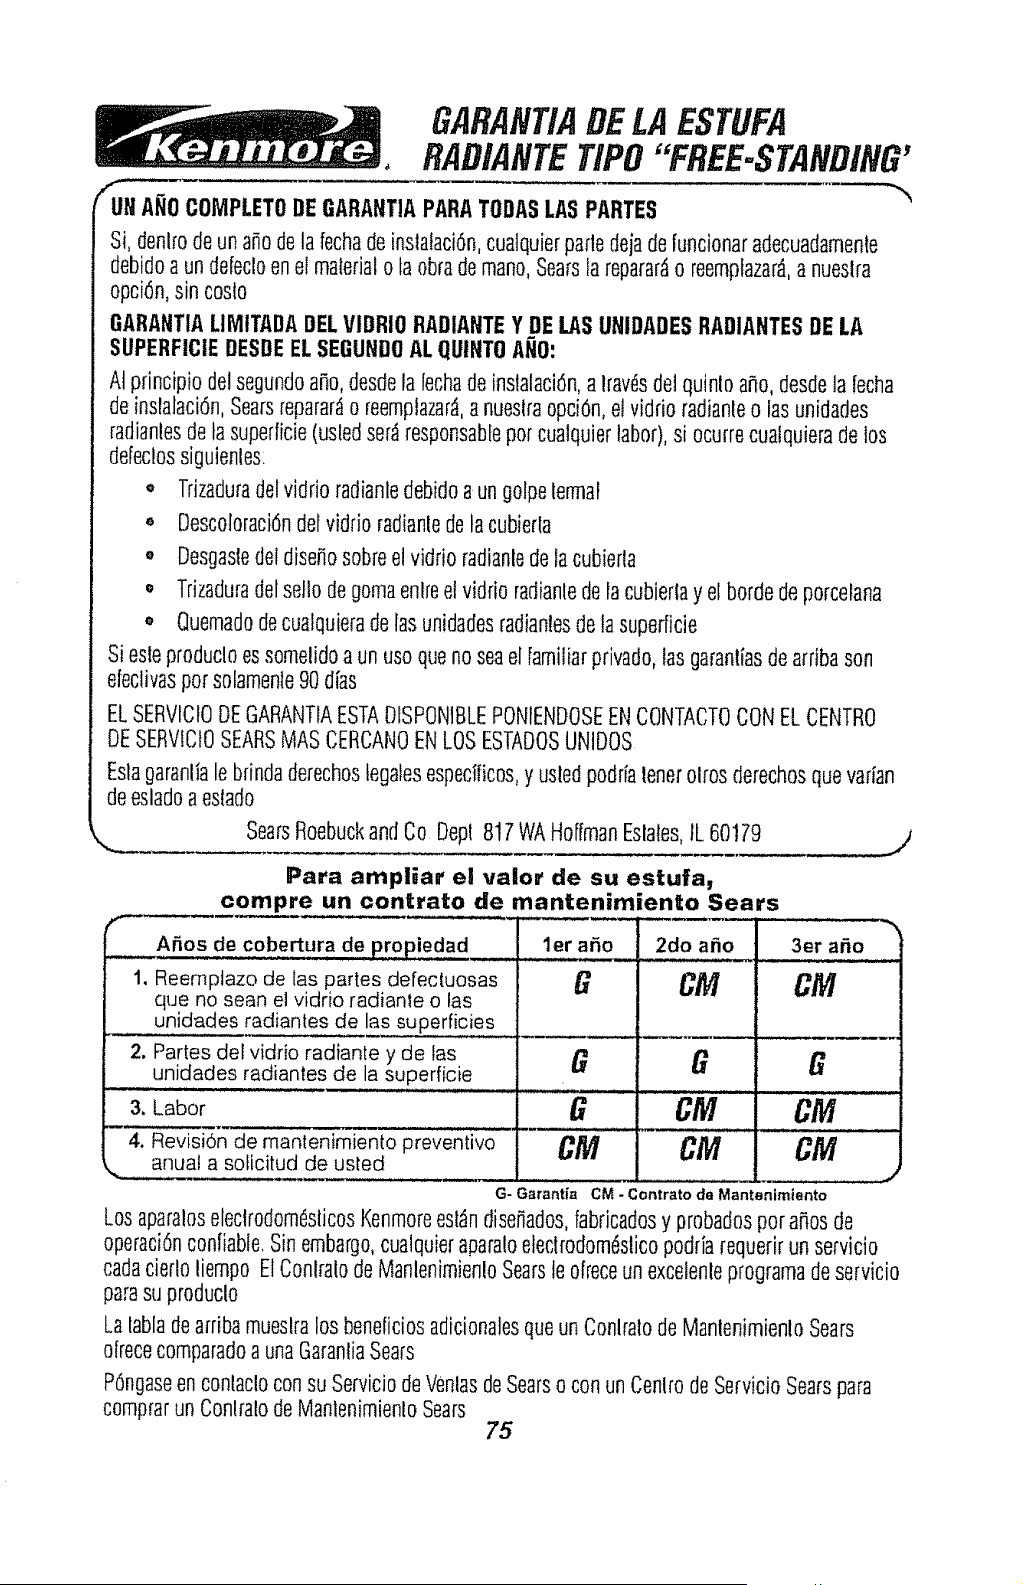
GARANT/ADELAESTUFA
RADIANTETIPO"FREE*STANDING'
fUUNANOCOMPLETODEGARANTIAPARATODASLASPARTES
Si, denlrodeun a_odela fechade inslalaci6n,cualquierparledejadefuncionaradecuadamenle
debidoa unddeclo enel malerialota obrademane,Searsiareparar_o reemplazad,a nueslra
opci6n,sin coslo
GARANTIALIMITADADELVIDRiO RADIANTEYDELASUHIDADESRADIANTESDELA
SUPERFICIEDESDEELSEGUNDOAL QUINTOANO:
At principle delsegundoafio,desdela lechade inslalaci6n,a Iravdsdel quinlo afio, desdela fecha
de inslalacidn,Searsreparardo reemplazad,a nueslraopci6n,e!vidrio radianleo las unidades
radianlesde tasuperficie(usledserdrespor_sableper cualquierlabor),si ocurrecualquierade los
ddeclos siguienles:
o Trizaduradel vidrio radianledebidoa ungolpelermal
o Descoloracidndel vidrio radianledela cubierla
. Desgasledel dise_osobreel vidrio radianledela cubierla
• Trizaduradelset!ode gomaenlreetvidrio radianledela cubierlay el borde deporcelana
• Quemadodecualquieradelas unidadesradianlesdeta superiicie
Siesleproducloessomelidoa un usequenoseael familiarprivado,las garanliasdearribason
declivasper solamente90dias
ELSERVICIODE GARANTIAESTADISPON1BLEPONtENDOSEENCONTACTOCONELCENTRO
DESERVICtOSEARSMAS CERCANOENLOSESTADOSUNIDOS
Eslagaran!iale brindaderechostegalesespeeificos,y usledpodrialenerolrosderechosquevarian
deesladoa estado
SearsRoebuckand Co Depl 817WAHoffmanEslates,IL 60179
J
Para ampliar el valor de su estufa,
compre un contrato de mantenimiento Sears
p_
A_os de cobertura de p.r...opiedad , ler a_o 2do a6o
1. Reemptazo de las partes defecfuosas
que no sean el vidrio radiante o las
unidades radiantes de las superficies
2. Partes del vidrio radiante y de las
unidades radiantes de la superficie
3. Labor
--4, Revisi-6"nde manienimiento preveniivo
,,,..._t a solicitud de usted
G
G
CM
G
CM
CM
3er a6o
CM
J
G
CM
J CM
G- Garantia CM - Contrato de Mantenimiento
LosaparaloselectrodomdslicosKenmoreesl_ndisenados,fabricadosy probadosper a_osde
operaci6nconfiable.Sinembargo,cualquieraparaloeleclrodom(_slicopodriarequerirun servicio
cadacierlo liempo ElConlralodeManlenimienloSearsteoireceun excelenleprogramadeservicio
parasu produclo
Lalabiadearribamueslralos befleficiosadicionalesqueun Conlralode Manlenimien!oSears
ofrececomparadoa una GaranliaSears
P6ngaseen conlacloconsu ServiciodeVenlasdeSearso con unCerflrodeServicioSearspara
comprarun ConlralodeManlenimienloSears
75
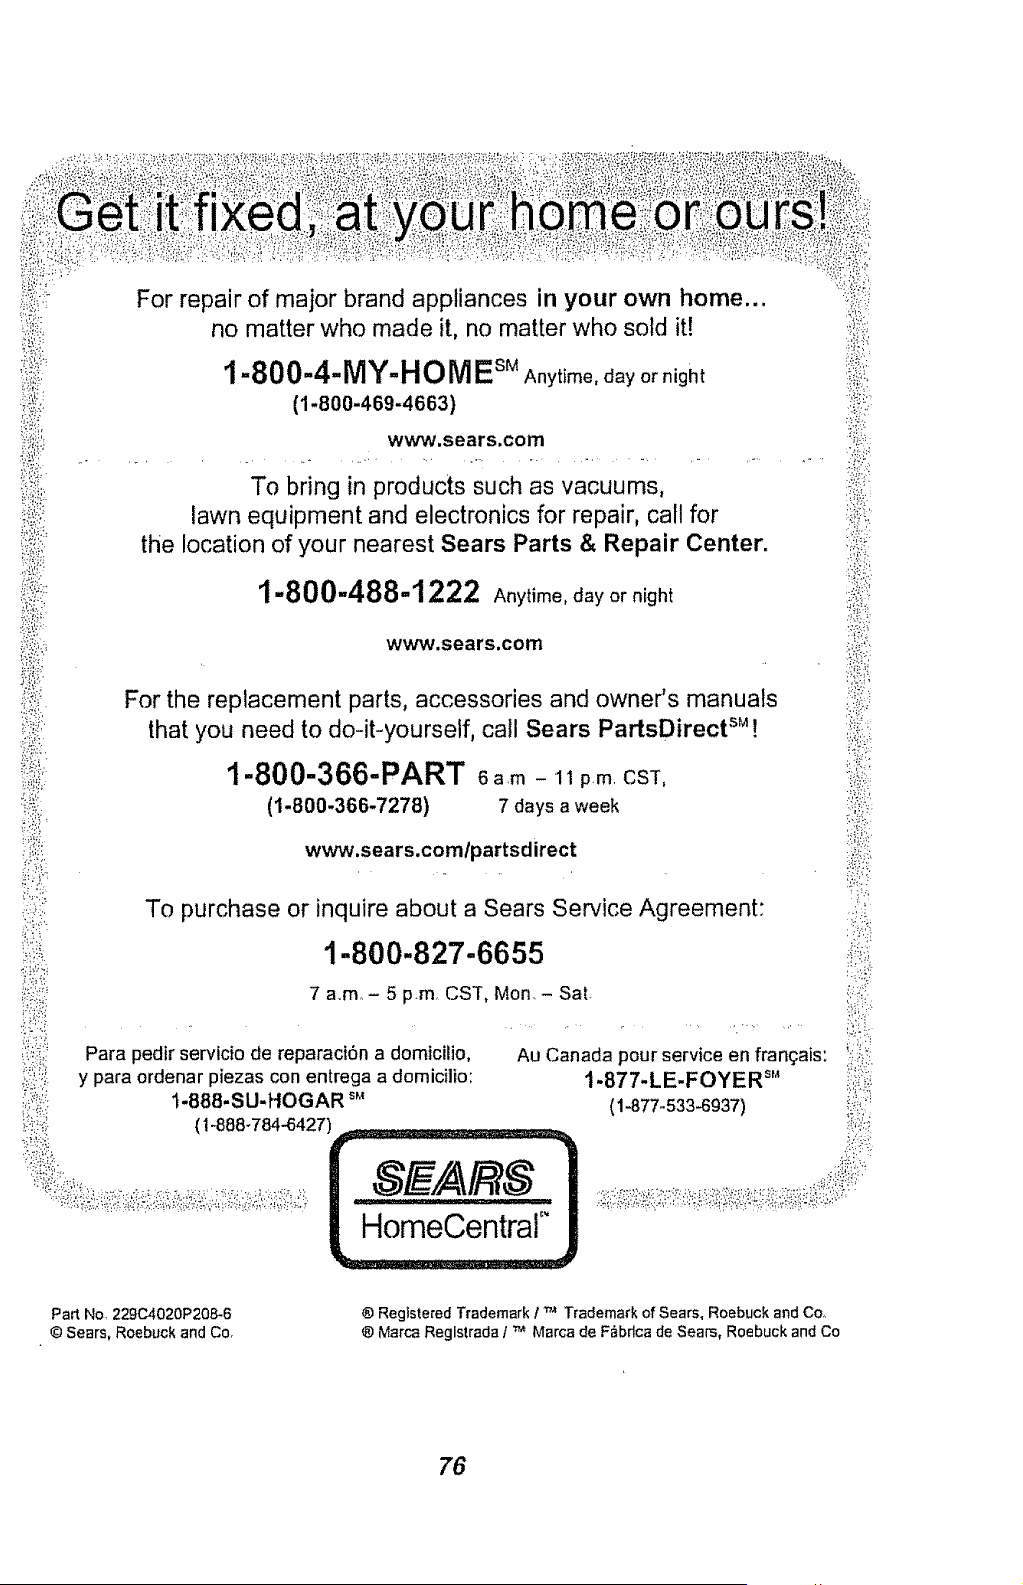
For repair of major brand appliances in your own home...
no matter who made it, no matter who sold it!
1-800-4-MY-H O MEsMAnytime, day or night
(1-800-469-4663)
www.sears.com
To bring in products such as vacuums,
lawn equipment and electronics for repair, call for
the location of your nearest Sears Parts & Repair Center.
1-800-488-1222 Anytime,dayo_o=ght
www.sears.com
_ii!!il
i_;i,ili
For the replacement parts, accessories and owner's manuals
that you need to do-it-yourself, call Sears PartsDirectS_!
1-800-366-PART 6am- 1_prn CST,
(t-800-366-7278) 7 days a week
www,sears.corn/partsdirect
To purchase or inquire about a Sears Service Agreement:
1-800-827-6655
7 a,m_- 5 pm CST, Mon.- Sat
Para pedir servicio de reparaci6n a domtcilio,
y para ordenar piezas con entrega a domicilio:
1-888-SU-HOGAR s_'_
(1-888-784-6427
Au Canada pour service en fran£ais:
t-877-LE-FOYER sM
(i -877,.533-6937)
Pa_ No229C4020P20_6
© Sears, Roebuck and Co,
® Registered Trademark 1_ Trademark of Sears, Roebuck and Co_
® Marc;] Registrada t "_ Marca de F_bdca de Sears, Roebuck and Co
76

