Loading ...
Loading ...
Loading ...

Page 10
TOOL OPERATION CHECK
IN ADDITION TO THE OTHER WARNINGS CONTAINED IN THIS MANUAL
OBSERVE THE FOLLOWING FOR SAFE OPERATION
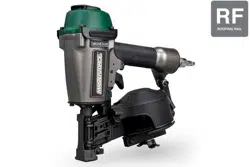
• Use the Masterforce pneumatic tool only for the purpose for which it was designed.
• Never use this tool in a manner that could cause a fastener to be
directed toward the
user or others in the work area.
• Do not use the tool as a hammer.
• Always carry the tool by the handle. Never carry the tool by the air hose.
• Always be aware that misuse and improper handling of this tool can cause injury to
yourself and others.
• Never clamp or tape the trigger or contact tip in an actuated position.
• Never leave a tool unattended with the air hose attached.
• Do not operate this tool if it does not contain a legible WARNING LABEL.
•
Do not
•
continue to use a tool that leaks air or does not function properly.
Notify Menards
service center if your tool continues to experience functional problems.
Keep the tool away from yourself and others when connecting air
source.
Remove all fasteners from tool before performing tool operation
check.To reduce the risk of injury to yourself and others, check the
tool before beginning work each day or if the tool is dropped, receive
a sharp blow, been run over, etc. If the tool does not work as it should,
contact Menards service center immediately.
1. CONTACT TRIP OPERATION:
A. With finger off the trigger, press the contact tip against the work surface.
THE TOOL MUST NOT CYCLE.
B. Hold the tool off the work surface, and pull the trigger.
THE TOOL MUST NOT CYCLE.
C. With the tool off the work surface, pull the trigger. Press the contact tip against the work surface.
THE
TOOL MUST CYCLE.
D. Without touching the trigger, press the contact tip against the work surface, then pull the trigger.
THE TOOL MUST CYCLE.
2. SEQUENTIAL TRIP OPERATION:
E. Press the contact tip against the work surface, without touching the trigger.
THE TOOL MUST NOT CYCLE.
F. Hold the tool off the work surface and pull the trigger.
THE TOOL MUST NOT CYCLE.
Release the trigger.
The trigger must return to the trigger stop on the frame.
C. Pull the trigger and press the contact tip against the work surface.
THE
TOOL MUST CYCLE.
D. With finger off the trigger, press the contact tip against the work surface. Pull the trigger.
THE TOOL MUST CYCLE.
Loading ...
Loading ...
Loading ...