Loading ...
Loading ...
Loading ...

14
EN
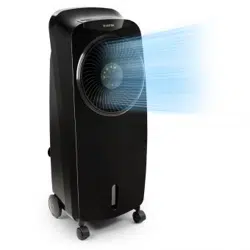
PRODUCT FEATURES
Increase humidity:
At low temperatures in winter, the skin dries out too quickly, lips and skin become rough
and cracked. The air humidifying technology adopted in this appliance can rapidly
improve the relative humidity of air and prevent the skin from drying out to quickly.
Water pump and distributed spray technology:
The water circuit is operated with a water pump. The use of decentralized spray
distribution technology, which transports the water into the lter core, ensures uniform air
humidication.
Refrigeration through physical energy storage:
Refrigeration is achieved by physical energy storage (ice crystal energy storage
refrigeration). The ice crystal energy storage leads to a long release time, whereby cold
air can be blown out over a longer period of time.
Energy-saving and environmentally friendly:
The total power output of the appliance is 110 W, equal to
1
⁄20 of the general power
consumption of air conditioners. This product is an environmentally friendly, our-free
household appliance.
120 degrees wide-angle air supply:
You have three wind adjustment options: low wind, medium wind and strong wind.
Removable lter insert:
For cleaning, remove the paper lter insert (see section “Cleaning and Maintenance“).
INSTALLATION
1. Open the package and take out the cooling fan and place it on the horizontal oor.
2. Check if the parts in the packing box are conform to the packing list in the
instruction or not.
Note: The ice pack, casters and wrench accessories are placed in the bottom of the
box.
3. lnstall the casters:
Place the unit upside down on a at surface (preferably with a soft cloth or mat
underneath to avoid scratching the top of the unit). Use the wrench to attach the
two casters without a brake to the bottom front of the unit and the two casters with
brakes to the bottom back of the unit.
4. Add water:
Remove the water tank from the appliance and ll it with clean tap water.
Loading ...
Loading ...
Loading ...