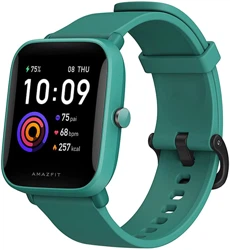
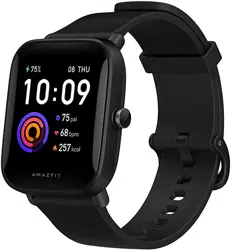
User Guide for Amazfit W2017OV3N
Table of Contents
- Amazfit Bip U User Guide
- Preparations
- Device binding and unbinding
- Feature navigation on the watch face screen and button usage
- Feature navigation
- Physical button operations
- How to wear and charge the watch
- How to wear the watch and replace the watch strap
- Charging
- Watch face
- Control center
- Notifications
- Shortcut apps
- App settings on the watch
- Activities and health
- PAI
- Activity goals
- Standing alerts
- Heart rate
- Sleep
- Assisted sleep monitoring
- SpO2
- Precautions for SpO2 measurement
- Stress monitoring
- Respiratory training
- Cycle tracking
- Watch apps
- To-Do-List
- Alarm
- World Clock
- Pomodoro Tracker
- Countdown
- Stopwatch
- Music
- Taking pictures remotely
- Find My Phone
- Exercise
- How to enable the exercise feature
- Instructions for using GPS on the phone
- Activity alerts
- Operations while exercising
- Pause, continue, and end exercising
- View exercise results
- Exercise settings
- Activity goal
- Heart rate range for exercises
- Watch status alerts
- Incoming call alert
- Nudge alert
- Activity goal achieved" alert
- Red envelope alert
- Settings
- Daily maintenance
- Precautions
Feature navigation
Swipe up, down, left, and right to navigate features on the watch screen.
The watch face screen appears by default.
1. Swipe up on the watch face screen to view historical notifications. You can view up to 10 recent notifications.
2. Swipe down on the watch face screen to go to the control center, where you can set Do-Not-Disturb, Brightness, and Alarms, and view the watch battery level and phone connection status.
3. Swipe left and right on the watch face screen to open shortcut apps, such as Activity Goal, Heart Rate, PAI, Weather, Cards, and Music. To modify shortcut apps settings, go to Watch settings > Preferences > Shortcut apps. You can set up to 10 shortcut apps.
4. On the watch face screen, press the physical button on the right to go to the app list.
Press the physical button once:
① When the screen is locked, press the physical button to unlock the screen.
② On the watch face screen, press the physical button to go to the app list.
③ On screens other than the watch face screen, press the physical button to return to the previous screen.
④ On the Exercise screen, press the physical button to swipe up and down between screens.
Press and hold the physical button:
① When the watch is shut down, press and hold the physical button for 2 seconds to power on the watch.
② On the watch face screen, press and hold the physical button to quickly start the Exercise app. To set quick start-up items, go to Settings > Preferences > Press and hold the button.
③ On the Exercise screen, press and hold the physical button to end the exercise.
④ Press and hold the physical button for 8 seconds to restart the watch.
How to wear and charge the watch
How to wear the watch and replace the watch strap
Put the strap on at a comfortable tightness to allow the skin to breathe and the sensor to function. When you measure SpO2, wear the watch correctly and at the appropriate tightness so that the watch feels comfortable on your skin. Do not wear the watch on the carpal area. Keep your arm flat and still throughout the measurement process. Factors such as arm drooping or shaking, hair, and tattoos may affect measurement results or lead to measurement failure. You can tighten the watch strap while exercising and loosen it afterwards. Try to tighten the watch strap when the watch sways on your wrist or fails to generate data.
Charging
1. Connect the USB port of the watch charging base to a phone charger or a PC's USB interface.
2. Put the watch onto the magnetic charging base and keep the metal contact on the back of the watch aligned with the gold pin of the charging base. Ensure that the watch is firmly attached to the charging base.
3. After the watch is correctly placed onto the charging base, the charging icon will appear on the watch screen, indicating that charging is in progress.
When the watch is being charged, you can view the current time and receive incoming call alerts and app notifications. We recommend that you charge the watch using a PC's USB interface or a branded phone's charger with a rated output voltage of 5 V and an output current more than 1 AH.
Watch face
To change the watch face, tap and hold the watch face screen, or go to Settings > Watch Face and swipe left and right to select the desired watch face.
Go to the Watch face settings screen. The watch faces for which thumbnails are marked with the Edit icon below are editable. The selected watch face is highlighted. You can tap or swipe on the screen to select different watch faces. The watch faces in gray are available to choose. Tap to select one.
The watch provides several watch faces by default. You can also go to the Store in the Zepp app to synchronize online watch faces to the watch, or set a picture on the phone as the watch face picture by using the Zepp app.
To add online watch faces, keep the watch connected to the phone, open the Zepp app, go to Profile > My Device > Amazfit Bip U > Store, and select your desired online watch faces to synchronize them to the watch.
Control center
Swipe down on the watch face screen to go to the control center screen.
DND
Tap the DND icon to configure Do-Not-Disturb settings. After DND is enabled, the watch does not vibrate when it receives incoming call alerts, SMS alerts, app alerts, email alerts, and nudge alerts. After you select Enable in smart mode, DND is automatically enabled when you fall asleep while wearing the watch. After you select Enable in custom mode, DND is automatically enabled during your predefined period.
Alarm
Tap the Alarm icon to open the Alarm app.
Brightness adjustment
Tap the Brightness Adjustment button to adjust the brightness of the watch screen.
Settings
Tap the Settings icon to configure watch settings.
Notifications
Enable the notifications feature
Before you use the notifications feature, enable the app alerts feature in the Zepp app and keep the watch connected to the phone.
1. If you use an iPhone, pair the watch with the phone's Bluetooth before you use the notifications feature. Otherwise, when you enable this feature, a message requesting Bluetooth pairing appears. Tap Agree.
2. If you use an Android phone, add the Zepp app to the whitelist or autorun list in the phone's background so that the app keeps running in the background without being killed by a background process of the phone. Otherwise, the watch will be disconnected from the app and cannot receive app alerts. For the setting method on a specific phone, go to Profile > Amazfit Bip U > Run in background.
View notifications
When the watch receives notification alerts, it vibrates and displays the notifications. If you do not view notifications when you first receive them, you can swipe up on the watch face screen to view them later.
Delete or clear notifications
The watch can store up to 10 notifications. When this limit is exceeded, the earliest notification is automatically deleted each time when a new notification is received.
Incoming call alert
Keep the watch connected to the phone to receive incoming call alerts on the watch. You can choose to ignore the incoming call alert on the watch (iOS) or mute the incoming call ringtone on the Android phone.
Settings on an Android phone:
Keep the watch connected to the phone, open the Zepp app, and go to Profile > My Device > Amazfit Bip U > Notifications and Reminders > Incoming call. Tap the "Please enable the Send SMS function" message on the top of the screen. In the Grant Phone Permission dialog box, grant call permission to the Zepp app. If the message does not appear, the Zepp app has been granted the phone permission.
Note: To enable this feature on an Android phone, you need to add the Zepp app to the whitelist or auto-run list in the phone's background so that the app always runs in the background. If the Zepp app is killed by a background process of the phone, the watch is disconnected from the phone and cannot receive incoming call alerts.
Shortcut apps
Shortcut apps are displayed on the left and right of the watch face screen, allowing you to conveniently open these apps. You can go to Settings to set a frequently used app or feature, such as Exercise, as a shortcut app. To change shortcut apps, follow these steps: After you wake up the watch, swipe down on the watch face screen to go to the control center. Tap Settings and go to Settings > Preferences > Shortcut apps. Then, swipe up and down on the screen to view a list of apps that can be set as shortcut apps. You can add up to 10 shortcut apps. When the number of apps on the Current Apps screen reaches this limit, you cannot add any more shortcut apps. To add more shortcut apps, remove some shortcut apps from Current Apps.
App settings on the watch
The watch provides apps that can be used independently, such as Activity Goal, Exercise, Heart Rate,andRate, and Blood Oxygen Detection. By default, apps are displayed in the following order: Activity Goal -> PAI - > Heart Rate -> Sleep -> Exercise -> Activities -> SpO2 -> Stress monitoring -> Respiratory Training -> Cycle Tracking -> Alarm -> Settings -> More. To add apps on the screen, open the Zepp app and go to Profile > Amazfit Bip U > App Settings to select apps.