Loading ...
Loading ...
Loading ...
11
Operating Instructions and Owner’s ManualMr. Heater Series Heater
Couplings: Tubeandtubefittingsareconnectedbywrap-
aroundcouplingswhichclampbymeansof
atapered,hammer-drivenlockmember.The
startingendsofthecouplingandlockmember
areidentifiedby1/4”holeswhichareput
togetherwhenstartingassembly.Besurethe
tubeendsareinlineandtubeendsbuttagainst
stoppin(s)insidecoupling.Theslidebaristobe
hammer-driventoapointofsecuringthecoupling
snuglytothetubes.Over-drivingwillresultin
distortionofthecouplingorslidebarliptoa
pointdecreasingtheholdingthecapabilityofthe
coupling.(SeeFigure4)
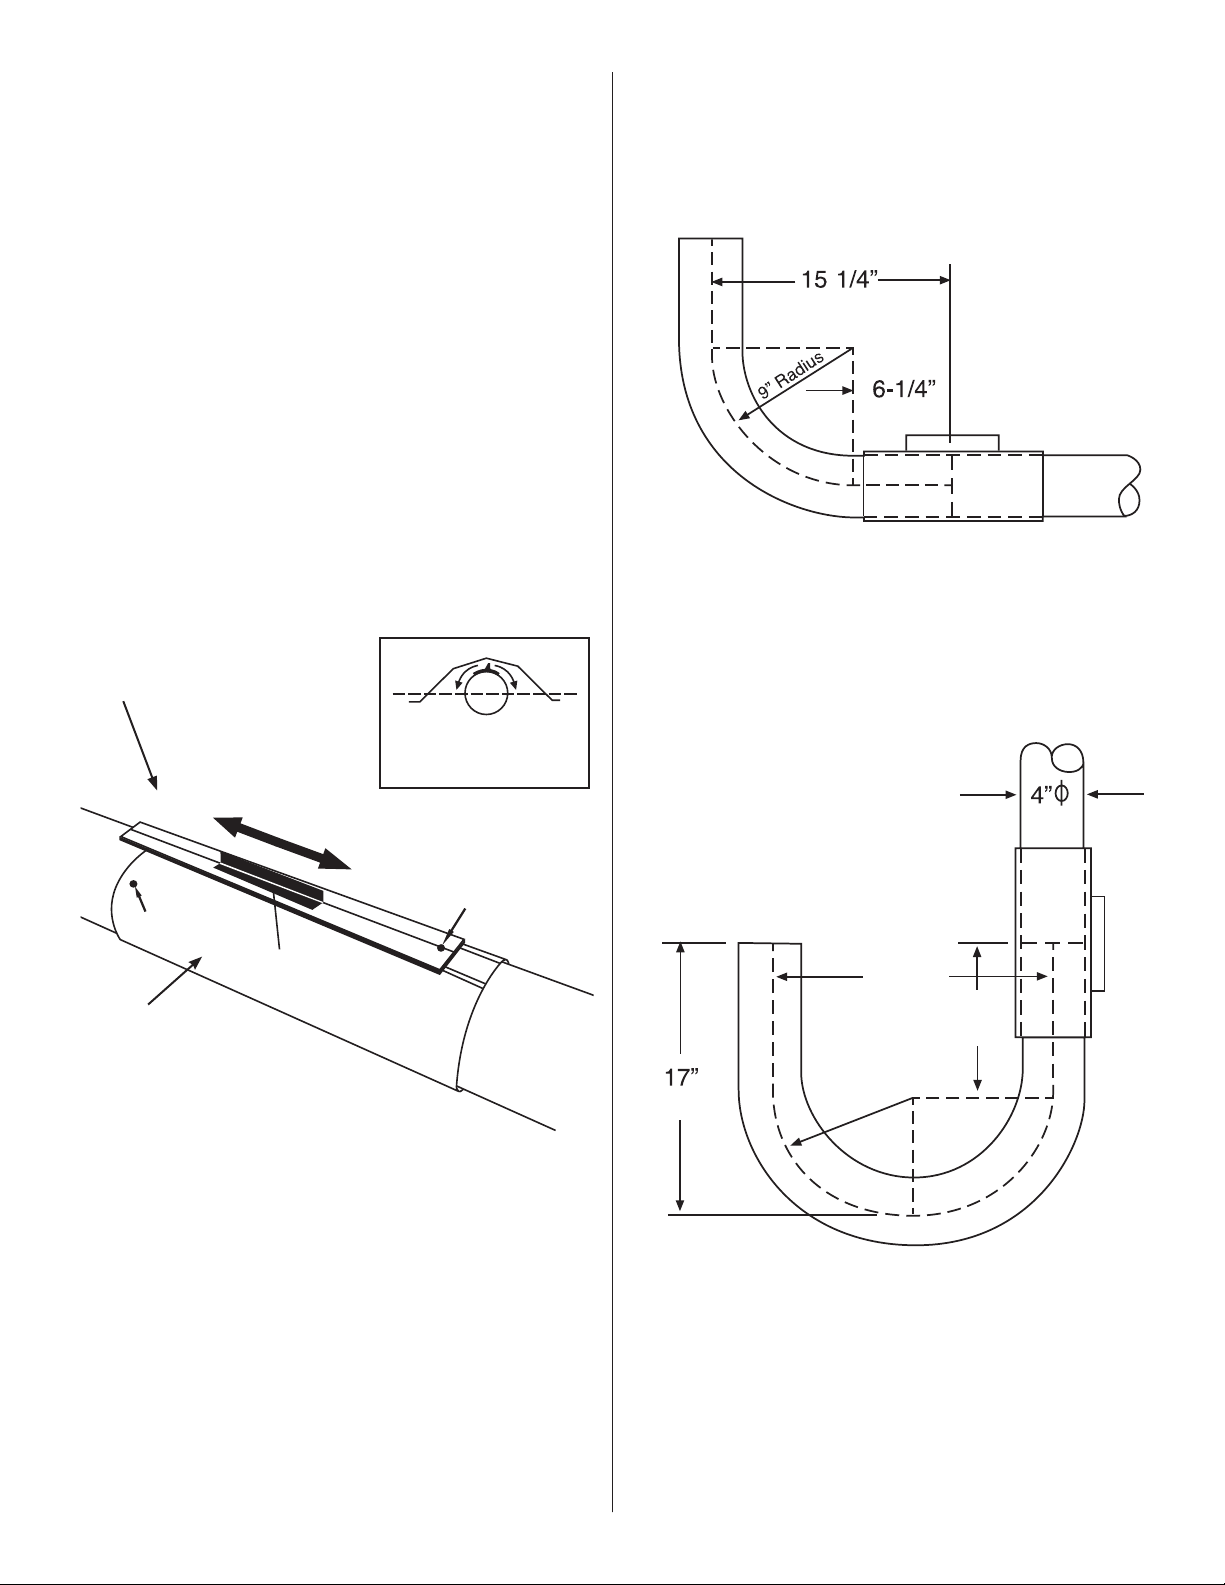
ElbowFittingDimensions
FIGURE 5: Installation of Elbow & Coupling
ElbowPackage: Stk.#F106415ElbowPackageincludes:
(1)elbow,(1)coupling.Installelbow
intoradianttubesequencewhereplans
indicatea90°bend(seeFigure4).
U-TubeFittingDimensions 180°U-Tube
Stk.#i ncludes:F106414U-TubePackage
radianttubesequencewhereplans
indicatea180°bend
(seeFigure4).
COUPLING ASSEMBLY
Plain Coupling - 14612
Key for Coupling - 14616
Tighten
Loosen
Hole 1
Coupling
Assembly
Impact
Block
Hole 2
Whenassemblingcouplingnote
thelocationofHole1andHole2
Orientcouplingsothat
theimpactblockisabove
tubecenterline.
TUBECOUPLING
KEYforCOUPLING
FIGURE 4:
(38.73 CM)
(15.24 CM)
18" (45cm)
10"
(25cm)
(10cm)
(43cm)
9"
(22cm)
Radius
90°
(1) U-tube, (1) coupling
Install U-tube elbow into
Loading ...
Loading ...
Loading ...