
Loading ...
Loading ...
Loading ...
W415-2348 / B / 01.22.20
EN
24
installation
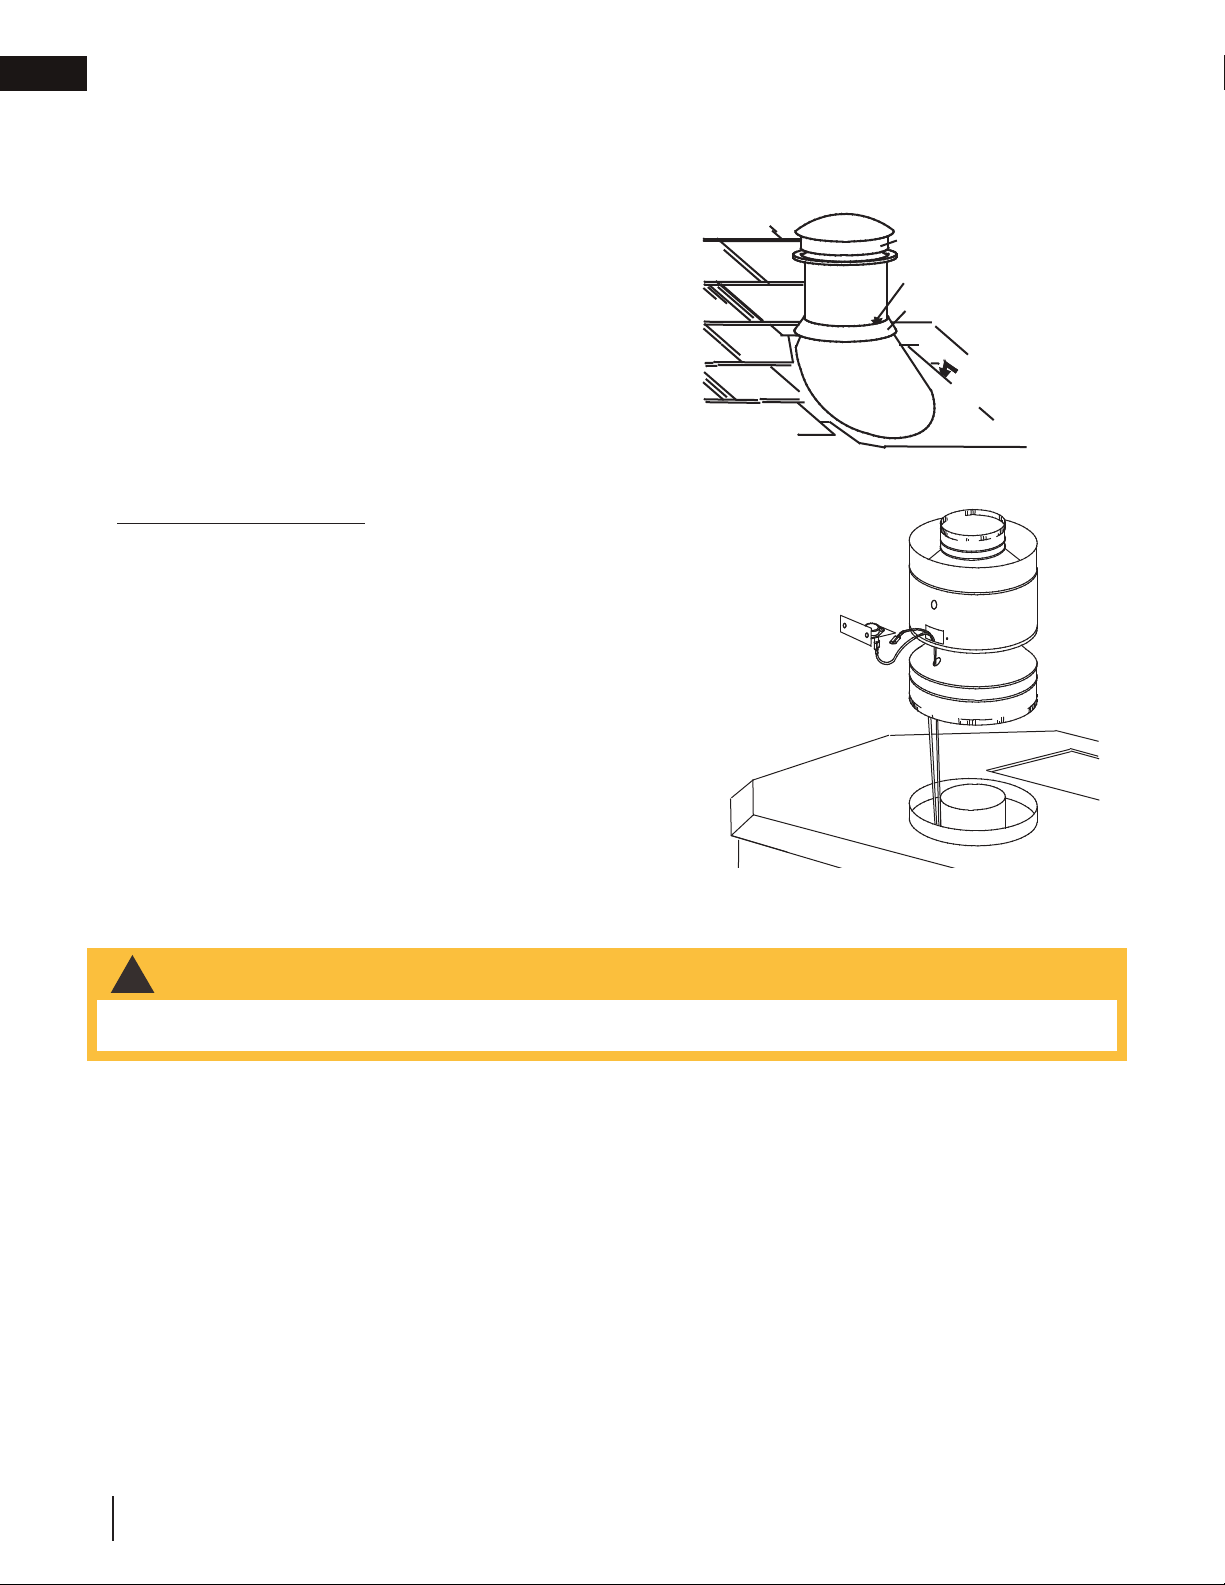
3.2.2 installing fl ashing and storm collar
RAIN CAP
CAULKING
STORM COLLAR
WEATHER
SEALANT
FLASHING
The following are generic installation instructions for installing the flashing around a chimney. Installation of all
types of factory-built chimney systems is to be in accordance with the chimney manufacturer’s installation
instructions. Remove the nails from the shingles above and to the sides of the chimney. Place the flashing over
the chimney pipe and slide underneath the sides and upper edge
of the shingles. Ensure that the chimney pipe is properly
centered within the flashing, giving a 3/4” (19.1mm) margin all
around. Fasten to the roof on the top and sides. DO NOT NAIL
through the lower portion of the flashing. Make weather-tight by
sealing with caulking. Where possible, cover the sides and top
edges of the flashing with roofing material. Apply waterproof
caulking, provided with the flashing, around the chimney, 1”
(25.4mm) above the top of the flashing and push the storm collar
down into the caulking. Insert a rain cap onto the top of the last
chimney section.
3.2.3 installing natural vent
ADAPTER INSTALLATION:
• Remove the spill switch bracket from the rear of the
adapter.
• Gently pull the two wire terminals (located inside the
7" (178mm) fl ue collar at the top of the appliance) out
approximately 8" (203mm).
• Bring the wires through the lower hole in the adapter and
out the spill switch opening. To pass the wires through
the hole more easily, temporarily tape the two terminals
together.
• With the spill switch opening aligned to the back of the
appliance, take hold of the adaptor base and push the
crimped edge into the appliance fl ue collar.
• Connect the wire terminals to the spill switch and resecure
the bracket.
For aesthetics, the adaptor has been designed to accept a
standard matte black 7" (178mm) appliance pipe and a decorative
black band (standard with the GS150KT). Both are available from
your local authorized dealer / distributor.
SWITCH
SPILL
ADAPTER
3.2.4 combustion air
If using outside air, connections can be made through a hole in the fl oor to line up with the hole in the pedestal
base. Use a fresh air kit available through your local authorized dealer / distributor. Secure the 4" (102mm)diameter
aluminum liner to the hole in the base of the pedestal. Avoid cutting away fl oor joist, electrical wiring or plumbing.
Seal around the outside pipe with insulation to prevent drafts.
• Any appliance needs air for safe operation and must be installed in such a way that adequate combustion air is
available. This appliance is designed to function using either outisde or inside (room) air.
!
WARNING
Loading ...
Loading ...
Loading ...