Loading ...
Loading ...
Loading ...

12
EN
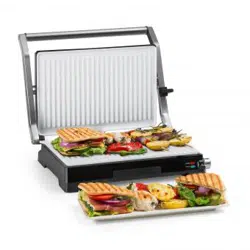
OPERATION
Do not use this product to cook or defrost frozen food. All food must be completely
defrosted before cooking it with this product.
Note: During the initial uses of this product, it may produce some smoke. This is
normal and will subside with further use.
1. Before using this product for the rst time, clean it as described in the “Care and
Maintenance” section.
2. Press in the end of the Locking Latch nearest the Handle to unlock the product.
3. Open the unit by pulling the Handle up.
4. Close the Plates and turn the unit on by plugging it into a standard electrical outlet.
Verify that the Power Indicator Light illuminates in orange.
CAUTION
Risk of burns! The Cooking Plates and metal surfaces of the unit will
become extremely hot when in use. To avoid a burn hazard, wear heat
resistant mitts or gloves and touch only the black portion of the Handle.
5. After the unit preheats for approximately ve minutes, the Ready Indicator Light will
illuminate in green, indicating the product is ready for use.
6. Use the Handle to lift the Upper Plate. Place food on the Lower Plate using wooden
or plastic heat-resistant utensils. Do not use metal utensils on this product, as they
will scratch and damage the Plates’ non-stick coating.
7. Use the Handle to lower and rest the Upper Plate on top of the food.
Note: The cooking time for different foods depends on the type and thickness of the
foods. Foods should be cooked thoroughly before consumption.
8. When the food is cooked as desired, lift the Handle to open the Plates, then remove
the food using the utensils. If more cooking will be done at this time, close the Plates
to conserve heat.
9. Repeat Steps 7-9 until all cooking is complete, reapplying cooking oil as necessary.
10. Turn off the product by unplugging the Power Cord from the electrical outlet.
11 . When the unit has completely cooled, clean and dry it.
12. Lock the unit in its closed position by pressing in the end of the Locking Latch farthest
from the Handle.
Loading ...
Loading ...
Loading ...