
Loading ...
Loading ...
Loading ...
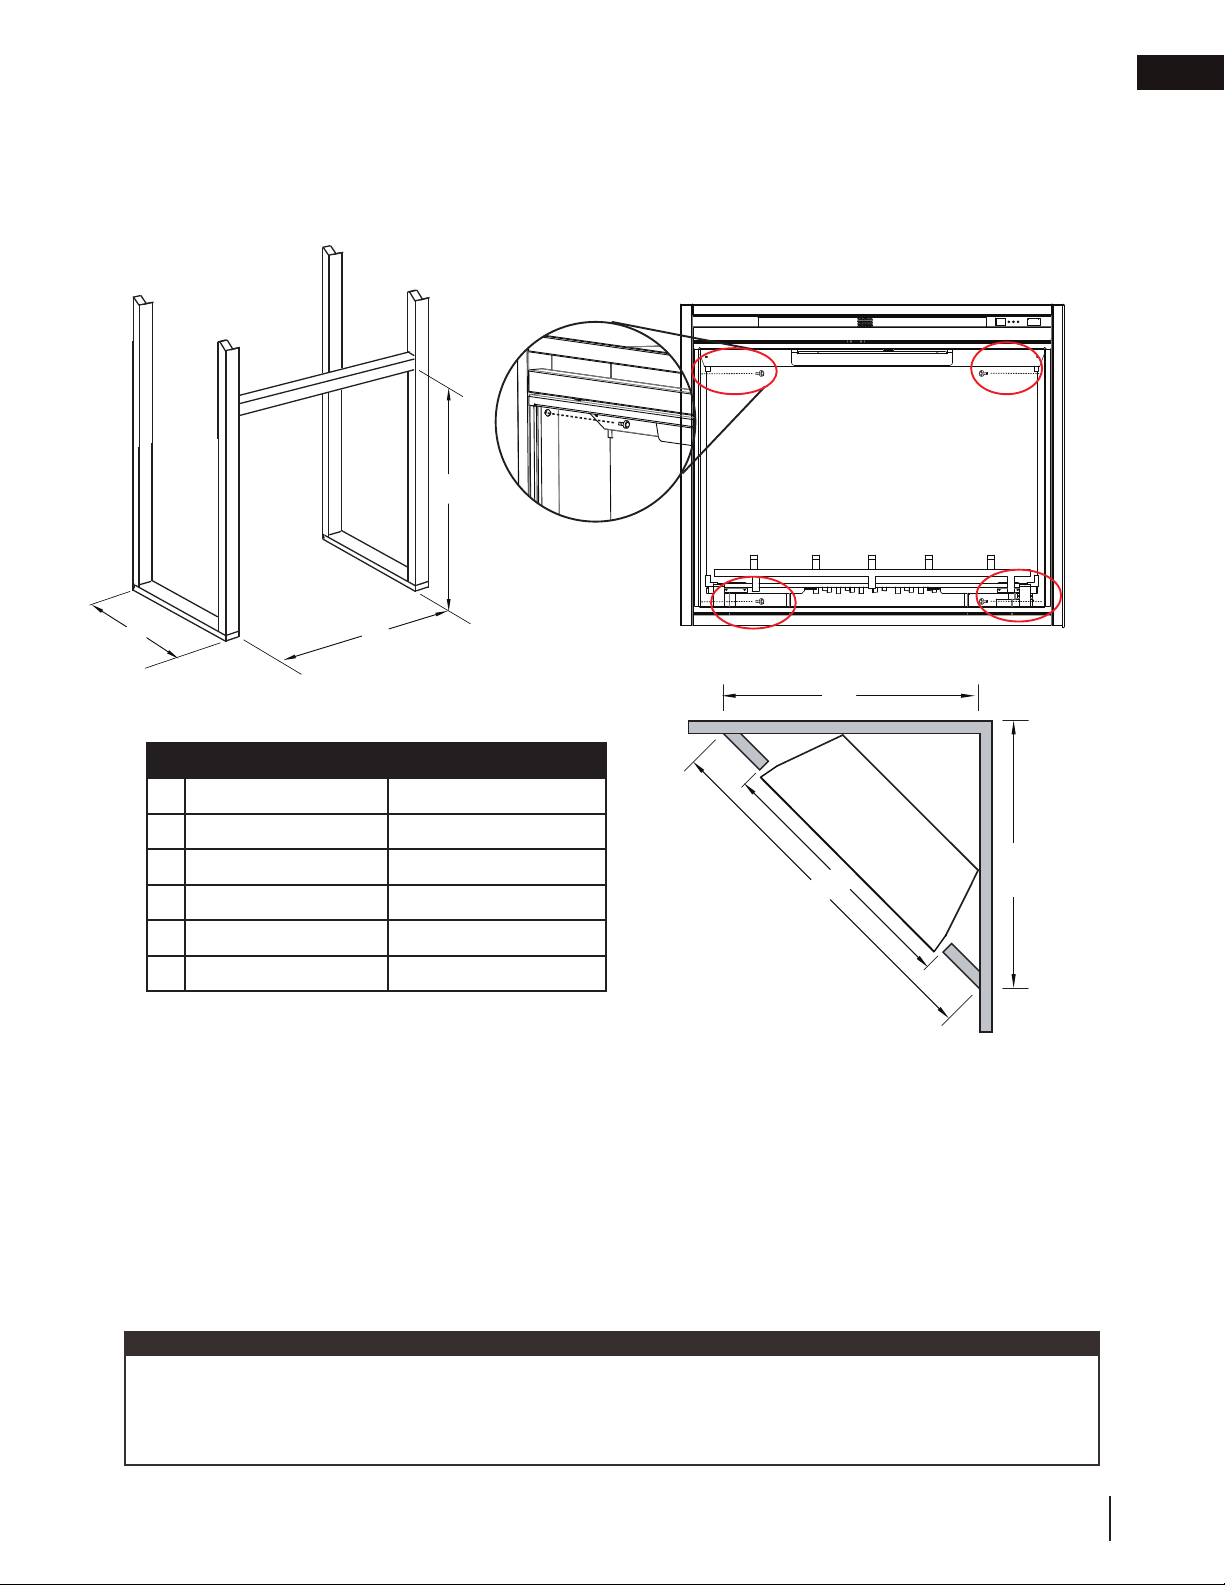
Fig. 2
A. Once the rough opening has been prepared and the power has been routed to the right side of the
recess, the appliance may be installed.
B. The electrical connection must be made prior to placing the appliance into position (see "hard wiring
installation" section). Have 2 people lift the appliance up and insert into the opening of the wall.
C. To secure the appliance to the wall, remove the glass door (see "glass door removal and installation"
section) and log / grate / ember bed (see "log, grate and ember bed assembly / removal" section).
D. Level the appliance and use the 4 screws (supplied) to secure the appliance to the wall studs (Fig. 2).
E. Install the brick panels (see "brick panel installation and removal" section), log /grate and ember bed
assembly, and the glass door to the appliance.
Prepare rough in framing following the recommended dimensions in Figure 1. For the corner rough in framing,
follow the recommended dimension in Figure 3.
Select a location that is not prone to moisture and is located at least 36" (91.4cm) away from combustible
materials such as curtain drapes, furniture, bedding, paper, etc.
L
K
J
B
C
B
A
Fig. 1
Fig. 3
EN
W415-2165 / J / 04.28.2020
11
installation
3.3 framing
NEFB33H NEFB40H
A
10" (254mm)
14 1/2" (36.8cm)
B
33 1/4" (84.4cm)
39 1/2" (100.3cm)
C
28 3/8" (72cm)
31 5/8" (80.1cm)
J
44 1/2" (113cm)
60 3/4" (154.3cm)
K
31 1/2" (80cm)
43" (109.2cm)
L
31 1/2" (80cm)
43" (109.2cm)
In order to avoid the possibility of exposed insulation or vapour barrier coming in contact with the appliance
body, it is recommended that the walls of the appliance enclosure be "fi nished" (ie. drywall/sheetrock), as you
would fi nish any other outside wall of a home. This will ensure that clearance to combustibles is maintained
within the cavity.
note:
Loading ...
Loading ...
Loading ...