Loading ...
Loading ...
Loading ...
6 | perlick.com/residential
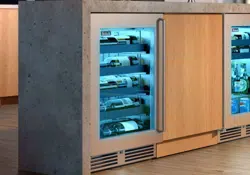
PERLICK RESIDENTIAL UNDERCOUNTER USE & CARE GUIDE
CARE & MAINTENANCE
MAINTENANCE
SEASONAL MAINTENANCE FOR UL-APPROVED OUTDOOR
MODELS
Winterizing
This process should occur when the daily low temperatures is at
or below the temperatures stated below:
Freezer models: 32° F
Refrigerator models: 38° F
Beverage Center: 42° F
Wine Reserve: 45° F
It is best to winterize your unit before the low temperatures
listed above.
1. Turn the unit to OFF position by pressing the OFF button on
the controller. The controller displays the word “OFF” and,
for Signature Series models, turn the master switch located
behind the grille o (if the power cord is accessible, unplug
the power cord. If not, turn o the circuit breaker to the
electrical receptacle the cabinet is plugged into).
2. Remove all contents from the unit.
3. Remove the front grille.
4. Clean the condenser by using a vacuum cleaner to remove
loose debris (leaves, dirt, etc.) that may have accumulated
inside the grille.
5. Reinstall the front grille.
6. Clean the interior of the unit using stainless steel cleaner and
polish (see page 9).
7. Clean the exterior of the unit using stainless steel cleaner and
polish (see page 9).
NOTE: Do not place a cover over the unit. While not required, you may
choose to remove the unit from the outdoor location and store indoors.
CAUTION
Operating the unit at temperatures
lower than those recommended will
void the warranty.
Spring Start-Up
This process should occur after the daily low temperatures is
above the temperatures stated below:
Freezer models: 32° F
Refrigerator models: 38° F
Beverage Center: 42° F
Wine Reserve: 45° F
1. Remove the grille.
2. Check the condensing unit to ensure it is clear of loose debris,
and clean as necessary with a vacuum cleaner.
3. Reattach front grille to the unit.
4. Clean the interior of the unit using stainless steel cleaner and
polish (see page 9).
5. Clean the exterior of the unit using stainless steel cleaner and
polish (see page 9).
6. Plug the unit into the electrical receptacle or turn on the
circuit breaker.
7. Turn on the master switch located behind the grille if model
is Signature Series. Press the OFF button one time to turn
the unit on. The controller display will show the actual
temperature inside the cabinet.
8. The cooling process will begin to bring the unit to the set
temperature. It’s recommended you run the unit for 24 hours
to stabilize the operating temperature before using.
DANGER
Never attempt to repair or perform
maintenance on the unit until the
main electrical power to the unit has been disconnected!
LED REPLACEMENT
Call your Perlick Factory Authorized Service Center. For the
location of the Service Center in your area, contact your selling
dealer, inquire via the web at www.perlick.com, E-mail us at
warrantyserv@perlick.com, or call (800) 558-5592 during normal
business hours.
Loading ...
Loading ...
Loading ...