Loading ...
Loading ...
Loading ...
14
Assembly Instructions
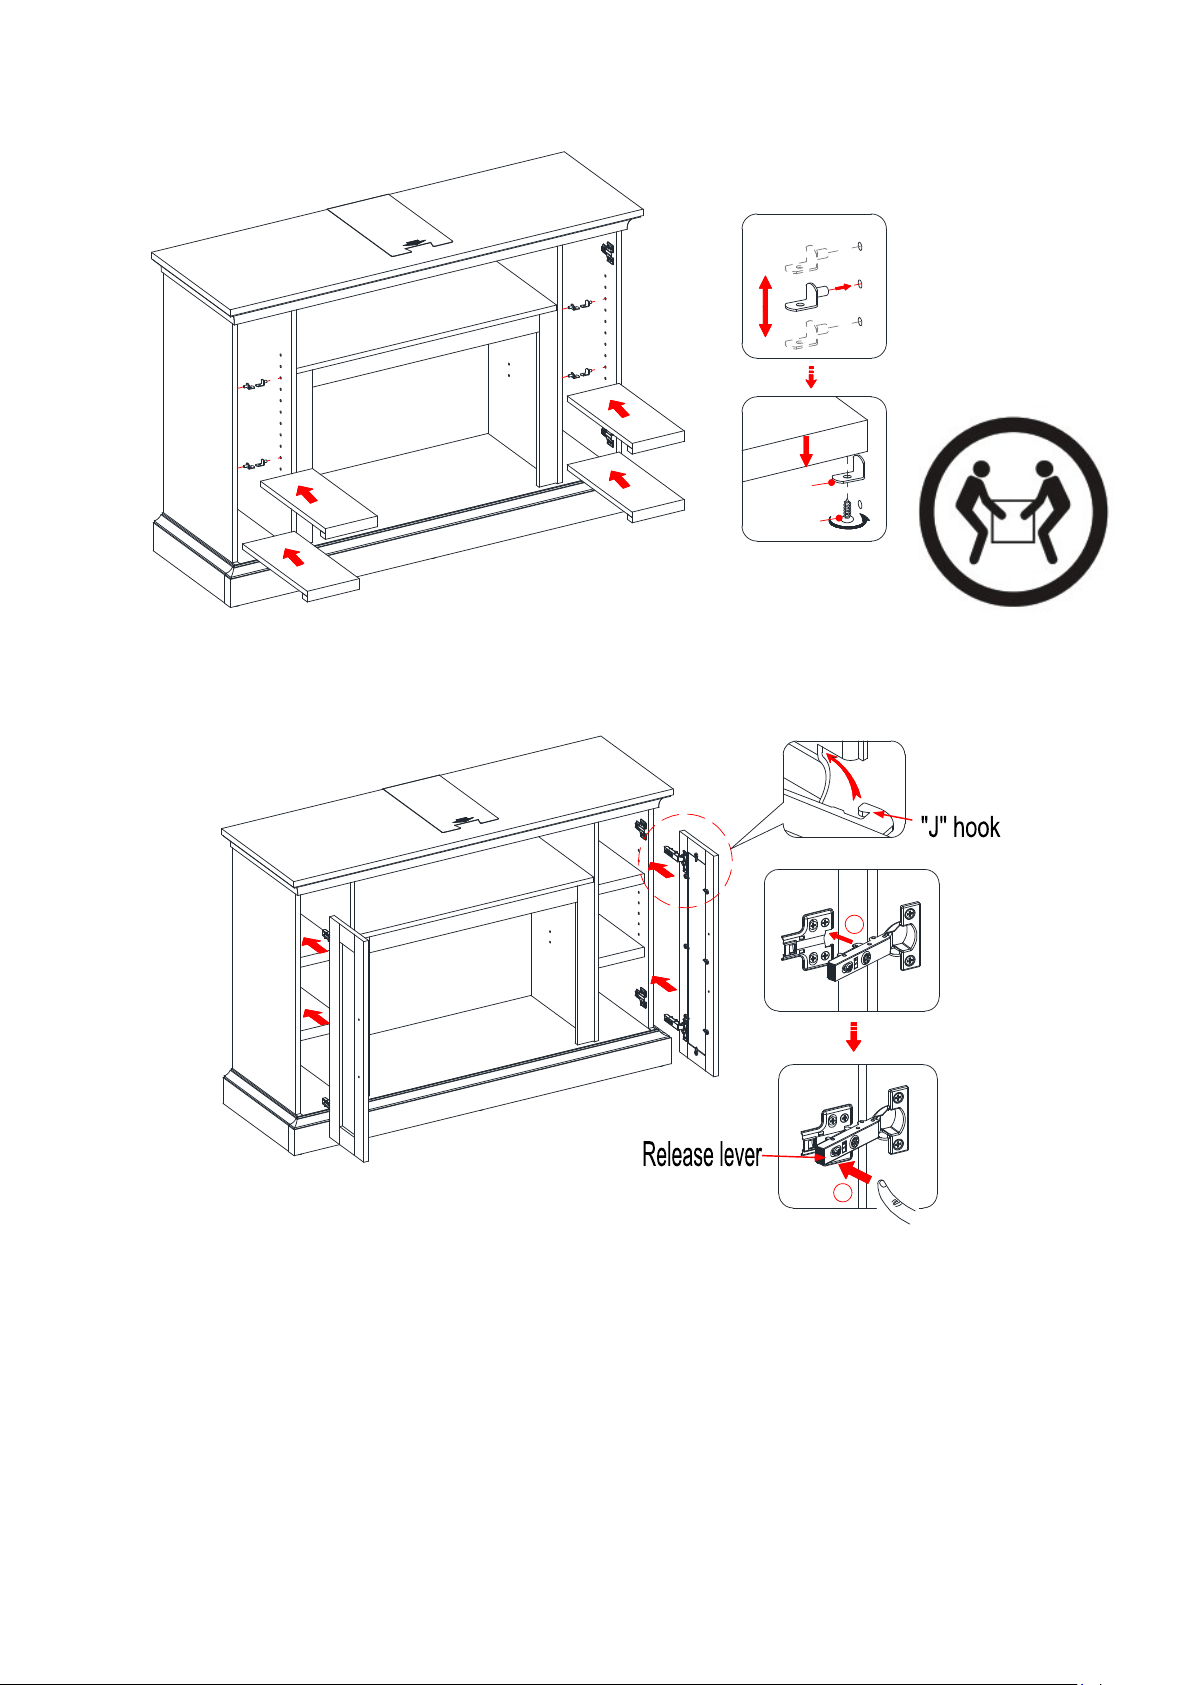
24. Ask for assistance to lift the assembly unit upright and position it near the final location.
25. Insert eight Shelf Supports (13) into the holes at the desired height inside each side compartment. Make
sure you place four shelf supports in the same level, so the shelf is not tilted. Tilt and rest the Adjustable
Shelves (N) onto the Shelf Supports (13) and secure them into place with 12 mm Flat Head Screws (4).
26. Pick up one Door (P) and attach the extended hinge arms to the hinge bases installed on the Right Side
Panel (E). Please follow the steps below to combine the door hinges together.
a). Extend both hinge arms of the Door (P) to open position.
b). Locate the lugs on the mounting plates pre-attached on the Right Side Panel (E) into the “J” hooks
beneath the hinge arms.
c) Press lightly on the end of both hinge arms to engage the catch.
d) To remove the hinge arms from the mounting plates, press gently in the release lever on the back of
hinge arms.
27. Repeat the same procedure to install the other Door (P) to the Left Side Panel (D).
28. Open and close the doors to make sure they are aligned and shut correctly. If necessary, adjust the screws
for a good fit. Refer to the hinge sticker on door for adjustment.
A
D
E
N
N
N
N
P
13
4
A
D
E
P
P
2
1
Loading ...
Loading ...
Loading ...