Loading ...
Loading ...
Loading ...
9
www.warmlite.co
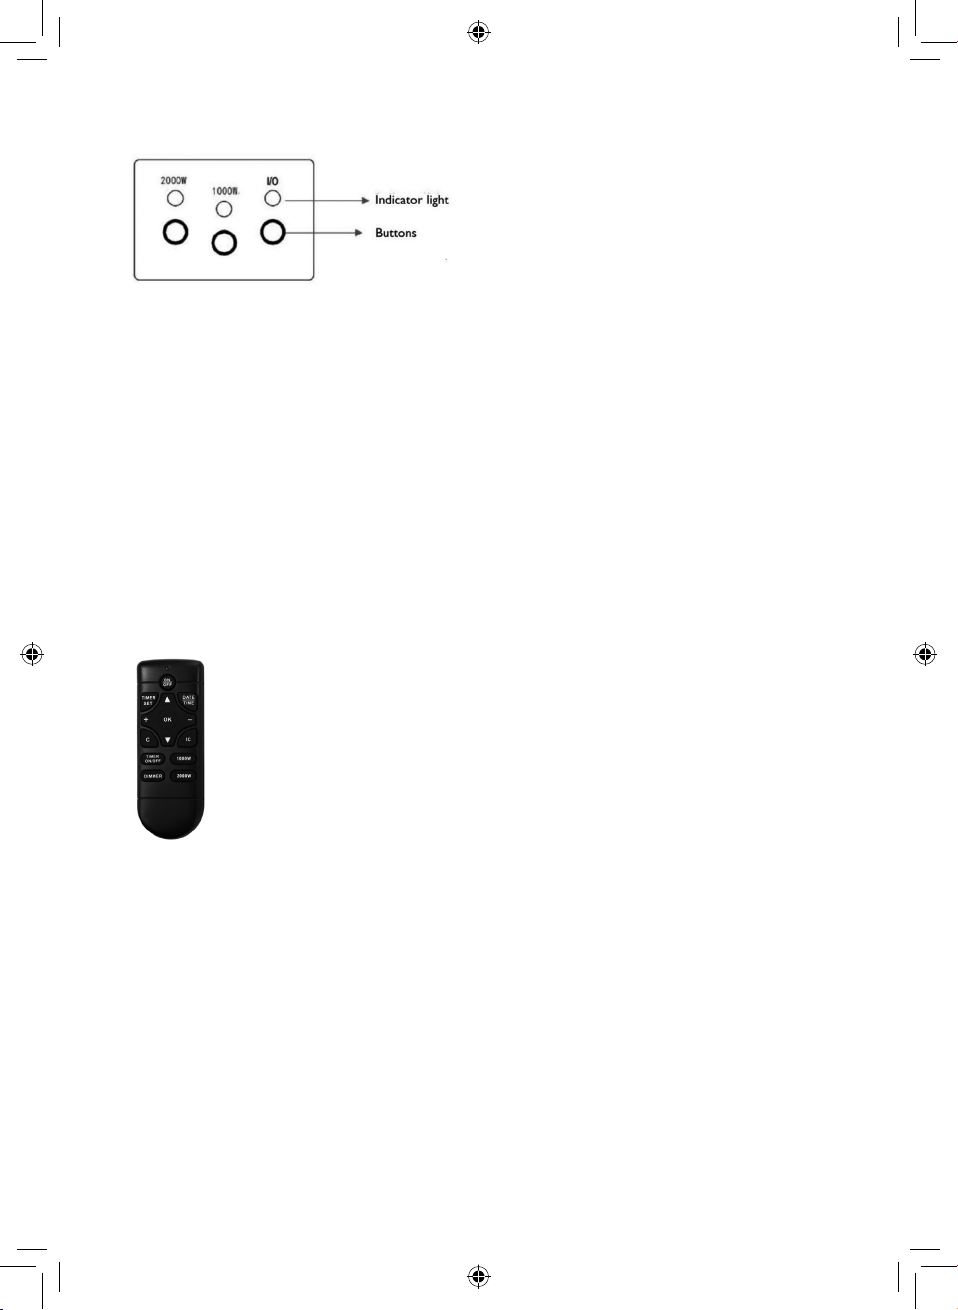
Manual Operation:
• Switch on the standby switch at the left hand side
of the re canopy.
• Press the O/I button once to turn on the appliance
and re eect. A red indicator light will appear to
indicate that the function is ON.
• Press the O/I button for 3 seconds this will operate
the dimmer mode. There are 5 levels of ame
brightness available.
• Press the 1000W button once for the low heat
setting. A red indicator light will appear to indicate
the function; press twice to switch o the heat
setting.
• Press the 2000W button once for the high heat
setting. A red indicator light will appear to indicate
the function; press twice to switch o the heat
setting.
Remote Operation:
Adjusting the Flame Effect Brightness:
• Press the “DIMMER” button on the remote control
to operate the dimmer mode. There are 5 levels
ame brightness available. The ame brightness
changes, step by step, with each press of the
button.
Setting the Time and Date:
• Settings are made using the remote control.
• Press the “DATE TIME” button, then press the “▲”
or “▼” button to select the date.
• Press the “DATE TIME” button again, then press
the “+” or “-” button to set the hour.
• Press the “DATE TIME” button again, then press
the “+” or “-” button to set the minute.
• Press the “OK” button to conrm and complete.
Selecting the Temperature:
NOTE: The set temperature must be higher than the
room temperature for the heat to be emitted.
• Press the “+” or “-” button on the remote control
to set the temperature, which ranges from 15 to
30℃. The default set temperature is 20 ℃.
Selecting the Heating Operation:
• Press the ON/OFF button once on the remote
control to turn the re and ame eect ON/OFF.
• Press the “1000W” button once to turn the low-
level heating on and press twice to stop heating.
• Press the “2000W” button once to turn the high-
level heating on and press twice to stop heating.
NOTE: The set temperature must be higher than the
room temperature for heat to be emitted.
The AUTO Function (Intelligent Control):
• Press the “IC” button on the remote control to turn
the automatic heating ON or OFF.
• When turned on, the re will automatically
change the heating mode depending on the set
temperature and the room temperature.
• During a timed starting process, it is possible to
start heating ahead of schedule.
NOTE: The set temperature must be higher than the
room temperature for heat to be emitted.
The Timer Function:
• Up to 10 dierent timer settings can be
programmed.
• Each timer setting consists of a Date, Timer ON
time and Timer OFF time.
• The maximum duration of each setting is 23 hours
50 minutes.
• The date for each setting can be any day or days
of a week.
• The date in each timer setting represents the date
of the Timer ON time.
• If the Timer OFF time being set falls on the second
day, it is unnecessary to set the date – you just set
the Timer OFF time.
Setting the Timer:
1. Select the settings
• Press the “TIMER SET” button, and the “serial
number” of the setting starts blinking.
• Press the “+” or “-” button to change the “serial
number” until you arrive at the serial number of
setting that you need to set or modify.
2. Select the date
• Press the “TIMER SET” button once again, and the
cursor on the left side of date starts blinking.
Loading ...
Loading ...
Loading ...