Loading ...
Loading ...
Loading ...
30
49-85221
Maintenance
CARE AND CLEANING: Maintenance
SHOCK OR BURN HAZARD: Before replacing oven light bulb, disconnect the electrical
power to the oven at the main fuse or circuit breaker panel. Failure to do so may result in
electric shock or burn.
WARNING
BURN HAZARD: The glass cover and bulb should be removed when cool. Touching hot
glass with bare hands or a damp cloth can cause burns.
CAUTION
Oven Light Replacement
NOTE: The glass cover should be removed only when
cold. Wearing latex gloves may offer a better grip.
Before replacing the bulb, disconnect electrical power to
WKHRYHQDWWKHPDLQIXVHRUFLUFXLWEUHDNHUSDQHO/HW
the bulb cool completely before removing it. For your
safety do not touch a hot bulb with a damp cloth. If you
do the bulb may break.
To remove:
7XUQWKHJODVVFRYHUFRXQWHUFORFNZLVHWXUQXQWLOWKH
tabs of the glass cover clear the grooves of the socket
and pull the cover off. Remove the bulb.
To replace:
Put in a new 40-watt appliance bulb. Place the tabs of
the glass cover into the grooves of the socket. Turn the
JODVVFRYHUFORFNZLVHWXUQ
NOTE:
Ŷ A 40-watt appliance bulb
is smaller than a standard
40-watt household bulb.
Ŷ Reconnect electrical power
to the oven once the new
bulb is installed.
Ŷ For improved lighting inside
the oven, clean the glass
cover frequently using a
wet cloth. This should be
done when the oven is
completely cool.
Bulb
Socket
Tab
3
1
ø2”
Max
length
Glass cover
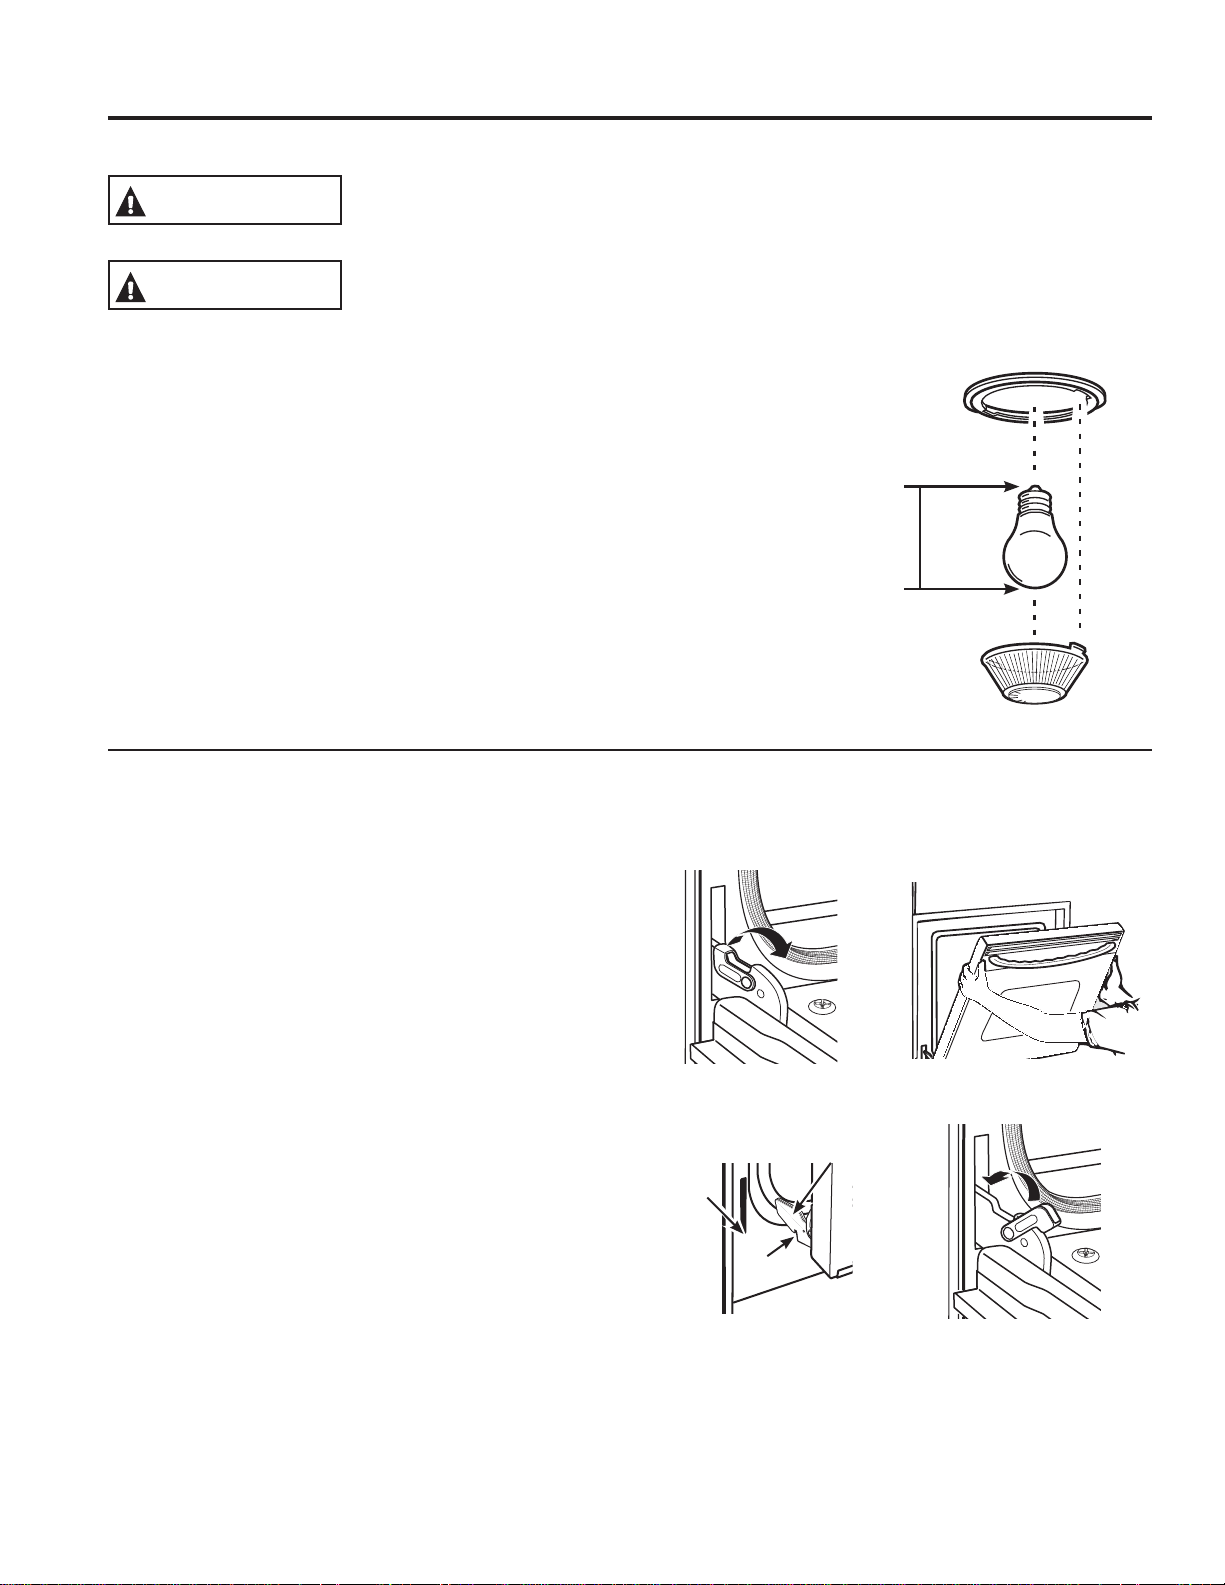
Lift-Off Oven Door
The door is very heavy. Be careful when removing and lifting the door. Do not lift door by the handle.
To Remove the Door:
1. Fully open the door.
2. Pull the hinge locks up and away from the range
frame to the unlocked position.
)LUPO\JUDVSERWKVLGHVRIWKHGRRUQHDUWKHWRS
4. Close door until the top of the door is approximately
´IURPWKHUDQJHIUDPH
/LIWGRRUXSDQGDZD\IURPWKHUDQJHXQWLOERWKKLQJH
arms are clear of the slots in the range frame.
To Replace the Door:
1. Firmly grasp both sides of the door near the top.
2. With the door at the same angle as the removal
position, rest the notch on the underside of the left
hinge arm on the bottom edge of the left hinge slot.
The notch in the hinge arm must be fully seated into
the bottom of the slot. Repeat for the right side.
)XOO\RSHQWKHGRRU,IWKHGRRUZLOOQRWIXOO\ RSHQWKH
notches in the bottoms of the hinge arms have not
VHDWHGFRUUHFWO\LQWKHERWWRPHGJHRIWKHVORW/LIWWKH
door off the range and repeat previous step.
4. Push the hinge locks toward the range cavity and
down to the locked position.
5. Close the oven door.
Removal positionPull hinge locks up to unlock
Push hinge locks down to lockRest notch on bottom edge
of hinge slot
Notch
Bottom
edge of
slot
Hinge arm
Loading ...
Loading ...
Loading ...