Loading ...
Loading ...
Loading ...
ML Power 1
Advanced Web Manual
EN
9
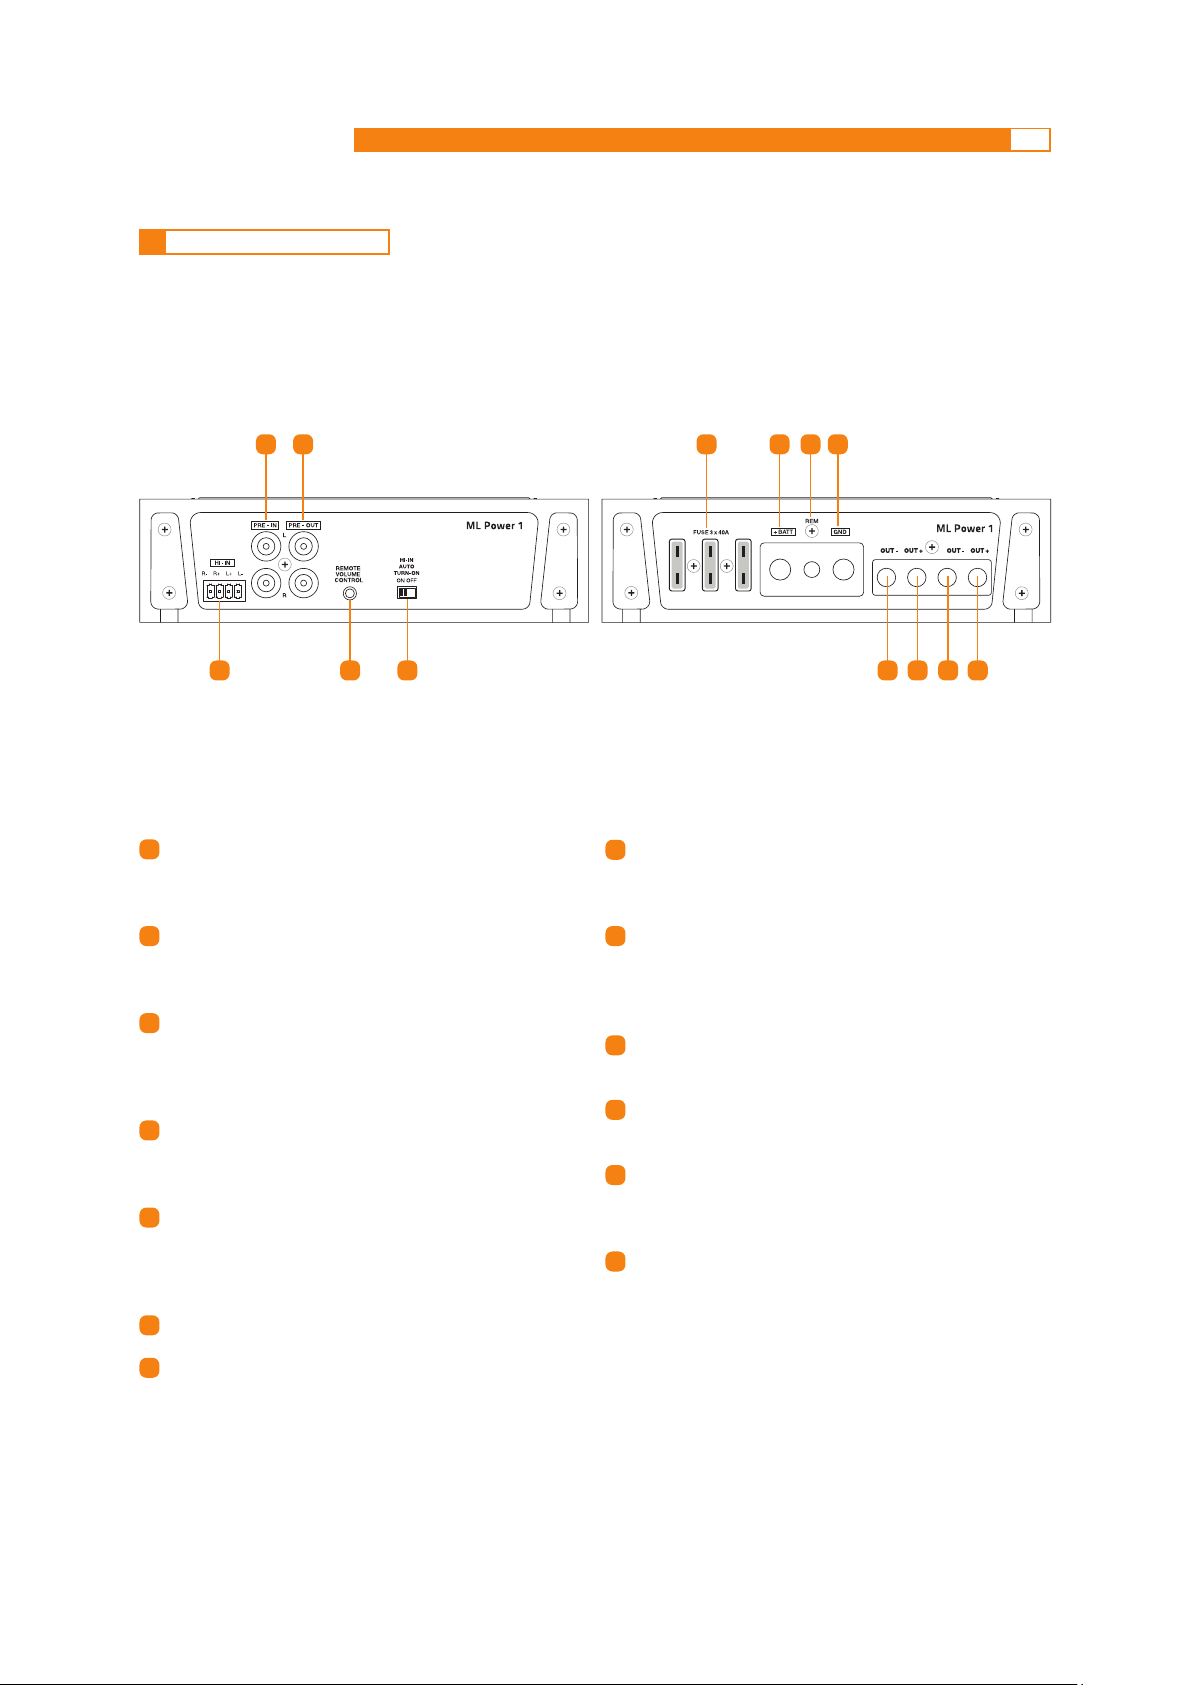
PRE-OUT This jack provide Left and Right pre-amplified
outputs to drive a separate amplifier. These signals are
full range, without crossover action.
PRE-IN: Left and Right pre-amplified inputs. Drive power
output with L and R mixed signal. Connect to pre-amplified
source output. Signal can be 0.2 to 5V RMS.
HI-IN:
Hi-Level signal Left and Right inputs. If the head
unit does not feature a pre-amplified output, connect
here its speaker wire to drive Left and Right channels.
Signal can be 0.8 to 20V RMS.
REMOTE VOLUME CONTROL:
Input for REMOTE SUB
VOLUME CONTROL. Connect here the adjustment control
that the amplifier features (optional).
HI-IN AUTO TURN-ON (ON - OFF):
Select ON to turn on
the amplifier through the speaker power cable, if the
source does not feature a 12V DC REMOTE OUT. Select
OFF if REMOTE OUT from the source is available.
PROTECTION FUSE: 3 x 40A
POWER (+ BATT): Terminal block for the amplifier 11 ÷ 15V
DC power supply positive pole connection. Insert here
the battery positive cable. The plug accepts cables up
to 2 A.W.G.
REMOTE IN: REMOTE IN terminal for the remote cable
coming from the device which turns on the amplifier.
Voltage must be between 7 and 16V DC.
POWER (GND): Terminal block for the amplifier power
supply negative pole connection. Insert here the battery
negative cable or wire connected to the vehicle chassis.
The plug accepts cables up to 2 A.W.G.
OUT - Speaker OUT: Negative power terminal, connect
to negative speaker terminal.
OUT + Speaker OUT: Positive power terminal, connect
to positive speaker terminal.
OUT - Speaker OUT: Negative power terminal (same
output as nr.10), connect to negative terminal of
second speaker if needed.
OUT + Speaker OUT: Positive power terminal (same
output as nr.11), connect to positive terminal of second
speaker if needed.
1
7
8
9
10
11
12
13
2
3
4
5
6
4
1 6
5
2
8 97
10 11 12 13
3
9. FRONT AND REAR PANELS
Loading ...
Loading ...
Loading ...