Loading ...
Step 2
Place carefully around the upright bars the 4 mounting
straps at the position shown - see Fig. 3. (Note the straps
must be positioned up tight to the cross bar as indicated)
Securely fix them by screwing in place fully the M4 x 10mm
screw. Ensure the brackets are fitted with the rear of the
straps facing directly backwards.
Step 3
Place the towel rail straps into the wall mounted brackets,
secure them with the locater pins by inserting it and giving it
a quarter turn - see Fig. 2. Check the four brackets and towel
rail are fitting horizontal. If not go back to step 2. The straps
can be repositioned to ensure that the towel rail is horizontal
when fitted to your wall. If the towel rail cross rails are not
level, loosen both straps on either left or right hand upright
bar. Lower the two straps and raise up the towel rail until it
is horizontal, then secure as indicated in step 2 and 3.
(e)
screws
No.10 x 40
mounting
straps
cross
bar
wall mtg.
brackets
Note: Mounting
strap must be
positioned up
tight to the
cross bar
Detail view of mounting
strap/cross bar
mounting
strap
upright
bar
(c)
wall mounting
bracket
(a)
mounting
strap
phillips head
screwdriver
flat head
screwdriver
(b)
screw M4x10
(d)
locater pin
rotated quarter
turn to lock
Bathroom Installations
If fitted in a room containing a bath or shower, to comply with
the current I.E.E. Regulations, a cable outlet will be
necessary with the supply to the heater controlled by a
double-pole pull-cord switch having a contact separation of
3mm in each pole. The body of the switch should be
situated as to be normally inaccessible to a person using a
bath or shower. Should Equipotential Earth Bonding be
required the earthing conductor in the supply cord is deemed
to provide the supplementary bonding connection (see
Regulation 547-03-0@,’16’h Edition I.E.E. Wiring
Regulations.
Installation
IMPORTANT - Protect the electrical connection whilst
handling the towel rail.
The towel rail must be permanently fixed to the wall using the
wall brackets supplied. The rail must be mounted vertically
as shown observing the minimum clearances stated.
WARNING - The towel rail is heavy. Do not remove without
seeking specialist advice.
Wall mounting
The Wall mounting accessory pack contains:
(a) 4 mounting straps
(b) 4 screws (M4 x 10)
(c) 4 wall mounting brackets
(d) 4 locator pins
(e) 4 wall mounting screws (No.10 x 40) and wall plugs
Procedure for fixing Wall Brackets
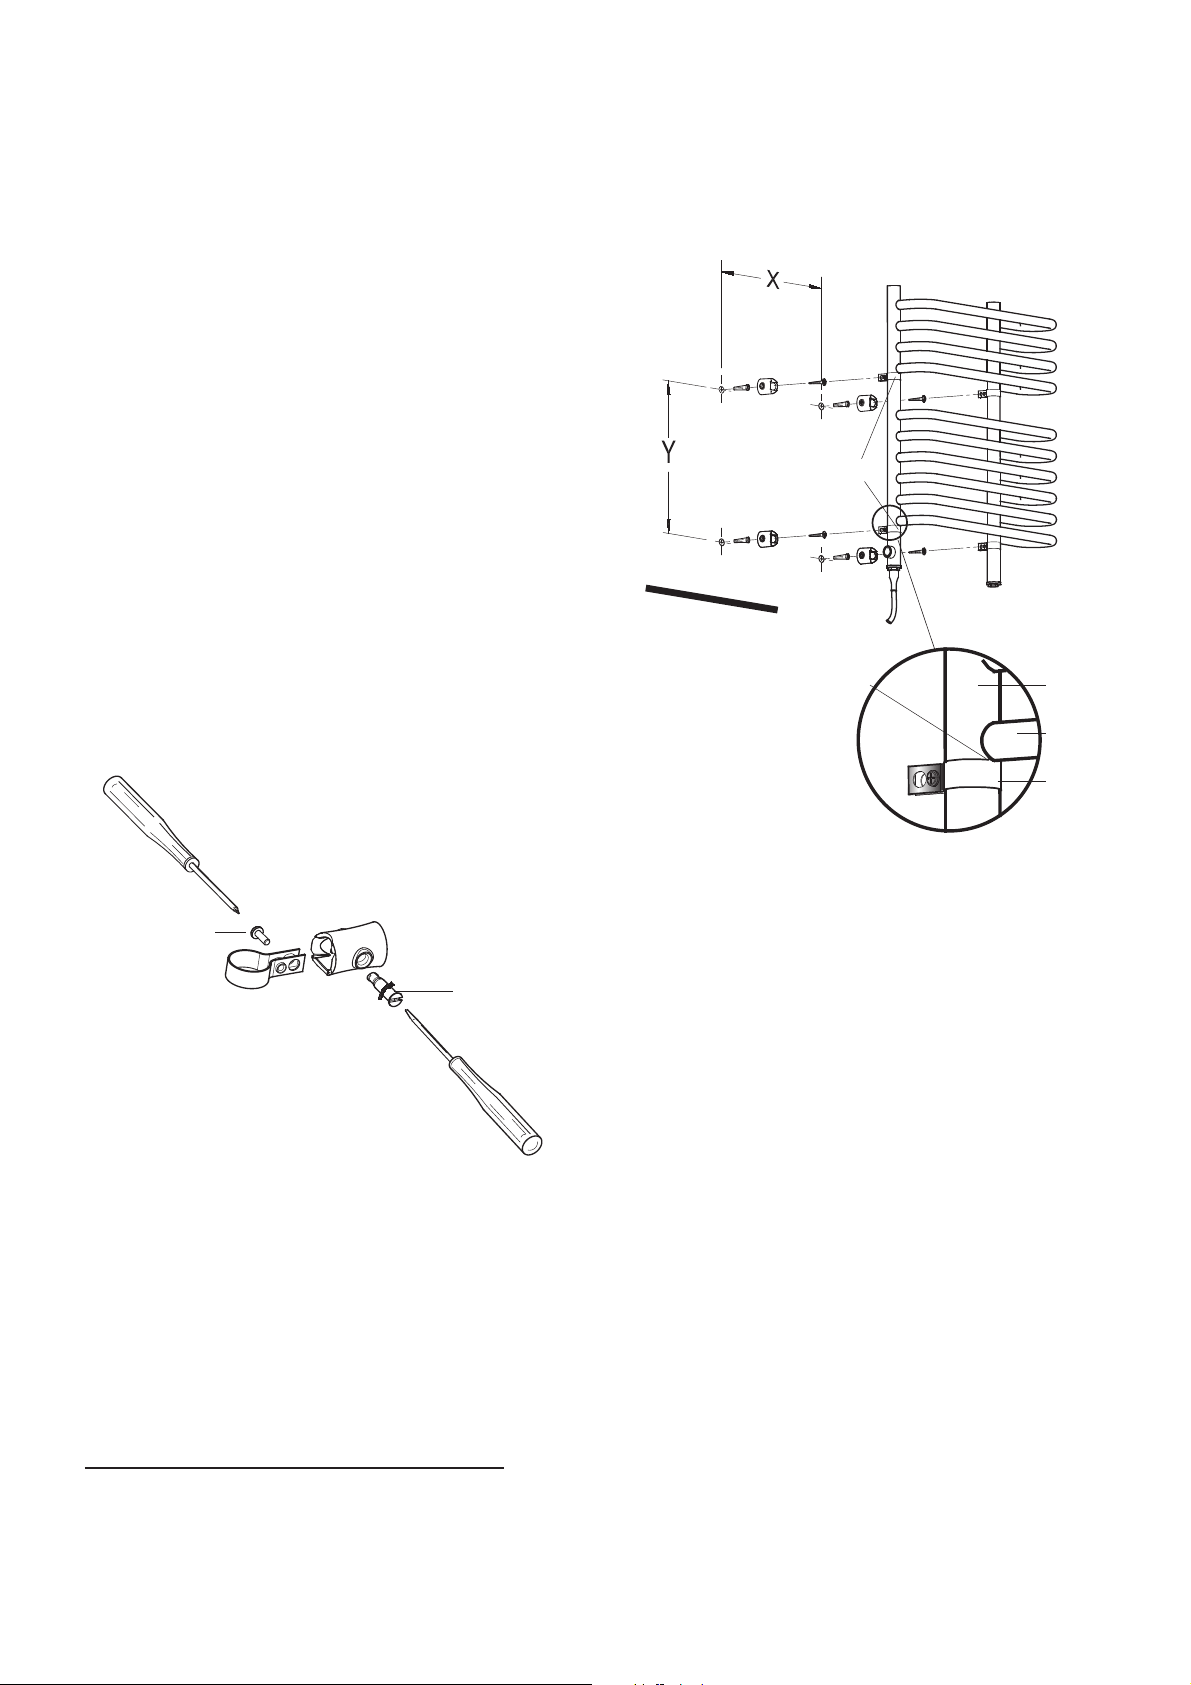
Step 1
Using Dim. X (fixed) and Dim. Y (variable) as a guide, mark
the hole positions for the four fixing brackets (or use the
template when provided) and drill and plug the wall to suit.
Note: Allow enough room above and below for the clearance
stated. Screw the four fixing brackets securely to the wall -
see Fig. 3.
Fig. 3
Wall bracket Fixing Dimensions
Model(s) Dim. X Dim. Y
BR150 385 318
BR350 603 638
BR400 447 638
Fig. 2
Loading ...
Loading ...