Loading ...
Loading ...
Loading ...

16
SETTING DEPTH ADJUSTMENT
Alter the depth of the cut by loosening the Depth
Locking Knob (15). The Base Plate (8) is now
free to adjust to the required depth when the
Plunge Release (12) is pressed.
Adjust the Base Plate to the required depth
using the Depth Scale (14) or a ruler and
retighten the Depth Locking Knob at the base so
it cannot exceed that depth.
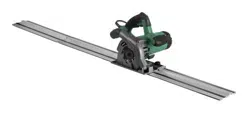
ASSEMBLING THE GUIDE TRACK
The aluminum guide track is used in conjunction
with the Plunge cut circular saw to make precise
cuts up to 53-1/2” (1.36 m). The guide track is
shipped in four sections. To assemble the guide
track, you will need a table or work
bench at least 4’ (1.2 m) long. Assemble the
guide track as follows:
1. Lay the track section (without joining bars)
on its back toward the left hand side of the
work surface.
2. Using the supplied hexagon key to loosen
the 4 screws in the joining bar, Slide the
cavities over the joining bar that is
protruding from track section. (Fig.9. Fig.10)
3. Insert joining bar into the matching cavities
in the left hand track section.(Fig.11)
NOTE: Do not tighten any screws until the guide
track has been fully assembled.
Fig.9
Fig.10
Fig.11
4. Repeat the process 2 and 3 to assemble
the 3nd and 4nd track section. so 4 track
sections be connected into a bar. (Fig 12)
Fig.12
5. Once all track sections are assembled,
tighten all 12 screws.
NOTE: It is important to ensure that the fully
assembled guide track forms a straight line for
cutting. Turning the guide track assembly on its
edge on a flat table or workbench will help in
aligning all four sections as they are tightened.
Once all screws are fully tightened, recheck the
assembly with a straight edge. Loosen and
retighten the screws as required to properly
align all sections of the guide track assembly.
ASSEMBLY AND OPERATING
SAVE THESE INSTRUCTIONS FOR REFERENCE
Loading ...
Loading ...
Loading ...