Loading ...
Loading ...
Loading ...
10
Assembly Instructions
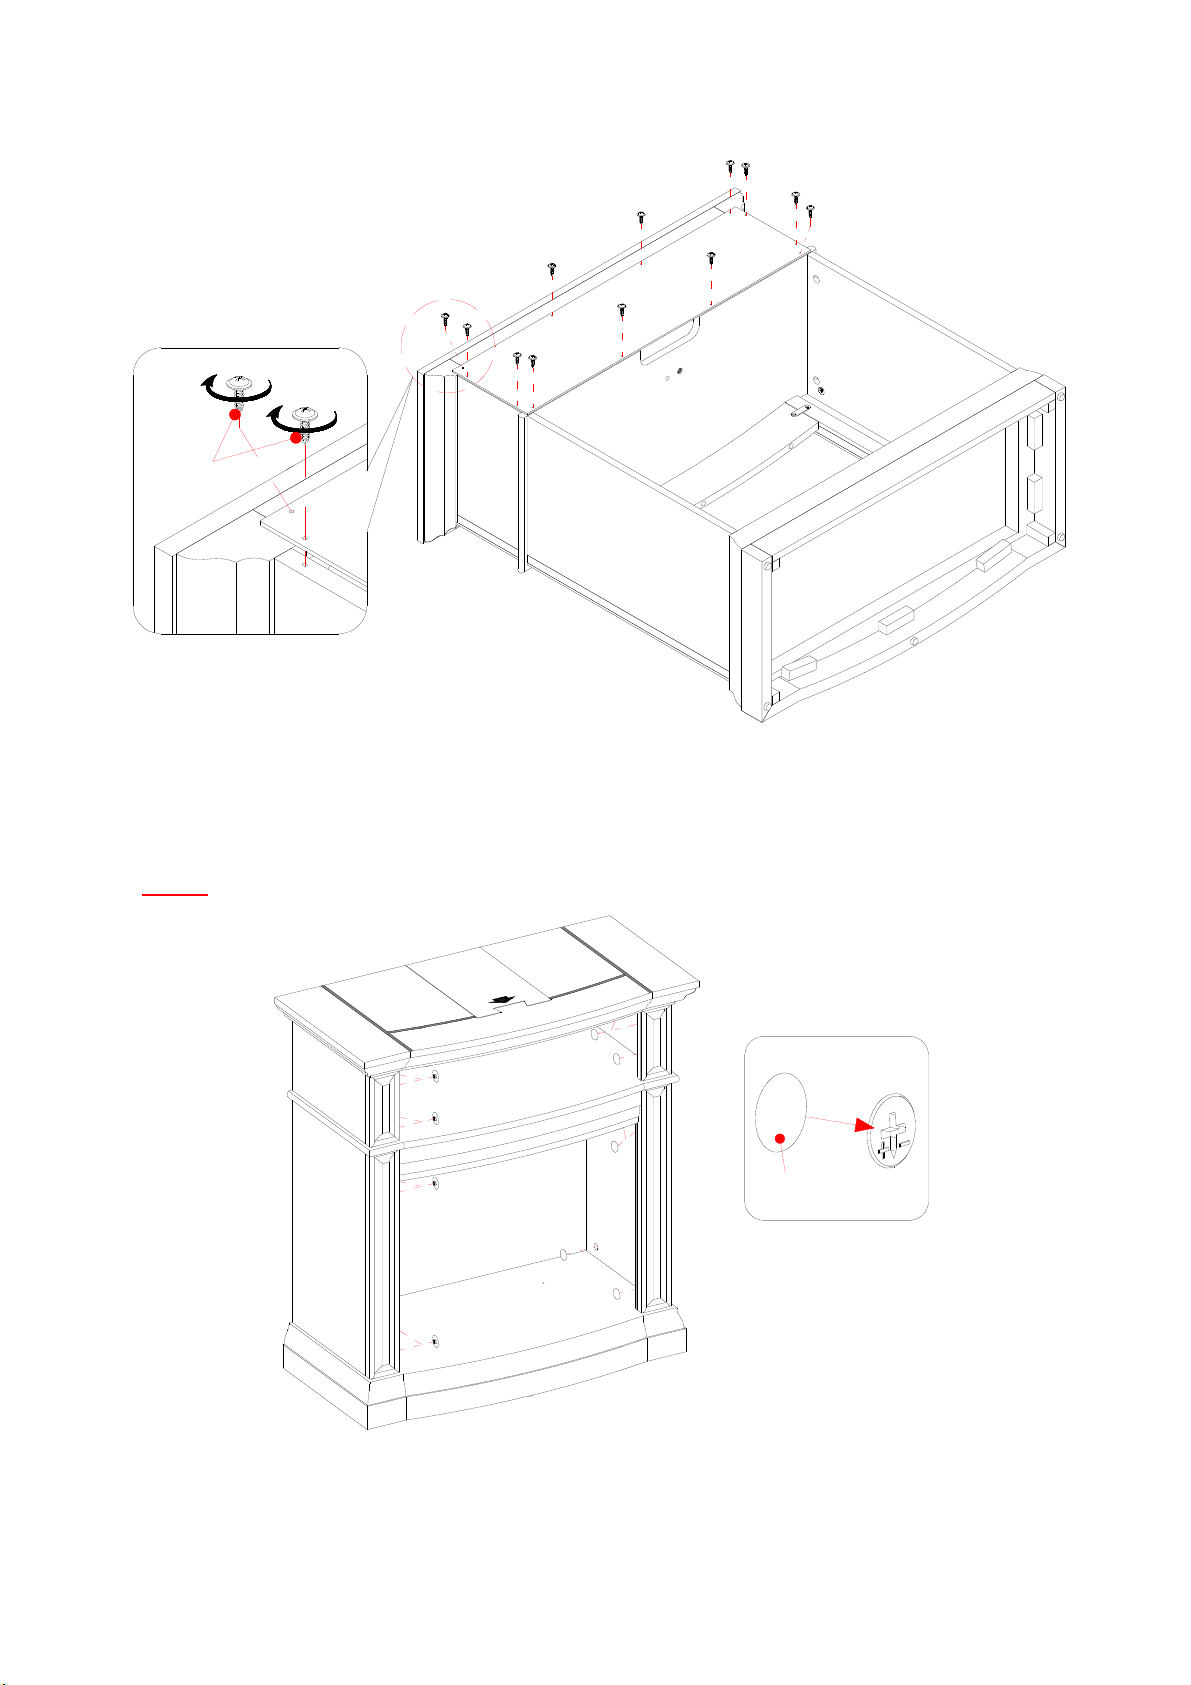
12. Now, go back and securely tighten all the Cam Locks and Wood Screws. Make sure all the parts are
tight and there are no gaps between the parts. This will help keep the unit square.
13. Pick up the Upper Back Panel (H) and align the drilled holes with pilot holes on the back stretcher of
the Top Panel (A). Secure it in place with the provided Washer Head Screws (5).
NOTE: We recommend attaching back panel with the screws at the corners first.
14. Stand the unit upright.
15. Plug the Cam Lock Covers (8) onto the visible Cams Locks to conceal the cams.
5
D
H
C
8
Loading ...
Loading ...
Loading ...