
Loading ...
Loading ...
Loading ...
Page: 11
DFT Installation Instructions
Apply Mortar
For optimum performance, the top of the heating cables should be a maximum of 3/4" (19mm) below
the finished floor surface� However, if the floor is insulated below, it is possible to increase this depth to
2-1/2" (64mm)� The Warm Tiles heating cables must be completely embedded in a cement-based layer
of mortar prior to installation of the flooring material� This will add about 1/4" (6mm) to the floor height�
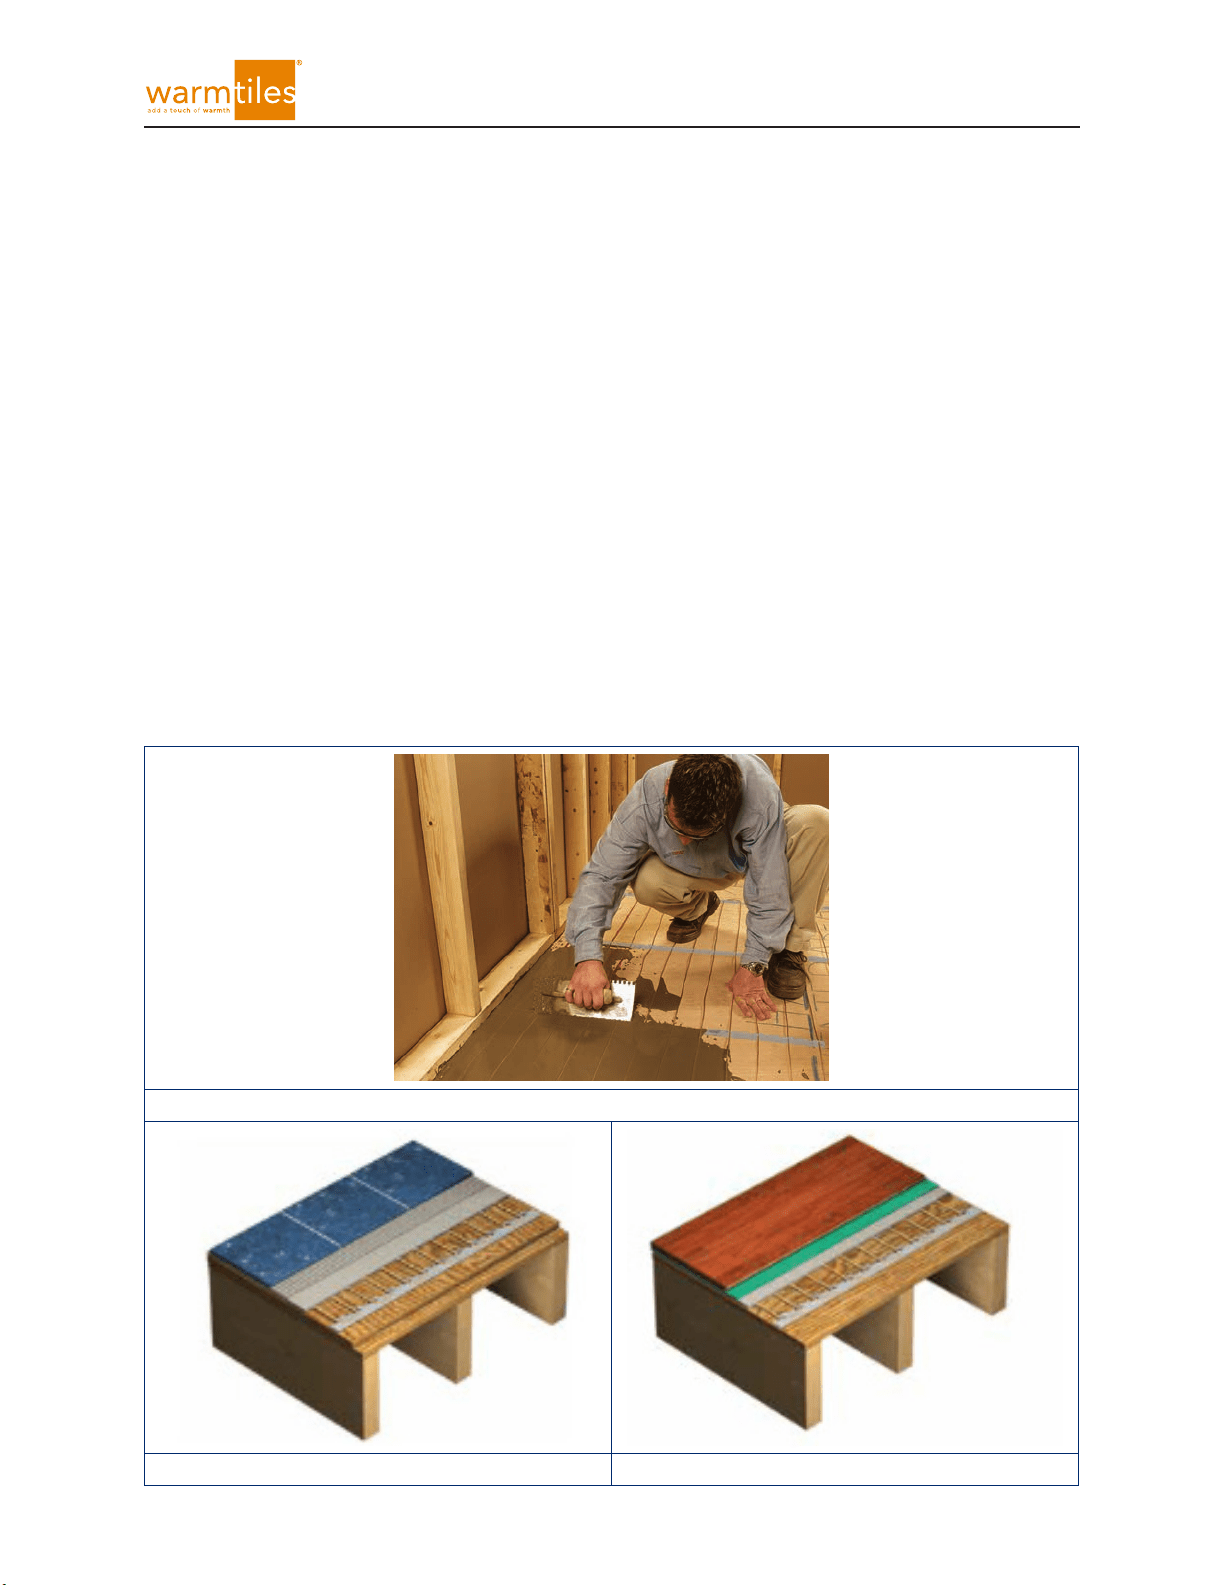
Once the cables have been installed on the floor, apply a ‘scratch coat of cement-based mortar
uniformly over the entire floor area, such that the heating cables are completely embedded� Self-leveling
cement-based mortar compounds may be most appropriate for this procedure, consult with your
flooring supplier for advice�
Follow the compound manufacturer’s instructions for preparing the mix�
Using a straight edge trowel, cover the entire floor area, including areas without cable, to maintain a
uniform floor height� Only apply mortar in the direction of the straight cable runs to minimize lateral
movement between adjacent cable runs (Figure 17 shows an example)�
After the mortar is dry, repeat test of the system as per the section “Verifying Resistance of Heating
Cable and Sensor�”
The tile can be set in the usual manner� Floors with heating cables installed are typically 1/4" (6mm)
higher than those without heating cables� Figures 18 and 19 illustrate each of the sublayers of a finished
floor when tile and laminate/engineered wood are used as the floor finishing materials�
Figure 17
Figure 18 Figure 19
Loading ...
Loading ...
Loading ...