Loading ...
Loading ...
Loading ...
Page 9
TO ATTACH VACUUM
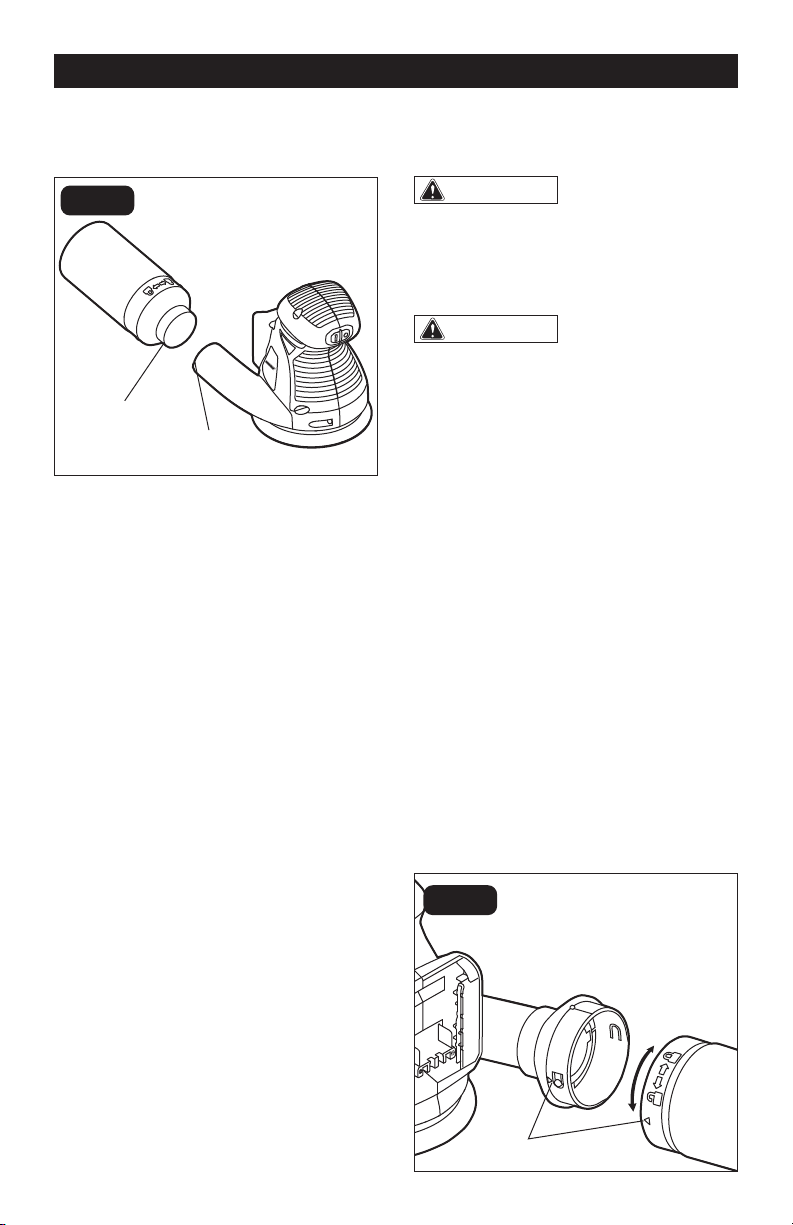
ADAPTOR (FIG. 2)
The vacuum adapter allows you to connect
a 2-1/2 in. diameter vacuum hose to help
keep the work area clean.
To install:
1. Detach the battery pack from the
sander.
2. Align the raised rib of the dust-exhaust
port with the groove of the vacuum
adaptor (FIG. 2).
3. Slide the vacuum adaptor forward and
push it onto the dust-exhaust port until
it is firmly seated.
NOTICE: From time to time, clean the vac-
uum adaptor with a dry brush.
To remove:
1. Detach the battery pack from the
sander.
2. Grip the adaptor firmly and pull it out
from the tool.
ATTACHING THE DUST BAG TO
THE ADAPTOR
WARNING:
Do not use the dust
bag when sanding metal. Using the dust
bag when sanding metal creates a re haz-
ard, which could damage the tool and lead
to serious personal
WARNING:
Collected sanding dust
from sanding surface coatings such as
polyurethanes, linseed oil, etc., can self-
ignite in the sander dust bag or elsewhere
and cause re. To reduce the risk of re, al-
ways empty the dust bag frequently while
sanding and never store or leave a sander
without totally emptying its dust bag. Also
follow the recommendations of the coating
manufacturers.
Your sander is supplied with a dust-
collecting bag to help you keep the working
area clean. The dust bag is ideal for smaller
jobs.
To install:
1. Detach the battery pack from the
sander.
2. Align the indicators on the vacuum
adaptor and the dust bag.
3. Slide the dust bag forward and push
it onto the adaptor. Rotate the bag
clockwise to lock it in place (FIG. 3).
ASSEMBLY
Groove
Raised Rib
FIG. 2
Lock
Unlock
Indicators
FIG. 3
Loading ...
Loading ...
Loading ...