Loading ...
General
The towel rail is designed to provide an all year round service for
airing towels and articles of clothing. It is not intended to provide a
sole heating service, but will take the chill off a small size bathroom,
lavatory or en suite.
No routine maintenance is necessary apart from occasional cleaning.
The unit is splashproof to IPX5 standard.
Electrical
WARNING - This appliance must be earthed
The electrical installation of this towel rail must be carried out by a
competent electrician in accordance with the current I.E.E Regulations
for Electrical Equipment. The towel rail is suitable for use on an A.C.~
electrical supply. Before installation check that the supply voltage
corresponds with that marked on the rail.
IMPORTANT - The wires in the mains lead are coloured in
accordance with the following code:
BLUE - NEUTRAL
BROWN - LIVE
GREEN/ YELLOW - EARTH
As the colours of the wires in the mains lead of this
appliance may not correspond with the coloured markings identifying
the terminals in your plug, proceed as follows:
The wire which is coloured GREEN and YELLOW must be
connected to the terminal in the plug which is marked with the letter
E or by the earth symbol or coloured green or green and yellow.
The wire which is coloured BLUE must be connected to the terminal
which is marked with the letter N or coloured black.
The wire which is coloured BROWN must be connected to the terminal
which is marked with the letter L or coloured red.
This appliance must only be used on A.C. mains supply of 230/240
Volts~.
Installation
If fitted in a room containing a bath or shower, to comply
with the current I.E.E. Regulations, a cable outlet will be
necessary with the supply to the heater controlled by a
double-pole pull-cord switch having a contact separation of 3mm in
each pole. The body of the switch should be situated as to be normally
inaccessible to a person using a bath or shower. Alternatively the switch
can be located outside of the bathroom.
IMPORTANT - Protect the electrical connection whilst
handling the towel rail.
The towel rail must be permanently xed to the wall using the wall
brackets supplied.
WARNING - to ensure safe/ correct operation the rail must only
be mounted vertically as shown in Fig. 1, observing the minimum
clearances stated.
WARNING - The towel rail is heavy. Care must be taken when
lifting and tting the towel rail.
Wall mounting
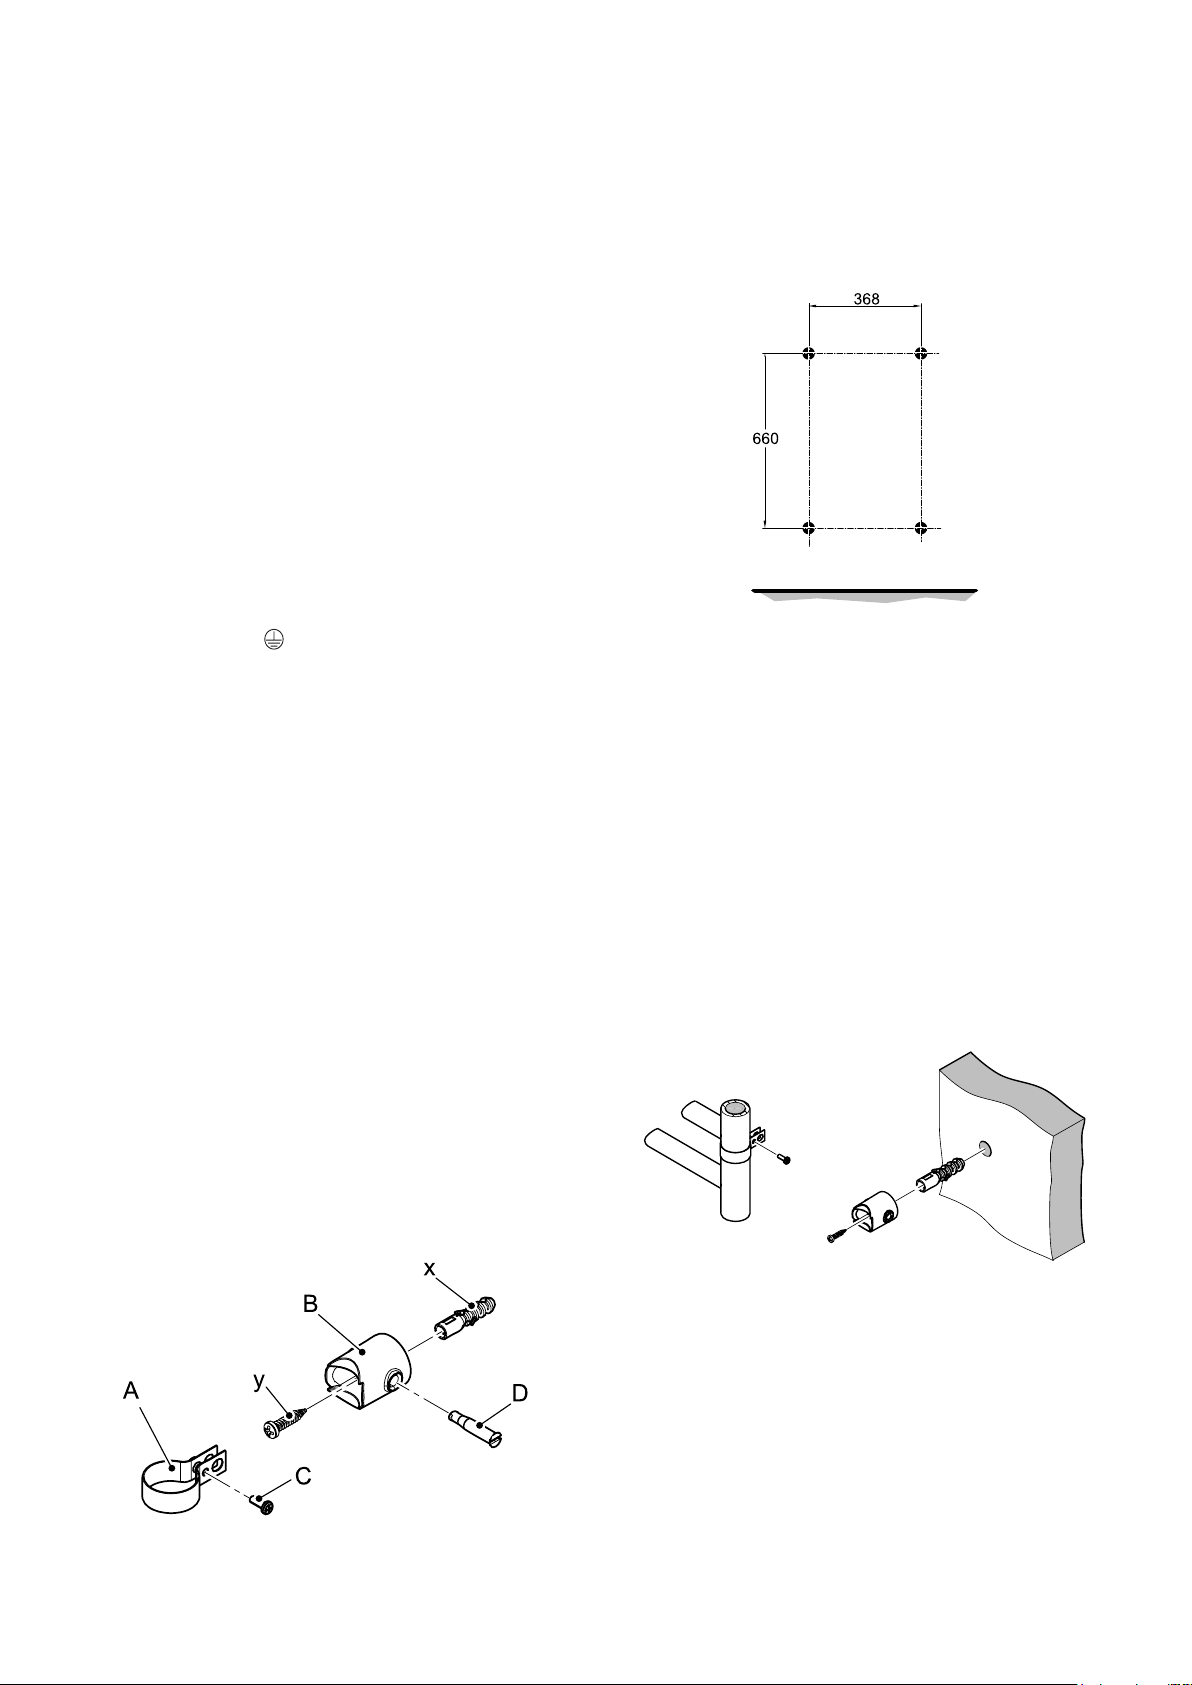
The wall mounting accessory pack contains the following:
Fig. 2
(A) 4 mounting collars,
(B) 4 mounting brackets,
(C) 4 collar xing screws,
(D) 4 bracket pins,
(X) 4 wall plugs,
(Y) 4 wall mounting screws,
Procedure for wall mounting
Wall mounting dimensions:
Step 1
Mark suitable mounting hole positions for the xing brackets (ensuring
they are horizontal) - see Fig. 3, ensure to allow enough room above
and below to maintain the minimum clearance stated in Fig. 1.
Step 2
Drill and plug (x) the wall to suit. Fix the mounting brackets to the
wall using the screws provided (y). Ensure the bracket pin holes are
aligned horizontally to allow the mounting pins to be inserted through
the collars - see Fig. 4.
Note: Ensure the mounting brackets are aligned to allow easy assembly
of the bracket pins once the towel rail is in place, it is recommended
that the pins are inserted towards the adjacent wall (from outside the
product) to provide the clearance necessary for the use of tools to
secure the rail in place - see Fig. 5.
Step 3
Carefully place the four mounting collars around the towel rail uprights
in the positions shown in Fig. 1 and secure in place using xing screws
(C) provided - see Fig. 4. ensure the rear of the straps are facing
directly backwards.
Step 4
Lift the towel rail complete with the collars attached and align with
the mounting brackets which were previously xed to the wall. Insert
the collar ends into the mounting brackets and x in place using the
bracket pins (D). The rail is then locked in place by rotating the pins
a quarter turn - see Fig. 5.
Fig. 3
Fig. 4
Loading ...
Loading ...