10031705
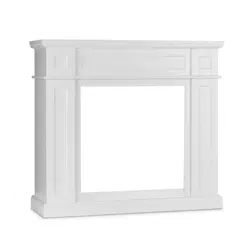
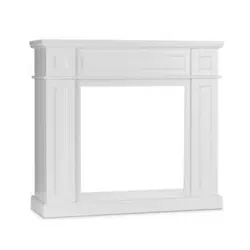
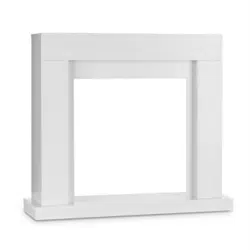
Kamingehäuse

2
Sehr geehrter Kunde,
wir gratulieren Ihnen zum Erwerb Ihres Gerätes. Lesen Sie die folgenden Hinweise sorgfältig durch und befol-
gen Sie diese, um möglichen Schäden vorzubeugen. Für Schäden, die durch Missachtung der Hinweise und
unsachgemäßen Gebrauch entstehen, übernehmen wir keine Haftung.
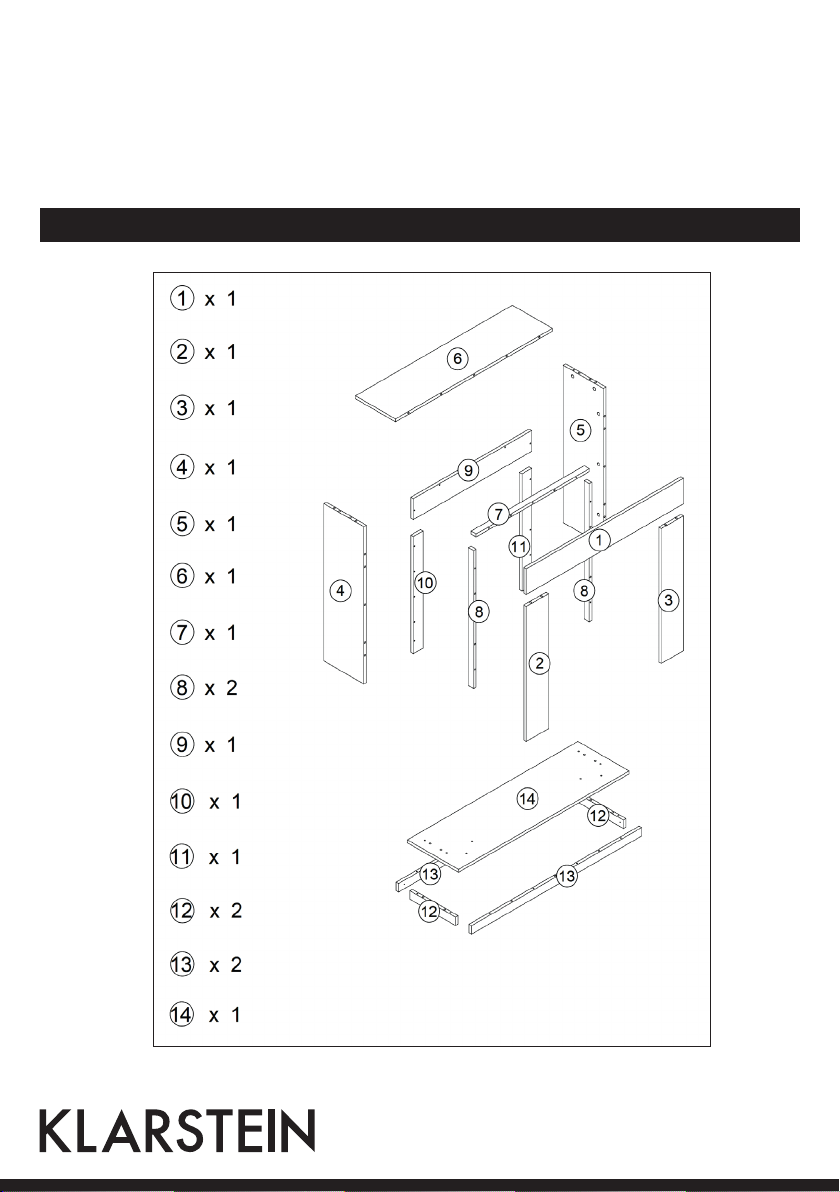
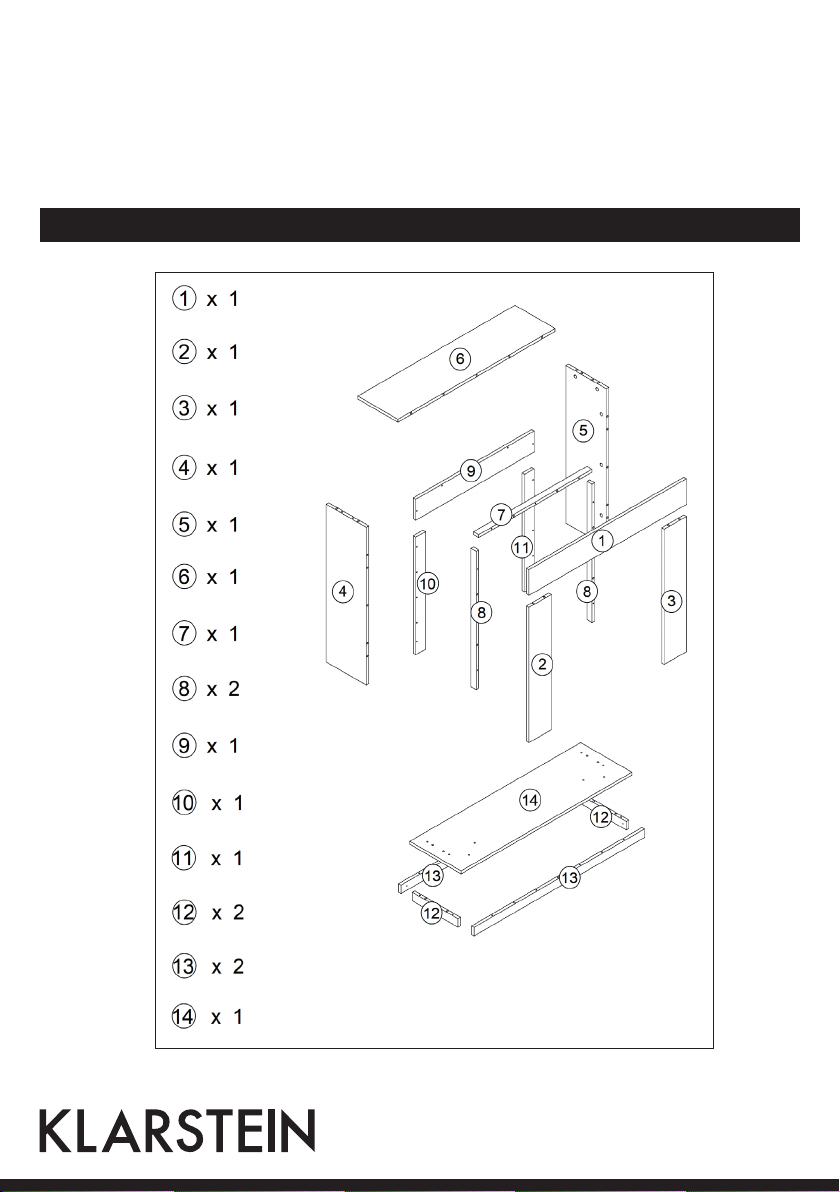
Lieferumfang

3
Vor dem Zusammenbau
Wichtige Hinweise zum Zusammenbau
• Stellen Sie das Gehäuse an einem Ort auf, der vor direkter Sonneneinstrahlung geschützt ist.
• Lesen Sie sich alle Hinweise durch, bevor Sie das Gehäuse zusammenbauen.
• Befolgen Sie die Montageanleitung genau.
• Überprüfen Sie vor dem Zusammenbau, ob der Karton alle Teile enthält.
• Um Schäden und Kratzer zu vermeiden, montieren Sie das Gehäuse auf einem weichen Teppich oder einer
Decke.
• Reinigen Sie die Gehäuseoberfläche nach dem Aufbau mit einem weichen, trockenen oder leicht feuchten
Tuch. Benutzen Sie zur Reinigung keine Scheuermittel.
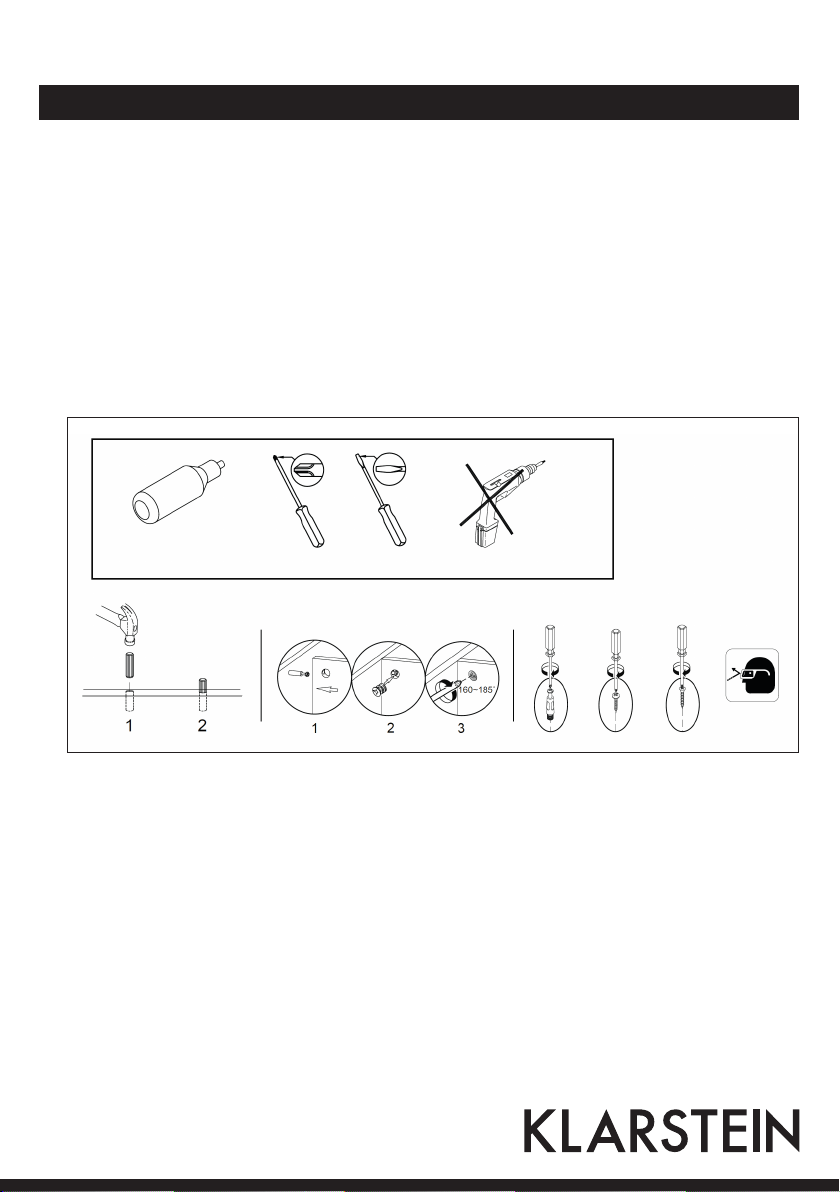
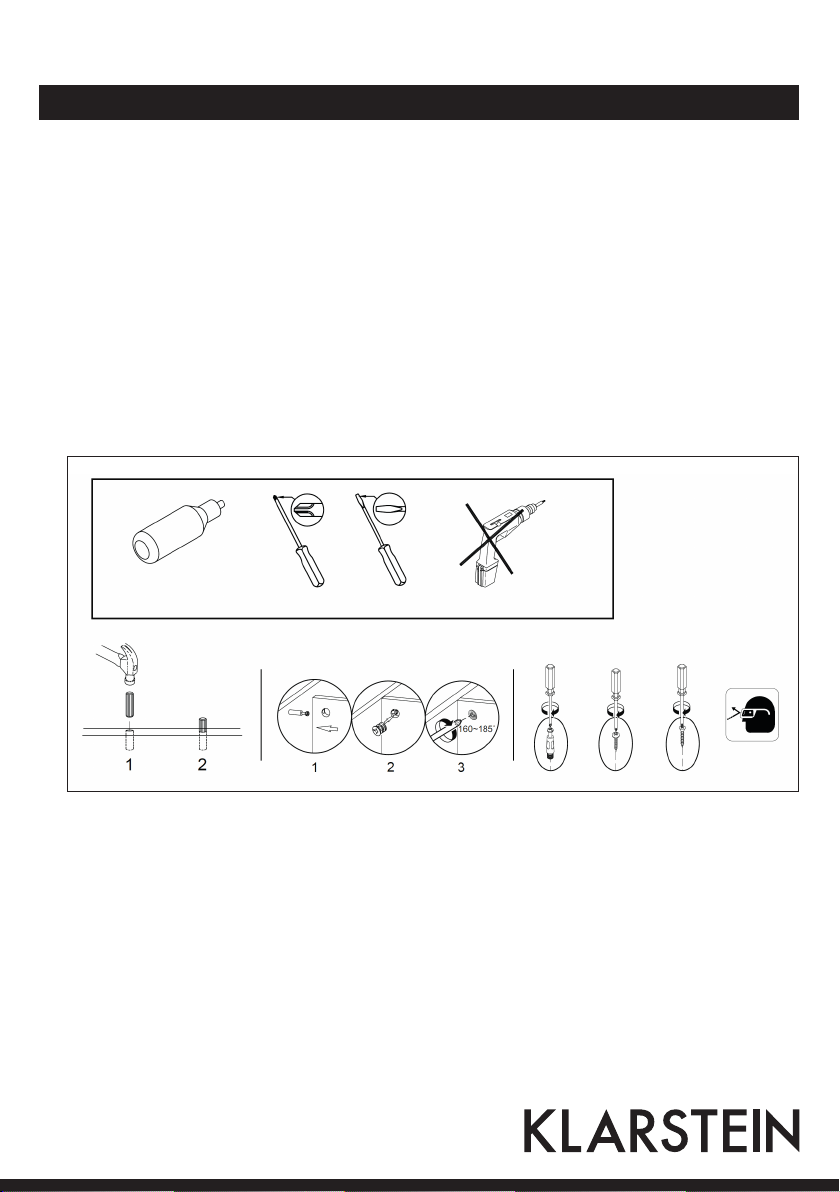
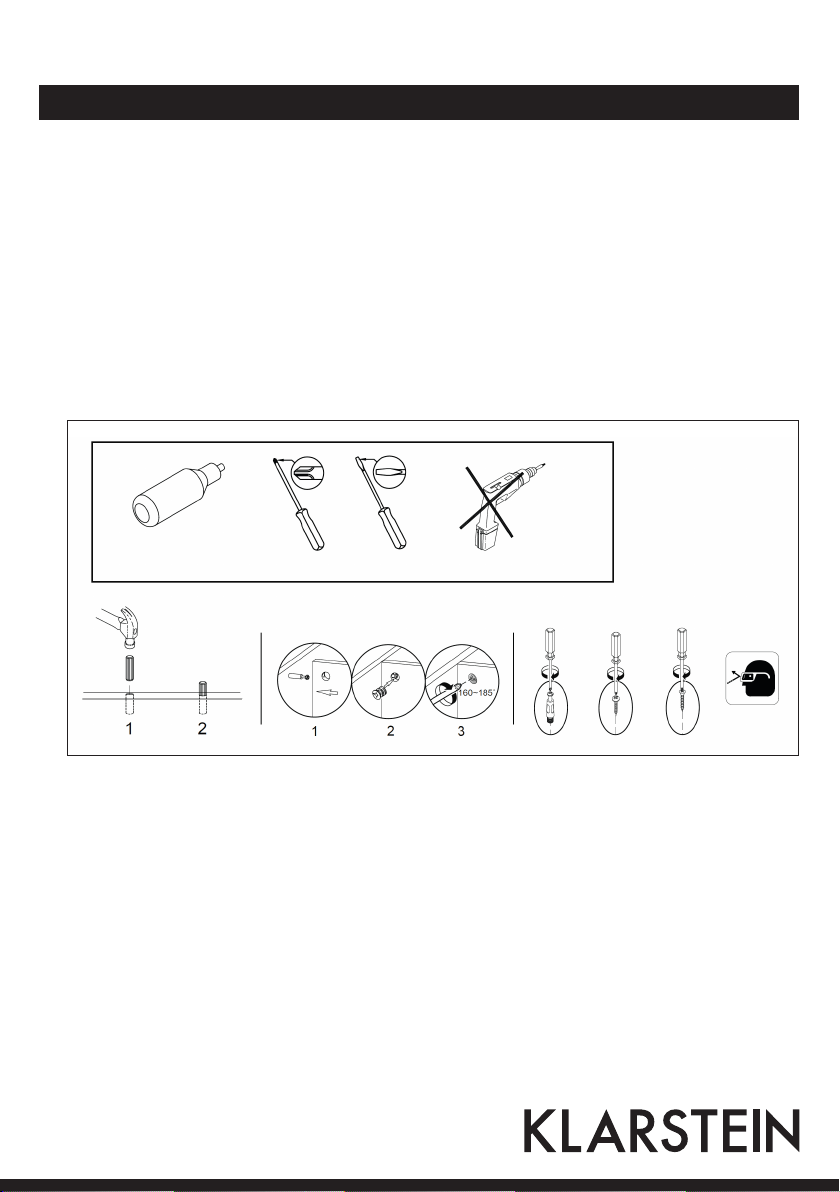
Benötigte Werkzeuge und Hilfsmittel
Wir empfehlen Ihnen etwas Holzleim (nicht im Lieferumfang enthalten) in die Löcher zu geben, bevor Sie die
Holzdübel einsetzen.
Holzdübel

4
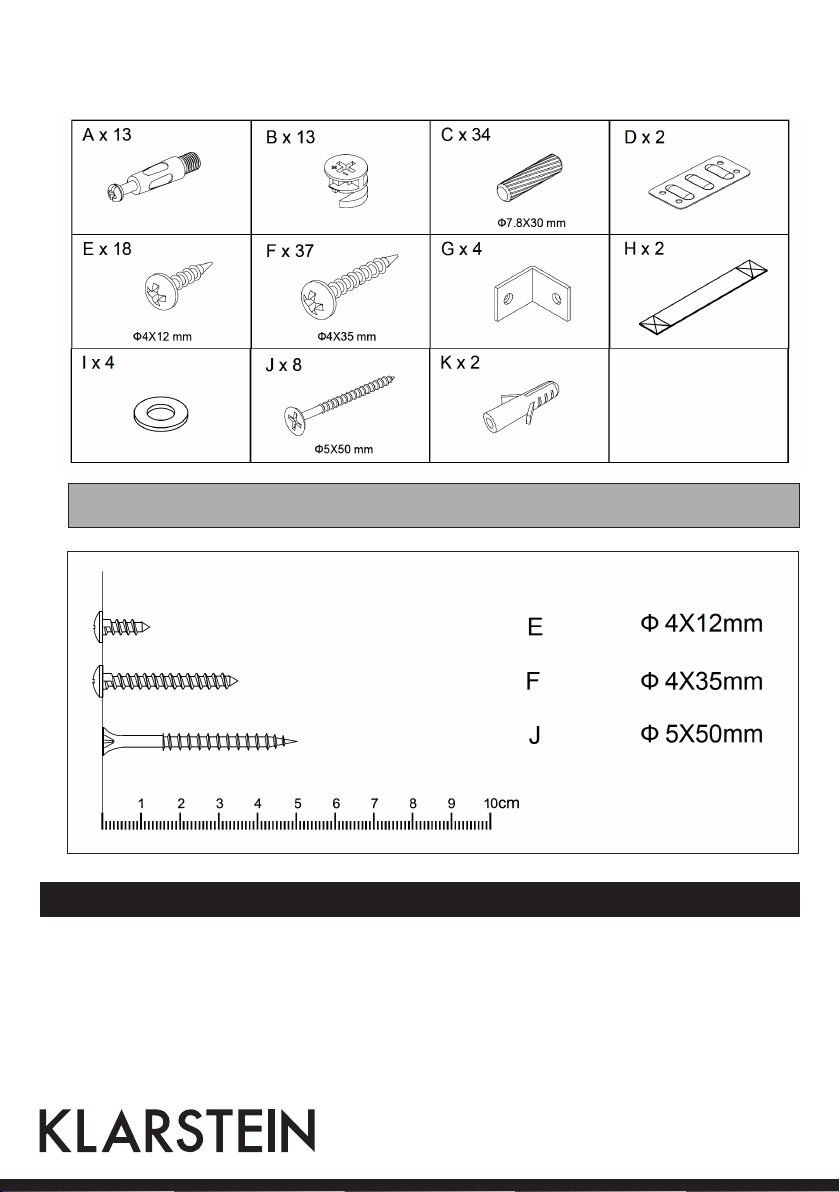
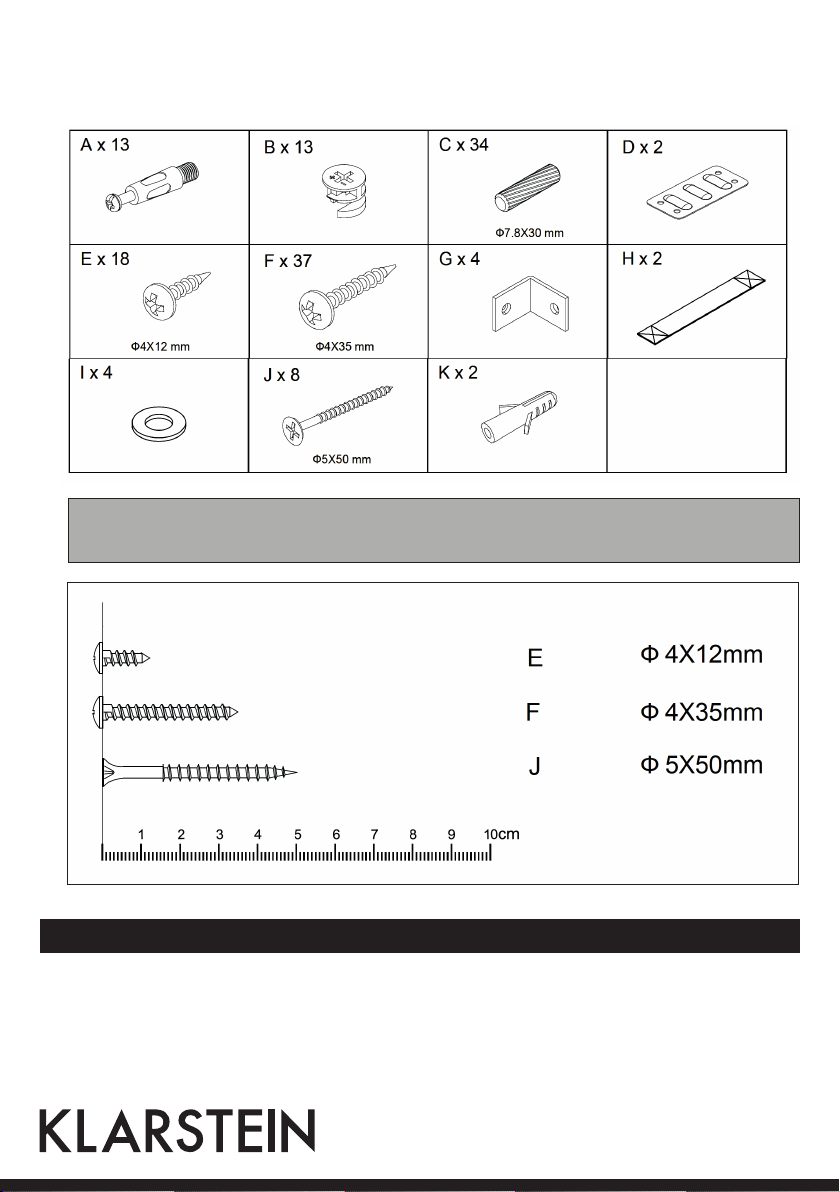
Mitgelieferte Kleinteile und Schrauben
HINWEIS: Benutzen Sie immer die richtigen Schrauben, um das Gehäuse nicht zu beschädigen. Identifizie-
ren und sortieren Sie die Schrauben vor dem Zusammenbau. Halten Sie sich genau an die folgende Monta-
geanleitung.
Hersteller
Chal-Tec GmbH, Wallstraße 16, 10179 Berlin, Deutschland
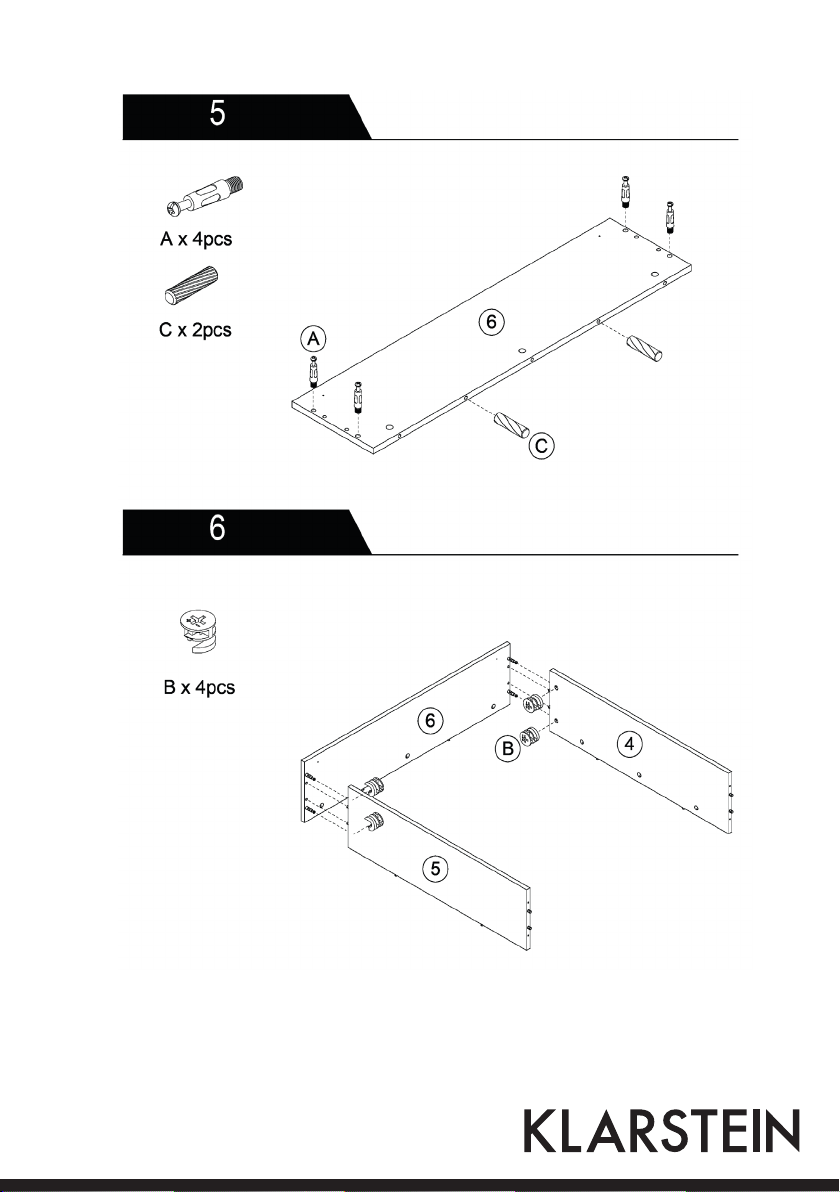
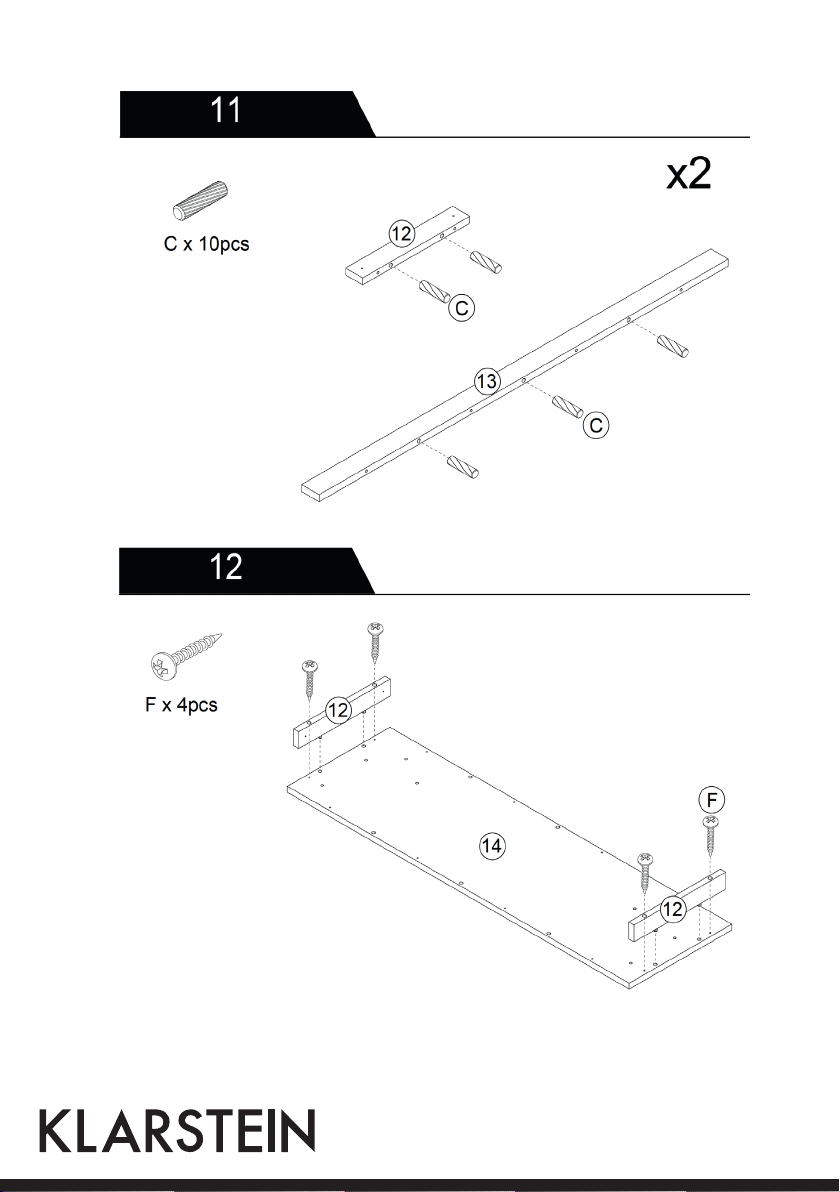
5
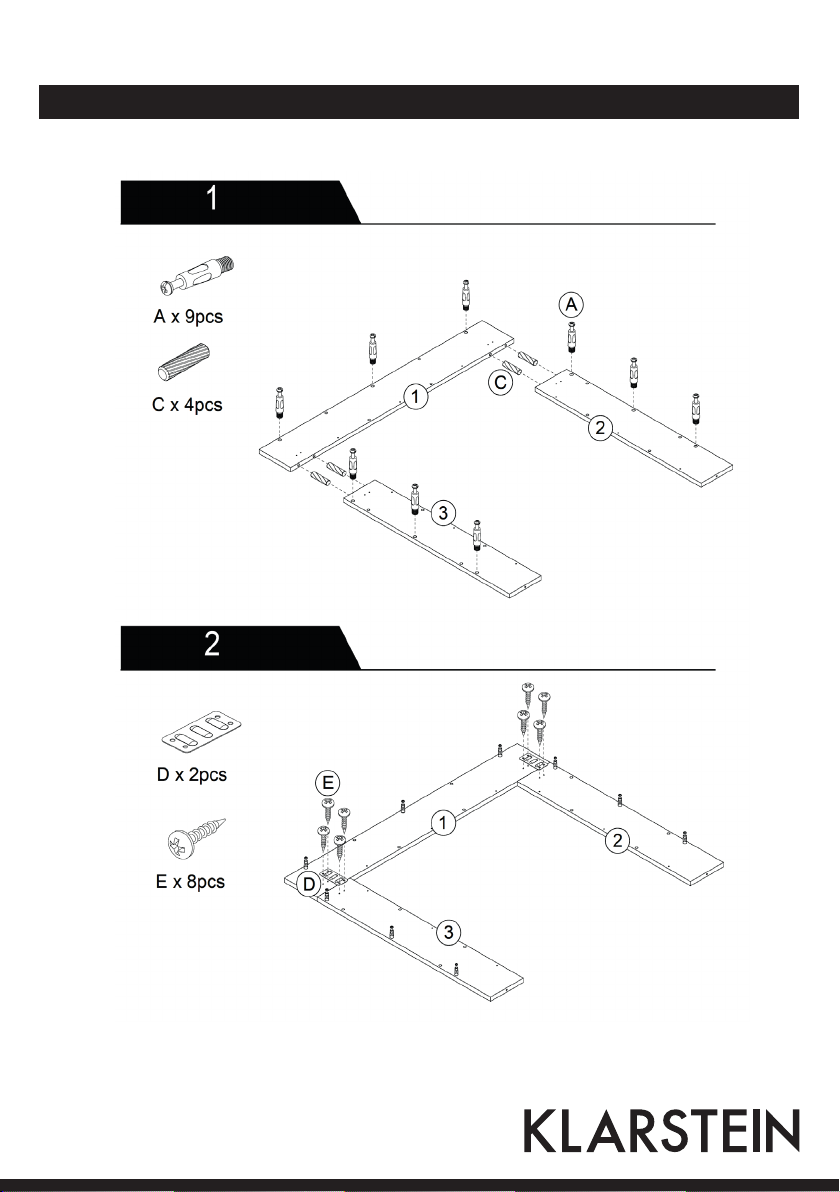
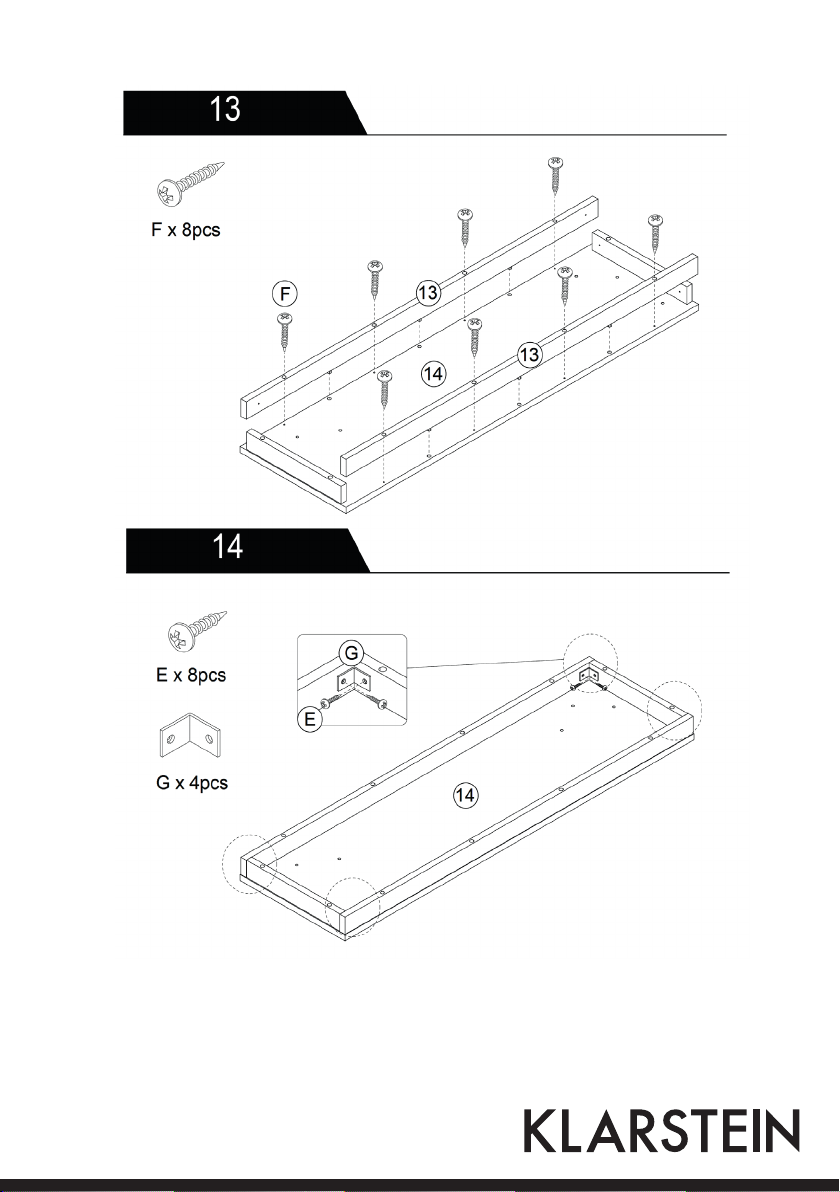
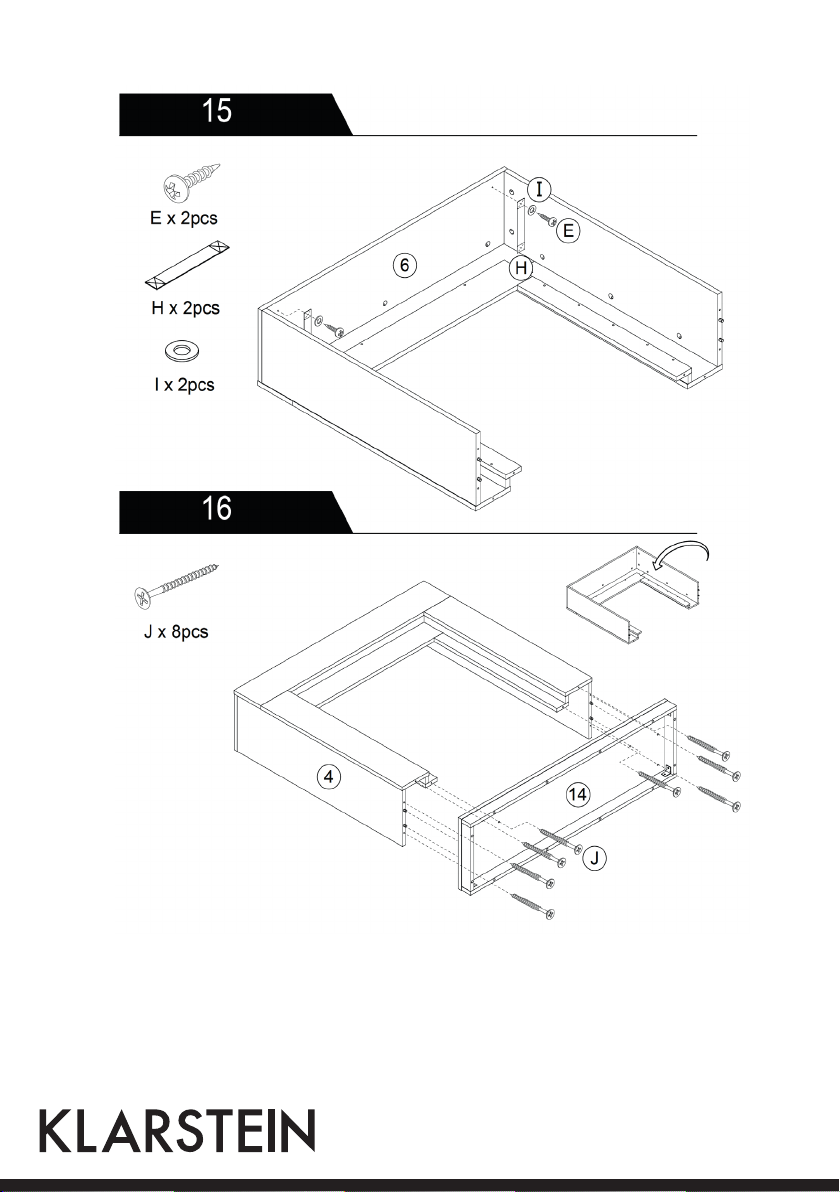
Montageanleitung
HINWEIS: pcs = Stückzahl

6

7

8

9

10

11

12

13
14
Dear Customer,
Congratulations on purchasing this equipment. Please read this manual carefully and take care of the following
hints to avoid damages. Any failure caused by ignoring the mentioned items and cautions mentioned in the
instruction manual are not covered by our warranty and any liability.
Packing Content
15
Before Assembly
Important Hints on Assembly
• Find a location for the fireplace heater that is protected from direct sunlight.
• Do not plug the electric fireplace heater into the power outlet before you read all instruction.
• Follow carefully the assembly instructions.
• Check to ensure this carton contains all parts.
• To prevent product damage, assemble the furniture on the carton.
• Clean surface of furniture with a duster or damp cloth only,do not use abrasive cleaners.
Necessary Tools
We recommend to apply some wood glue (not included in the packing content) into holes before inserting
wood dowels.
Wood dowels
16
Parts List
NOTE: Using the wrong screw will cause damage. Before beginning assembly, identify each type of screw.
Carefully study the screw diagrams below.
Producer
Chal-Tec GmbH, Wallstraße 16, 10179 Berlin, Germany

17
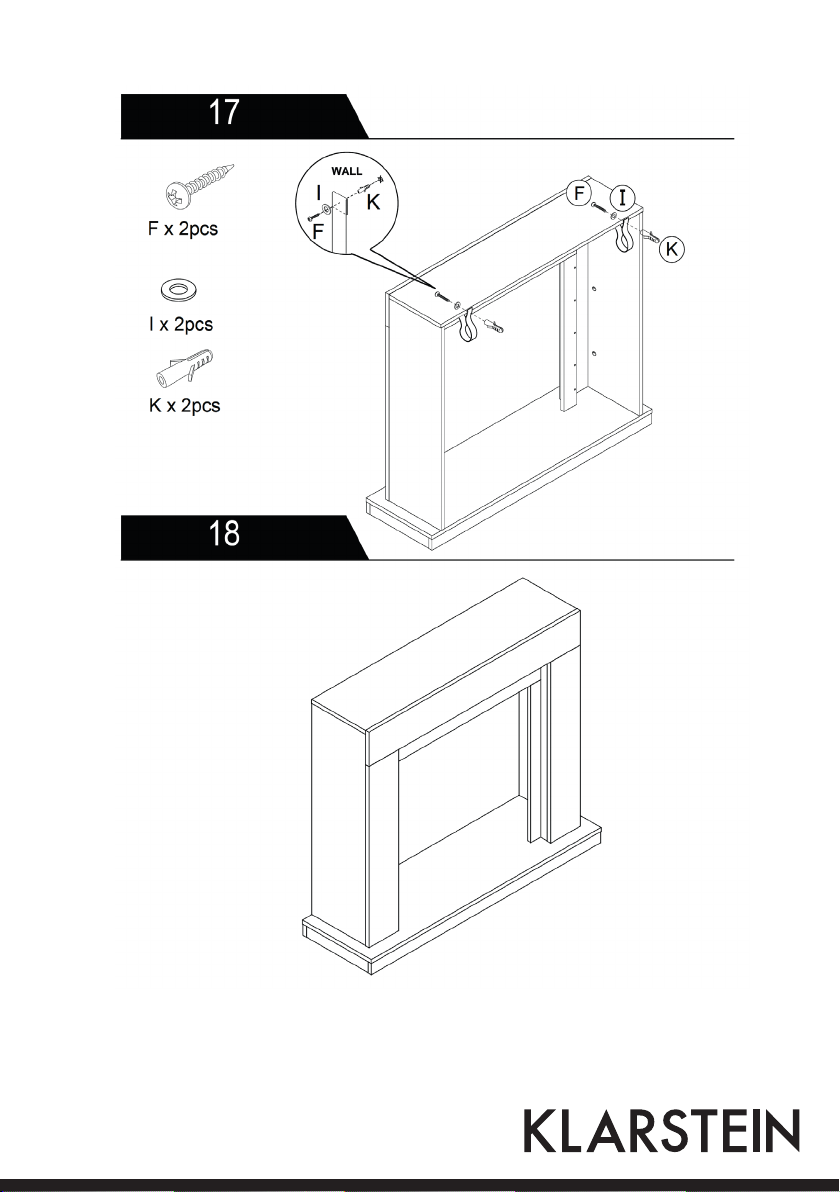
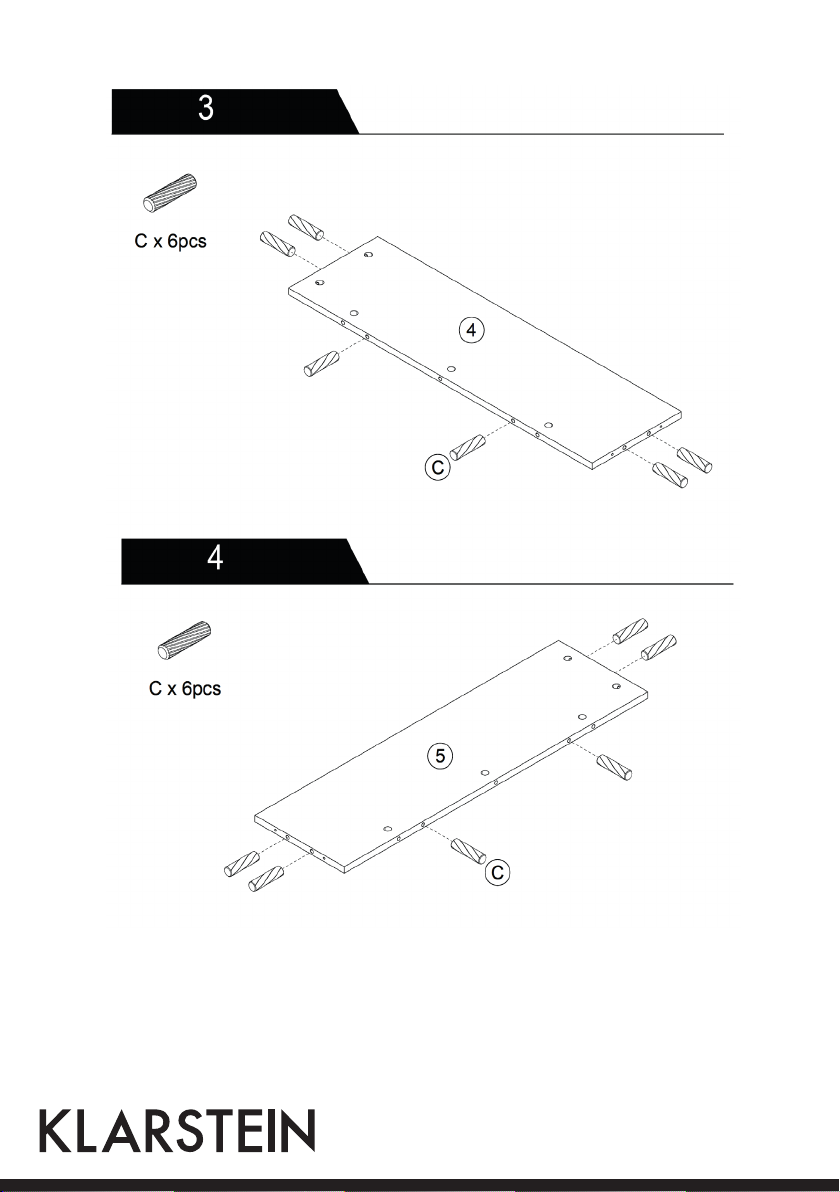
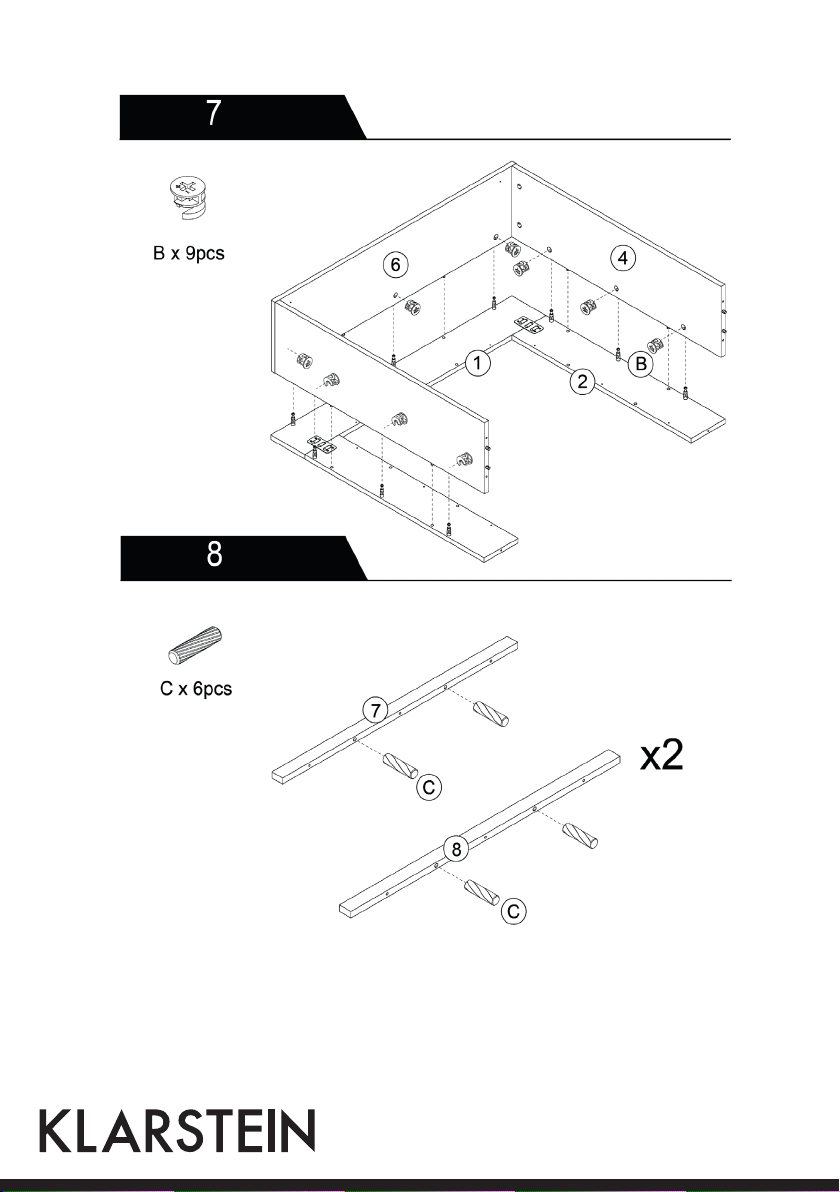
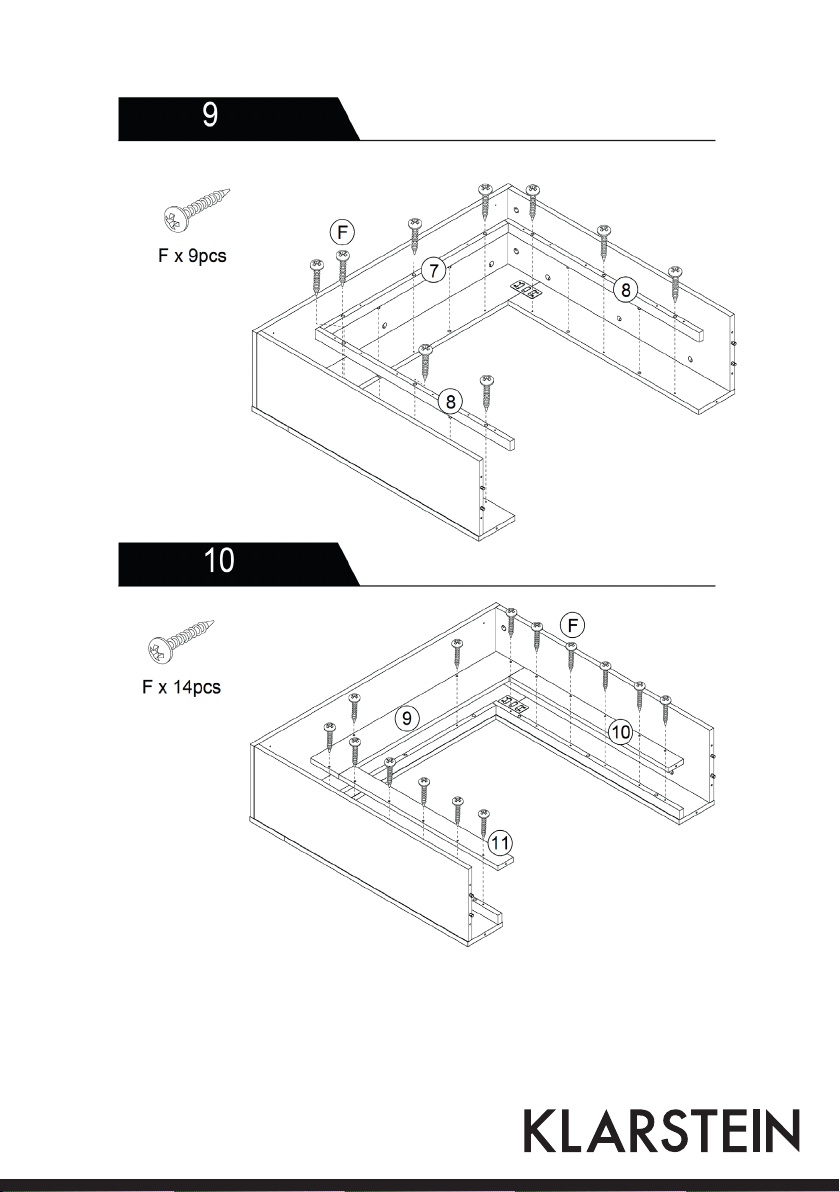
Assembly Instructions
NOTE: pcs = number of pieces

18

19

20

21

22
23

24

25

26
Estimado cliente:
Le felicitamos por la adquisición de este producto. Lea atentamente el siguiente manual y siga cuidadosamen-
te las instrucciones de uso con el fin de evitar posibles daños. La empresa no se responsabiliza de los daños
ocasionados por un uso indebido del producto o por haber desatendido las indicaciones de seguridad.
Contenido del envío
27
Antes del montaje
Indicaciones importantes sobre el montaje
• Coloque el marco en un lugar protegido de la luz directa del sol.
• Lea atentamente todas las indicaciones antes de montar el aparato.
• Siga las instrucciones de montaje.
• Antes del montaje, compruebe que la caja contenga todas las piezas.
• Para evitar daños y arañazos, monte el aparato sobre una alfombra o manta.
• Limpie la superficie del aparato tras el montaje con un paño suave y seco o ligeramente húmedo. No utilice
productos abrasivos ni disolventes.
Herramientas y medios auxiliares necesarios
Le recomendamos emplear un poco de cola de carpintero (no incluida en el envío) en los orificios antes de
encajar los tacos de madera.
Tacos de
madera
28
Piezas y tornillos incluidos
ADVERTENCIA:
utilice siempre los tornillos adecuados para no dañar el marco. Identifique y clasifique los tornillos antes del
montaje. Cíñase a las instrucciones de este manual.
Fabricante
Chal-Tec GmbH, Wallstraße 16, 10179 Berlín (Alemania)

29
Instrucciones de montaje
Advertencia: pcs = unidades

30

31

32

33

34

35
36

37
38
Cher client,
Toutes nos félicitations pour l’acquisition de ce nouvel appareil. Veuillez lire attentivement les instructions su-
ivantes afin d’éviter d’éventuels dommages. Le fabricant ne saurait être tenu pour responsable des dommages
dus au non-respect des consignes de sécurité et à la mauvaise utilisation de l’appareil.
Livraison
39
Avant l’assemblage
Conseils importants pour l’assemblage
• Placez l’insert dans un endroit à l’abri de l’ensoleillement direct.
• Lisez bien toutes les consignes avant d’assembler l’insert.
• Suivez précisément les indications de montage.
• Avant l’assemblage, vérifiez que le carton contient bien toutes les pièces.
• Pour éviter les dommages et les rayures, assemblez l’insert sur un tapis doux ou une couverture.
• Nettoyez les surfaces de l’insert à la fin de l’assemblage avec un chiffon doux, sec ou légèrement humide.
N’utilisez aucun produit abrasif.
Outillage nécessaire et aides
Nous vous conseillons de mettre un peu de colle à bois (non fournie) dans les trous avant d’insérer les tourillons.
tourillons

40
Petits éléments fournis et vis
REMARQUE :
utilisez toujours les bonnes vis pour ne pas endommager l’insert. Repérez et triez les vis avant de commencer
l’assemblage. Tenez-vous en strictement aux indications de montage.
Fabricant
Chal-Tec GmbH, Wallstraße 16, 10179 Berlin, Allemagne

41
Notice d’assemblage
REMARQUE : pcs = nombre de pièces

42
43

44

45
46

47

48
49

50
Gentile cliente,
La ringraziamo per aver acquistato il nostro prodotto. La preghiamo di leggere attentamente le seguenti istru-
zioni e di seguirle per evitare eventuali danni. Non ci assumiamo alcuna responsabilità per danni derivati da una
mancata osservazione delle avvertenze di sicurezza e da un uso improprio del dispositivo.
Consegna

51
Prima del montaggio
Note importanti per il montaggio
• Installare la cornice per il caminetto in un luogo non esposto alla luce diretta del sole.
• Leggere tutte le istruzioni prima di assemblare la cornice per il caminetto.
• Seguire attentamente tutte le istruzioni.
• Prima del montaggio verificare che tutti i componenti siano contenuti nella confezione.
• Per evitare di danneggiare o di graffiare la cornice, montarla su una superficie morbida.
• Dopo il montaggio, pulire le superfici della cornice con un panno morbido, asciutto o leggermente umido.
Non utilizzare per la pulizia prodotti abrasivi.
Attrezzi necessari
Prima di inserire i tasselli in legno, si consiglia di applicare nei fori un po´ di colla per legno (non inclusa nella
consegna).
Tassello in
legno

52
Componenti e viti inclusi nella consegna
NOTA:
utilizzare sempre le viti corrette per non danneggiare la cornice. Identificare e classificare le viti prima del
montaggio. Attenersi alle istruzioni per il montaggio che seguono.
Produttore
Chal-Tec GmbH, Wallstraße 16, 10179 Berlino, Germania

53
Istruzioni per il montaggio
NOTA: pcs = Pezzo
54

55
56
57

58

59

60

61