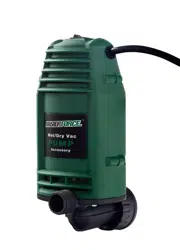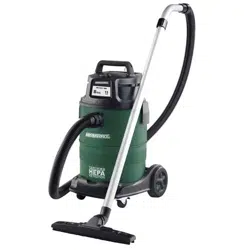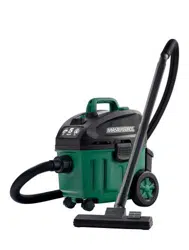
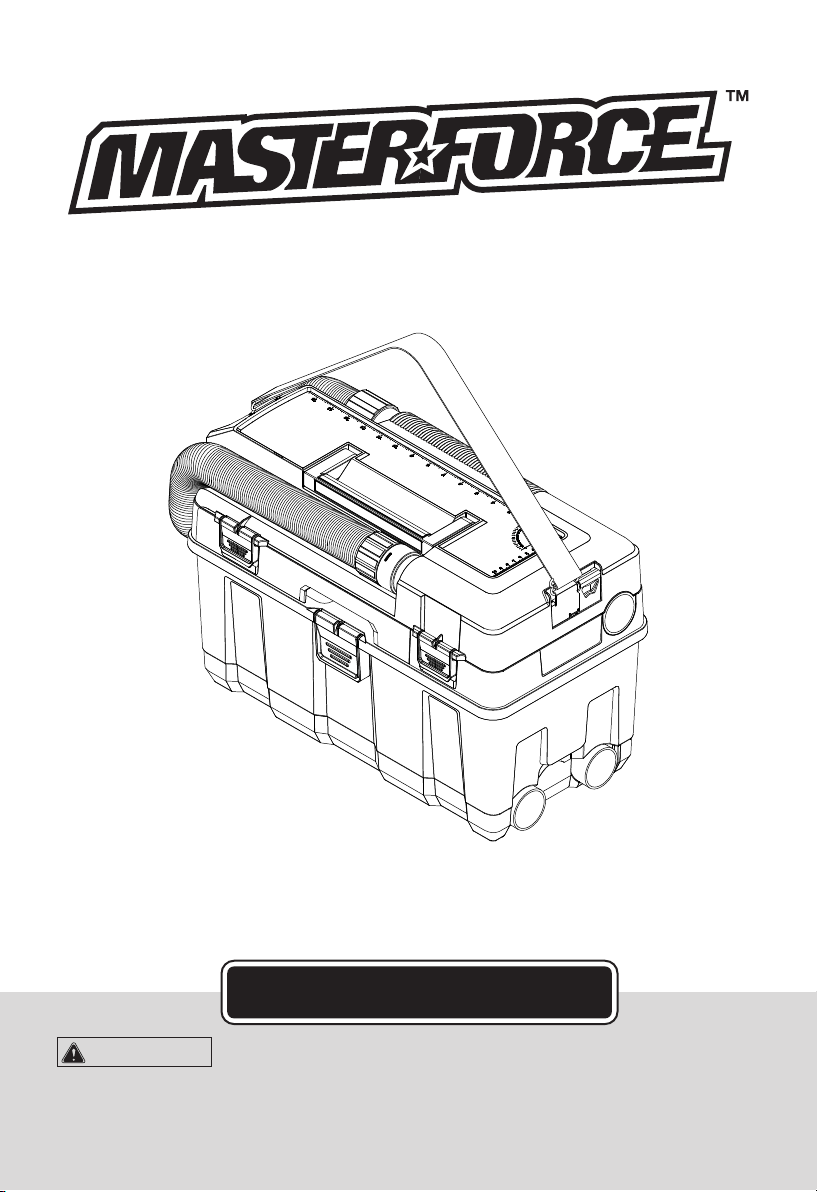
Wet/Dry Vacuums
240-5241
OPERATOR’S MANUAL
CAUTION:
To Reduce The Risk Of Injury, User Must Read
And Understand Operator's Manual. Save These Instructions
For Future Reference.

Page 1
SECTION PAGE
Safety Instructions & Warnings ......................................................................................................2
Know Your Product- Cordless Toolbox Wet & Dry Vacuum ............................................................5
Unpacking Your Wet/Dry Vacuum & General Assembly .................................................................6
General Operation ..........................................................................................................................8
Dry Vacuum Operation ...................................................................................................................9
Liquid Vacuum Operation ............................................................................................................. 11
Blower Operation .......................................................................................................................... 13
Maintenance. ................................................................................................................................15
Installing & Cleaning Cartridge Filter. ...........................................................................................16
Troubleshooting ............................................................................................................................ 17
Exploded View & Parts List ..........................................................................................................18
Warranty .......................................................................................................................................22
Thank you for purchasing this wet/dry vacuum cleaner. Feel confident
that with this vacuum cleaner you are obtaining a high quality product
engineered for optimal performance. This vacuum is capable of picking
up liquids and dry materials.
FOR YOUR SAFETY: CAREFULLY READ AND UNDERSTAND ALL
INSTRUCTIONS.
TABLE OF CONTENTS
Page 2
SAFETY INSTRUCTIONS & WARNINGS
The purpose of safety symbols is to attract our attention to possible dangers. The safety symbols,
and the explanations with them, deserve your careful attention and understanding. The symbol
warnings do not by themselves eliminate any danger. The instructions and warnings they give are
no substitutes for proper accident prevention measures.
WARNING:
Be sure to read and understand all safety instructions in this manual,
including all safety alert symbols such as “DANGER”, “WARNING” and “CAUTION”, before
using this wet/dry vacuum. Failure to follow all instructions listed below may result in
electric shock, re and/or serious personal injury.
SYMBOL MEANING
DANGER:
Failure to obey this warning WILL result in death or serious injury to
yourself or to others. Always follow the safety precautions to reduce the risk of re, electric
shock and personal injury.
WARNING:
Failure to obey this safety warning CAN result in death or serious injury
to yourself or to others. Always follow the safety precautions to reduce the risk of fire,
electric shock and personal injury.
CAUTION:
Failure to obey this safety warning MAY result in personal injury to
yourself or others or property damage. Always follow the safety precautions to reduce the
risk of re, electric shock and personal injury.
NOTICE:
(Without Safety Alert Symbol) Indicates a situation that may result in property
damage.

Page 3
SAFETY INSTRUCTIONS & WARNINGS
READ AND UNDERSTAND ALL
INSTRUCTIONS BEFORE USING THIS
VACUUM.
Read and understand this owner’s manual
and all labels on the Wet/Dry Vacuum cleaner
before operating. Safety is a combination of
common sense, staying alert and knowing
how your vacuum works. Use this Wet/Dry
Vacuum only as described in this manual. To
reduce the risk of personal injury or damage to
your Wet/Dry Vacuum, use only Masterforce
TM
recommended accessories.
SAVE THIS MANUAL FOR FUTURE
REFERENCE.
When using an electrical appliance, basic
precautions should always be followed
including the following:
Failure to follow the warnings and instructions
may result in explosion, fire and/or serious
injury.
WARNING:
TO REDUCE THE RISK
OF FIRE, EXPLOSION, OR INJURY:
• Do not run vacuum unattended.
• Do not use without filters in place.
• Do not use to pick up f lammable or
combustible liquids, such as gasoline, or use
in areas where they may be present.
• Do not pick up anything that is burning or
smoking, such as cigarettes, matches, or hot
ashes. To reduce the risk of health hazards
from vapors or dusts, do not vacuum toxic
materials.
• Do not use or store near hazardous
materials.
• If vacuum is not working as it should, has
been dropped, damaged, left outdoors, or
dropped into water, return it to a service
center.
• Do not allow to be used as a toy. Close
attention is necessary when used by or near
children.
• Do not put any object into openings. Do not
use with any opening blocked; keep free of
dust, lint, hair, and anything that may reduce
air f low.
• Keep hair, loose clothing, fingers, and all
parts of body away from openings and
moving parts.
• Use extra care when cleaning on stairs.
• Do not handle vacuum, charger, charger
plug, or charger terminals with wet hands.
• Turn off all controls before removing the
battery pack.
• Turn off the vacuum and remove the battery
pack before connecting the hose or other
accessories.
• Prevent unintentional starting. Ensure the
switch is in the off-position before connecting
to battery pack, picking up or carrying the
vacuum. Carrying the vacuum with your
finger on the switch invites accidents.
• Disconnect the battery pack from the
vacuum before making any adjustments,
changing accessories, or storing vacuum.
Such preventive safety measures reduce the
risk of starting the vacuum accidentally.
• Recharge only with the charger specified by
the manufacturer. A charger that is suitable
for one type of battery pack may create a
risk of fire when used with another battery
pack.
• Use vacuum only with specifically
designated battery packs. Use of any other
battery packs may create a risk of injury and
fire.
• When battery pack is not in use, keep it
away from other metal objects, like paper
clips, coins, keys, nails, screws or other
small metal objects that can make a
connection from one terminal to another.
Shorting the battery terminals together may
cause burns or a fire.
• Under abusive conditions, liquid may be
ejected from the battery; avoid contact. If
contact accidentally occurs, f lush with water.
If liquid contacts eyes, additionally seek
medical help. Liquid ejected from the battery
may cause irritation or burns.
• Do not use a battery pack or vacuum that is
damaged or modified. Damaged or modified
batteries may exhibit unpredictable behavior
resulting in fire, explosion or risk of injury.
• Do not expose a battery pack or vacuum
to fire or excessive temperature. Exposure
to fire or temperature above 130°C (265°F)
may cause explosion. The temperature of
Page 4
SAFETY INSTRUCTIONS & WARNINGS
130°C can be replaced by the temperature
of 265°F.
• Follow all charging instructions and do not
charge the battery pack or vacuum outside
of the temperature range specified in the
instructions. Charging improperly or at
temperatures outside of the specified range
may damage the battery and increase the
risk of fire.
• Have servicing performed by a qualified
repair person using only identical
replacement parts. This will ensure that the
safety of the product is maintained.
• Do not modify or attempt to repair the
vacuum or the battery pack except as
indicated in the instructions for use and care.
• Use only as described in this manual.
Use only manufacturer’s recommended
attachments.
CAUTION:
TO REDUCE THE
RISK OF INJURY FROM MOVING PARTS,
DISCONNECT BATTERY PACK BEFORE
CLEANING OR SERVICING.
WARNING:
TO REDUCE THE RISK
OF FIRE OR EXPLOSION, DO NOT EXPOSE
TO RAIN. STORE INDOORS.
WARNING:
TO REDUCE THE RISK
OF FIRE OR EXPLOSION, DISCONNECT
BATTERY PACK BEFORE CLEANING OR
SERVICING.
• Use the vacuum at a temperature between
-5°C (23°F) and 40°C (104°F).
• Store the vacuum, the charger and the
battery at a temperature between -20°C
(-4°F) and 50°C (122°F).
• Use only with battery and charger listed
below:
Battery Pack Charger
252-8029 252-8025
252-8035 252-8036
252-8030 252-8037
252-8031 252-8044
When using as blower:
• Direct air discharge only at work area.
• Do not use Wet/Dry Vac as a sprayer.
• Do not direct air at bystanders.
• Keep children away when blowing.
• Use safety goggles.
SAVE THIS INSTRUCTION
Household Type
Page 5
Hose
Vacuum
Port
Handle
Bottle
Opener
Toolbox
Cover
Cover
Latches
Cover
Latches
Collection
Tank Latches
Collection
Tank Latches
Bottle
Opener
Extension
Wand
Storage
Crevice
Tool
Vacuum
Port
Floor
Nozzle
On/Off
Switch
Battery
Bay Cover
Battery
Bay
Tool Storage
Blower
Port
Hose
Storage
Shoulder Strap
Filter
Collection
Tank
Built-in
Measurement
Ruler
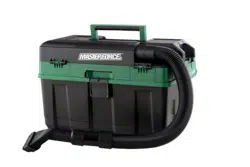
KNOW YOUR PRODUCT - CORDLESS
TOOLBOX WET/DRY VACUUM
Remove all contents from the box. Remove the power head and take out any contents inside
the collection tank. Check each item against the carton contents list.

Page 6
UNPACKING YOUR WET/DRY VACUUM
& GENERAL ASSEMBLY
1. Verify that the battery pack is not installed.
2. Undo the latches.
3. Remove the contents from inside the
collection tank; make sure you have all
contents as listed on page 5.
INSTALLING & REMOVING THE HOSE
1. Pull one end of the hose out of the hose
storage (Fig. 1).
Fig. 1
2. Connect the other end of the hose to the
vacuum port; make sure it is secure.
3. This wet/dry vacuum has blowing
capabilities. To use as a blower, connect
the hose to the blower port (Fig. 2).
Fig. 2
INSTALLING & REMOVING ACCESSORIES
1. To remove the extension wands, pull each
wand from its storage slot at the bottom of
the vac (Fig. 3).
Fig. 3
2. Choose the desired accessories and
extension wands and push onto the hose
(Fig. 4 & 5).
Fig. 4
Fig. 5
Page 7
UNPACKING YOUR WET/DRY VACUUM
& GENERAL ASSEMBLY
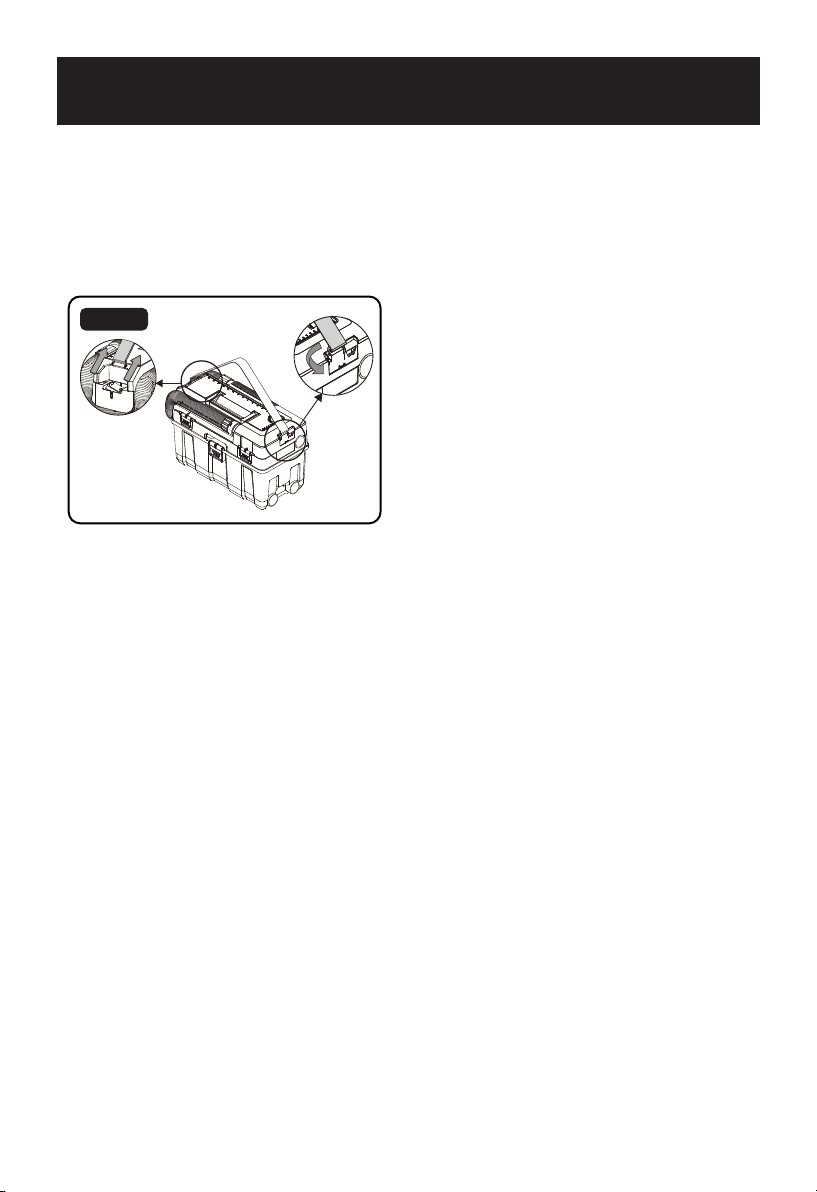
INSTALLING SHOULDER STRAP
A removable shoulder strap has been included
for your convenience. To install the shoulder
strap, follow the instructions below.
Insert one side of the shoulder strap into the
groove on the toolbox cover, and put the other
side into the slot (Fig. 6).
Fig. 6
Page 8
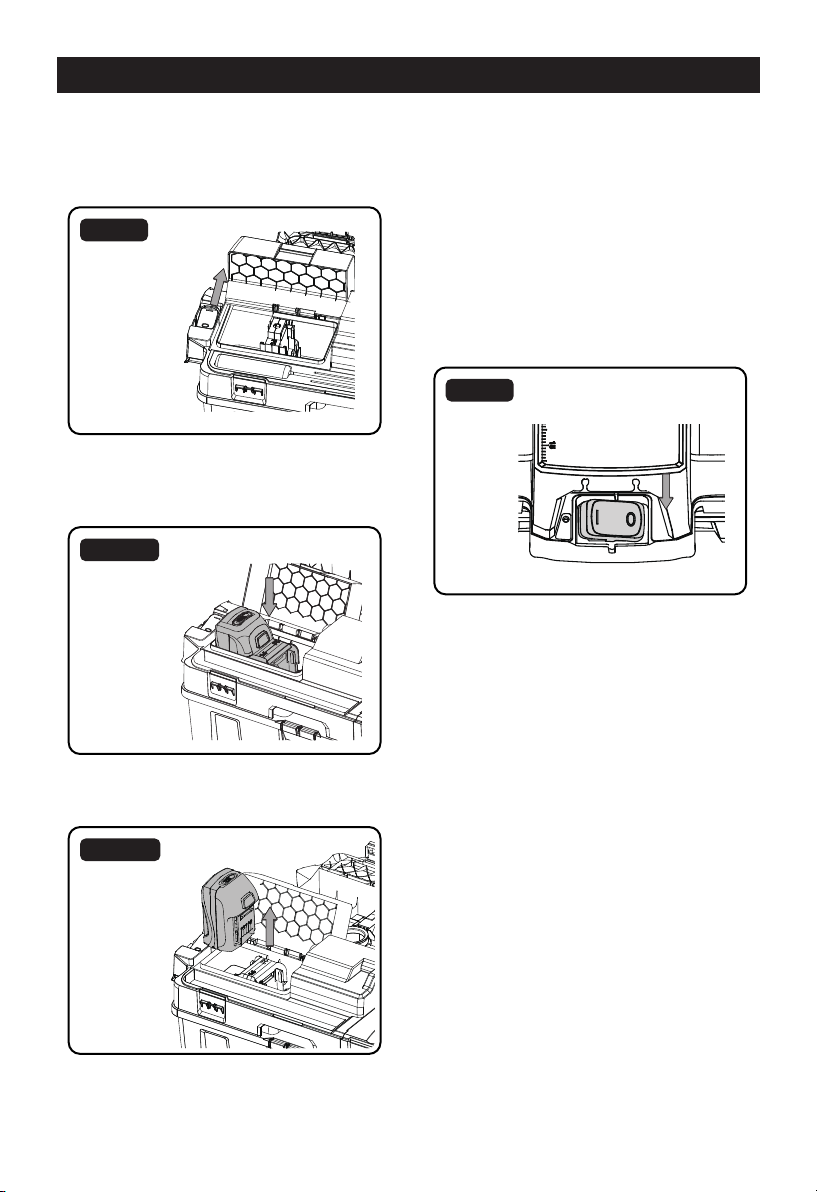
GENERAL OPERATION
INSTALLING & REMOVING BATTERY PACK
1. Flip the ON/OFF switch to the 'O' OFF
position.
2. Lift the battery/tool compartment lid (Fig. 7).
Fig. 7
3. To insert the battery pack, slide it into the
battery bay until it snaps into place
(Fig. 8.1).
Fig. 8.1
4. To remove the battery pack, press the latch
and pull it out of the battery bay(Fig. 8.2).
Fig. 8.2
5. Close the battery/tool compartment lid and
secure using the latches.
NOTE:
This vacuum has 2 bays available. Use
the left bay to operate the vacuum. The right
bay can be used for storage.
STARTING/STOPPING THE WET/DRY
VACUUM
To turn on the wet/dry vacuum, flip the switch
to the 'I' ON position. To turn off the wet/dry
vacuum, f lip the switch to the 'O' OFF position
(Fig. 9).
Fig. 9
Page 9
DRY VACUUM OPERATION
WARNING:
BE SURE TO READ,
UNDERSTAND, AND APPLY, INFORMATION
ENTITLED ‘SAFETY INSTRUCTIONS &
WARNINGS’. DO NOT VACUUM IN AREAS
WITH FLAMMABLE GASES, VAPORS,
OR EXPLOSIVE DUSTS IN THE AIR.
FLAMMABLE GASES OR VAPORS INCLUDE
BUT ARE NOT LIMITED TO: LIGHTER
FLUID, SOLVENT TYPE CLEANERS, OIL-
BASED PAINTS, GASOLINE, ALCOHOL, OR
AEROSOL SPRAYS. EXPLOSIVE DUSTS
INCLUDE BUT ARE NOT LIMITED TO: COAL,
MAGNESIUM, GRAIN, OR GUN POWDER.
TO REDUCE THE RISK OF HEALTH
HAZARDS FROM VAPORS OR DUST, DO
NOT VACUUM TOXIC MATERIALS.
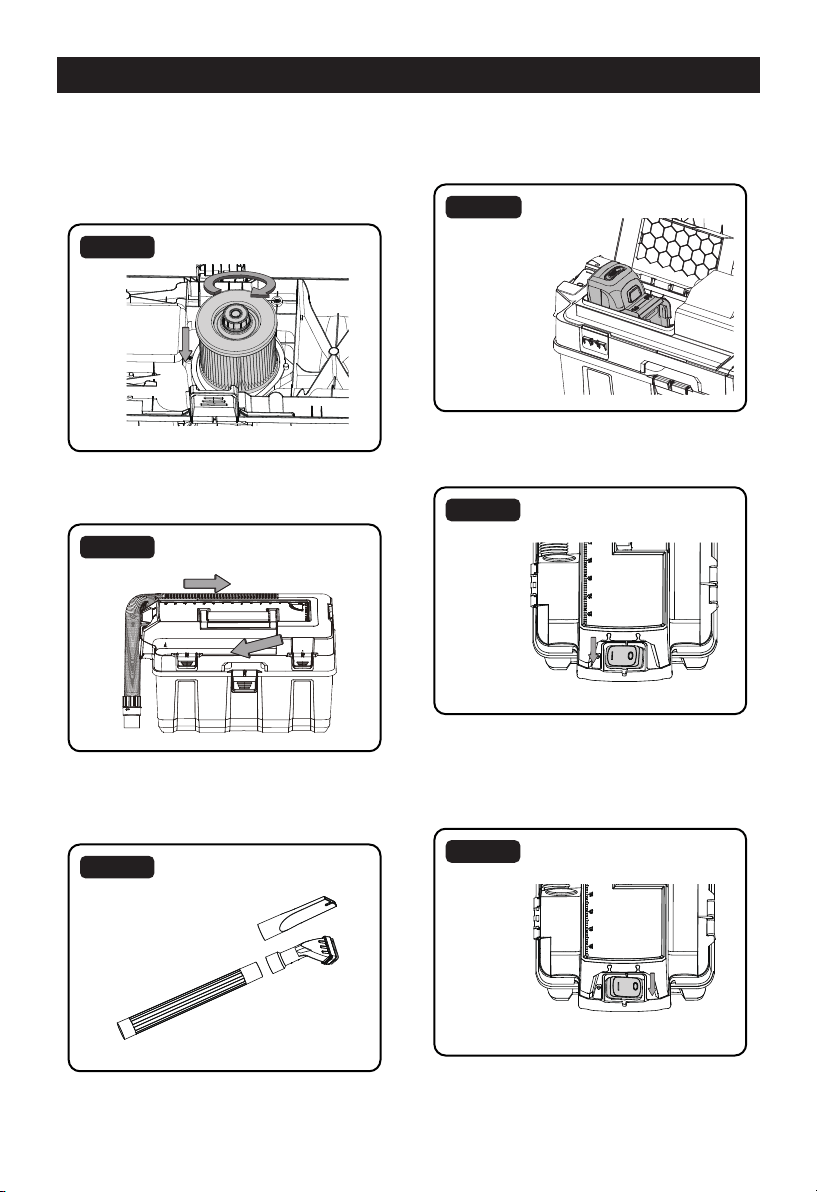
1. Verify that the cartridge filter is securely
mounted (Fig. 10). For installation
instructions see page 16.
Fig. 10
2. Insert the hose into the vacuum port
(Fig. 11).
Fig. 11
3. Push required accessories onto the free
end of the hose or the extension wand
(Fig. 12).
Fig. 12
4. Make sure the battery pack is correctly
installed (Fig. 13). For installation
instructions see page 8.
Fig. 13
5. Turn the motor on by flipping the switch to
the 'I' ON position (Fig. 14).
Fig. 14
Page 10
DRY VACUUM OPERATION
6. Once you have completed vacuuming, or
when the collection tank is full, turn the
motor off by flipping the switch to the 'O'
OFF position (Fig. 15).
Fig. 15
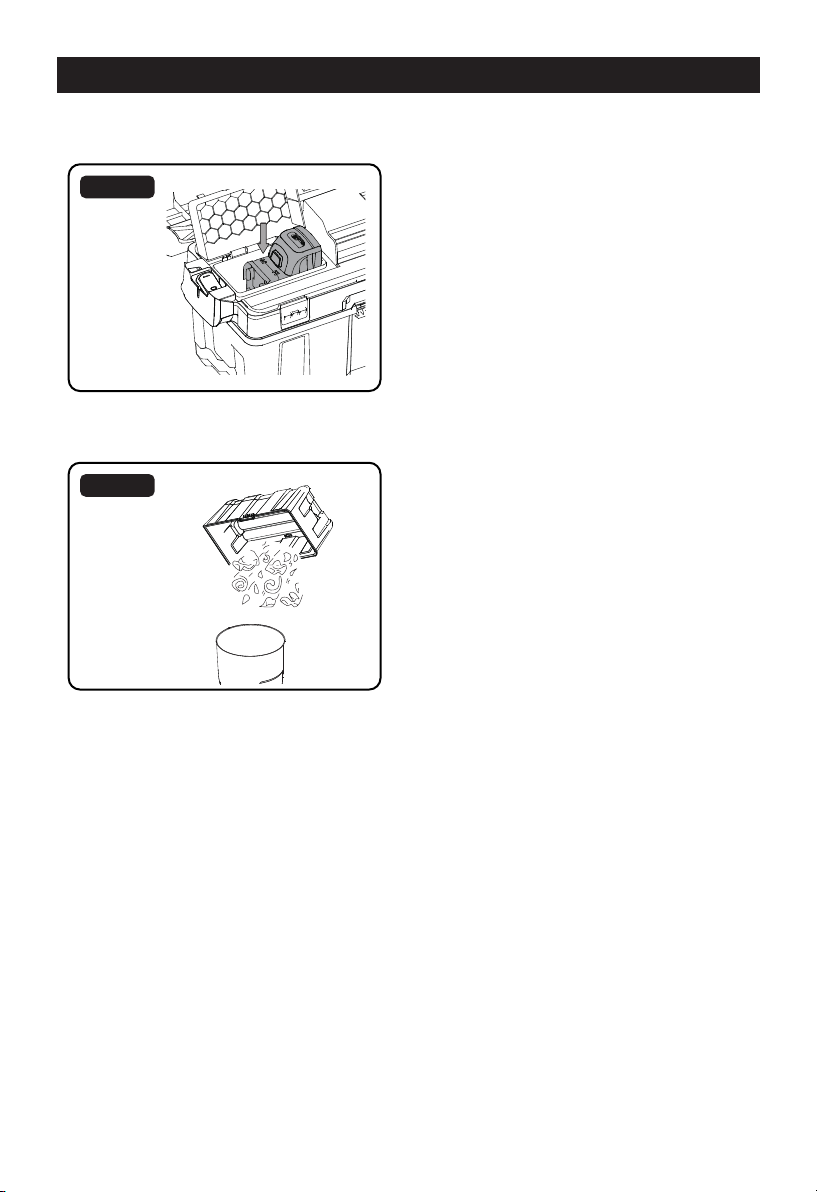
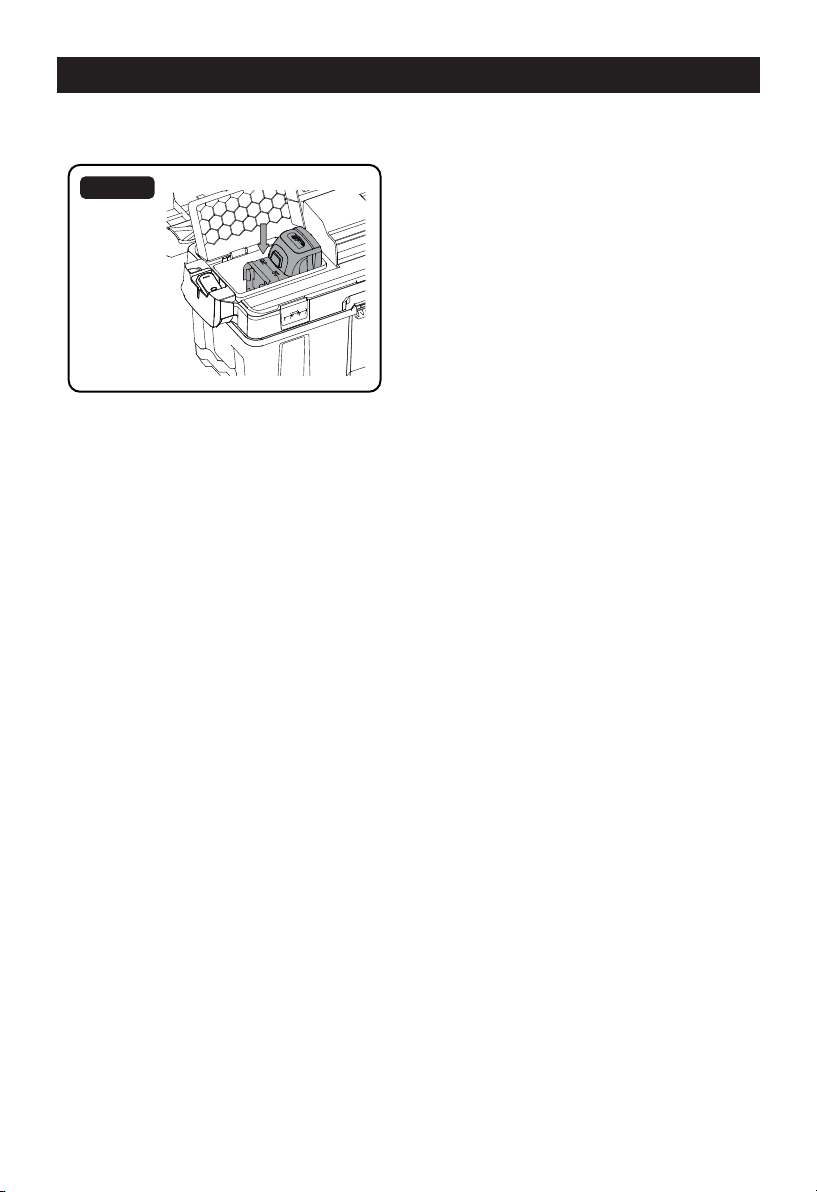
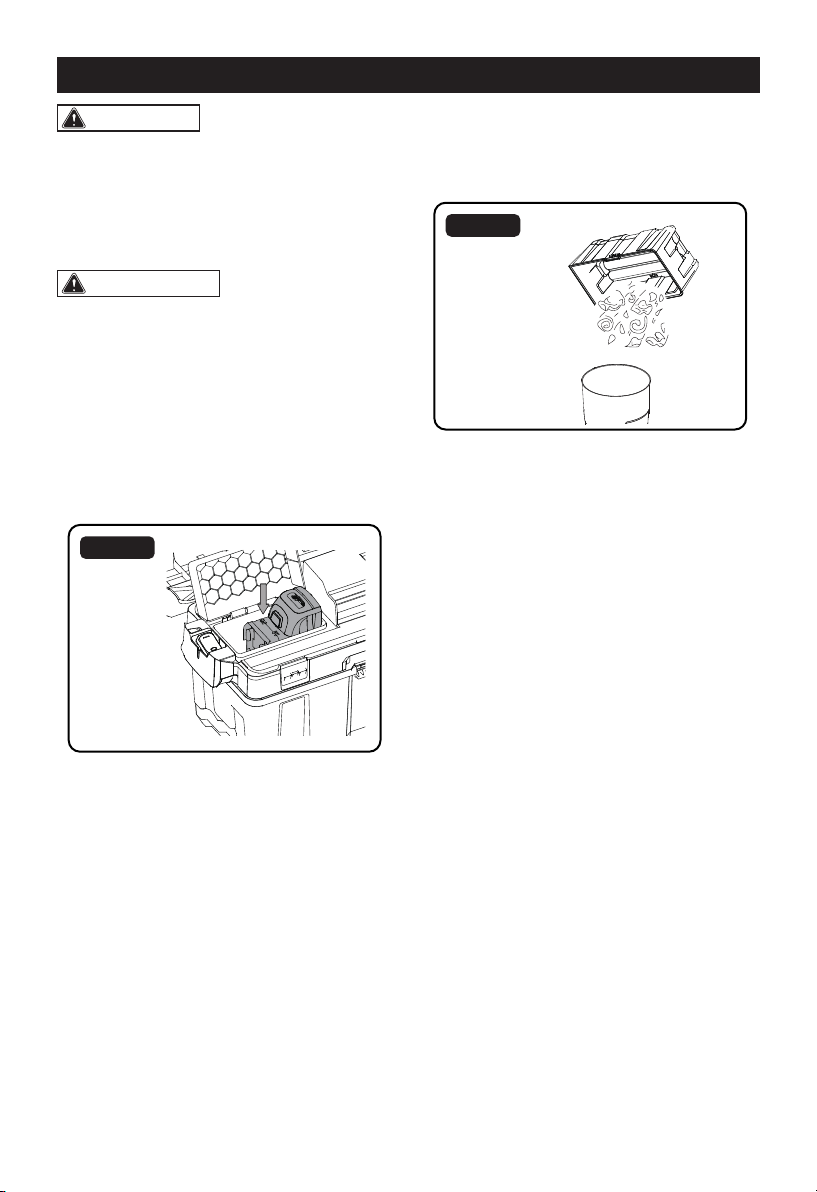
7. Remove the battery and place it in the
storage bay (Fig. 16).
Fig. 16
8. Empty the collection tank into a suitable
receptacle (Fig. 17).
Fig. 17
Page 11
NOTE:
The provided filter can be used for both
wet and dry vacuum operation.
1. Verify that the cartridge filter is securely
mounted (Fig. 18). For installation
instructions see page 16.
Fig. 18
2. Insert the hose into the vacuum port
(Fig. 19).
Fig. 19
3. Push required accessories onto the free
end of the hose or the extension wand
(Fig. 20).
Fig. 20
4. Make sure the battery pack is correctly
installed (Fig. 21). For installation
instructions see page 8.
Fig. 21
5. Turn the motor on by flipping the switch to
the 'I' ON position (Fig. 22).
Fig. 22
6. Once you have completed vacuuming, or
when the tank is full, turn the motor off by
f lipping the switch to the 'O' OFF position
(Fig. 23).
Fig. 23
LIQUID VACUUM OPERATION
Page 12
LIQUID VACUUM OPERATION
7. Remove the battery and place it in the
storage bay (Fig. 24).
Fig. 24
8. Empty the collection tank into a suitable
receptacle or drain (Fig. 25).
Fig. 25
IMPORTANT!
When vacuuming large
quantities of liquids, do not immerse the nozzle
completely in the liquid; leave a gap at the tip
of the nozzle opening to allow air inflow. The
machine is fitted with a float valve that stops the
suction action when the collection tank reaches
its maximum capacity. You will notice an
increase in motor speed. When this happens,
turn off the machine, disconnect from power
supply, and drain the liquid into a suitable
receptacle or drain. To continue vacuuming,
refit the power head to the collection tank.
After wet vacuuming, turn the machine off and
remove the battery. Empty the collection tank,
clean and dry the inside and outside before
storage.

Page 13
BLOWER OPERATION
This wet/dry vacuum has blowing
capabilities. To use the blower feature
follow the instructions listed.
WARNING:
ALWAYS WEAR SAFETY
GOGGLES WHILE USING BLOWER.
WARNING:
KEEP BYSTANDERS
CLEAR FROM BLOWING DEBRIS.
WARNING:
WEAR A DUST MASK IF
BLOWING CREATES DUST THAT MIGHT BE
INHALED.
1. Connect the hose to the blower port
(Fig. 26).
Fig. 26
2. Push required accessories onto the free
end of the hose or the extension wand
(Fig. 27).
Fig. 27
3. Make sure the battery is correctly installed
(Fig. 28). For installation instructions see
page 8.
Fig. 28
4. Turn the motor on by flipping the switch to
the 'I' ON position (Fig. 29).
Fig. 29
5. Once you have completed blowing, turn the
motor off by flipping the switch to the 'O'
OFF position (Fig. 30).
Fig. 30
Page 14
BLOWER OPERATION
6. Remove the battery and place it in the
storage bay (Fig. 31).
Fig. 31
Page 15
MAINTENANCE
WARNING:
TO REDUCE THE
RISK OF INJURY, ALWAYS UNPLUG
THE CHARGER AND REMOVE THE
BATTERY PACK FROM THE CHARGER
OR TOOL BEFORE PERFORMING ANY
MAINTENANCE. NEVER DISASSEMBLE THE
TOOL, BATTERY PACK OR CHARGER.
IMPORTANT!
BEFORE CLEANING
YOUR VACUUM OR CARRYING OUT ANY
MAINTENANCE, MAKE SURE THAT THE
TOOL IS SWITCHED OFF AND POWER
SUPPLY DISCONNECTED TO PREVENT
ACCIDENTAL START-UP.
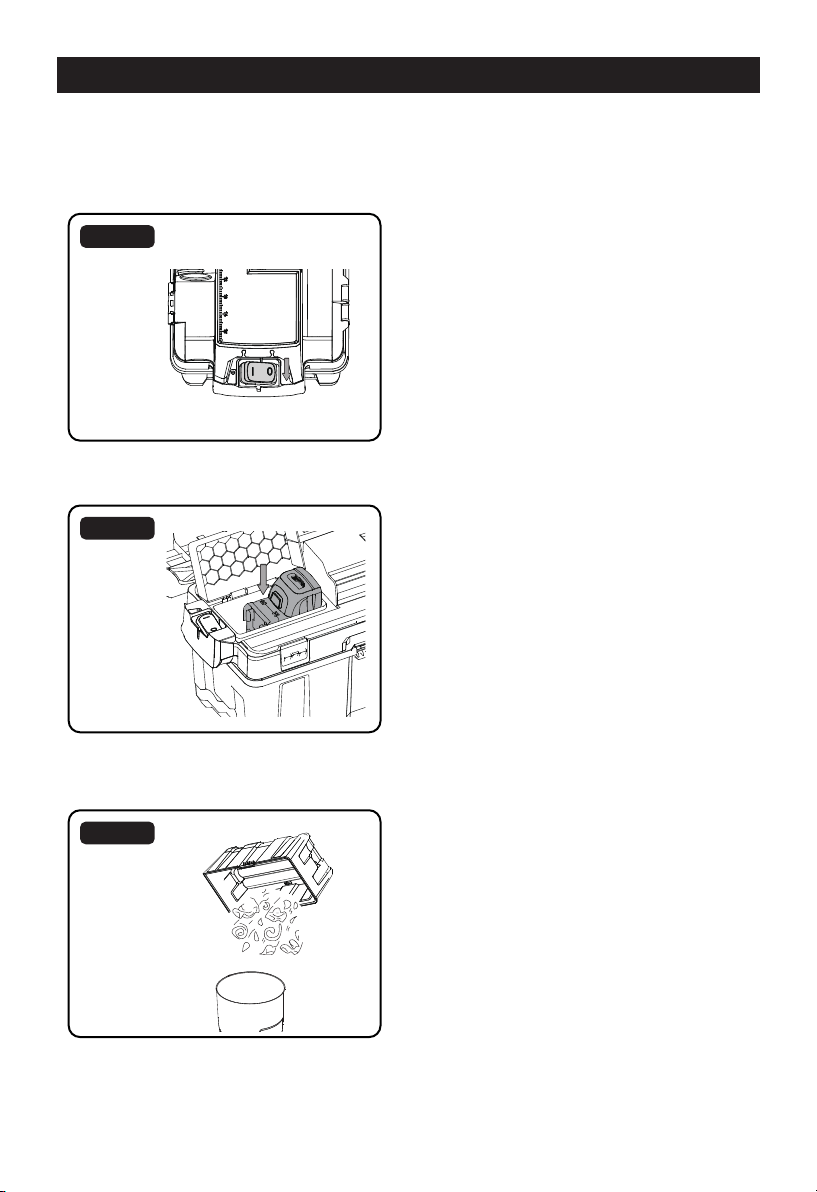
EMPTYING & CLEANING THE COLLECTION
TANK
1. Verify that the battery has been removed
from the operational battery bay (Fig. 32).
Fig. 32
2. Disconnect the hose from the vacuum.
3. Undo the latches and remove the power
head from the collection tank.
4. Clear all dirt or debris from the collection
tank and clean with mild soap and water.
Allow to dry before replacing the power
head (Fig. 33).
Fig. 33
STORAGE
Before storing your vacuum cleaner, the
collection tank should be emptied and cleaned.
The battery should be stored in the right storage
bay. The accessories should be cleaned and
stored so they can be readily available when
needed. Store wet/dry vacuum indoors.
REPAIRS
Repairs for this wet/dry vacuum should be
performed only by qualified service personnel
using only identical replacement parts.
Page 16
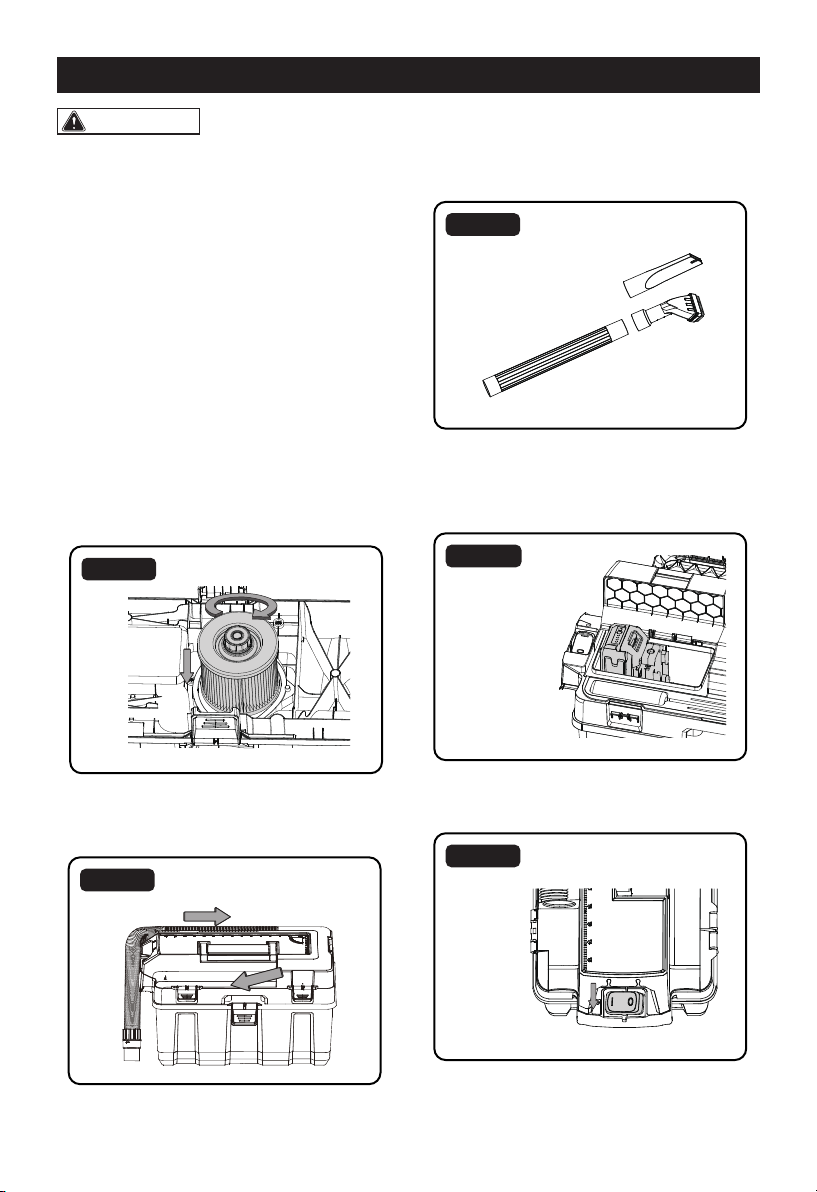
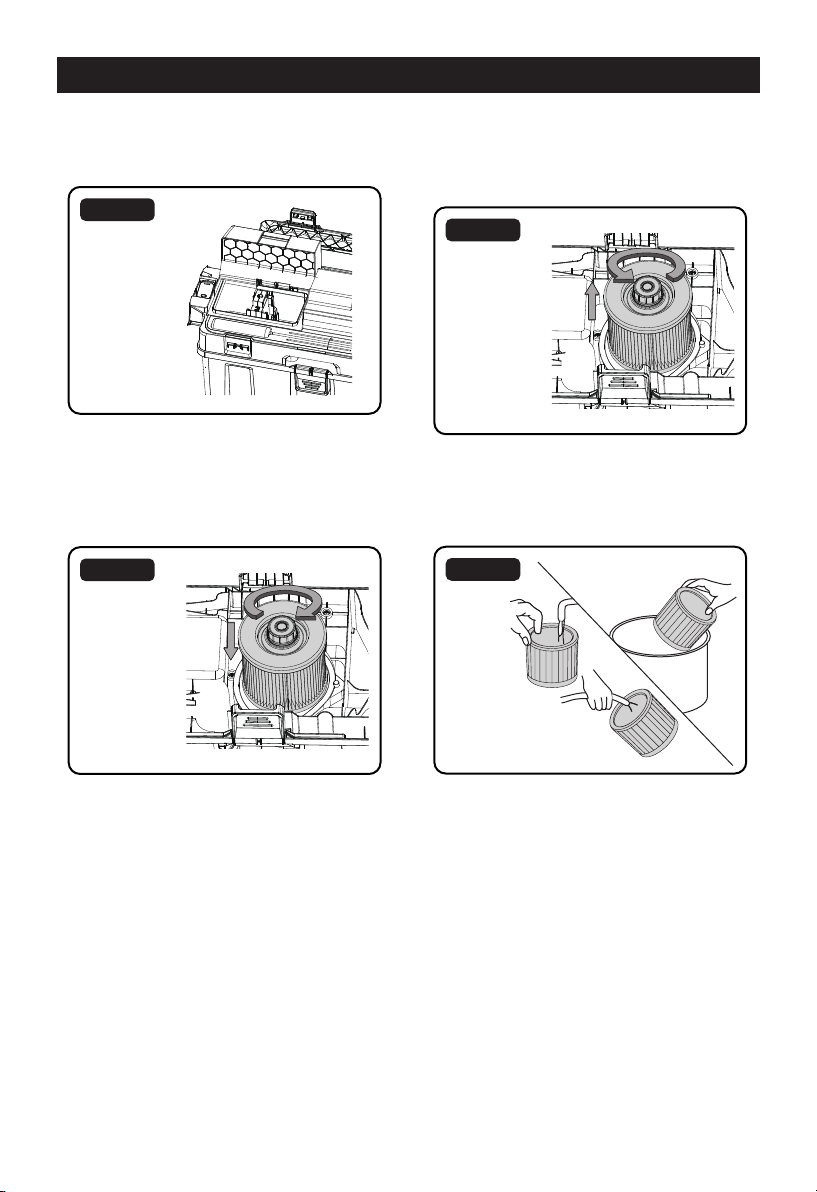
INSTALLING & CLEANING CARTRIDGE FILTER
INSTALLING CARTRIDGE FILTER
1. Verify that the battery is disconnected
(Fig. 34).
Fig. 34
2. Remove power head and place in an upside
down position.
3. Install the cartridge filter over the filter cage,
securing it with the retainer nut. Do not
overtighten (Fig. 35).
Fig. 35
REMOVING & CLEANING CARTRIDGE
FILTER
1. Unscrew the retainer nut by turning counter
clockwise (Fig. 36).
Fig. 36
2. Carefully hold and pull the cartridge filter up
for removal.
3. Clean the cartridge filter by brushing or
rinsing off the debris (Fig. 37).
Fig. 37
4. Install cleaned or new filter as instructed in
steps 2 & 3 of INSTALLING CARTRIDGE
FILTER.
5. Wet filters should be removed and allowed
to air dry for 24 hours before installing onto
the filter cage.

Page 17
TROUBLESHOOTING
Problem Possible Cause Solution
Vacuum will not operate.
Battery has no capacity. Charge the battery.
Battery not inserted properly. Insert battery pack correctly.
Wrong battery being used.
Be sure to use only the
battery and charger supplied
with your product.
Vacuum power is weak.
There is a blockage in the
hose and the tank inlet.
Check the hose and tank inlet
for blockage.
The filter is clogged by fine
dust.
Take off the filter and clean it
or install a new filter.
The collection tank is full. Empty the collection tank.
Low battery capacity Charge the battery.
Vacuum turns off on its own.
No battery capacity. Charge the battery.
Battery may be depleted. Charge the battery.
Dust escapes from vacuum.
Filter is missing or installed
incorrectly.
Check the filter for correct
installation.
Filter is damaged. Replace the filter.
Page 18
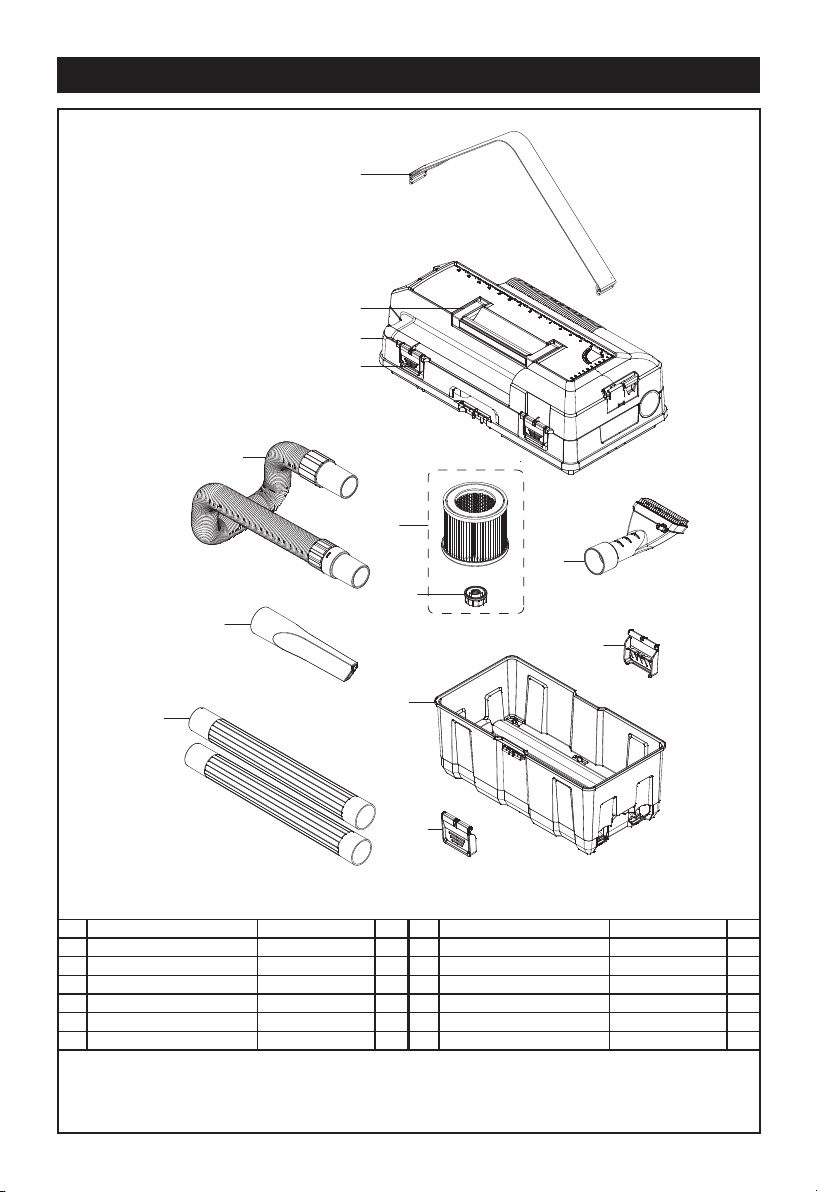
EXPLODED VIEW & PARTS LIST
3
3.1
5
5
6
7
8
9
2.2
4
2.1
2
1
Key Description Part # Qty
1 Shoulder Strap 551351101 1
2 Power Head Assembly 1
2.1 Toolbox Cover Latch 551350103 2
2.2 Handle Assembly 551351103 1
3 Cartridge Filter Assembly 240-5252 1
3.1 Retainer Nut 551346103 1
Key Description Part # Qty
4 Collection Tank 1
5 Collection Tank Latch 551350106 2
6 1-7/8" Extension Wand 551001121 2
7 1-7/8" X 6' Flexible Hose 551350107 1
8 1-7/8" Crevice Tool 551350108 1
9 1-7/8" Floor Nozzle 551350109 1

Page 19
NOTES

Page 20
NOTES

Page 21
NOTES

Page 22
SAVE YOUR RECEIPTS
THIS WARRANTY IS VOID WITHOUT THEM
SAVE YOUR RECEIPTS
THIS WARRANTY IS VOID WITHOUT THEM
WARRANTY
This MASTERFORCE
TM
brand wet/dry vacuum carries our 90-Day Money Back
Guarantee. If you are not completely satisfied with your MASTERFORCE
TM
brand wet/
dry vacuum for any reason within ninety (90) days from the date of purchase, return the
vacuum with your original receipt to any MENARDS
®
retail store, and we will provide you
a refund - no questions asked.
Wet/Dry Vacuums
3-YEAR LIMITED WARRANTY
This MASTERFORCE
TM
brand wet/dry vacuum carries our famous No Hassle 3-Year
Limited Warranty to the original purchaser. If, during normal use, this MASTERFORCE
TM
wet/dry vacuum breaks or fails due to a defect in material or workmanship within three (3)
years from the date of original purchase, simply bring the vacuum with the original sales
receipt back to your nearest MENARDS
®
retail store. At its discretion, MASTERFORCE
TM
agrees to have the vacuum or any defective part(s) repaired or replaced with the
same or similar MASTERFORCE
TM
product or part free of charge, within the stated
warranty period, when returned by the original purchaser with original sales receipt.
Not withstanding the foregoing, this limited warranty does not cover any damage that
has resulted from abuse or misuse of the Merchandise. This warranty: (1) excludes
expendable parts including but not limited to filters, hoses, nozzles, latches, and casters;
(2) shall be void if this vacuum is used for commercial and/or rental purposes; and (3)
does not cover any losses, injuries to persons/property or costs. This warranty does give
you specific legal rights and you may have other rights, which vary from state to state.
Be careful, wet/dry vacuums are dangerous if improperly used or maintained. Seller’s
employees are not qualified to advise you on the use of this merchandise. Any oral
representation(s) made will not be binding on seller or its employees. The rights under
this limited warranty are to the original purchaser of the merchandise and may not be
transferred to any subsequent owner. This limited warranty is in lieu of all warranties,
expressed or implied including warranties or merchantability and fitness for a particular
purpose. Seller shall not be liable for any special, incidental, or consequential damages.
The sole exclusive remedy against the seller will be for the replacement of any defects as
provided herein, as long as the seller is willing or able to replace this product or is willing
to refund the purchase price as provided above. For insurance purposes seller is not
allowed to demonstrate any of these wet/dry vacuums for you.
For questions / comments, technical assistance or repair parts -
Please call toll free at:
1-866-384-8432
. (M-F 8:30am-5:00pm EST)
90-DAY MONEY BACK GUARANTEE

05/2018
© 2018 Menard, Inc., Eau Claire, WI 54703