Loading ...
Loading ...
Loading ...
13
Assembly Instructions
21. Now, go back and securely tighten all the Cam Locks and the Screws. Make sure that all the parts are
tight and there are no gaps between the parts. This will help keep the unit square.
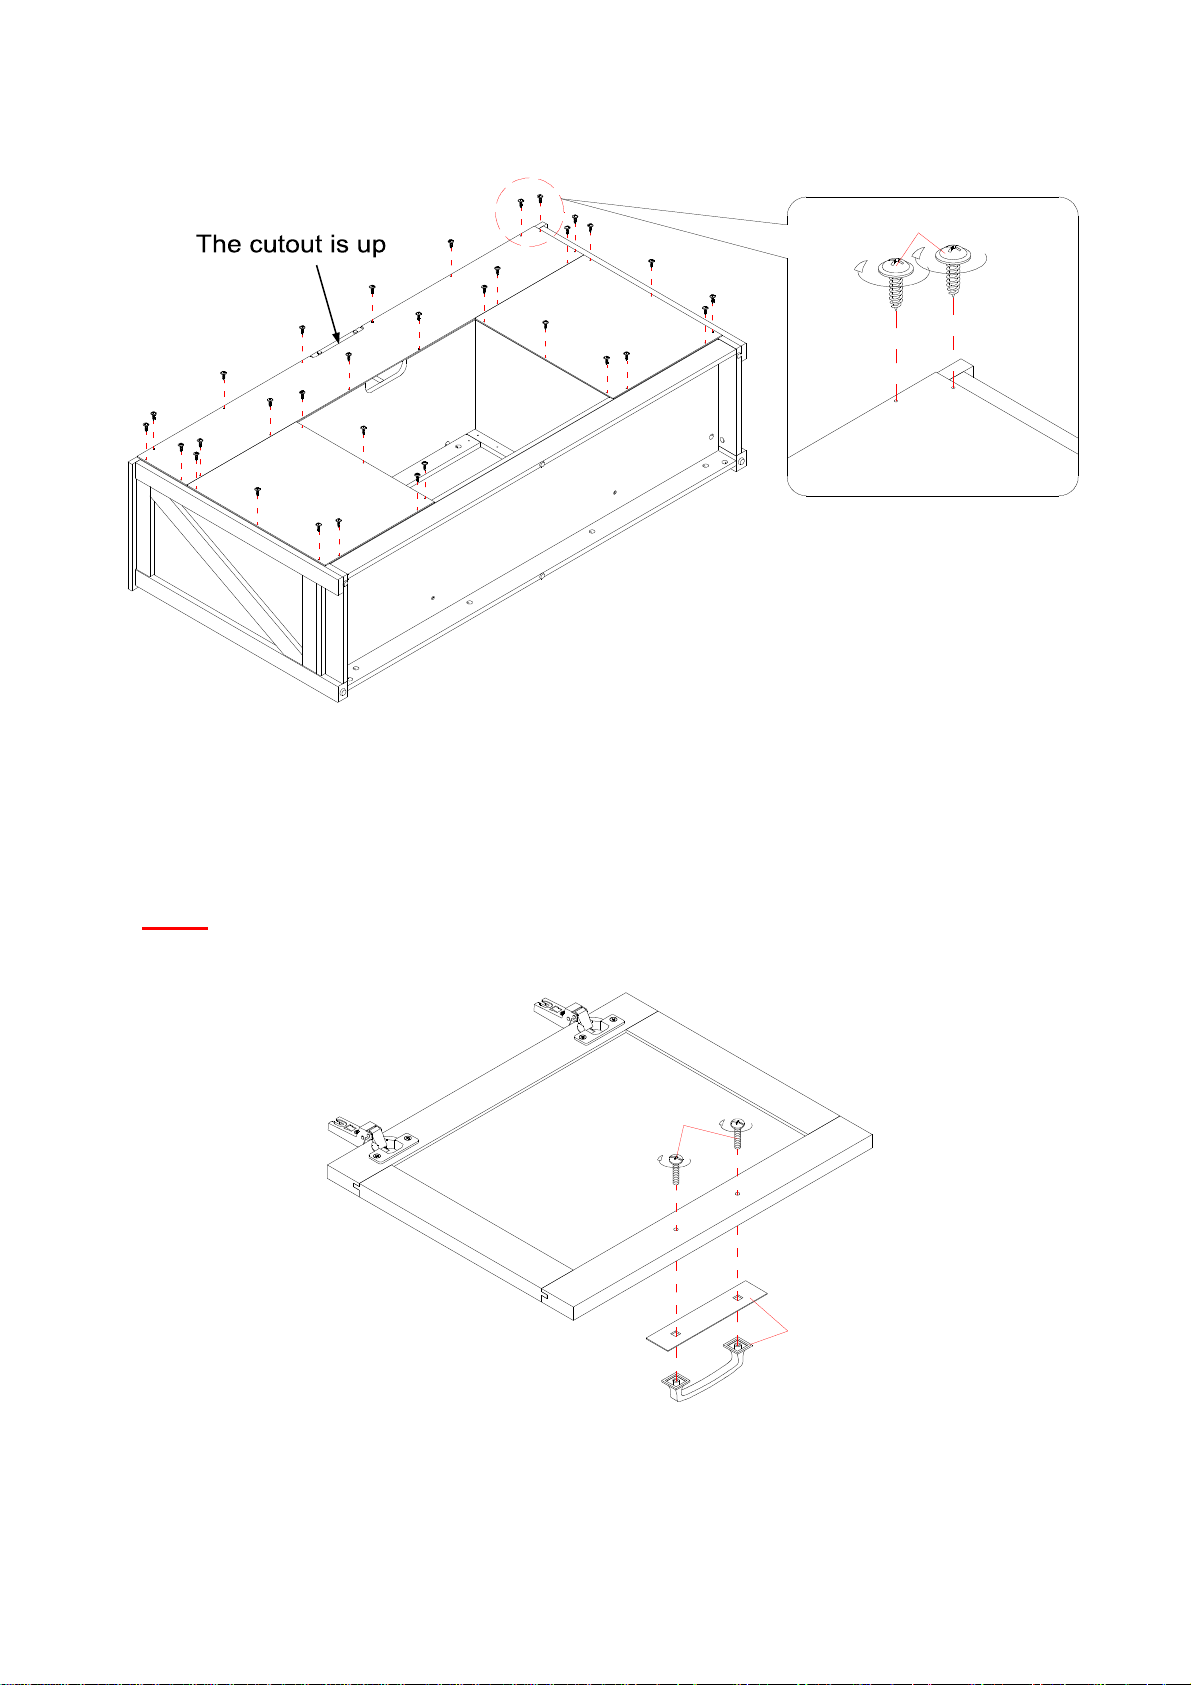
22. Pick up the Upper Back Panel (P) and align the pre-drilled holes against the upper long edge with the
pilot holes on the back of the Top Panel (A). Attach the Back Panel (P) in place using the provided
Washer Head Screws (8).
NOTE: We recommend attaching back panel with the screws at the corners first.
23. Attach two Lower Back Panels (Q) to the mantel frame with the provided Washer Head Screws (8).
24. Attach one Handle and Back Plate (10) to the front side of each Door (R and S) using two Handle Bolts
(11).
R/S
11
10
8
C
Q
P
Q
D
H
E
Loading ...
Loading ...
Loading ...