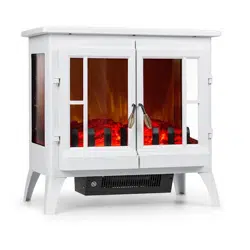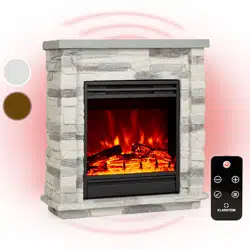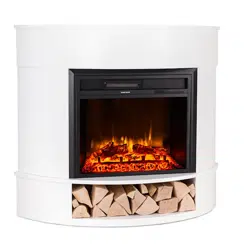
BORMIO
Elektrischer Kamin
Fireplace Heater
Cheminée électrique
Camino elettrico
Chimenea eléctrica
Elektrische haard
Hinweis: Dieses Produkt ist nur für gut isolierte Räume
oder für den gelegentlichen Gebrauch geeignet.
Note: This product is only suitable for well insulated
spaces or occasional use.
Advertencia: Este producto está indicado únicamente
en lugares abrigados o para una utilización punctual.
Remarque : Ce produit ne peut être utilisé que dans des
locaux bien isolés ou de manière occasionnelle.
Nota: Questo prodotto è adatto solo per spazi ben
isolati o uso occasionale.
www.klarstein.com
10032590 10034249
10035071 10035072


3
DE
Sehr geehrter Kunde,
wir gratulieren Ihnen zum Erwerb Ihres Gerätes. Lesen Sie
die folgenden Hinweise sorgfältig durch und befolgen Sie
diese, um möglichen Schäden vorzubeugen. Für Schäden,
die durch Missachtung der Hinweise und unsachgemäßen
Gebrauch entstehen, übernehmen wir keine Haftung. Scannen
Sie den folgenden QR-Code, um Zugriff auf die aktuellste
Bedienungsanleitung und weitere Informationen rund um das
Produkt zu erhalten.
INHALTSVERZEICHNIS
Produktdatenblatt4
Sicherheitshinweise5
Bedienfeld und Tastenfunktionen6
Fernbedienung und Tastenfunktionen7
Inbetriebnahme8
Manuelle Bedienung8
Bedienung per Fernbedienung9
Hinweise zur Entsorgung13
Hersteller & Importeur (UK)13
TECHNISCHE DATEN
Artikelnummer
10032590, 10034249, 10035071,
10035072
Stromversorgung 220-240 V ~ 50/60 Hz
Leistung 1600-1900 W
English 15
Español 27
Français 39
Italiano 51
Nederlands 63
4
DE
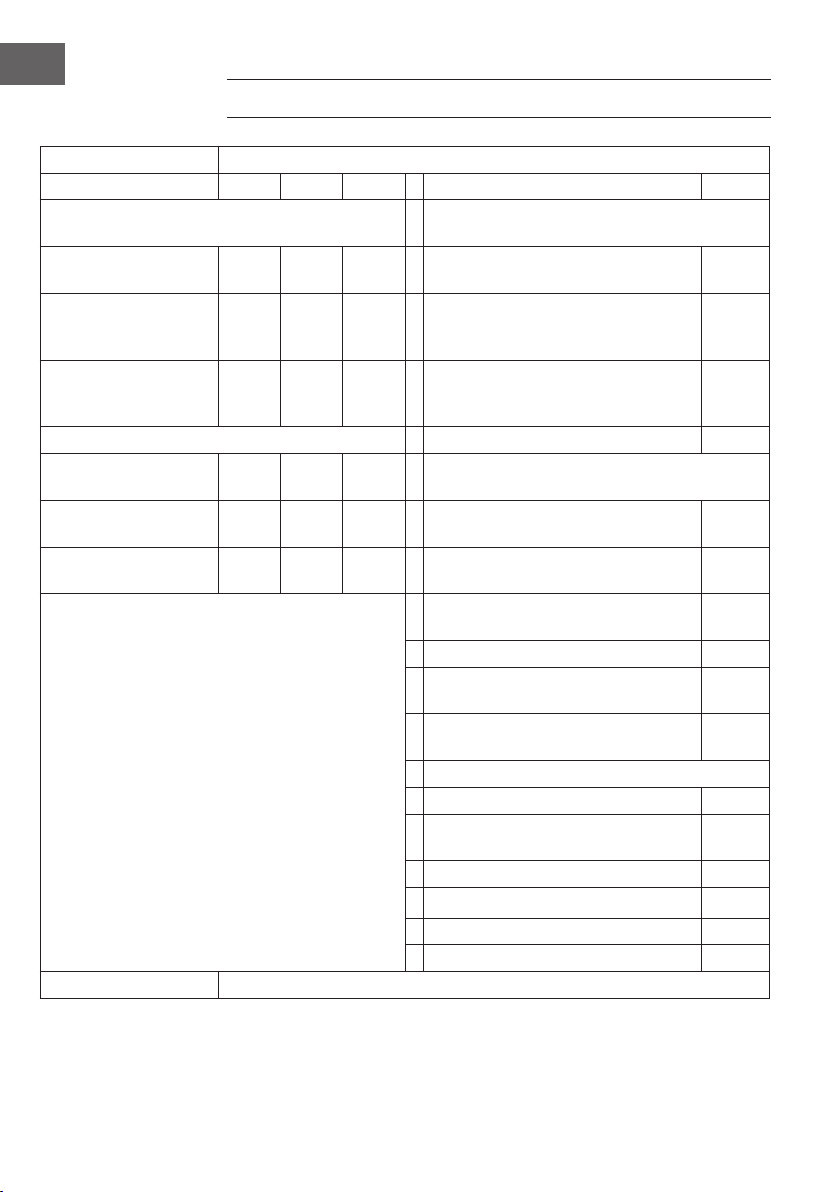
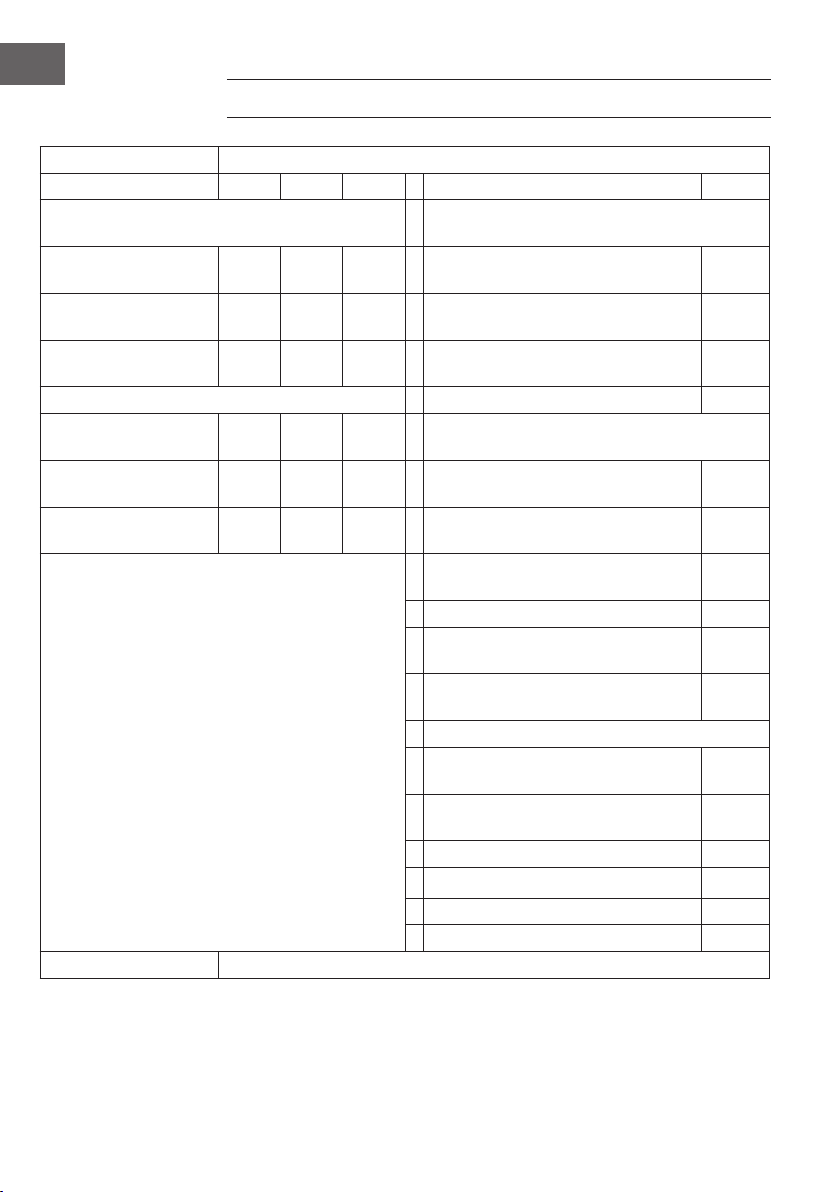
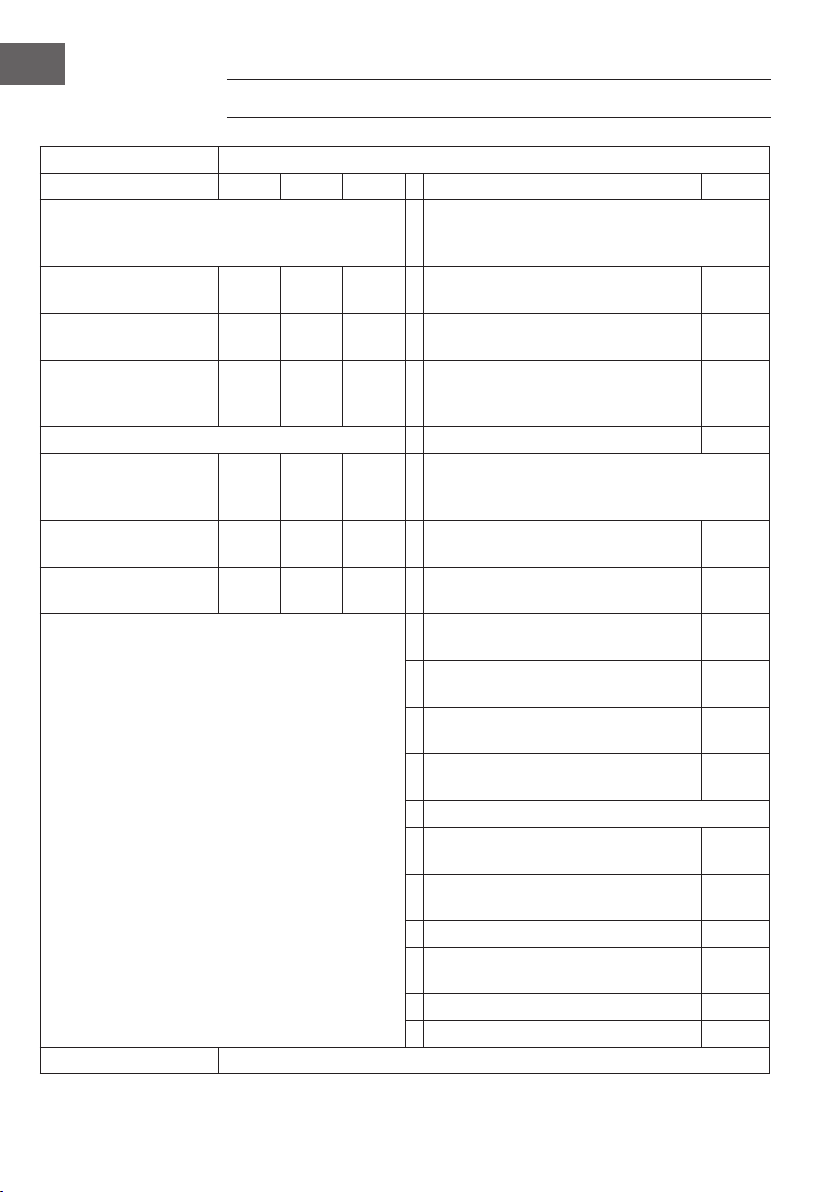
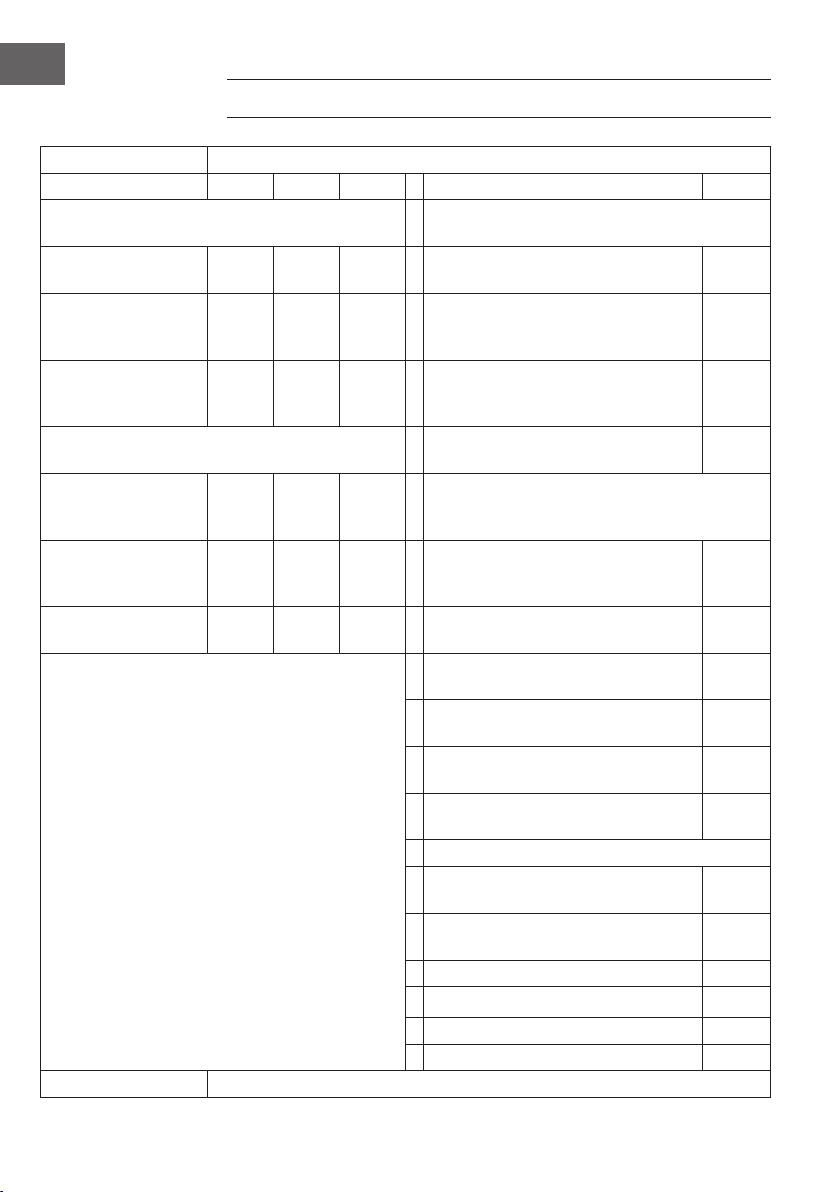
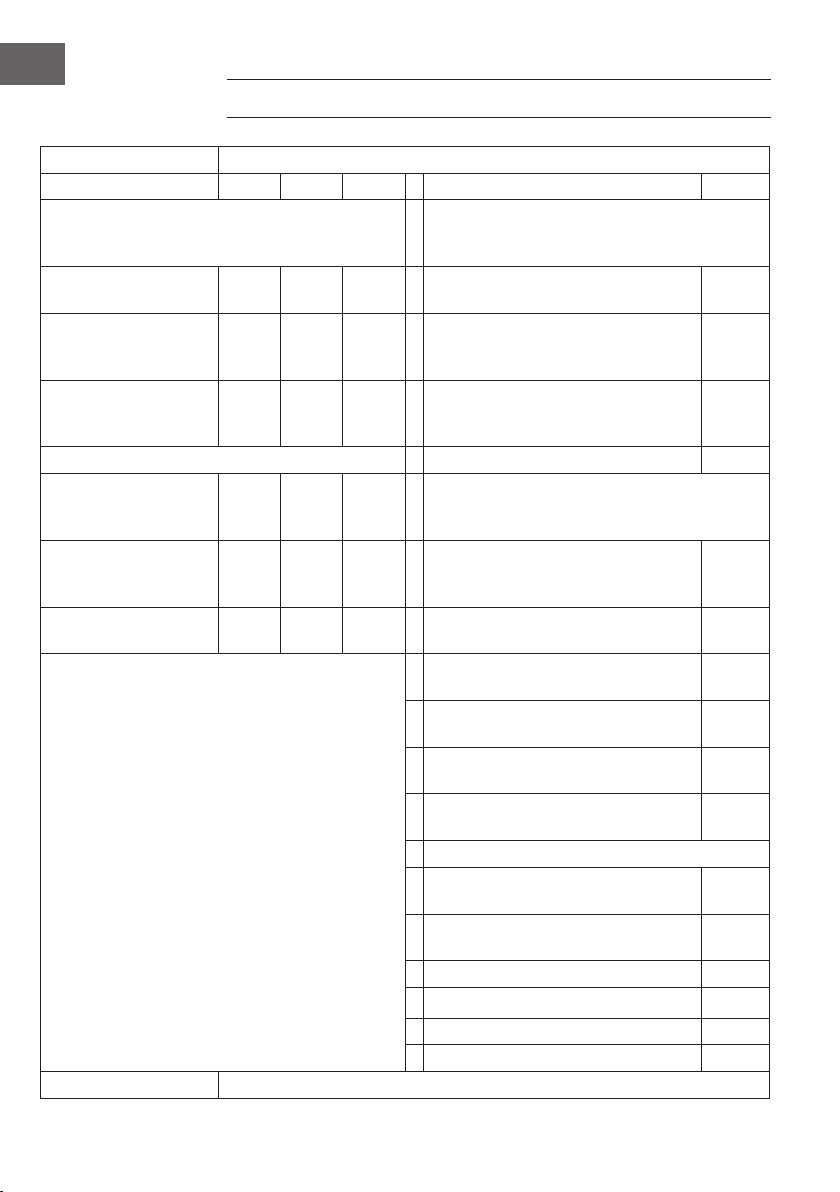
PRODUKTDATENBLATT
Modellkennung(en) 10032590, 10034249, 10035071, 10035072
Angabe Symbol Wert Einheit Angabe Einheit
Wärmeleistung Nur bei elektrischen Speicher-Einzelraumheizgeräten:
Art der Regelung der Wärmezufuhr
Nennwärmeleistung P
nom
1,8
kW Manuelle Regelung der Wärmezufuhr mit
integriertem Thermostat
k.A.
Mindestwärmeleistung
(Richtwert)
P
min
0
kW Manuelle Regelung der Wärmezufuhr
mit Rückmeldung der Raum- und/oder
Außentemperatur
k.A.
Maximale kontinuierliche
Wärmeleistung
P
max,c
1,8
kW Elektronische Regelung der Wärmezufuhr
mit Rückmeldung der Raum- und/oder
Außentemperatur
k.A.
Hilfsstromverbrauch
Wärmeabgabe mit Gebläseunterstützung k.A.
Bei Nennwärmeleistung
(Ventilator-Motor)
el
max
k.A. kW
Art der Wärmeleistung/Raumtemperaturkontrolle
Bei Mindestwärmeleistung
(Ventilator-Motor)
el
min
k.A. kW Einstuge Wärmeleistung, keine
Raumtemperaturkontrolle
nein
Im Bereitschaftszustand el
SB
0
W Zwei oder mehr manuell einstellbare Stufen,
keine Raumtemperaturkontrolle
nein
Raumtemperaturkontrolle mit mechanischem
Thermostat
nein
Mit elektronischer Raumtemperaturkontrolle nein
Mit elektronischer Raumtemperaturkontrolle und
Tageszeitregelung
nein
Mit elektronischer Raumtemperaturkontrolle und
Wochentagsregelung
ja
Sonstige Regelungsoptionen
Raumtemperaturkontrolle mit Präsenzerkennung nein
Raumtemperaturkontrolle mit Erkennung offener
Fenster
nein
Mit Fernbedienungsoption nein
Mit adaptiver Regelung des Heizbeginns nein
Mit Betriebszeitbegrenzung nein
Mit Schwarzkugelsensor nein
Kontaktangaben Chal-Tec GmbH, Wallstraße 16, 10179, Berlin, Deutschland
5
DE
SICHERHEITSHINWEISE
• Lesen Sie die Bedienungsanleitung vor der Inbetriebnahme aufmerksam durch und
bewahren Sie diese für den zukünftigen Gebrauch auf.
• Installieren Sie den Elektrokamin gemäß den Bestimmungen dieser
Bedienungsanleitung. Konsultieren Sie bei Zweifeln den Kundendienst.
• Achten Sie darauf, dass die Steckdose, welche Sie verwenden möchten, leicht
zugänglich ist und sich nicht oberhalb des Geräts be ndet.
• Schalten Sie das Gerät immer aus und ziehen Sie den Netzstecker aus der
Steckdose, bevor Sie das Gerät bewegen, es reinigen oder warten.
• Befestigen Sie das Gerät, so dass es nicht umfallen kann.
• Lassen Sie das Gerät nicht unbeaufsichtigt, wenn sich kleine Kinder oder ältere
Menschen in der näheren Umgebung aufhalten.
• Lassen Sie Kinder niemals allein und unbeaufsichtigt im selben Raum wie das Gerät,
wenn dieses eingeschaltet ist.
• Decken Sie die Belüftungsöffnungen des Geräts nicht ab und blockieren Sie diese
nicht. Stecken Sie keinesfalls Gegenstände in die Belüftungsöffnungen.
• Installieren Sie das Gerät nicht in Räumen, in denen ießendes Wasser verwendet
wird, wie beispielsweise in Bädern, Küchen, Duschräumen, in der Nähe von
Swimmingpools etc.
• Verwenden Sie zur Reinigung des Geräts niemals Sprays oder Dampfreiniger.
• Verlegen Sie das Gerätekabel niemals unter Teppichen oder an Orten, wo es zur
Stolperfalle werden kann.
• Installieren Sie das Gerät nicht in der Nähe von Vorhängen oder anderen leicht
brennbaren Materialien.
• Verwenden Sie das Gerät nicht zum Trocken von Kleidung etc.
• Setzen oder stellen Sie sich niemals auf das Gerät.
• Verwenden Sie das Gerät niemals in Kombination mit Zeitschaltuhren oder anderen
Geräten, die das Gerät zu einer bestimmten Zeit automatisch einschalten.
Hinweis: Das Gerät verfügt über einen Überhitzungsschutz. Wenn das Gerät auf Grund
von Überhitzung stoppt, gehen Sie folgendermaßen vor: Schalten Sie das Gerät aus
und ziehen Sie den Netzstecker aus der Steckdose. Sollten Gegenstände das Gerät
abdecken, entfernen Sie diese.
WARNUNG
Verbrennungsgefahr! Das Gerät wird sehr heiß, berühren Sie es nicht.
Stellen Sie alle Schalter auf „aus“ und lassen Sie es vollständig abkühlen.
Sobald das Gerät vollständig abgekühlt hat, können Sie den Netzstecker
wieder mit der Steckdose verbinden. Öffnen Sie das Produkt keinesfalls!
Es verfügt über keine vom Nutzer zu wartenden Teile.
6
DE
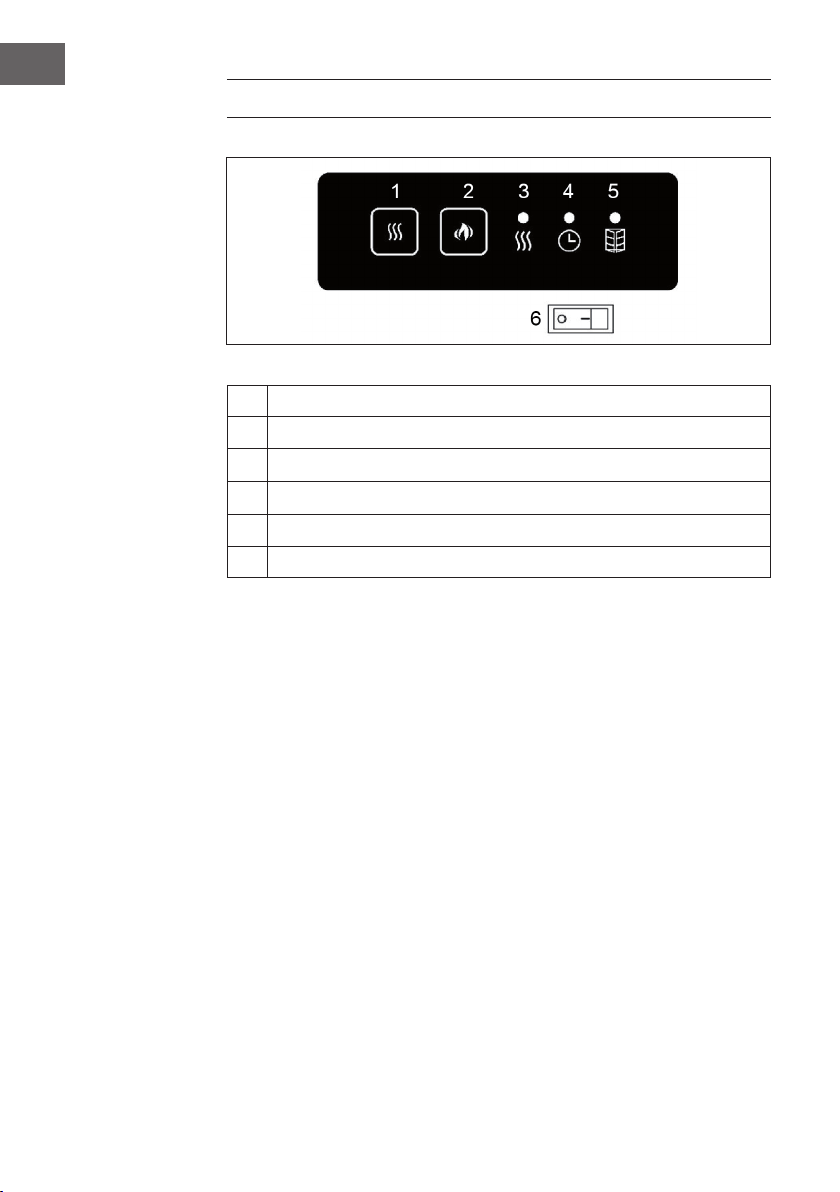
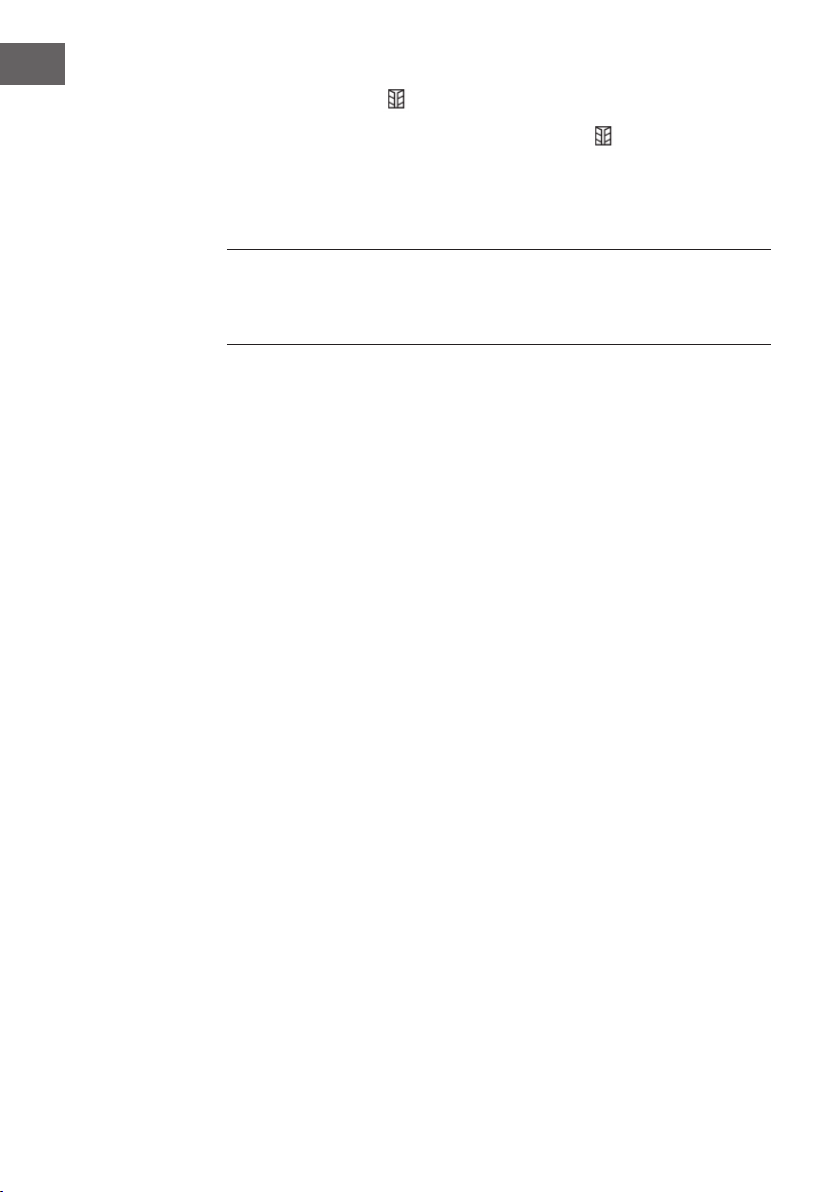
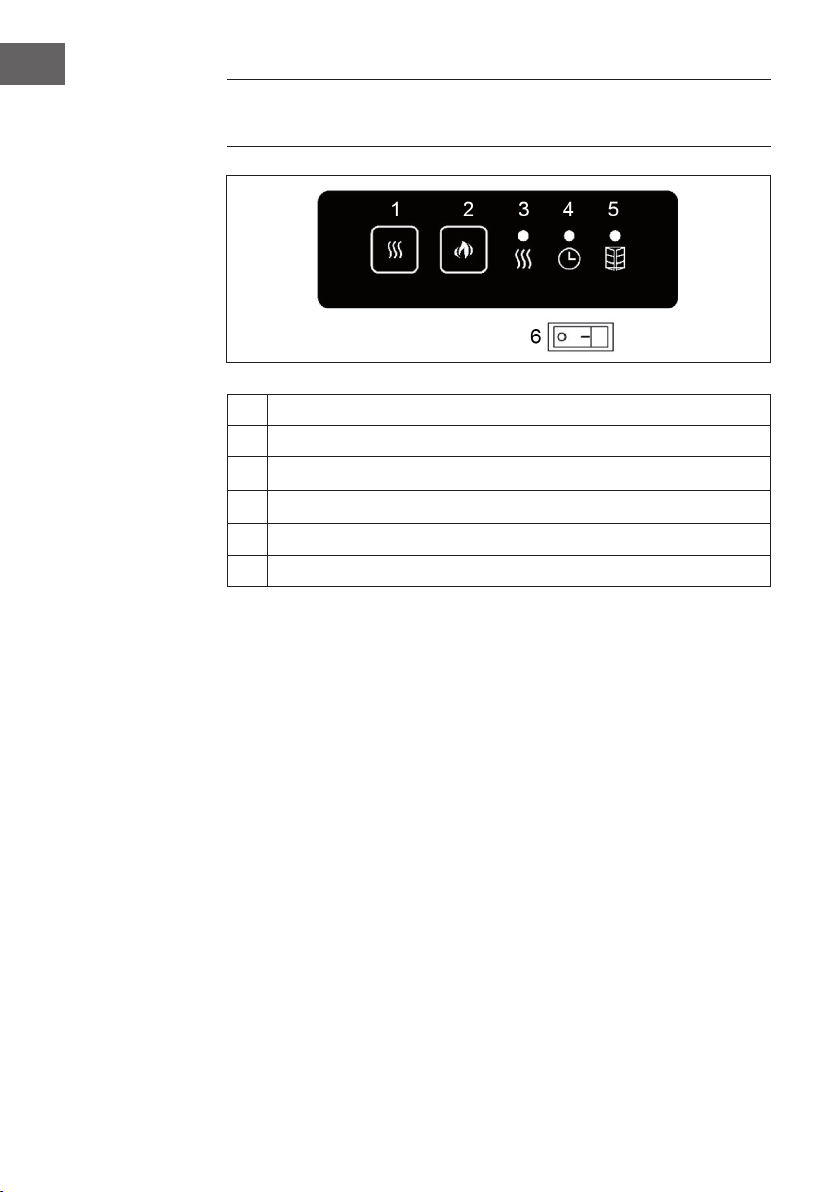
BEDIENFELD UND TASTENFUNKTIONEN
1
Zum Anpassen der Heizleistung
2
Zum Anpassen der Helligkeit des Flammeneffekts
3
Anzeige für die Heizleistung
4
Anzeige für den Timer
5
Offenes-Fenster-Anzeige
6
Ein-/Aus-Schalter
7
DE
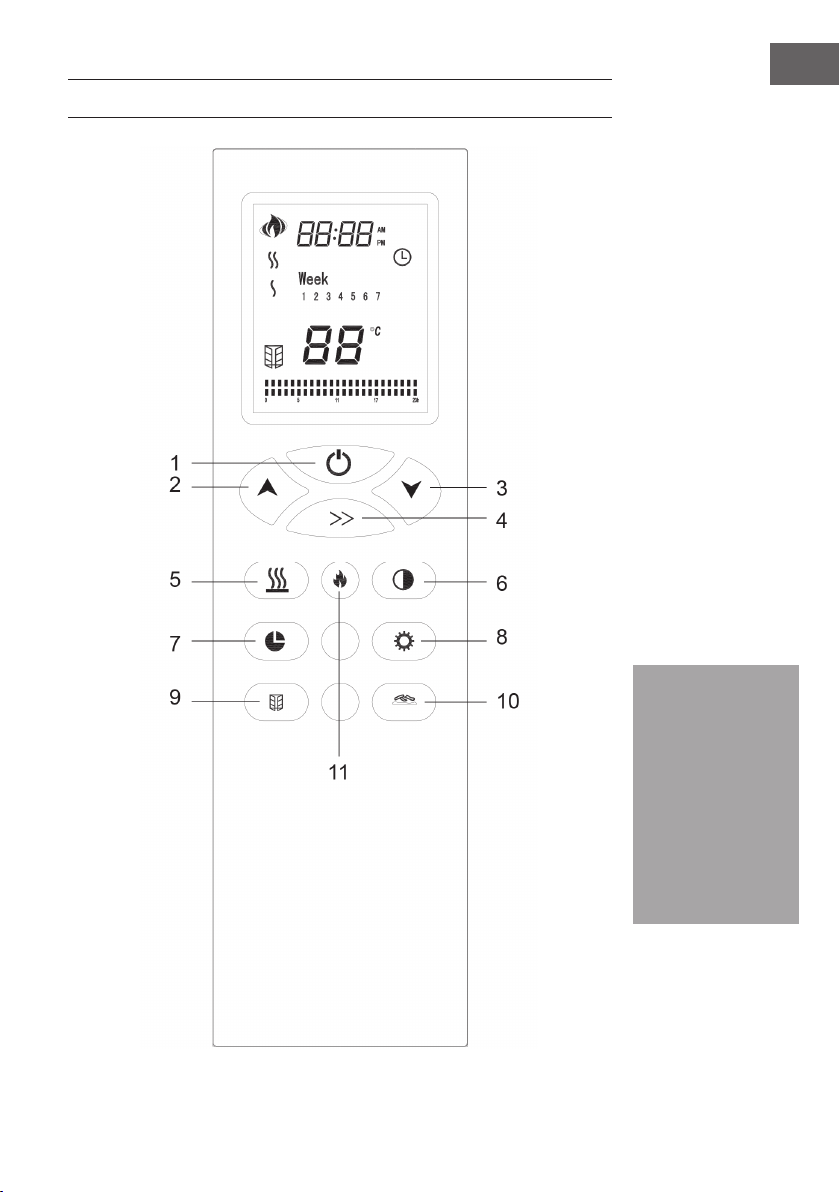
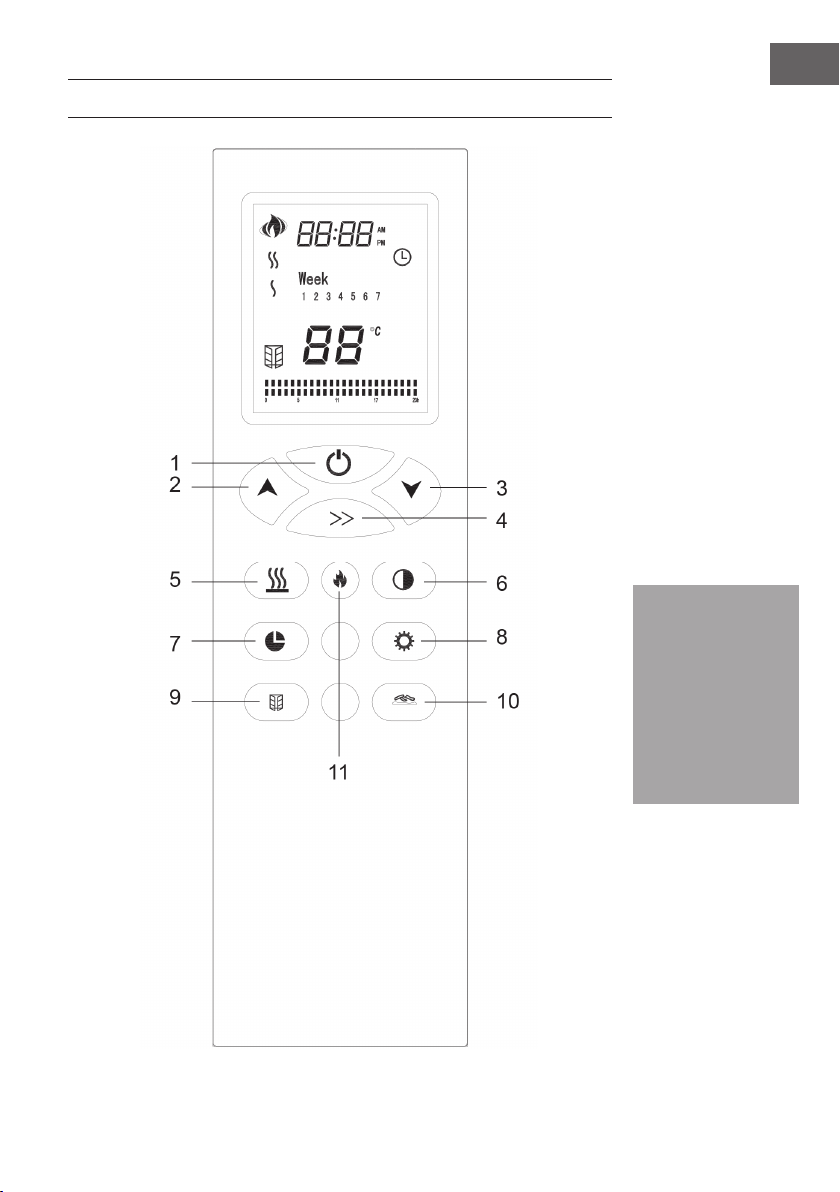
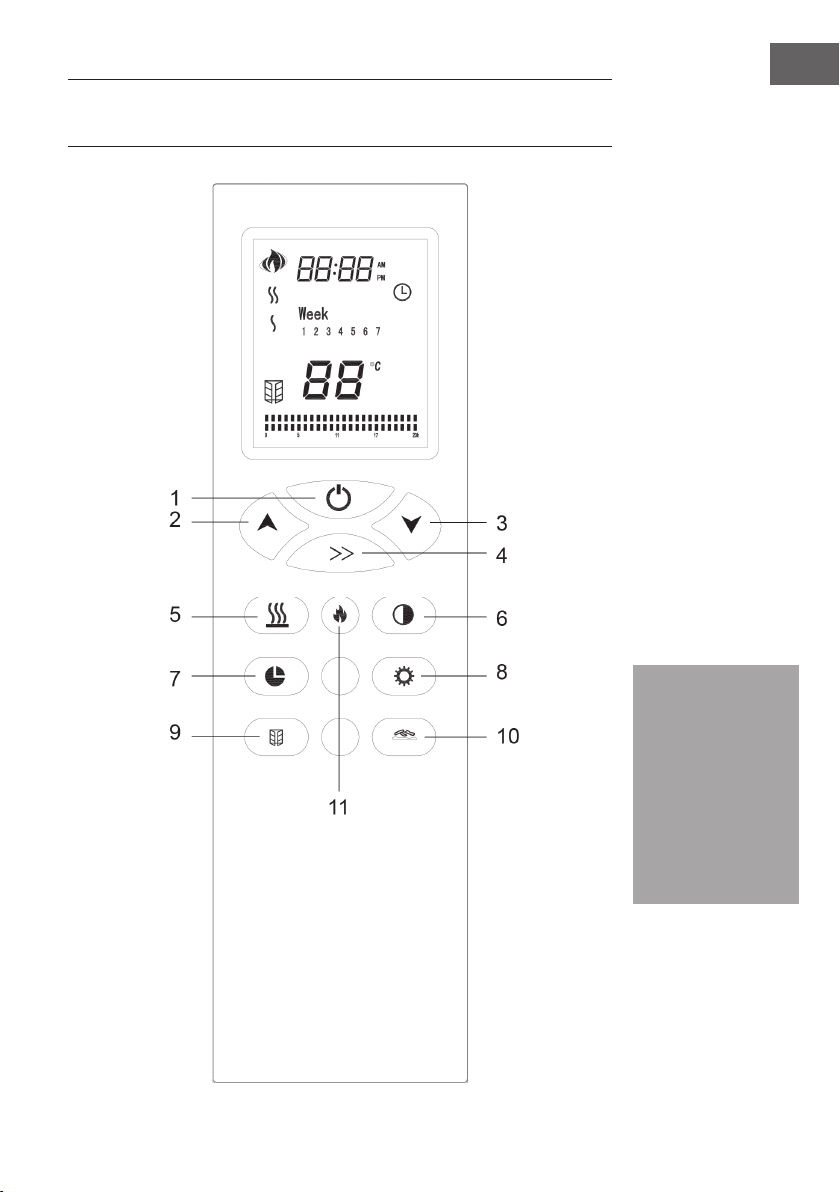
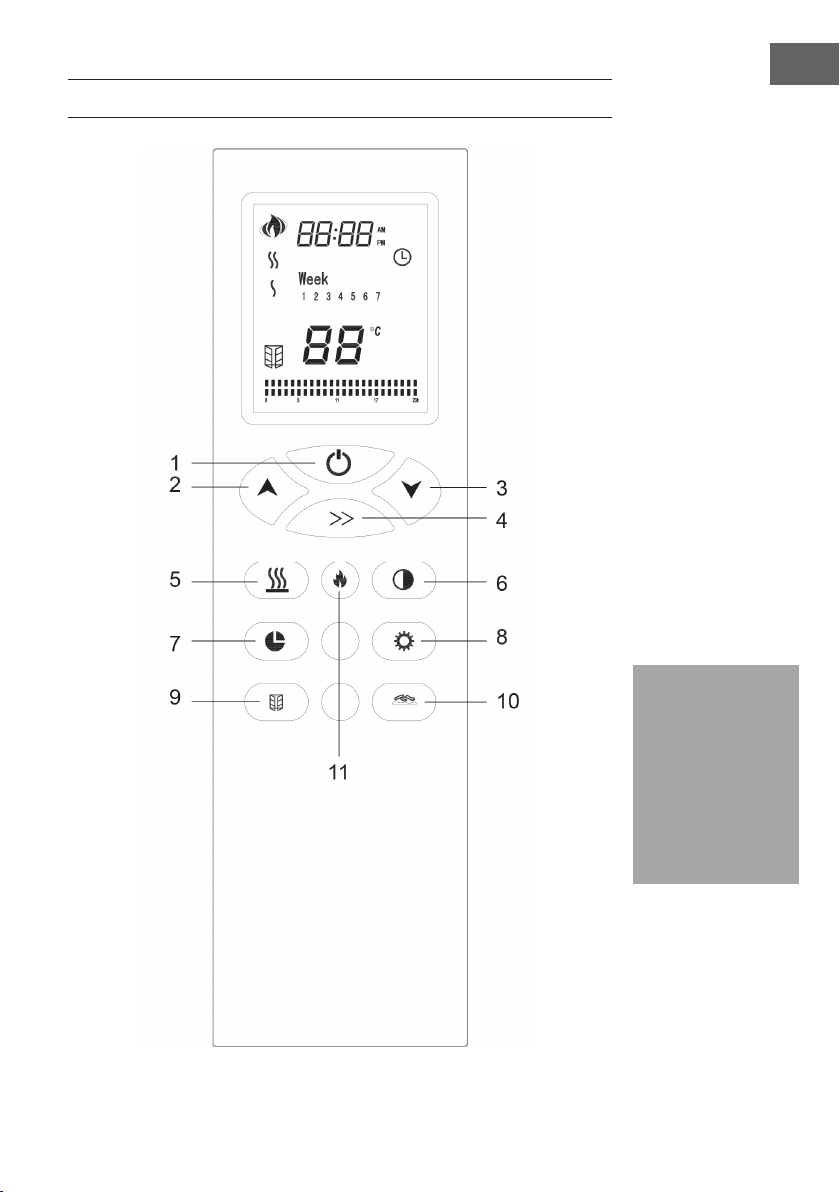
1 Ein-/Aus-Schalter
2 Wert erhöhen
3 Wert verringern
4 Zum Anpassen der
aktuellen Woche und
Uhrzeit
5 Zum Anpassen der
Heizleistung
6 Flammeneffekt und
Kohlebett ein- oder
ausschalten
7 Zum Anpassen des
Timers
8 Zum Anpassen der
Timer-Parameter
9 Offenes-Fenster-
Funktion ein- oder
ausschalten
10 Zum Anpassen
der Helligkeit des
Kohlebetts
11 Zum Anpassen der
Flammenhelligkeit
Hinweis: Die
Fernbedienung benötigt
2 AAA Batterien
(nicht im Lieferumfang
enthalten). Öffnen Sie
das Batteriefach, indem
Sie die Abdeckung
nach unten schieben
und legen Sie die
Batterien, gemäß der
richtigen Polarität, in
das Batteriefach ein.
FERNBEDIENUNG UND TASTENFUNKTIONEN
8
DE
INBETRIEBNAHME
Stecken Sie den Stecker in die Steckdose. Drücken Sie auf den Ein-/Aus-Schalter auf
der unteren rechten Seite des Geräts. Wenn das Gerät eingeschaltet wurde, kann
es ausschließlich über die Fernbedienung gestartet werden. Drücken Sie dazu die
Einschalttaste auf der Fernbedienung.
Hinweis: Sobald das Gerät über die Fernbedienung gestartet wurde, kann es sowohl
über das Bedienfeld links unten am Gerät, als auch über die im Fernbedienung
bedient werden.
MANUELLE BEDIENUNG
Schalten Sie das Gerät über den Hauptschalter ein. Das Gerät piept einmal, um
anzuzeigen, dass es sich einschaltet. Das Gerät bendet sich nun im Standby-
Modus. Sobald das Gerät über die Fernbedienung gestartet wurde, kann es über das
Bedienfeld links unten am Gerät bedient werden.
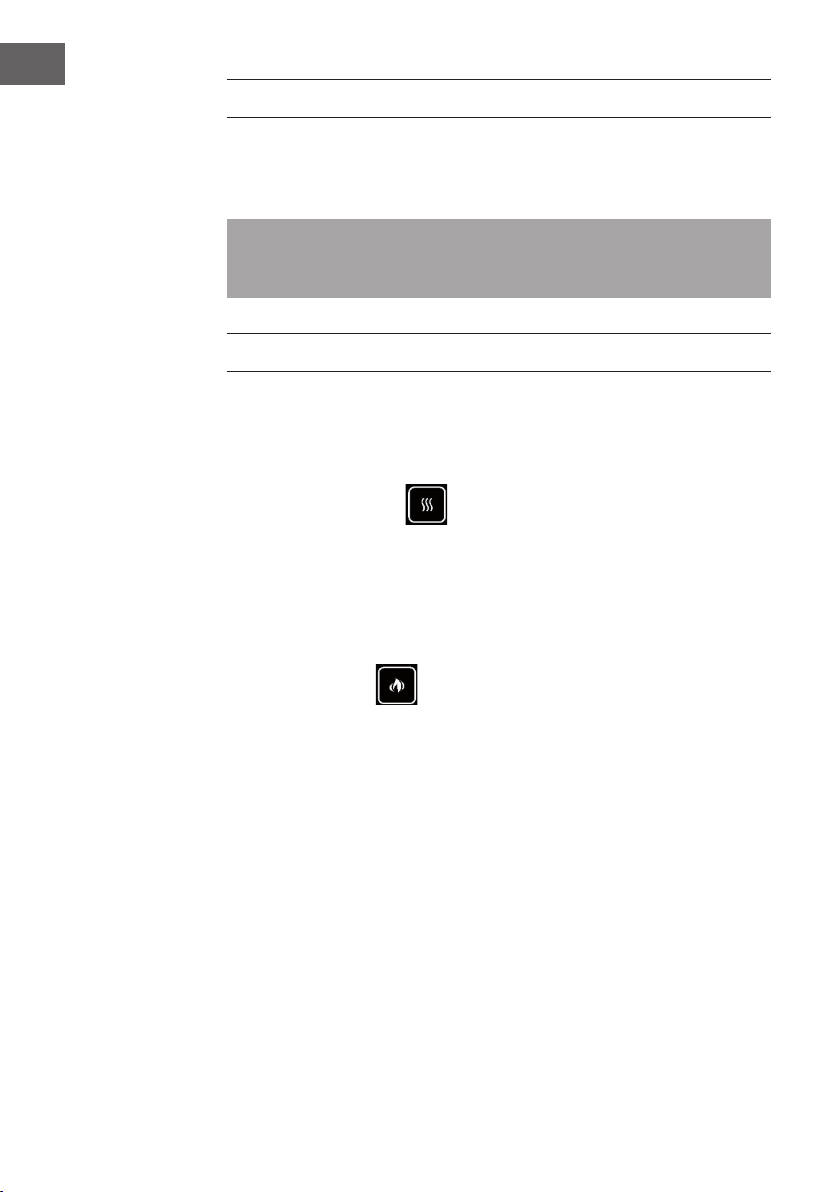
Anpassen der Heizleistung
• Wenn Sie die Taste das erste Mal drücken, heizt das Gerät mit 1900 W Leistung.
Die Anzeige für die Heizleistung leuchtet rot.
• Wenn Sie die Taste das zweite Mal drücken, heizt das Gerät mit 950 W Leistung.
Die Anzeige für die Heizleistung leuchtet blau.
• Wenn Sie die Taste ein drittes Mal drücken, werden die Heizelemente
ausgeschaltet und die Anzeige für die Heizleistung erlischt.
Anpassen der Helligkeit
• Wenn Sie die Taste das erste Mal drücken, benden sich die Kohle und die
Flammen in der höchsten Helligkeitsstufe.
• Wenn Sie die Taste ein zweites Mal drücken, benden sich die Kohle und die
Flammen in der mittleren Helligkeitsstufe.
• Wenn Sie die Taste ein drittes Mal drücken, benden sich die Kohle und die
Flammen in der niedrigsten Helligkeitsstufe.
• Wenn Sie die Taste ein viertes Mal drücken, gehen die Kohle und die Flammen aus.

9
DE
BEDIENUNG PER FERNBEDIENUNG
Hinweis: Entfernen Sie sich bei der Verwendung der Fernbedienung nicht mehr als
6 Meter vom Gerät und achten Sie darauf, dass die Fernbedienung immer in die
Richtung des Geräts ausgerichtet ist.
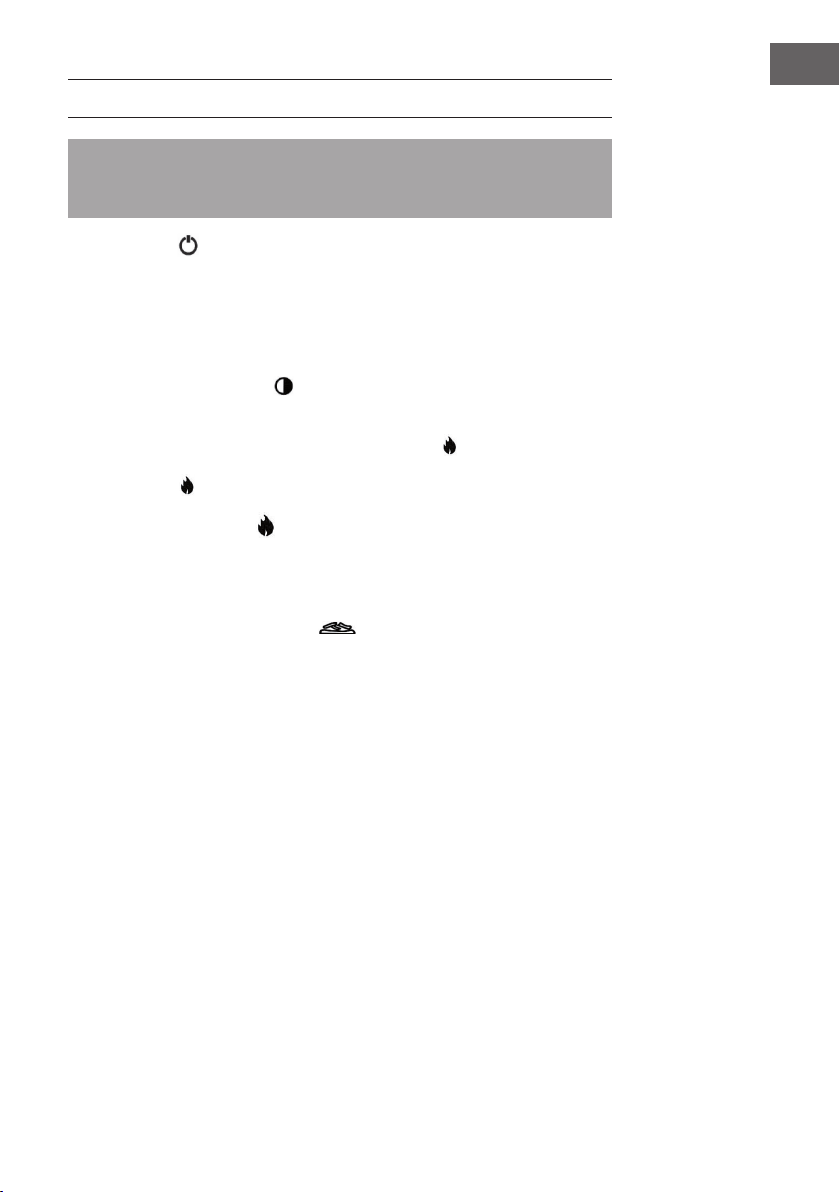
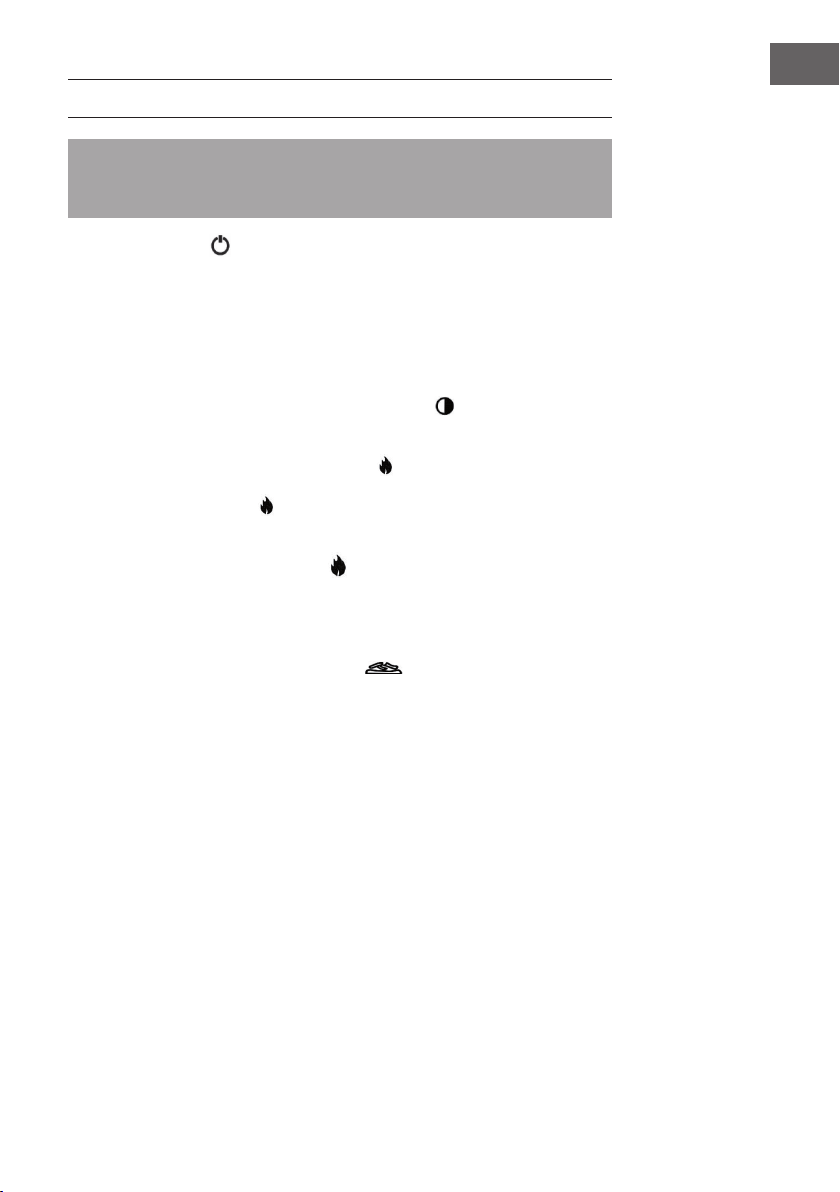
Gerät starten
Wenn Sie auf der Fernbedienung die Einschalttaste drücken, geht der Bildschirm der
Fernbedienung an, die Flamme entzündet sich und das Flammensymbol erscheint auf
dem LCD-Bildschirm. Woche, Uhrzeit (24h-System) und Temperaturanzeige werden
normal angezeigt. Wenn Sie die Einschalttaste erneut drücken, geht der LCD-Bildschirm
der Fernbedienung aus.
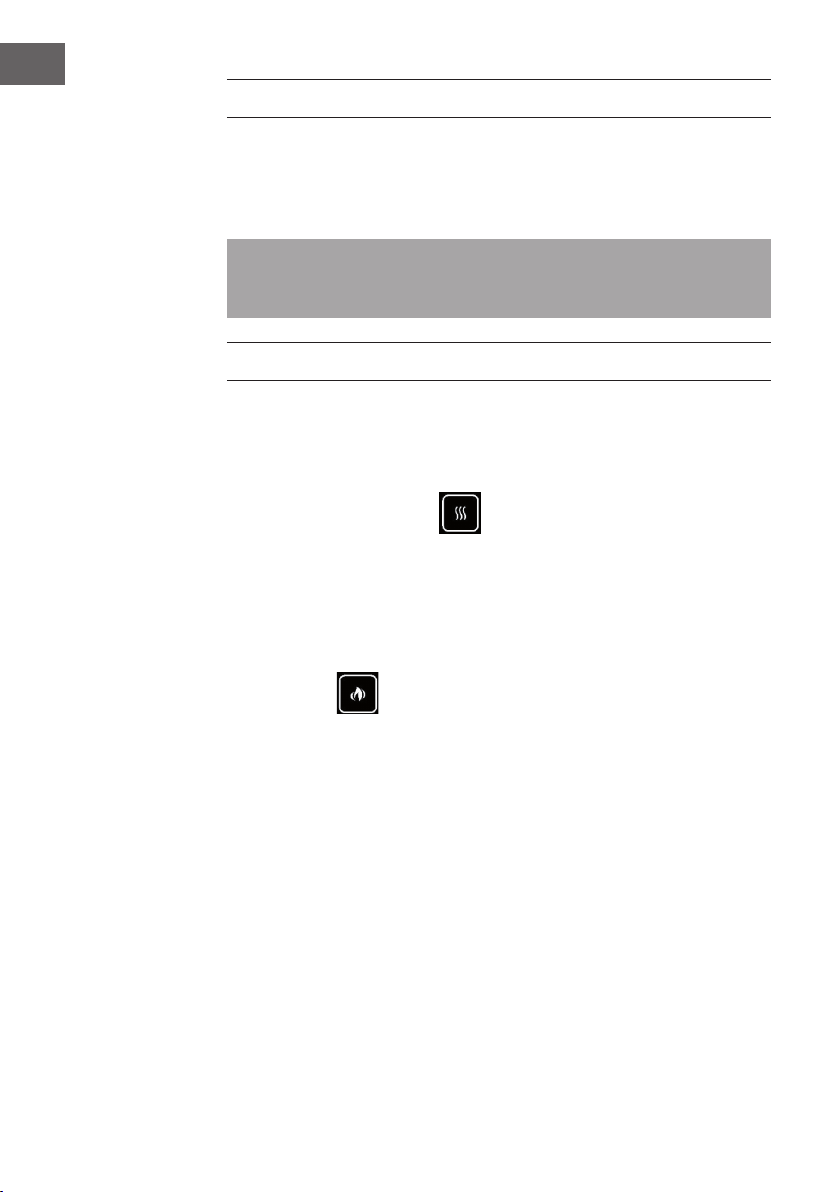
Flammen- und Kohlekontrollschalter
• Wenn Sie die Taste einmal drücken, wenn das Gerät eingeschaltet ist, erlöschen die
Flamme und das Kohlebett und der LCD-Bildschirm zeigt das Symbol nicht mehr
an.
• Wenn Sie diese Taste erneut drücken, gehen die Flamme und die Kohle wieder an
und der Bildschirm zeigt das Symbol an. Wenn diese Taste gedrückt wird, piept
das Gerät einmal.
Anpassen der Flammenhelligkeit
Drücken Sie zum Anpassen der Flammenhelligkeit auf diese Taste. Wenn diese Taste
gedrückt wird piept das Gerät einmal.
Anpassen der Helligkeit des Kohlebetts
Drücken Sie zum Anpassen der Helligkeit des Kohlebetts diese Taste. Das Gerät piept
einmal, wenn diese Taste gedrückt wird.

10
DE
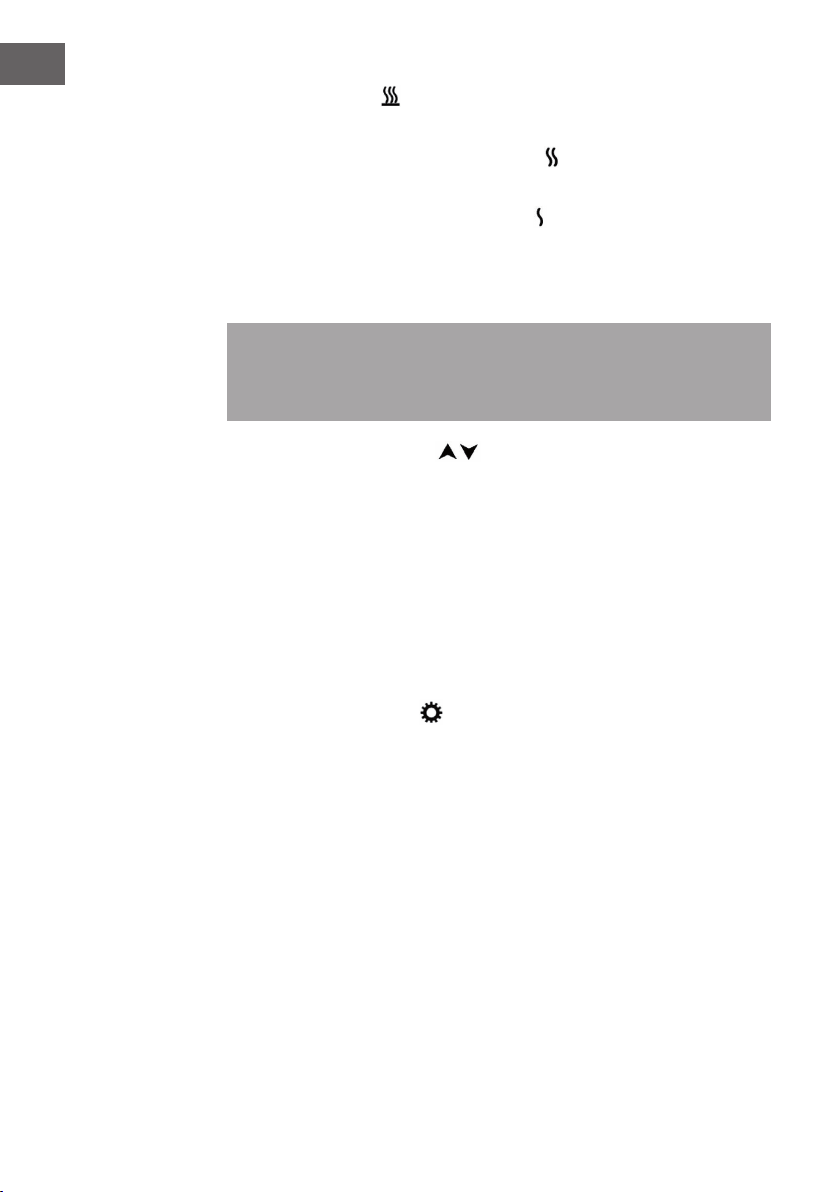
Anpassen der Heizleistung
• Wenn Sie die Taste das erste Mal drücken, arbeiten die Heizelemente mit einer
Leistung von 1900 W, der LCD-Bildschirm zeigt an und die Anzeige für die
Heizleistung leuchtet rot.
• Wenn Sie die Taste das zweite Mal drücken arbeiten die Heizelemente mit einer
Leistung von 950 W, der LCD-Bildschirm zeigt an und die Anzeige für die
Heizleistung leuchtet blau.
• Wenn Sie die Taste ein drittes Mal drücken, werden die Heizelemente ausgeschaltet,
der LCD-Bildschirm zeigt das Symbol nicht mehr an und die Anzeige für die
Heizleistung geht aus. Das Gerät piept einmal, wenn die Taste gedrückt wird.
Hinweis: Wenn die Heizelemente mit der Fernbedienung eingeschaltet werden hängt
es von der Temperatureinstellung und der Raumtemperatur ab, ob diese aktiviert
werden oder nicht. Die Heizelemente werden nur dann aktiviert, wenn die von Ihnen
am Gerät eingestellte Temperatur über der Raumtemperatur liegt.
Anpassen der Temperatureinstellung
Drücken Sie zur Anpassung der Temperatureinstellung die Pfeiltasten. Sie können am
Gerät eine Temperatur zwischen 7 °C und 30 °C einstellen. Das Gerät piept einmal,
wenn eine der Tasten gedrückt wird.
Einstellen der aktuellen Woche und der Uhrzeit >>
• Wenn Sie die Taste einmal drücken, leuchtet das entsprechende Symbol auf dem
LCD-Bildschirm auf.
• Drücken Sie nun die Pfeiltasten, um die aktuelle Uhrzeit und die Woche einzustellen.
Wenn diese Taste gedrückt wird, piept das Gerät nicht.
Anpassen der Timer-Parameter
Wenn Sie die Taste das erste Mal drücken, zeigt der LCD-Bildschirm „1“ an, was für
Montag steht. Die Temperatureinstellung beginnt zu blinken.
• Drücken Sie die Pfeiltasten, um die Temperatur für Montag einzustellen. Drücken Sie
zur Bestätigung die Taste >> und drücken Sie die Pfeiltasten, um die Uhrzeit für den
Start der Heizung einzustellen.
• Der Bildschirm zeigt nun [00-23] an. Drücken Sie >>, um den Start der Heizung
einzustellen.
• Die Anzeige [:] bedeutet, dass die Timerfunktion aktuell aktiviert ist und dass die
vom Gerät gemessene Temperatur der Temperatureinstellung entspricht.
• Die Anzeige [.] bedeutet, dass die Timerfunktion aktuell aktiviert ist und die vom
Gerät gemessene Temperatur der Temperatureinstellung minus 3 °C entspricht.
• Wenn der LCD-Bildschirm nichts anzeigt, deutet dies darauf hin, dass die
Timerfunktion deaktiviert ist und die Heizelemente nicht in Betrieb sind. Der
entsprechende Punkt blinkt bei der Einstellung.
11
DE
Wenn Sie die Taste das zweite Mal drücken, zeigt der LCD-Bildschirm „2“ an, was für
Dienstag steht.
Hinweis: Sie können diese Taste bis zu sieben Mal drücken, um die
Temperatureinstellung für die gesamte Woche vorzunehmen. Wenn Sie die Taste
ein achtes Mal drücken, wird das Menü verlassen und der Bildschirm zeigt die
Einstellung für den aktuellen Wochentag an.
Aktivieren der Timer-Funktion
Wenn Sie die Timer-Taste drücken, wird die Timerfunktion aktiviert.
• Wenn Sie die Taste das erste Mal drücken, zeigt der Bildschirm an und die
Anzeige für den Timer leuchtet am Gerät grün auf.
• Wenn Sie die Taste erneut drücken, verschwindet das Symbol vom Bildschirm
und die Anzeige für den Timer am Gerät geht aus.
• Nach dem Aktivieren der Timerfunktion orientiert sich diese an den jeweiligen
Temperatureinstellungen.
• Der LCD-Bildschirm zeigt die eingestellten Parameter an:
Hinweis: Wenn Sie die Einstellung für Zeit, Woche und Timer ändern möchten,
müssen Sie die Timertaste einmal an- und ausschalten, damit die neuen Daten
gespeichert werden. Wenn das Gerät die neuen Daten empfangen hat, piept es
einmal.

12
DE
Offenes-Fenster-Funktion
• Wenn Sie die Taste einmal drücken, zeigt der Bildschirm das Symbol an und die
Anzeige für die Offenes-Fenster-Anzeige am Gerät leuchtet gelb auf.
• Wenn Sie die Taste erneut drücken, verschwindet das Symbol vom Bildschirm und
die Anzeige am Gerät geht aus.
• Wenn diese Taste gedrückt wird, piept das Gerät einmal.
Nach dem Aktivieren der Fensterfunktion überprüft das Gerät zunächst, ob die
Heizelemente aktuell aktiv sind. Sollten die Heizelemente aktiv sein, speichert das
Programm die aktuellen Raumtemperaturwerte und misst die Raumtemperatur alle 12
Minuten erneut.
• Wenn innerhalb von 30 Minuten ein Temperaturabfall von mehr als 4 °C
festgestellt wird, deaktiviert das Programm automatisch die Heizelemente, da das
Gerät ein offenes Fenster vermutet. Die Offenes-Fenster-Anzeige am Gerät blinkt.
• Nachdem der Heizvorgang für 70 Minuten gestoppt wurde, startet sich das
Programm erneut, um zu überprüfen, ob das Fenster geschlossen wurde. Die
Offenes-Fenster-Anzeige am Gerät blinkt langsam.
• Das Gerät heizt nun alle 30 Minuten für 6 Minuten auf 1900 W. Wenn die
Temperatur in diesem Zeitraum um mehr als 2 °C ansteigt, wird das Fenster als
geschlossen erachtet und die Offenes-Fenster-Anzeige am Gerät hört auf zu
blinken.

13
DE
HINWEISE ZUR ENTSORGUNG
Wenn es in Ihrem Land eine gesetzliche Regelung zur
Entsorgung von elektrischen und elektronischen Geräten
gibt, weist dieses Symbol auf dem Produkt oder auf der
Verpackung darauf hin, dass dieses Produkt nicht im
Hausmüll entsorgt werden darf. Stattdessen muss es zu
einer Sammelstelle für das Recycling von elektrischen
und elektronischen Geräten gebracht werden. Durch
regelkonforme Entsorgung schützen Sie die Umwelt und die
Gesundheit Ihrer Mitmenschen vor negativen Konsequenzen.
Informationen zum Recycling und zur Entsorgung dieses
Produkts, erhalten Sie von Ihrer örtlichen Verwaltung oder
Ihrem Hausmüllentsorgungsdienst.
Dieses Produkt enthält Batterien. Wenn es in Ihrem Land
eine gesetzliche Regelung zur Entsorgung von Batterien
gibt, dürfen die Batterien nicht im Hausmüll entsorgt werden.
Informieren Sie sich über die örtlichen Bestimmungen zur
Entsorgung von Batterien. Durch regelkonforme Entsorgung
schützen Sie die Umwelt und die Gesundheit Ihrer
Mitmenschen vor negativen Konsequenzen.
HERSTELLER & IMPORTEUR (UK)
Hersteller:
Chal-Tec GmbH, Wallstraße 16, 10179 Berlin, Deutschland.
Importeur für Großbritannien:
Chal-Tec UK limited
Unit 6 Riverside Business Centre
Brighton Road
Shoreham-by-Sea
BN43 6RE
United Kingdom


15
EN
Dear Customer,
Congratulations on purchasing this device. Please read the
following instructions carefully and follow them to prevent
possible damages. We assume no liability for damage caused
by disregard of the instructions and improper use. Scan the QR
code to get access to the latest user manual and more product
information.
CONTENT
Safety Instructions17
Control Panel and Button Functions18
Remote Control and Button Functions19
Getting Started20
Manual Operation20
Operation via Remote Control21
Disposal Considerations25
Manufacturer & Importer (UK)25
TECHNICAL DATA
Article number
10032590, 10034249, 10035071,
10035072
Power supply 220-240 V ~ 50/60 Hz
Power consumtion 1600-1900 W
16
EN
PRODUCT DATA SHEET
Model identier(s): 10032590, 10034249, 10035071, 10035072
Item Symbol Value Unit Item Unit
Heat output Type of heat input, for electric storage local space
heaters only
Nominal heat output P
nom
1.8
kW manual heat charge control, with integrated
thermostat
N/A
Minimum heat output
(indicative)
P
min
0
kW manual heat charge control with room and/or
outdoor temperature feedback
N/A
Maximum continuous heat
output
P
max,c
1.8
kW electronic heat charge control with room and/or
outdoor temperature feedback
N/A
Auxiliary electricity consumption
fan assisted heat output N/A
At nominal heat output
(fan motor)
el
max
N/A kW
Type of heat output/room temperature control
At minimum heat output
(fan motor)
el
min
N/A kW single stage heat output and no room
temperature control
no
In standby mode el
SB
0 W Two or more manual stages, no room
temperature control
no
with mechanic thermostat room temperature
control
no
with electronic room temperature control no
electronic room temperature control plus day
timer
no
electronic room temperature control plus week
timer
yes
Other control options (multiple selections possible)
room temperature control, with presence
detection
no
room temperature control, with open window
detection
no
with distance control option no
with adaptive start control yes
with working time limitation no
with black bulb sensor no
Contact details Chal-Tec GmbH, Wallstraße 16, 10179, Berlin, Germany
17
EN
SAFETY INSTRUCTIONS
• Read these operating instructions carefully before use and keep them for future
reference.
• Install the electric replace in accordance with the provisions of this manual. If in
doubt, consult customer service.
• Make sure the power outlet you want to use is easily accessible and not above the
unit.
• Always turn the device off and unplug the power cord before moving, cleaning or
servicing the unit.
• Fix the device securely so that it can not fall over.
• Do not leave the unit unattended when small children or elderly people are in the
vicinity.
• Never leave children alone and unattended in the same room as the appliance
when it is switched on.
• Do not cover the ventilation holes of the unit or block them. Never insert objects into
the ventilation holes.
• Do not install the unit in rooms where running water is used, such as in bathrooms,
kitchens, shower rooms, near swimming pools, etc.
• Never use sprays or steam cleaners to clean the unit.
• Never lay the device cable under carpets or in places where it may become a trip
hazard.
• Do not install the device near curtains or other ammable materials.
• Do not use the device to dry clothing etc.
• Never sit or stand on the device.
• Never use the device in combination with timers or other devices that automatically
turn on the device at a certain time.
Note: The device has overheating protection. If the device stops due to overheating, do
the following: turn off the device and disconnect the power plug from the wall outlet. If
any objects are covering the device, remove them.
WARNING
Risk of burns! The device gets very hot, so do not touch it. Set all switches
to “off” and allow it to cool completely. Once the unit has cooled down
completely, you may reconnect the power plug to the power outlet.
Never open the product. It has no user serviceable parts.

18
EN
CONTROL PANEL AND BUTTON FUNCTIONS
1
Adjust the heating power
2
Adjust the brightness of the ame effect
3
Display of heating power
4
Display of timer
5
Open window display
6
On / off switch
19
EN
1 On / off switch
2 Increase value
3 Decrease value
4 Adjust the current
week and time
5 Adjust the heating
power
6 Switch the ame
effect and coal bed
on or off
7 Set the timer
8 Set the timer
parameters
9 Turn on or off the
open window function
10 Adjust the brightness
of the coal bed
11 Adjust the brightness
of the ame
Note: The remote
control requires 2 AAA
batteries (not included
with delivery). Open the
battery compartment by
sliding the cover down
and insert the batteries
into the battery
compartment according
to the correct polarity.
REMOTE CONTROL AND BUTTON FUNCTIONS
20
EN
GETTING STARTED
Insert the plug into the socket. Press the on / off switch on the lower right side of the
device. If the device has been switched on, it can only be started via the remote control.
To do this, press the power button on the remote control.
Note: As soon as the device has been started via the remote control, it can be
operated via the control panel on the bottom left of the device as well as via the
remote control.
MANUAL OPERATION
Switch on the device via the main switch. The unit will beep once to indicate that it has
been switched on. The device is now in standby mode. Once the device has been
started via the remote control, it can be operated via the control panel in the lower left
corner of the device.
Adjust the heating power
• When you press the button for the rst time, the unit will heat up with 1900 W of
power. The heating power indicator will light up red.
• The second time you press the button, the unit will heat up to 950 W of power. The
heating power indicator will light up blue.
• If you press the button a third time, the heating elements will be switched off and the
heating power indicator will disappear.
Adjust the brightness
• When you press the button for the rst time, the coal and the ames will be at the
highest brightness level.
• If you press the button a second time, the coal and the ames will be at the middle
brightness level.
• If you press the button a third time, the coal and the ames will be at the lowest
brightness level.
• Pressing the button a fourth time will cause the coal and ames to go out.
21
EN
OPERATION VIA REMOTE CONTROL
Note: When using the remote control, do not remove it more than 6 meters (19 feet)
from the unit, making sure that the remote control is always oriented in the direction of
the unit.
Start the device
When you press the power button on the remote control, the screen of the remote control
will turn on, the ame will ignite, and the ame icon will appear on the LCD screen.
Week, time (24h system) and temperature display will be displayed normally. If you
press the power button again, the LCD screen of the remote control will turn off.
Flame and coal control switch
• Pressing the button once when the unit is turned on will extinguish the ame and the
coal bed, and the LCD screen will no longer display the icon.
• If you press this button again, the ame and the coal will start again and the screen
will show the icon. When this button is pressed, the unit will beep once.
Adjust the ame brightness
Press this button to adjust the ame brightness. When this button is pressed, the unit will
beep once.
Adjust the brightness of the coal bed
To adjust the brightness of the coal bed, press this button. The unit will beep once when this
button is pressed.
22
EN
Set the heating power
• When you press the button for the rst time, the heating elements will operate at a
power of 1900 W, the LCD screen will display and the heating power indicator
lights up red.
• When you press the button the second time, the heating elements will operate at a
power of 950 W, the LCD screen will display and the heating power indicator will
light up blue.
• If you press the button a third time, the heating elements will be switched off, the
LCD screen no longer displays the icon and the heating power indicator will turn
off. The unit will beep once when the button is pressed.
Note: If the heating elements are switched on with the remote control, whether
they are activated or not will depend on the temperature setting and the room
temperature. The heating elements will only be activated if the temperature set by you
on the device is above the room temperature.
Adjust the temperature setting
Press the arrow keys to adjust the temperature setting. You can set a temperature
between 7 ° C and 30 ° C on the device. The device will beep once when one of the
keys is pressed.
Setting the current week and time >>
• If you press the button once, the corresponding symbol will light up on the LCD
screen.
• Now press the arrow buttons to set the current time and the week. When this button
is pressed, the unit will not beep.
Adjust the timer parameters
When you press the button for the rst time, the LCD screen will display “1” which stands
for Monday. The temperature setting will start to ash.
• Press the arrow keys to set the temperature for Monday. Press the >> button to
conrm and press the arrow buttons to set the start time of the heating.
• The screen will now show [00-23]. Press >> to set the start of the heating.
• The [:] indication means that the timer function is currently activated and that the
temperature measured by the unit corresponds to the temperature setting.
• The [.] Indication means that the timer function is currently activated and the
temperature measured by the unit corresponds to the temperature setting minus
3°C.
• If the LCD screen does not show anything, this indicates that the timer function is
disabled and the heating elements are not operating. The corresponding point will
ash during the setting.
23
EN
When you press the button a second time, the LCD screen displays „2“ for Tuesday.
Note: You may press this button up to seven times to set the temperature for the entire
week. If you press the key an eighth time, you will exit the menu and the screen will
show the setting for the current day of the week.
Activate the timer function
If you press the timer button, the timer function will be activated.
• ● When you press the button for the rst time, the screen will display and the timer
indicator will light up green on the device.
• If you press the button again, the icon will disappear from the screen and the
timer indicator on the unit will turn off.
• After activating the timer function, this will be based on the respective temperature
settings.
• The LCD screen will display these set parameters:
Note: If you want to change the time, week, and timer settings, you must turn the timer
button on and off once to save the new data. When the device has received the new
data, it will beep once.
24
EN
Open window function
• If you press the button once, the screen will display the icon and the open
window indicator on the device will turn amber.
• If you press the button again, the icon will disappear from the screen and the
indicator on the unit will turn off.
• When this button is pressed, the unit will beep once.
After the open window function is activated, the device rst checks whether the heating
elements are currently active. If the heating elements are active, the program will save
the current room temperature values and measure the room temperature again every 12
minutes.
• If a temperature drop of more than 4 ° C is detected within 30 minutes, the program
will automatically deactivate the heating elements as the device suspects an open
window. The open window display on the device will ash.
• After the heating has been stopped for 70 minutes, the program will start again
to check whether the window has been closed. The open window indicator on the
device will slowly ash.
• The unit now will now heat to 1900W for 6 minutes every 30 minutes. If the
temperature rises more than 2 ° C during this period, the window will be assumed
to be closed and the open window indicator on the unit will stop ashing.

25
EN
DISPOSAL CONSIDERATIONS
If there is a legal regulation for the disposal of electrical
and electronic devices in your country, this symbol on the
product or on the packaging indicates that this product must
not be disposed of with household waste. Instead, it must be
taken to a collection point for the recycling of electrical and
electronic equipment. By disposing of it in accordance with
the rules, you are protecting the environment and the health of
your fellow human beings from negative consequences. For
information about the recycling and disposal of this product,
please contact your local authority or your household waste
disposal service.
This product contains batteries. If there is a legal regulation
for the disposal of batteries in your country, the batteries must
not be disposed of with household waste. Find out about local
regulations for disposing of batteries. By disposing of them in
accordance with the rules, you are protecting the environment
and the health of your fellow human beings from negative
consequences.
MANUFACTURER & IMPORTER (UK)
Manufacturer:
Chal-Tec GmbH, Wallstrasse 16, 10179 Berlin, Germany.
Importer for Great Britain:
Chal-Tec UK limited
Unit 6 Riverside Business Centre
Brighton Road
Shoreham-by-Sea
BN43 6RE
United Kingdom


27
ES
Estimado cliente:
Le felicitamos por la adquisición de este producto. Lea
atentamente el siguiente manual y siga cuidadosamente las
instrucciones de uso con el n de evitar posibles daños. La
empresa no se responsabiliza de los daños ocasionados por
un uso indebido del producto o por haber desatendido las
indicaciones de seguridad. Escanee el código QR para obtener
acceso al manual de usuario más reciente y otra información
sobre el producto:
ÍNDICE DE CONTENIDOS
Hoja de datos del producto28
Indicaciones de seguridad29
Panel de control y funciones de los botones30
Mando a distancia y botones de funcionamiento31
Puesta en marcha32
Uso manual32
Manejo a través del mando a distancia33
Indicaciones sobre la retirada del aparato37
Fabricante e importador (Reino Unido)37
DATOS TÉCNICOS
Número de artículo
10032590, 10034249, 10035071,
10035072
Suministro eléctrico 220-240 V - 50/60 Hz
Potencia 1600-1900 W
28
ES
HOJA DE DATOS DEL PRODUCTO
Denominación del modelo 10032590, 10034249, 10035071, 10035072
Dato Símbolo Valor Unidad Dato Unidad
Potencia térmica Solo con disposítivos de acumulación de calor
eléctricos para abastecimiento local: Tipo de regulación
del abastecimiento de calor
Potencia térmica nominal P
nom
1,8
kW Regulación manual del abastecimiento de calor
con termostato integrado:
n/a
Potencia térmica mínima
(valor orientativo)
P
min
0
kW Regulación manual de abastecimiento de calor
con aviso de temperatura ambiente y/o exterior
n/a
Potencia térmica continua
máxima
P
max,c
1,8
kW Regulación electrónica de abastecimiento de
calor con aviso de temperatura ambiente y/o
exterior
n/a
Consumo de corriente auxiliar
Disípación de calor con ventilación auxiliar n/a
Con potencia térmica
nominal (Motor del
ventilador)
el
max
n/a kW
Tipo de potencia térmica/control de temperatura
ambiente
Con potencia térmica mínima
(Motor del ventilador)
el
min
n/a kW Potencia térmica de un solo nivel, sín control de
temperatura ambiente
no
En modo de espera el
SB
0 W Dos o más niveles regulables manualmente, sín
control de temperatura ambiente
no
Control de temperatura ambiente con termostato
mecánico
no
Con control electrónico de temperatura
ambiente
no
Con control de temperatura ambiente y
regulación del momento del día
no
Con control de temperatura ambiente y
regulación del día de la semana
sí
Otras opciones de regulación
Control de temperatura ambiente con detección
de presencia
no
Control de temperatura ambiente con detección
de ventanas abiertas
no
Con opción de control remoto no
Con regulación adaptable del comienzo de la
calefacción
sí
Con limitación de tiempo de funcionamiento no
Con sensor de bulbo negro no
Información de contacto Chal-Tec GmbH, Wallstraße 16, 10179, Berlín (Alemania)
29
ES
INDICACIONES DE SEGURIDAD
• Lea con detenimiento las instrucciones antes de la puesta en marcha y consérvelas
para consultas posteriores.
• Instale la chimenea eléctrica conforme a las disposiciones de este manual de
instrucciones. Consulte al servicio de atención al cliente en caso de dudas.
• Asegúrese de que la toma de corriente que desee utilizar esté fácilmente accesible
y no se encuentre por encima del aparato.
• Apague el aparato y desconecte el enchufe antes de limpiar o mover el aparato o
de realizar labores de mantenimiento.
• Fije el aparato para que no se caiga.
• No deje el aparato sin supervisión si hay cerca niños pequeños o ancianos.
• Nunca deje solos a los niños sin supervisar en la misma estancia del aparato
cuando este se encuentre encendido.
• No cubra las ranuras de ventilación del aparato ni las bloquee. No introduzca
objetos en las ranuras de ventilación.
• No instale el aparato en estancias donde se utilice agua corriente, como baños,
cocinas, duchas, cerca de piscinas, etc.
• No utilice sprays ni limpiadores a vapor para limpiar el aparato.
• No coloque el cable de alimentación debajo de alfombras ni en lugares donde
exista riesgo de caídas.
• No instale el aparato cerca de cortinas ni de otros materiales fácilmente
in amables.
• No utilice el aparato para secar ropa, etc.
• No se siente ni se apoye en el aparato.
• Nunca utilice el aparato junto con temporizadores ni otros aparatos que lo
enciendan automáticamente a una hora determinada.
Advertencia: El aparato dispone de una protección contra el sobrecalentamiento.
Si el aparato se apaga debido al sobrecalentamiento, siga estos pasos: Apague el
aparato y desconecte el enchufe de la toma de corriente. Si descubre algún objeto en
el aparato, retírelo.
ADVERTENCIA
Existe riesgo de quemaduras. El aparato alcanza temperaturas muy
elevadas, no lo toque. Coloque el interruptor en la posición „off“ y deje
que se enfríe por completo. En cuanto el aparato se haya enfriado por
completo, puede conectar el enchufe a la toma de corriente. No abra el
producto en ningún caso. No cuenta con ninguna pieza que el usuario
pueda reparar.

30
ES
PANEL DE CONTROL Y FUNCIONES DE LOS
BOTONES
1
Para ajustar la potencia calefactora
2
Para ajustar el brillo del efecto de llamas
3
Indicador de la potencia de calefacción
4
Indicador del temporizador
5
Indicador de ventana abierta
6
Interruptor on/off
31
ES
1 Interruptor on/off
2 Aumentar valor
3 Reducir valor
4 Para adaptar la
semana y hora
actuales
5 Para ajustar la
potencia calefactora
6 Encender / apagar
efecto de llamas y el
carbón
7 Para ajustar el
temporizador
8 Para ajustar los
parámetros del
temporizador
9 Activar/desactivar
función de ventana
abierta
10 Para ajustar el brillo
del efecto carbón
11 Para ajustar el brillo
de las llamas
Advertencia: El mando
a distancia necesita 2
pilas AAA (no incluidas
en el envío). Abra el
compartimento para
las pilas deslizando
la tapa hacia abajo
e introduzca las pilas
siguiendo la polaridad
correcta dentro del
compartimento.
MANDO A DISTANCIA Y BOTONES DE
FUNCIONAMIENTO
32
ES
PUESTA EN MARCHA
Conecte el enchufe a la toma de corriente. Pulse el interruptor on/off situado en la
parte inferior derecha del aparato. Cuando el aparato se haya encendido, puede
iniciarse exclusivamente desde el mando a distancia. Para ello, pulse el botón de
encendido del mando a distancia.
Advertencia: En cuanto el aparato se haya iniciado mediante el mando a distancia,
puede manejarse con el panel de control situado en la parte izquierda del aparato y
también desde el mando a distancia.
USO MANUAL
Encienda el aparato mediante el interruptor principal. El aparato pita una vez para
mostrar que está encendido. El aparato se encuentra en modo standby. En cuanto se
haya activado el aparato a través del mando a distancia, podrá controlarse mediante
el panel de control situado en la parte inferior izquierda el aparato.
Ajustar la potencia calefactora
• Si pulsa el botón una vez, el aparato calienta a 1900 W de potencia. El indicador
de potencia calefactora se ilumina en color rojo.
• Si pulsa el botón dos veces, el aparato calienta a 950 W de potencia. El
indicador de potencia calefactora se ilumina en color azul.
• Si pulsa el botón una tercera vez, las resistencias se apagan y el indicador de la
potencia de calefacción se apaga.
Ajuste del brillo
• Si pulsa el botón una vez, el carbón y las llamas se encuentran en el grado
máximo de brillo.
• Si pulsa el botón dos veces, el carbón y las llamas se encuentran en el grado
medio de brillo.
• Si pulsa el botón tres veces, el carbón y las llamas se encuentran en el grado bajo
de brillo.
• Si pulsa el botón cuatro veces, el carbón y las llamas se apagan.

33
ES
MANEJO A TRAVÉS DEL MANDO A DISTANCIA
Advertencia: Al utilizar el mando a distancia, no se aleje a más de 6 metros del
aparato y asegúrese de que el mando a distancia siempre se oriente en dirección al
aparato.
Iniciar el aparato
Si pulsa el botón de encendido del mando a distancia, el display del mando se
enciende, las llamas se iluminan y el símbolo de las llamas aparece en el display
LCD. La semana, hora (formato 24h) e indicador de temperatura se visualizan de
modo normal. Si pulsa de nuevo el botón de encendido, la pantalla LCD del mando a
distancia se apaga.
Interruptor para las llamas y el carbón
• Si pulsa el botón una vez, al encender el aparato, las llamas desaparecen y el
carbón y la pantalla LCD dejan de mostrar el símbolo .
• Si pulsa de nuevo el botón, las llamas y el carbón vuelven a encenderse y el
display muestra el símbolo . Si pulsa este botón, el aparato pita una vez.
Ajuste del brillo de las llamas
Pulse este botón para ajustar el brillo de las llamas. Si pulsa este botón, el aparato pita
una vez.
Para ajustar el brillo del efecto del carbón
Para ajustar el brillo del efecto del carbón, pulse este botón. Si pulsa este botón, el
aparato pita una vez.
34
ES
Ajustar la potencia calefactora
• Si pulsa el botón una vez, las resistencias funcionan a 1900 W de potencia, el
display LCD muestra X y el indicador de potencia calefactora se ilumina en
color rojo.
• Si pulsa el botón dos veces, las resistencias funcionan a 950 W de potencia, el
display LCD muestra y el indicador de potencia calefactora se ilumina en color
azul.
• Si pulsa el botón una tercera vez, las resistencias se apagan, el display LCD deja
de mostrar el símbolo y el indicador de la potencia de calefacción se apaga. Si
pulsa este botón, el aparato pita una vez.
Advertencia: Si las resistencias se encienden con el mando a distancia, depende
del ajuste de temperatura y de la temperatura ambiente para que estas se activen
o no. Las resistencias solo se activan si la temperatura que ha seleccionado para el
aparato se sitúa por encima de la temperatura ambiente.
Ajuste de la conguración de temperatura
Pulse los botones de dirección para ajustar la temperatura. Puede ajustar la temperatura
del aparato entre 7 °C y 30 °C. Si pulsa uno de esos botones, el aparato pita una vez.
Ajustar la semana y hora actuales >>
• Si pulsa el botón una vez, el símbolo correspondiente se ilumina en el display LCD.
• Pulse los botones de dirección para ajustar la hora y semana actuales. Si pulsa este
botón, el aparato no pita.
Ajuste de los parámetros de temporizador
Si pulsa el aparato la primera vez, el display LCD muestra „1“, que corresponde a
lunes. Los ajustes de temperatura comienzan a parpadear.
• Pulse los botones de dirección para ajustar la temperatura para el lunes. Pulse el
botón >> para conrmar y pulse los botones de dirección para ajustar la hora para
el inicio de la calefacción.
• El display muestra [00-23]. Pulse >> para ajustar el inicio de la calefacción.
• El indicador [:] signica que la función del temporizador está activada actualmente
y que corresponde a la temperatura medida por el aparato de la conguración de
temperatura.
• El indicador [.] signica que la función del temporizador está activada actualmente
y la temperatura medida por el aparato de la conguración de temperatura es de
3 °C menos.
• Si el display LCD no muestra nada, esto signica que la función del
temporizador está desactivada y que la resistencia no está funcionando. El punto
correspondiente parpadea en la conguración.

35
ES
Si pulsa el botón dos veces, el display LCD muestra „2“, que corresponde a martes.
Advertencia: Pulse pulsar este botón hasta siete veces para realizar el ajuste de
temperatura para toda la semana. Si pulsa el botón una octava vez, abandona el
menú y el monitor muestra el ajuste para el día de la semana actual.
Activar la función temporizador
Si pulsa el botón del temporizador, se activa la función del temporizador.
• Si pulsa el botón una vez, el display muestra y el indicador del temporizador
del aparato se ilumina en color verde.
• Si pulsa de nuevo el temporizador, desaparece el símbolo X del display y el
indicador del temporizador se apaga.
• Tras activar la función del temporizador, esta se orienta a los ajustes
correspondientes de temperatura.
• El display LCD muestra los parámetros congurados:
Advertencia: Si desea modicar la conguración para tiempo, semana y
temporizador, el temporizador debe apagarse y encenderse para guardar los
nuevos datos. Si el aparato ha recibido los nuevos datos, pita una vez.

36
ES
Función de ventana abierta
• Si pulsa el botón X una vez, el monitor muestra el símbolo y el indicador de
ventana abierta del aparato se ilumina en color amarillo.
• Si pulsa de nuevo el botón, desaparece el símbolo del display y el indicador del
aparato se apaga.
• Si pulsa este botón, el aparato pita una vez.
Tras activar la función de la ventana, el aparato comprueba primero si las resistencias
están activadas. Si las resistencias están activadas, el programa guarda los valores
actuales de temperatura ambiente y mide dicha temperatura cada 12 minutos.
• Si en 30 minutos se determina una caída de temperatura superior a 4 °C, el
programa desactiva automáticamente las resistencias, pues el aparato supone que
existe una ventana abierta. El indicador de ventana abierta del aparato parpadea.
• Después de haber apagado el sistema de calefacción durante 70 minutos, el
programa se reinicia para comprobar si se ha cerrado la ventana. El indicador de
ventana abierta del aparato parpadea lentamente.
• El aparato calienta ahora cada 30 minutos durante 6 minutos a 1900 W. Si la
temperatura sube más de 2 °C en este periodo de tiempo, se deducirá que la
ventana está cerrada y el indicador de ventana abierta para de parpadear.
37
ES
INDICACIONES SOBRE LA RETIRADA DEL
APARATO
Si en su país existe una disposición legal relativa a la
eliminación de aparatos eléctricos y electrónicos, este
símbolo estampado en el producto o en el embalaje
advierte que no debe eliminarse como residuo doméstico.
En lugar de ello, debe depositarse en un punto de recogida
de reciclaje de aparatos eléctricos y electrónicos. Una
gestión adecuada de estos residuos previene consecuencias
potencialmente negativas para el medio ambiente y la salud
de las personas. Puede consultar más información sobre el
reciclaje y la eliminación de este producto contactando con
su administración local o con su servicio de recogida de
residuos.
Este producto contiene baterías. Si en su país existe una
disposición legal relativa a la eliminación de baterías, estas
no deben eliminarse como residuo doméstico. Infórmese
sobre la normativa vigente relacionada con la eliminación de
baterías. Una gestión adecuada de estos residuos previene
consecuencias potencialmente negativas para el medio
ambiente y la salud de las personas.
FABRICANTE E IMPORTADOR (REINO UNIDO)
Fabricante:
Chal-Tec GmbH, Wallstraße 16, 10179 Berlín, Alemania.
Importador para Gran Bretaña:
Chal-Tec UK limited
Unit 6 Riverside Business Centre
Brighton Road
Shoreham-by-Sea
BN43 6RE
United Kingdom


39
FR
Cher client,
Toutes nos félicitations pour l’acquisition de ce nouvel appareil.
Veuillez lire attentivement les instructions suivantes de branchement
et d’utilisation an d’éviter d’éventuels dommages. Le fabricant ne
saurait être tenu pour responsable des dommages dus au non-
respect des consignes de sécurité et à la mauvaise utilisation
de l’appareil. Scannez le QR-Code pour accéder à la dernière
version du mode d‘emploi et à d‘autres informations concernant
le produit:
SOMMAIRE
Fiche de données produit40
Consignes de sécurité41
Panneau de commande et fonctions des touches42
Télécommande et fonctions des touches43
Mise en service44
Utilisation manuelle44
Utilisation avec la télécommande45
Informations sur le recyclage49
Fabricant et importateur (UK)49
FICHE TECHNIQUE
Numéro d'article
10032590, 10034249, 10035071,
10035072
Alimentation 220-240 V ~ 50/60 Hz
Puissance 1600-1900 W
40
FR
FICHE DE DONNÉES PRODUIT
Référence (s) du produit 10032590, 10034249, 10035071, 10035072
Donnée Symbole Valeur Unité Donnée Unité
Puissance calorique Uniquement pour les radiateurs électriques à
accumulation : Type de régulation de l'apport de chaleur
Puissance calorique
nominale
P
nom
1,8
kW Régulation manuelle de l'apport de chaleur
avec thermostat intégré
Sans
objet
Puissance calorique
minimale (indicative)
P
min
0
kW Régulation manuelle de l'apport de chaleur
avec indication de la température de la pièce
et/ou de l'extérieur
Sans
objet
Puissance maximale
continue de chauffage
P
max,c
1,8
kW Régulation électronique de l'apport de chaleur
avec indication de la température de la pièce
et/ou de l'extérieur
Sans
objet
Consommation de courant auxiliaire
Apport de chaleur assisté par ventilateur Sans
objet
A puissance calorique
nominale (moteur de
ventilateur)
el
max
Sans
objet
kW
Type de chauffage/contrôle de la température de la
pièce
A puissance calorique
minimale (moteur de
ventilateur)
el
min
Sans
objet
kW Chauffage à une seule vitesse, pas de contrôle
de la température ambiante
non
En mode veille el
SB
0
W Deux vitesses ou plus réglables manuellement,
pas de contrôle de la température ambiante
non
Contrôle de la température ambiante par
thermostat mécanique
non
Contrôle électronique de la température
ambiante
non
Contrôle électronique de la température
ambiante et régulation par jour
non
Contrôle électronique de la température
ambiante et régulation par semaine
oui
Autres options de régulation
Contrôle de la température ambiante avec
détection de présence
non
Contrôle de la température ambiante avec
détection de fenêtre ouverte
non
Avec option télécommande non
Avec contrôle du démarrage du chauffage oui
Avec limitation de la durée de fonctionnement non
Avec globe noir capteur de température non
Coordonnées de contact Chal-Tec GmbH, Wallstraße 16, 10179, Berlin, Allemagne
41
FR
CONSIGNES DE SÉCURITÉ
• Lisez attentivement ce mode d‘emploi avant d‘utiliser l‘appareil et conservez-le
pour vous y référer ultérieurement.
• Installez la cheminée électrique conformément aux dispositions de ce mode
d‘emploi. En cas de doute, consultez le service client.
• Assurez-vous que la prise de courant que vous souhaitez utiliser est facilement
accessible et ne se trouve pas juste au-dessus de l‘appareil.
• Éteignez toujours l‘appareil et débranchez le câble d‘alimentation avant de
déplacer, nettoyer ou entretenir l‘appareil.
• Fixez l‘appareil pour qu‘il ne puisse pas tomber.
• Ne laissez pas l‘appareil sans surveillance lorsque de jeunes enfants ou des
personnes âgées se trouvent à proximité.
• Ne laissez jamais les enfants seuls et sans surveillance dans la même pièce que
l‘appareil lorsqu‘il est allumé.
• Ne couvrez pas ou ne bloquez pas les ouvertures de ventilation de l‘appareil.
N‘introduisez jamais d‘objets dans les ori ces de ventilation.
• N‘installez pas l‘appareil dans une pièce d‘eau, comme une salle de bain, une
cuisine, une douche, piscine, etc.
• N‘utilisez jamais de sprays ou de nettoyeur à vapeur pour nettoyer l‘appareil.
• Ne faites jamais passer le câble de l‘appareil sous un tapis ou dans des endroits où
cela risquerait de faire trébucher des personnes.
• N‘installez pas l‘appareil à proximité de rideaux ou d‘autres matériaux
in ammables.
• N‘utilisez pas l‘appareil pour faire sécher des vêtements, etc.
• Ne vous asseyez jamais et ne vous tenez pas debout sur l‘appareil.
• N‘utilisez jamais l‘appareil en combinaison avec des minuteries ou d‘autres
appareils dans le but d‘allumer automatiquement l‘appareil en différé.
Remarque : L‘appareil possède une protection contre la surchauffe. Si l‘appareil s‘arrête
en raison d‘une surchauffe, procédez comme suit : éteignez l‘appareil et débranchez la
che d‘alimentation de la prise. Si des objets recouvrent l‘appareil, retirez-les.
MISE EN GARDE
Risque de brûlures ! L‘appareil chauffe fortement, ne le touchez pas.
Réglez tous les interrupteurs sur „off“ et laissez refroidir complètement.
Une fois l‘appareil complètement refroidi, vous pouvez rebrancher la
che dans la prise. N‘ouvrez jamais le produit ! Il ne contient aucune
pièce à entretenir par l‘utilisateur.
42
FR
PANNEAU DE COMMANDE ET FONCTIONS DES
TOUCHES
1
Pour régler la puissance de chauffage
2
Pour régler la luminosité de la simulation de ammes
3
Témoin de la puissance de chauffage
4
Témoin de la minuterie
5
Témoin de fenêtre ouverte
6
Bouton de marche/arrêt

43
FR
1 Marche/arrêt
2 Augmenter la valeur
3 Réduire la valeur
4 Ajustement de la
semaine en cours et
de l‘heure
5 Ajustement de
la puissance de
chauffage
6 Allumer ou éteindre la
simulation de ammes
et le lit de charbons
7 Pour régler la
minuterie
8 Pour régler les
paramètres de la
minuterie
9 Activer ou désactiver
la fonction fenêtre
ouverte
10 Pour régler la
luminosité du lit de
charbons
11 Pour régler la
luminosité de la
simulation de ammes
Remarque : la
télécommande utilise
2 piles AAA (non
fournies). Ouvrez le
compartiment à piles en
appuyant sur le cache
et insérez les piles dans
le compartiment en
respectant la polarité.
TÉLÉCOMMANDE ET FONCTIONS DES TOUCHES

44
FR
MISE EN SERVICE
Branchez la che dans la prise. Appuyez sur l‘interrupteur marche/arrêt sur le côté
inférieur droit de l‘appareil. Si l‘appareil a déjà été allumé, il ne peut être démarré
que via la télécommande. Pour ce faire, appuyez sur le bouton d‘alimentation de la
télécommande.
Remarque : Dès que l‘appareil a été démarré via la télécommande, il peut être
utilisé via le panneau de commande en bas à gauche de l‘appareil ainsi que via la
télécommande.
UTILISATION MANUELLE
Allumez l‘appareil via l‘interrupteur principal. L‘appareil émet un bip pour indiquer
qu‘il s‘allume. L‘appareil est maintenant en mode veille. Une fois que l‘appareil a
été démarré via la télécommande, il peut être commandé à partir du panneau de
commande situé dans le coin inférieur gauche de l‘appareil.
Ajustement de la puissance de chauffage
• Lorsque vous appuyez sur le bouton pour la première fois, l‘appareil chauffe avec
1900 W de puissance. Le témoin de puissance de chauffage s‘allume en rouge.
• La seconde fois que vous appuyez sur le bouton, l‘unité chauffe à 950 W. Le
témoin de puissance de chauffage s‘allume en bleu.
• Si vous appuyez une troisième fois sur le bouton, les éléments chauffants s‘éteignent
et le témoin de puissance de chauffage disparaît.
Ajustement de la luminosité
• Lorsque vous appuyez sur le bouton pour la première fois, le charbon et les
ammes sont au plus haut niveau de luminosité.
• Si vous appuyez une deuxième fois sur le bouton, le charbon et les ammes
passent au niveau de luminosité moyen.
• Si vous appuyez une troisième fois sur le bouton, le charbon et les ammes passent
au niveau de luminosité le plus faible.
• En appuyant une quatrième fois sur le bouton, vous éteignez le charbon et les
ammes.
45
FR
UTILISATION AVEC LA TÉLÉCOMMANDE
Remarque : Lorsque vous utilisez la télécommande, ne vous éloignez pas de plus de
6 mètres de l‘appareil, et assurez-vous que la télécommande reste toujours orientée
en direction de l‘appareil.
Démarrer l‘appareil
Lorsque vous appuyez sur le bouton d‘alimentation de la télécommande, l‘écran de
la télécommande s‘allume, la amme s‘allume et l‘icône de la amme apparaît sur
l‘écran LCD. La semaine, l‘heure (format 24h) et le témoin de la température s‘afchent
normalement. Si vous appuyez à nouveau sur le bouton d‘alimentation, l‘écran LCD de
la télécommande s‘éteint.
Interrupteur de contrôle des ammes et des charbons
• L‘appareil étant allumé, une pression sur le bouton éteint la amme et le lit de
charbon, et l‘écran LCD n‘afche plus l‘icône .
• Si vous appuyez à nouveau sur ce bouton, la amme et le charbon se rallument et
l‘écran afche le symbole . Lorsque vous appuyez sur ce bouton, l‘appareil émet
un bip.
Réglage de la luminosité des ammes
Appuyez sur ce bouton pour régler la luminosité de la amme. Lorsque vous appuyez
sur ce bouton, l‘appareil émet un bip.
Réglage de la luminosité du lit de charbons
Appuyez sur ce bouton pour régler la luminosité du lit de charbon. L‘appareil émet un bip
une fois quand vous appuyez sur ce bouton.
46
FR
Réglage de la puissance de chauffage
• Lorsque vous appuyez sur le bouton pour la première fois, les éléments chauffants
fonctionnent avec une puissance de 1900 W, l‘écran LCD afche et le témoin de
chauffage s‘allume en rouge.
• Lorsque vous appuyez une seconde fois sur le bouton, les éléments chauffants
fonctionnent à 950 W, l‘écran LCD afche et le témoin de chauffage s‘allume en
bleu.
• Si vous appuyez une troisième fois sur le bouton, les éléments chauffants
s‘éteignent, l‘écran LCD n‘afche plus l‘icône et le témoin de chauffage s‘éteint.
L‘appareil émet un bip lorsque vous appuyez sur le bouton.
Remarque : Si les éléments chauffants sont allumés avec la télécommande, ils
seront activés ou non en fonction du réglage de la température et de la température
ambiante de la pièce. Les éléments chauffants ne sont activés que si la température
que vous avez réglée sur l‘appareil est supérieure à la température ambiante.
Réglage de la température
Appuyez sur les touches échées pour régler la température. Vous pouvez régler une
température comprise entre 7°C et 30°C sur l‘appareil. L‘appareil émet un bip lorsque
vous appuyez sur l‘une des touches.
Réglage de la semaine en cours et de l‘heure >>
• Si vous appuyez une fois sur le bouton, l‘icône correspondante s‘allume sur l‘écran
LCD.
• Appuyez maintenant sur les touches échées pour régler l‘heure actuelle et la
semaine. Lorsque vous appuyez sur ce bouton, l‘appareil n‘émet pas de son.
Réglage des paramètres de la minuterie
Lorsque vous appuyez sur le bouton pour la première fois, l‘écran LCD afche „1“ pour
lundi. Le réglage de la température se met à clignoter.
• Appuyez sur les touches échées pour régler la température du lundi. Appuyez sur
le bouton >> pour conrmer et appuyez sur les boutons échés pour régler l‘heure
de début du chauffage.
• L‘écran afche maintenant [00-23]. Appuyez sur >> pour régler le début du
chauffage.
• L‘indication [:] signie que la fonction de minuterie est actuellement activée et que
la température mesurée par l‘appareil correspond au réglage de la température.
• L‘indication [.] Signie que la fonction de minuterie est actuellement activée et que la
température mesurée par l‘appareil correspond à la température réglée moins 3°C.
• Si l‘écran LCD n‘afche rien, cela indique que la fonction de minuterie est
désactivée et que les éléments chauffants ne fonctionnent pas. Le point
correspondant clignote au moment du réglage.
47
FR
Lorsque vous appuyez sur le bouton la deuxième fois, l‘écran LCD afche „2“ pour
„mardi“.
Remarque : Vous pouvez appuyer sur ce bouton jusqu‘à sept fois pour régler la
température pour toute la semaine. Si vous appuyez une huitième fois sur la touche,
vous quittez le menu et l‘écran afche le réglage du jour de la semaine en cours.
Activation de la fonction minuterie
Lorsque vous appuyez sur le bouton de la minuterie, vous activez cette fonction.
• Lorsque vous appuyez sur le bouton pour la première fois, l‘écran afche et le
témoin de la minuterie s‘allume en vert sur l‘appareil.
• Si vous appuyez à nouveau sur le bouton, l‘icône disparaît de l‘écran ainsi
que le témoin de minuterie sur l‘appareil.
• Une fois la fonction minuterie activée, celle-ci vous amène aux réglages de la
température.
• L‘écran LCD afche les paramètres en cours :
Remarque : Si vous souhaitez modier les paramètres d‘heure, de semaine et de
minuterie, vous devez allumer et éteindre une fois le bouton de minuterie pour
enregistrer les nouvelles données. Lorsque l‘appareil a reçu les nouvelles données, il
émet un bip.

48
FR
Fonction fenêtre ouverte
• Lorsque vous appuyez une fois sur la touche, l‘écran afche l‘icône et le témoin
de fenêtre ouverte s‘allume en jaune sur l‘appareil.
• Si vous appuyez à nouveau sur la touche, l‘icône disparaît de l‘écran et le témoin
s‘éteint sur l‘appareil.
• Lorsque vous appuyez sur cette touche, l‘appareil émet un bip.
Une fois la fonction fenêtre ouverte activée, l‘appareil vérie d‘abord si les éléments
chauffants sont actifs. Si tel est le cas, le programme sauvegarde les valeurs actuelles de
température ambiante et mesure la température ambiante toutes les 12 minutes.
• Si une chute de température de plus de 4 °C est constatée dans les 30 minutes,
le programme désactive automatiquement les éléments chauffants, car l‘appareil
suppose qu‘une fenêtre est ouverte. Le témoin de fenêtre ouverte clignote sur
l‘appareil.
• Après une interruption de chauffage de 70 minutes, le programme redémarre
pour vérier si vous avez fermé la fenêtre. Le témoin de fenêtre ouverte clignote
lentement sur l‘appareil.
• L‘appareil chauffe désormais pendant 6 minutes toutes les 30 minutes à 1900 W.
si la température augmente de plus de 2 °C durant cet intervalle, la fenêtre est
considérée comme fermée et le témoin de fenêtre ouverte cesse de clignoter sur
l‘appareil.

49
FR
INFORMATIONS SUR LE RECYCLAGE
S‘il existe une réglementation pour l‘élimination ou le
recyclage des appareils électriques et électroniques dans
votre pays, ce symbole sur le produit ou sur l‘emballage
indique que cet appareil ne doit pas être jeté avec les
ordures ménagères. Vous devez le déposer dans un point
de collecte pour le recyclage des équipements électriques
et électroniques. La mise au rebut conforme aux règles
protège l‘environnement et la santé de vos semblables des
conséquences négatives. Pour plus d‘informations sur le
recyclage et l‘élimination de ce produit, veuillez contacter
votre autorité locale ou votre service de recyclage des
déchets ménagers.
Ce produit contient des piles. S‘il existe une réglementation
pour l‘élimination ou le recyclage des piles dans votre pays,
vous ne devez pas les jeter avec les ordures ménagères.
Renseignez-vous sur les dispositions locales relatives à la
collecte des piles usagées. La mise au rebut conforme aux
règles protège l‘environnement et la santé de vos semblables
des conséquences négatives.
FABRICANT ET IMPORTATEUR (UK)
Fabricant :
Chal-Tec GmbH, Wallstraße 16, 10179 Berlin, Allemagne.
Importateur pour la Grande Bretagne :
Chal-Tec UK limited
Unit 6 Riverside Business Centre
Brighton Road
Shoreham-by-Sea
BN43 6RE
United Kingdom


51
IT
Gentile cliente,
La ringraziamo per aver acquistato il dispositivo. La preghiamo
di leggere attentamente le seguenti istruzioni per l’uso e di
seguirle per evitare possibili danni tecnici. Non ci assumiamo
alcuna responsabilità per danni scaturiti da una mancata
osservazione delle avvertenze di sicurezza e da un uso
improprio del dispositivo. Scansionare il codice QR seguente,
per accedere al manuale d’uso più attuale e per ricevere
informazioni sul prodotto.
INDICE
Scheda informativa del prodotto52
Avvertenze di sicurezza53
Pannello di controllo e tasti funzione54
Telecomando e tasti funzione55
Messa in funzione56
Utilizzo manuale56
Utilizzo con il telecomando57
Avviso di smaltimento61
Produttore e importatore (UK)61
DATI TECNICI
Numero articolo
10032590, 10034249, 10035071,
10035072
Alimentazione 220-240 V ~ 50/60 Hz
Potenza 1600-1900 W
52
IT
SCHEDA INFORMATIVA DEL PRODOTTO
Identicazione del modello (i) 10032590, 10034249, 10035071, 10035072
Indicazione Simbolo Valore Unità Indicazione Unità
Potenza termica Solo per gli apparecchi per il riscaldamento d'ambiente
locale elettrici ad accumulo: Tipo di controllo
dell´apporto termico
Potenza termica nominale P
nom
1,8
kW Controllo manuale del carico termico con
termostato integrato
N.D.
Potenza termica minima
(valore indicativo)
P
min
0
kW Controllo manuale del carico termico con
riscontro della temperatura ambiente e/o
esterna
N.D.
Potenza termica massima
continua
P
max,c
1,8
kW Controllo elettronico del carico termico con
riscontro della temperatura ambiente e/o
esterna
N.D.
Consumo di elettricità ausiliaria
Potenza termica con supporto del ventilatore N.D.
Per la potenza termica
nominale (Motore del
ventilatore)
el
max
N.D. kW
Tipo di potenza termica / controllo della temperatura
ambiente
Per la potenza termica
minima (Motore del
ventilatore)
el
min
N.D. kW Potenza termica di un solo livello, senza
controllo della temperatura ambiente
no
In modalità di attesa el
SB
0
W Due o più livelli impostabili manualmente, senza
controllo della temperatura ambiente
no
Con controllo della temperatura ambiente
tramite termostato meccanico
no
Con controllo elettronico della temperatura
ambiente
no
Controllo elettronico della temperatura
ambiente e timer giornaliero
no
Controllo elettronico della temperatura
ambiente e timer settimanale
si
Altre opzioni di controllo
Controllo della temperatura ambiente con
rilevamento di presenza
no
Controllo della temperatura ambiente con
rilevamento di nestre aperte
no
Con opzione telecomando no
Con controllo di avvio adattabile si
Con limitazione del tempo di funzionamento no
Con sensore lampada nero no
Informazioni di contatto Chal-Tec GmbH, Wallstraße 16, 10179, Berlino, Germania

53
IT
AVVERTENZE DI SICUREZZA
• Leggere attentamente il manuale d’uso prima della messa in funzione e conservarlo
per futuri utilizzi.
• Installare il camino elettrico secondo le indicazioni del presente manuale. In caso di
dubbi, consultare il servizio di assistenza ai clienti.
• Assicurarsi che la presa elettrica che si desidera utilizzare sia facilmente accessibile
e che non si trovi sopra al dispositivo.
• Prima di muovere, pulire o manutenere il dispositivo, spegnerlo e staccare la spina
dalla presa elettrica.
• Fissare il dispositivo in modo che non possa cadere.
• Non lasciare il dispositivo privo di controllo se nelle vicinanze ci sono bambini
piccoli o persone anziane.
• Non lasciare mai bambini soli e senza controllo nella stessa stanza del dispositivo,
quando è acceso.
• Non coprire o bloccare le aperture di ventilazione del dispositivo. Non inserirci
oggetti in nessun caso.
• Non installare il dispositivo in locali in cui viene utilizzata acqua corrente, come ad
esempio bagni, cucine, sale doccia o vicino a piscine, ecc.
• Non utilizzare mai spray o pulitrici a vapore per lavare il dispositivo.
• Non far passare mai il cavo del dispositivo sotto a tappeti o in luoghi in cui sia
possibile inciamparvi.
• Non installare il dispositivo vicino a tende o altri materiali in ammabili.
• Non utilizzare il dispositivo per asciugare vestiti, ecc.
• Non sedersi o poggiarsi sopra al dispositivo.
• Non utilizzare mai il dispositivo con timer o altri dispositivi che accendono
automaticamente il dispositivo ad un tempo determinato.
Nota: il dispositivo è dotato di una protezione dal surriscaldamento. Se il dispositivo si
arresta a causa del surriscaldamento, procedere come segue: spegnere il dispositivo
e staccare la spina dalla presa elettrica. Se ci sono oggetti che coprono il dispositivo,
toglierli.
AVVERTENZA
Pericolo d’incendio! Il dispositivo diventa estremamente caldo: non
toccarlo. Posizionare tutti gli interruttori su “OFF” e lasciarlo raffreddare
completamente. Non appena il dispositivo è raffreddato è possibile
inserire nuovamente la spina nella presa elettrica. Non aprire il
dispositivo in nessun caso! Non ci sono componenti che necessitano
manutenzione da parte dell’utente.

54
IT
PANNELLO DI CONTROLLO E TASTI FUNZIONE
1
Per regolare la potenza riscaldante
2
Per regolare l’intensità dell’effetto amma
3
Indicazione della potenza riscaldante
4
Indicazione per il timer
5
Indicazione Finestra Aperta
6
Interruttore ON/OFF
55
IT
1 Interruttore ON/OFF
2 Aumentare il valore
3 Diminuire il valore
4 Regolare la settimana
e l’ora attuale
5 Regolare la potenza
riscaldante
6 Accendere e
spegnere l’effetto
amma o il letto di
braci
7 Regolare il timer
8 Regolare i parametri
del timer
9 Accendere o
spegnere la funzione
Finestra Aperta
10 Regolare l’intensità
luminosa del letto di
braci
11 Regolare l’intensità
luminosa dell’effetto
amma
Nota: il telecomando
necessita di 2 pile AAA
(non contenute nel
volume di consegna).
Aprire il vano per le
batterie facendolo
scorrere verso il basso e
inserire le pile, facendo
attenzione alla polarità
corretta.
TELECOMANDO E TASTI FUNZIONE
56
IT
MESSA IN FUNZIONE
Inserire la spina nella presa elettrica. Premere l’interruttore ON/OFF sul lato inferiore
destro del dispositivo. Una volta acceso, il dispositivo può essere attivato solo con il
telecomando. A tal ne, premere il tasto di accensione sul telecomando.
Nota: non appena il dispositivo è stato attivato con il telecomando, è possibile
gestire le funzioni sia con il pannello di controllo in basso a sinistra sul dispositivo, sia
con il telecomando.
UTILIZZO MANUALE
Accendere il dispositivo con l’interruttore principale. Il dispositivo emette un segnale
acustico per indicare che si accende. Ora il dispositivo è in modalità standby. Non
appena il dispositivo viene attivato con il telecomando, è possibile utilizzarlo con il
pannello di controllo in basso a sinistra.
Regolare la potenza riscaldante
• Premendo il tasto la prima volta, il dispositivo riscalda con 1900 W di potenza.
L’indicazione per la potenza riscaldante si illumina di rosso.
• Premendo il tasto la seconda volta, il dispositivo riscalda con 950 W di potenza.
L’indicazione per la potenza riscaldante si illumina di blu.
• Premendo il tasto la terza volta, gli elementi riscaldanti vengono spenti e
l’indicazione per la potenza riscaldante si spegne.
Regolare l’intensità luminosa
• Premendo il tasto la prima volta, amme e braci si trovano al livello di massima
luminosità.
• Premendo il tasto la seconda volta, amme e braci si trovano al livello di luminosità
media.
• Premendo il tasto la terza volta, amme e braci si trovano al livello di minima
luminosità.
• Premendo il tasto la quarta volta, amme e braci si spengono.

57
IT
UTILIZZO CON IL TELECOMANDO
Avvertenza: non allontanarsi a più d 6 metri dal dispositivo se si utilizza il
telecomando e assicurarsi di direzionarlo sempre verso il dispositivo.
Attivare il dispositivo
Premendo il tasto ON/OFF sul telecomando, lo schermo del telecomando si
accende, la amma comincia a brillare e il simbolo della amma compare sul
display LCD. Settimana, ora (formato 24h) e l’indicazione della temperatura sono
mostrati normalmente. Premendo nuovamente il tasto ON/OFF, lo schermo LCD del
telecomando si spegne.
Interruttore per controllare amme e braci
• Premendo il tasto una volta a dispositivo acceso, le amme e le braci si spengono e
sul display LCD il simbolo non viene più mostrato.
• Premendo questo tasto nuovamente, amme e braci si accendono di nuovo e il
display mostra il simbolo . Quando viene premuto questo tasto, il dispositivo
emette un segnale acustico.
Regolare l’intensità luminosa delle amme
Premere questo tasto per regolare la luminosità delle amme. Quando viene premuto
questo tasto, il dispositivo emette un segnale acustico.
Regolare l’intensità luminosa del letto di braci
Premere questo tasto per regolare la luminosità delle braci. Quando viene premuto questo
tasto, il dispositivo emette un segnale acustico.
58
IT
Regolare la potenza riscaldante
• Premendo questo tasto la prima volta, gli elementi riscaldanti lavorano con una
potenza di 1900 W, lo schermo LCD mostra e l’indicazione per la potenza
riscaldante si illumina di rosso.
• Premendo questo tasto la seconda volta, gli elementi riscaldanti lavorano con
una potenza di 950 W, lo schermo LCD mostra e l’indicazione per la potenza
riscaldante si illumina di blu.
• Premendo il tasto una terza volta, gli elementi riscaldanti si spengono, lo schermo
LCD non mostra più il simbolo e l’indicazione per la potenza riscaldante si spegne.
Il dispositivo emette un segnale acustico quando viene premuto il tasto.
Nota: quando gli elementi riscaldanti vendono accesi con il telecomando, dipende
dalla temperatura impostata e dalla temperatura ambiente se si attivano o meno. Gli
elementi riscaldanti vengono attivati solo se la temperatura impostata è superiore a
quella ambiente.
Regolare l’impostazione della temperatura
Premere i tasti freccia per regolare la temperatura. Sul dispositivo è possibile regolare la
temperatura tra 7 °C e 30 °C. Il dispositivo emette un segnale acustico quando viene
premuto il tasto.
Impostare la settimana e l’ora attuale >>
• Premendo il tasto una volta, il simbolo corrispondente si illumina sullo schermo LCD.
• Premere dunque i tasti freccia per impostare ora e settimana attuali. Il dispositivo
non emette un segnale acustico quando viene premuto il tasto.
Regolare i parametri del timer
Premendo il tasto la prima volta, lo schermo LCD mostra “1”, che signica lunedì.
L’impostazione della temperatura comincia a lampeggiare.
• Premere i tasti freccia per impostare la temperatura per lunedì. Per confermare,
premere il tasto >> e i tasti freccia per impostare l’orario di avvio per il
riscaldamento.
• Lo schermo mostra ora [00-23]. Premere >> per impostare l’avvio del
riscaldamento.
• L’indicazione [:] signica che la funzione timer è attualmente attiva e che la
temperatura misurata dal dispositivo corrisponde a quella impostata.
• L’indicazione [.] signica che la funzione timer è attualmente attiva e che la
temperatura misurata dal dispositivo corrisponde a quella impostata meno 3 °C.
• Se lo schermo LCD non mostra niente, signica che la funzione timer non è
attiva e che gli elementi riscaldanti non sono in funzione. Il punto corrispondente
lampeggia al momento dell’impostazione.
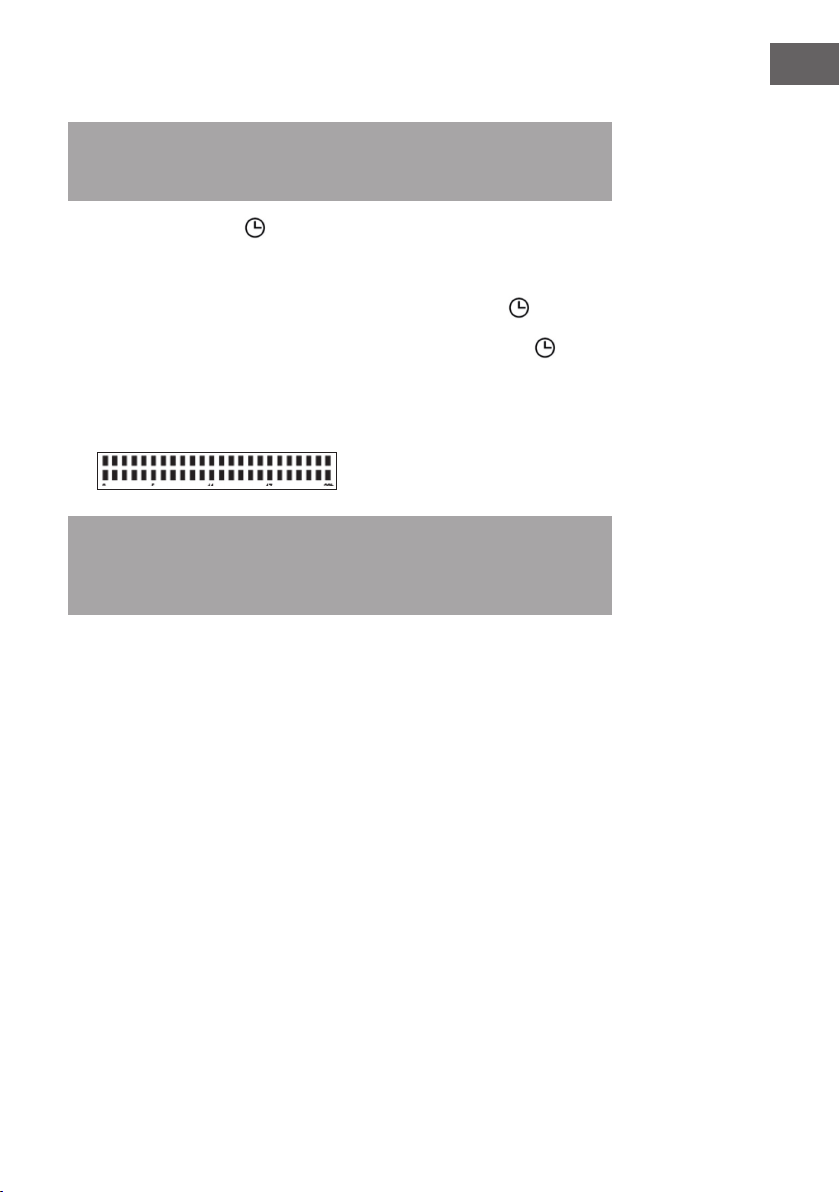
59
IT
Premendo il tasto una seconda volta, lo schermo LCD mostra “2”, che signica martedì.
Nota: è possibile premere questo tasto no a sette volte, per impostare la
temperatura di tutta la settimana. Premendo il tasto un’ottava volta, si esce dal menù
e lo schermo indica l’impostazione per il giorno della settimana corrente.
Attivare la funzione timer
Premendo il tasto timer si attiva la relativa funzione.
• Premendo il tasto la prima volta, sullo schermo compare il simbolo ) e
l’indicazione per il timer si illumina di verde sul dispositivo.
• Premendo il tasto la seconda volta, dallo schermo scompare il simbolo e
l’indicazione per il timer sul dispositivo si spegne.
• Dopo aver attivato la funzione timer, orientarsi alle relative impostazioni della
temperatura.
• Lo schermo LCD mostra i parametri impostati:
Nota: se si desidera modicare l’impostazione per tempo, settimana e timer, è
necessario accendere e spegnere una volta il tasto timer, in modo da poter salvare
i nuovi dati. Quando i nuovi dati sono stati ricevuti, il dispositivo emette un segnale
acustico.

60
IT
Funzione Finestra Aperta
• Premendo il tasto la prima volta, sullo schermo compare il simbolo e
l’indicazione per la Finestra Aperta si illumina di giallo sul dispositivo.
• Premendo il tasto la seconda volta, dallo schermo scompare il simbolo e
l’indicazione sul dispositivo si spegne.
• Quando si preme questo tasto, il dispositivo emette un segnale acustico.
Dopo aver attivato la funzione nestra, il dispositivo verica per prima cosa che gli
elementi riscaldanti siano attivi. Se sono attivi, il programma salva i valori attuali della
temperatura ambiente e misura di nuovo la temperatura ambiente ogni 12 minuti.
• Se entro 30 minuti c’è una diminuzione della temperatura di oltre 4 °C, il
programma disattiva automaticamente gli elementi riscaldanti, perché presuppone
che ci sia una nestra aperta. L’indicazione Finestra Aperta lampeggia sul
dispositivo.
• Dopo che il processo di riscaldamento è stato arrestato per 70 minuti, il programma
si attiva di nuovo, per controllare se la nestra è stata chiusa. L’indicazione Finestra
Aperta sul dispositivo lampeggia lentamente.
• Il dispositivo riscalda dunque ogni 30 minuti a 1900 W. Se la temperatura in
questo lasso di tempo aumenta di oltre 2 °C, la nestra viene considerata chiusa e
l’indicazione nestra aperta sul dispositivo smette di lampeggiare.

61
IT
AVVISO DI SMALTIMENTO
Se nel proprio paese si applicano le regolamentazioni
inerenti lo smaltimento di dispositivi elettrici ed elettronici,
questo simbolo sul prodotto o sulla confezione segnala che
questi prodotti non possono essere smaltiti con i riuti normali
e devono essere portati a un punto di raccolta di dispositivi
elettrici ed elettronici. Grazie al corretto smaltimento dei
vecchi dispositivi si tutela il pianeta e la salute delle persone
da possibili conseguenze negative. Informazioni riguardanti il
riciclo e lo smaltimento di questi prodotti si ottengono presso
l’amministrazione locale oppure il servizio di gestione dei
riuti domestici.
Il prodotto contiene batterie. Se nel proprio paese si
applicano le regolamentazioni inerenti lo smaltimento di
batterie, non possono essere smaltite con i normali riuti
domestici. Preghiamo di informarvi sulle regolamentazioni
vigenti sullo smaltimento delle batterie. Grazie al corretto
smaltimento dei vecchi dispositivi si tutela l’ambiente e la
salute delle persone da conseguenze negative.
PRODUTTORE E IMPORTATORE (UK)
Produttore:
Chal-Tec GmbH, Wallstraße 16, 10179 Berlino, Germania.
Importatore per la Gran Bretagna:
Chal-Tec UK limited
Unit 6 Riverside Business Centre
Brighton Road
Shoreham-by-Sea
BN43 6RE
United Kingdom

63
NL
Geachte klant,
hartelijk gefeliciteerd met de aanschaf van dit apparaat. Lees
de hierna volgende handleiding aandachtig door en volg de
instructies op om schade te voorkomen. Voor schade veroorzaakt
door het niet in acht nemen van de instructies of door onjuist
gebruik nemen wij geen verantwoordelijkheid. Scan de QR-code
om toegang te krijgen tot de meest recente gebruikershandleiding
en meer informatie over het product.
INHOUDSOPGAVE
Productgegevens 28
Veiligheidsinstructies 29
Controlepaneel en toetsenfuncties 30
Afstandsbediening en toetsenfuncties 31
Ingebruikname 32
Handmatige bediening 32
Gebruik van afstandsbediening 33
Instructies voor afvoer 37
TECHNISCHE GEGEVENS
Artikelnummer
10032590, 10034249, 10035071,
10035072
Stroomvoorziening 220-240 V ~ 50/60 Hz
Vermogen 1600-1900 W
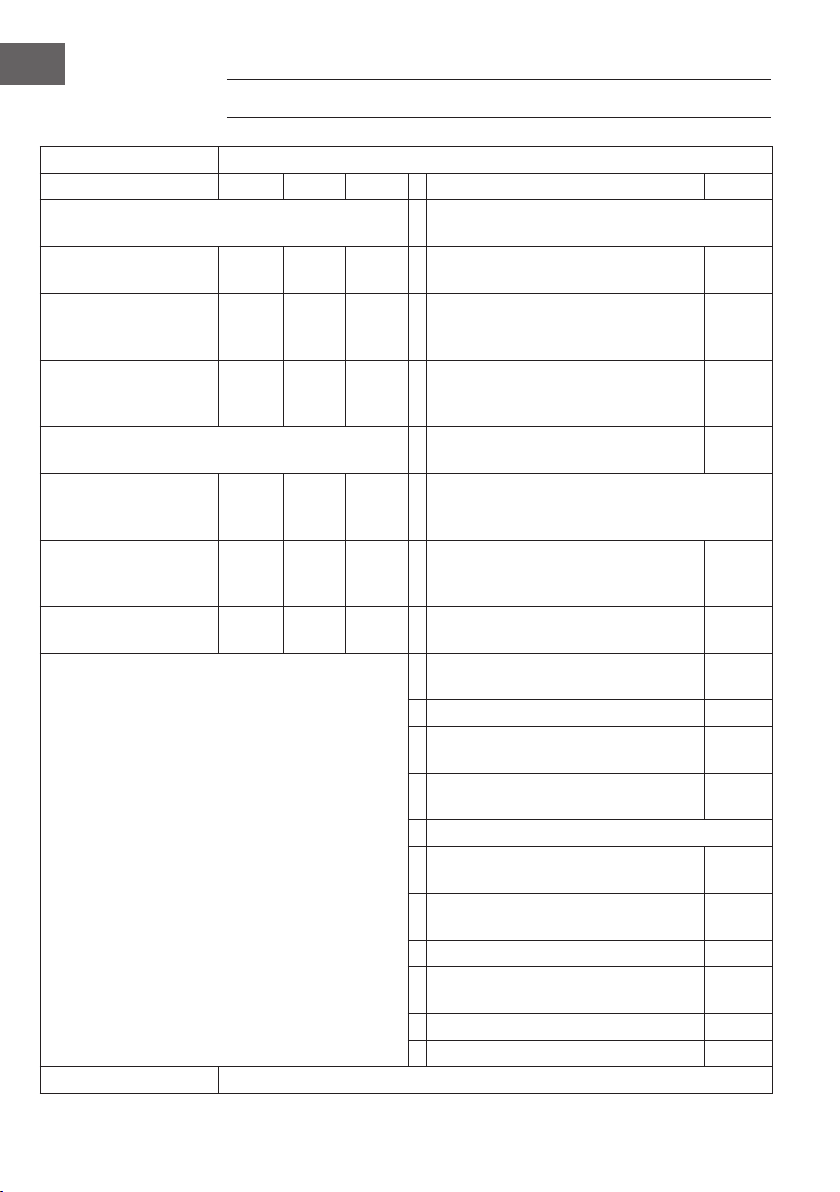
64
NL
PRODUCTGEGEVENS
Artikelidenticatie 10032590, 10034249, 10035071, 10035072
Aanduiding Symbool Waarde Eenheid Aanduiding Eenheid
Warmtevermogen Alleen voor individuele elektrische ruimteverwarmers:
regulering van de warmtetoevoer
Nominaal warmtevermogen P
nom
1,8
kW Handmatige regeling van de warmtetoevoer
met ingebouwde thermostaat
geen
indicatie
Minimaal warmtevermogen P
min
0
kW Handmatige regeling van de warmtetoevoer
met terugmelding van de kamer- en/ of externe
temperatuur
geen
indicatie
(richtwaarde) P
max,c
1,8
kW Elektronische regeling van de warmtetoevoer
met terugmelding van de kamer- en/ of externe
temperatuur
geen
indicatie
Maximaal continue warmtevermogen
Warmteafgifte met ondersteuning van een
ventilator
geen
indicatie
Bij nominaal
warmtevermogen (ventilator
motor)
el
max
geen
indicatie
kW
Type warmtevermogen / Kamertemperatuurcontrole
Bij minimaal
warmtevermogen (ventilator
motor)
el
min
geen
indicatie
kW Enkele warmtestand, geen
kamertemperatuurcontrole
nee
In stand-by modus el
SB
0
W Twee of meer handmatig in te stellen standen,
geen kamertemperatuurcontrole
nee
Controle kamertemperatuur met mechanische
thermostaat
nee
Met elektronische kamertemperatuurcontrole nee
Met elektronische kamertemperatuurcontrole en
tijdregulering
nee
Met elektronische kamertemperatuurcontrole en
weekdagregulering
ja
Overige reguleringsopties
Kamertemperatuurcontrole met
aanwezigheidsherkenning
nee
Kamertemperatuurcontrole met open raam
detectie
nee
Met afstandsbedieningsoptie nee
Met adaptieve regeling van de start van de
verwarming
nee
Met bedrijfstijdbegrenzing nee
Met elektronische sensor nee
Contactinformatie Chal-Tec GmbH, Wallstraße 16, 10179, Berlijn, Duitsland
65
NL
VEILIGHEIDSINSTRUCTIES
• Lees deze gebruikershandleiding voor de ingebruikname aandachtig door en
bewaar deze voor toekomstig gebruik.
• Installeer de elektrische haard confom de bepalingen in deze handleiding. Neem
bij twijfel contact op met de klantenservice.
• Let erop dat het stopcontact dat u wilt gebruiken gemakkelijk toegankelijk is en zich
niet boven het apparaat bevindt.
• Schakel het apparaat altijd uit en neem altijd de stekker uit het stopcontact voordat
u het verplaatst, schoonmaakt of repareert.
• Plaats het apparaat zo dat het niet kan omvallen.
• Laat het apparaat niet zonder toezicht wanneer kleine kinderen of oudere mensen
zich in de nabijheid van het apparaat bevinden.
• Laat kinderen nooit alleen en ongecontroleerd in dezelfde ruimte als het apparaat
wanneer het ingeschakeld is.
• Dek de ventilatieopeningen van het apparaat niet af en blokkeer deze niet. Plaats
in geen geval objecten in de ventilatieopeningen.
• Installeer het apparaat niet in ruimtes waar stromend water wordt gebruikt, zoals
badkamer, keuken, doucheruimte of in de nabijheid van een zwembad.
• Gebruik voor het reinigen nooit een spray of stoomreiniger.
• Leg de kabel nooit onder een tapijt of op plaatsen waar iemand erover kan
struikelen.
• Installeer het apparaat niet in de nabijheid van gordijnen of andere licht
ontvlambare materialen.
• Gebruik het apparaat niet om kleding e.d. te drogen.
• Leun niet op het apparaat en ga er niet op zitten.
• Gebruik het apparaat nooit in combinatie met tijdschakelaars of andere apparaten
die het apparaat op een bepaalde tijd automatisch aanzetten.
Let op! Het apparaat beschikt over een oververhittingsbescherming. Wanneer het
apparaat vanwege oververhitting stopt met functioneren handelt u als volgt: Schakel
het apparaat uit en haal de stekker uit het stopcontact. Wanneer objecten het apparaat
bedekken verwijdert u deze.
WAARSCHUWING
Verbrandingsgevaar! Het apparaat wordt heel heet, raak het dus niet
aan. Zet de schakelaar op “uit” en laat het volledig afkoelen. Zodra het
apparaat volledig is afgekoeld kunt u de stekker weer in het stopcontact
steken. Open het apparaat in geen geval! Het beschikt niet over
onderdelen die door de gebruiker moeten worden onderhouden.

66
NL
CONTROLEPANEEL EN TOETSENFUNCTIES
1
Aanpassen van het verwarmingsvermogen
2
Aanpassen van de helderheid van de vlammen
3
Display voor het verwarmingsvermogen
4
Display voor de timer
5
Open raam alert
6
Aan-/ Uitschakelaar
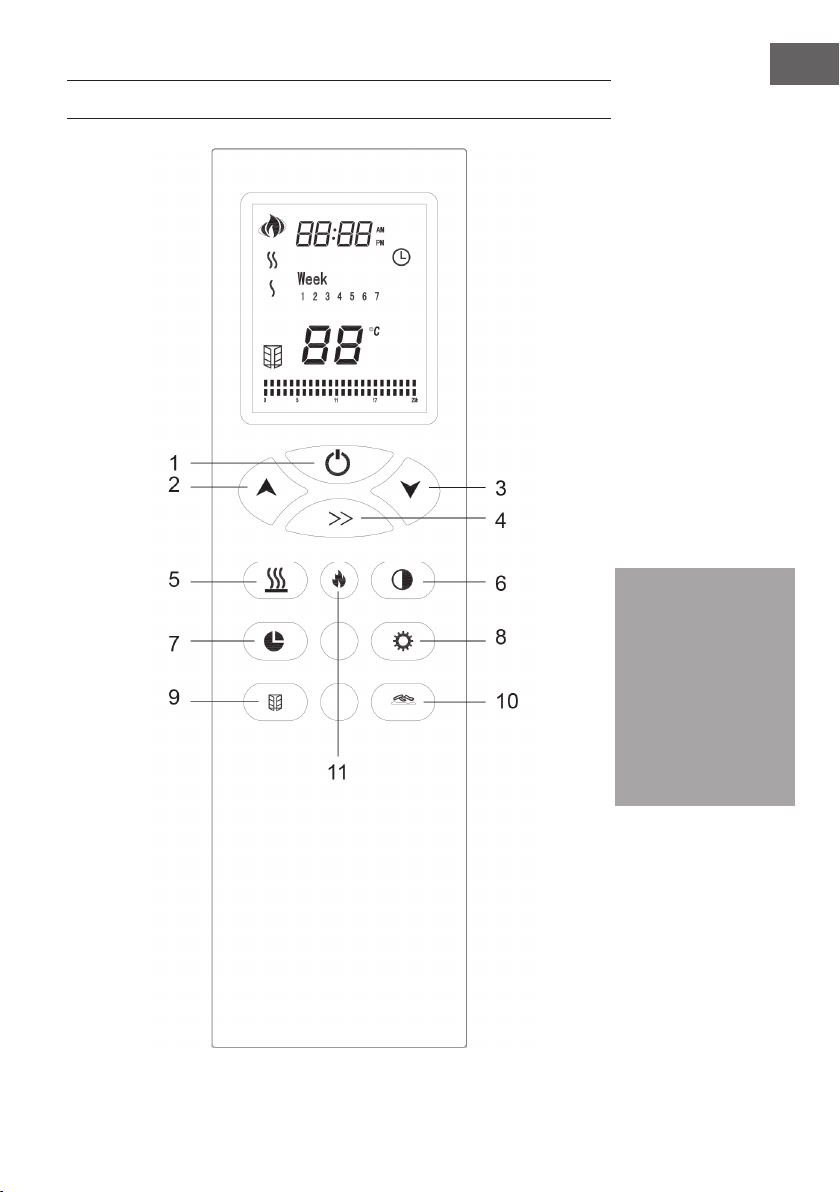
67
NL
1 Aan- / Uitschakelaar
2 Waarde verhogen
3 Waarde verminderen
4 Aanpassen actuele
week en tijd
5 Aanpassen
verwarmingsvermogen
6 Vlammeneffect en kolen
in- of uitschakelen
7 Aanpassen timer
8 Aanpassen timer
parameters
9 Open raam-detectie in-
of uitschakelen
10 Aanpassen helderheid
kolen
11 Aanpassen helderheid
vlammen
Let op! De
afstandsbediening
functioneert met twee
AAA batterijen (niet
inbegrepen). Open het
batterijencompartiment
door de afdekking naar
beneden te schuiven en
plaats de batterijen met
inachtneming van de
juiste polariteit
AFSTANDSBEDIENING EN TOETSENFUNCTIES
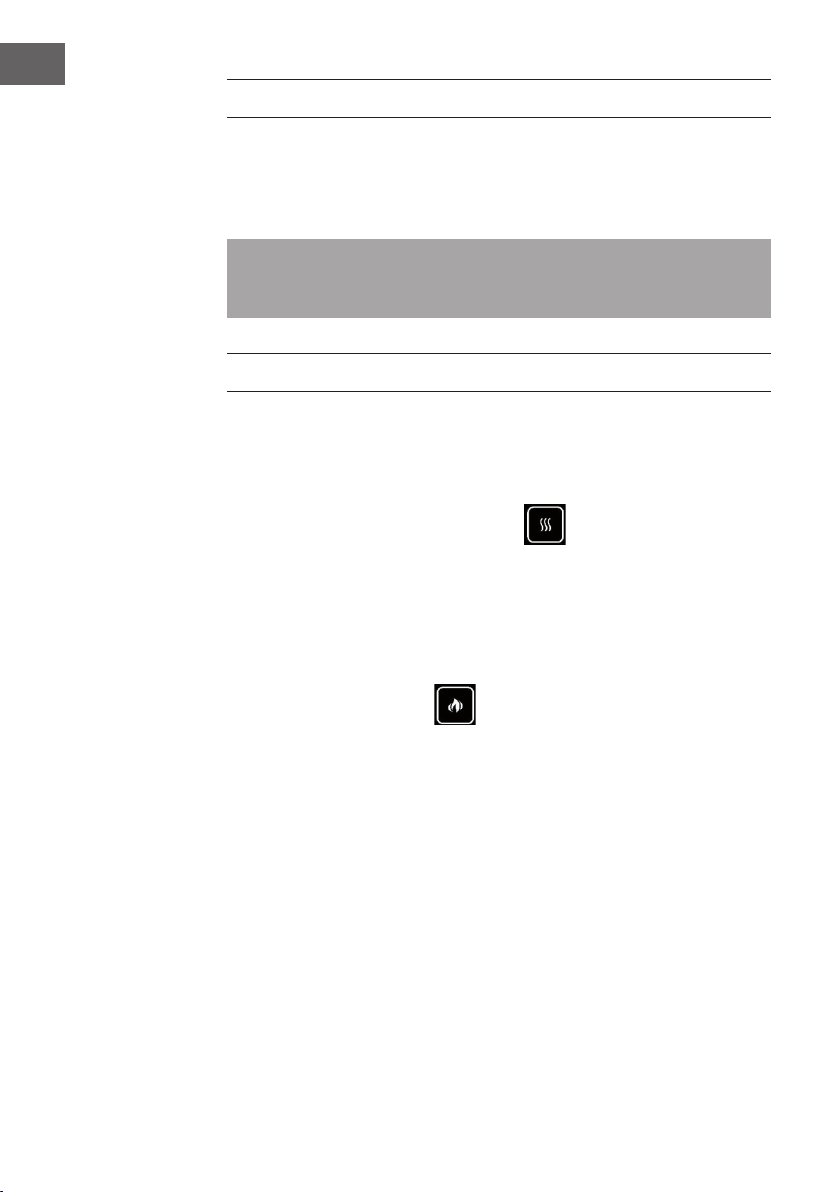
68
NL
INGEBRUIKNAME
Steek de stekker in het stopcontact. Druk op de aan-/ uitschakelaar rechtsonder
op het apparaat. Wanneer het apparaat ingeschakeld is kan hij uitsluitend via de
afstandsbediening worden opgestart. Druk daarvoor op de aan-/ uitschakelaar op de
afstandsbediening.
Let op! Zodra het apparaat via de afstandsbediening is opgestart kan het zowel via
de afstandsbediening als ook via het controlepaneel linksonder op het apparaat
worden bediend.
HANDMATIGE BEDIENING
Zet het apparaat aan via de hoofdschakelaar. Het apparaat piept eenmalig om
aan te geven dat het ingeschakeld is. Het apparaat bevindt zich nu in de stand-by
modus. Zodra het apparaat via de afstandsbediening is opgestart kan het via het
controlepaneel linksonder op het apparaat worden bediend.
Aanpassen van het verwarmingsvermogen
• Wanneer u deze toets eenmaal indrukt verwarmt het apparaat met 1900 W
vermogen. De indicator kleurt rood.
• Wanneer u deze toets nog eens indrukt verwarmt het apparaat met 950 W
vermogen. De indicator kleurt blauw.
• Wanneer u deze toets een derde keer indrukt worden de verwarmingselementen
uitgeschakeld en de indicator gaat eveneens uit.
Aanpassen van de helderheid
• Wanneer de toets een keer indrukt bevinden kolen en vlammen zich in de hoogste
helderheidsstand.
• Wanneer u de toets een tweede keer indrukt bevinden kolen en vlammen zich in de
middelste helderheidsstand.
• Wanneer u de toets een derde keer indrukt bevinden kolen en vlammen zich in de
laagste helderheidsstand.
• Wanneer u de toets een vierde keer indrukt doven de kolen en de vlammen.
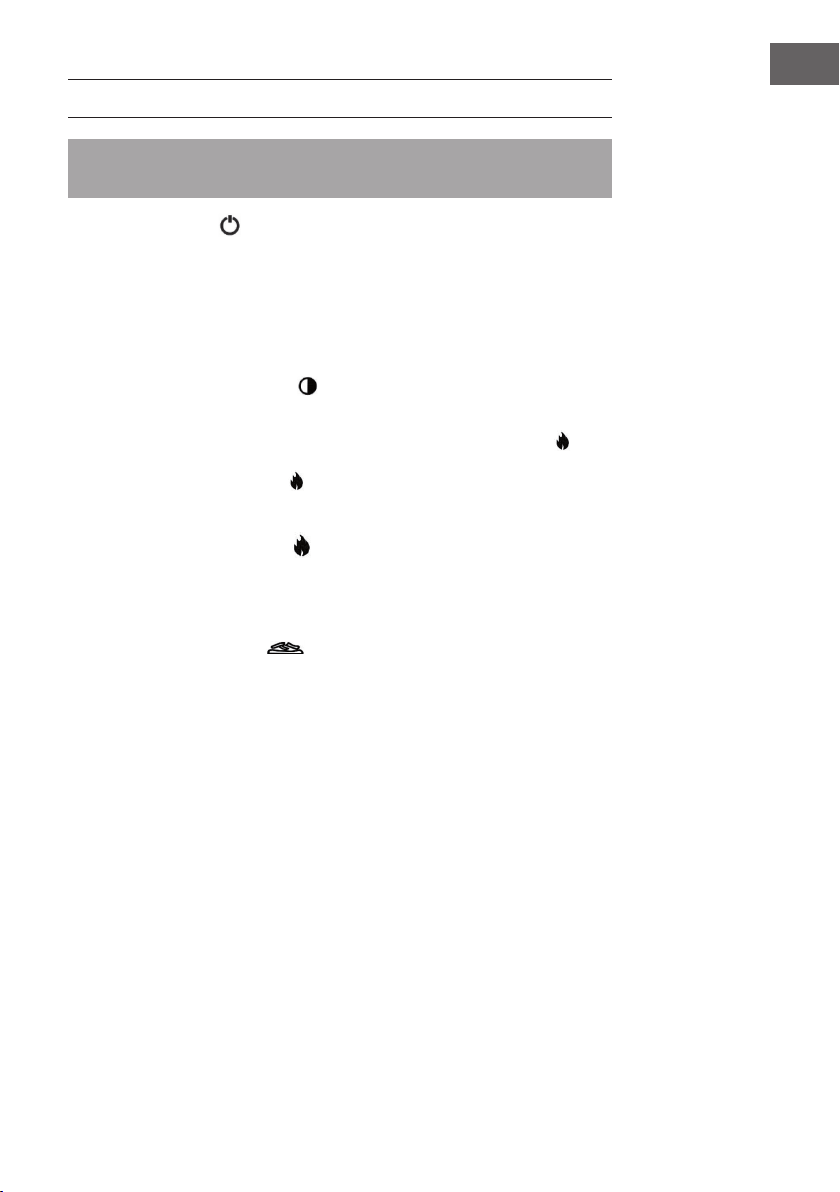
69
NL
GEBRUIK VAN AFSTANDSBEDIENING
Let op! De afstandsbediening heeft een bereik van 6 meter. Let erop dat u de
afstandsbediening altijd in de richting van het apparaat richt.
Het apparaat starten
Wanneer u op de afstandsbediening op de aan-toets drukt licht het beeldscherm van
de afstandsbediening op, de vlam wordt ontstoken en het vlammensymbool verschijnt
op het LC display. Week, tijd (24 uurs systeem) en temperatuurweergave worden
zichtbaar. Wanneer u de aan-toets nogmaals indrukt gaat het LC display van de
afstandsbediening uit.
Vlammen- en controleschakelaar
• Wanneer u deze toets een keer indrukt, als het apparaat ingeschakeld is, doven de
vlammen en de kolen en op het LC display verdwijnt het vlammensymbool .
• Wanneer u deze toets opnieuw indrukt gaan de vlammen en de kolen weer aan
en wordt het vlammensymbool opnieuw weergegeven. Wanneer deze toets
ingedrukt wordt piept het apparaat eenmalig.
Aanpassen helderheid vlammen
Druk op deze toets om de helderheid van de vlammen aan te passen. Wanneer u op
deze toets drukt piept het apparaat eenmalig.
Aanpassen helderheid kolen
Druk op deze toets om de helderheid van de kolen aan te passen. Wanneer u op deze
toets drukt piept het apparaat eenmalig.
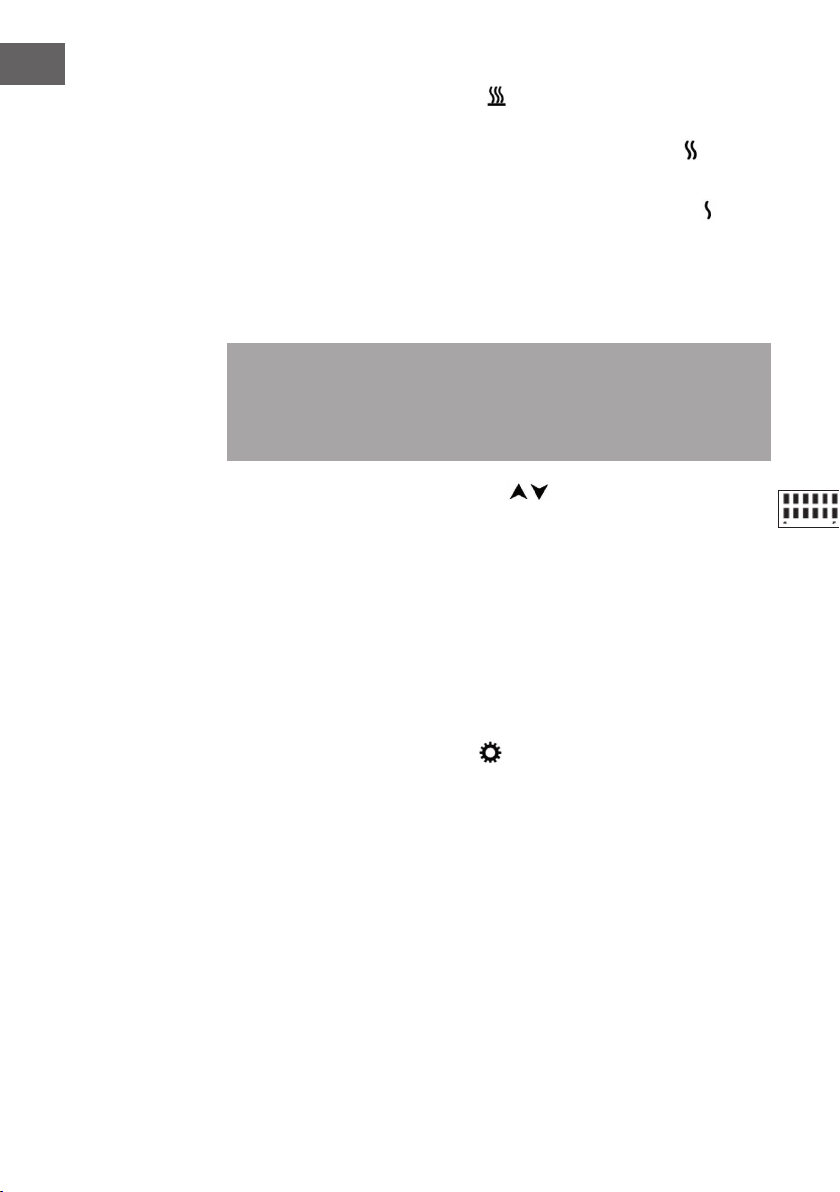
70
NL
Aanpassen van het warmtevermogen
• Wanneer u deze toets de eerste keer indrukt functioneren de
verwarmingselementen met 1900 W vermogen. Het LC display geeft weer en de
indicator brandt rood.
• Wanneer u deze toets een tweede keer indrukt functioneren de
verwarmingselementen met een vermogen 950 W. Het LC display geeft weer en
de indicator brandt blauw.
• Wanneer u deze toets een derde keer indrukt worden de verwarmingselementen
uitgeschakeld. Het LC display geeft geen enkel symbool meer aan en de
vermogensweergave gaat uit. Het apparaat piept eenmalig wanneer op de toets
wordt gedrukt.
Let op! Wanneer de verwarmingselementen met de afstandsbediening worden
ingeschakeld hangt het van de temperatuurinstelling en de ruimtelijke temperatuur af
of deze actief worden of niet. De verwarmingselementen worden alleen geactiveerd
wanneer de door u op het apparaat ingestelde temperatuur hoger ligt dan de
ruimtelijke temperatuur.
Aanpassen van de temperatuurinstelling
Druk voor het aanpassen van de temperatuurinstelling op de pijltjestoetsen. U kunt
op het apparaat een temperatuur tussen 7°C en 30°C instellen. Het apparaat piept
eenmalig wanneer op één van de toetsen wordt gedrukt.
Instellen van de actuele week en tijd >>
• Wanneer u de toets een keer indrukt licht het bijbehorende symbool op het LC
display op.
• Druk nu op de pijltjestoetsen om de actuele tijd en week in te stellen. Wanneer u
deze toets indrukt laat het apparaat geen pieptoon horen.
Aanpassen van de timer parameters
Wanneer u deze toets de eerste keer indrukt geeft het LC display “1” aan, dat maandag
betekent. De temperatuurinstelling begint te knipperen.
• Druk op de pijltjestoetsen om de temperatuur voor maandag in te stellen. Druk ter
bevestiging de toets >> en druk op de pijltjestoetsen om het tijdstip voor het begin
van de verwarming in te stellen.
• Het beeldscherm geeft nu (00-23) weer. Druk op >> om het tijdstip voor het begin
van de verwarming in te stellen.
• De weergave (:) betekent dat de timerfunctie op dat moment geactiveerd is en dat de
door het apparaat gemeten temperatuur overeenkomt met de temperatuurinstelling.
• De weergave (.) betekent dat de timerfunctie op dat moment geactiveerd is en de
door het apparaat gemeten temperatuur overeenkomt met de temperatuurinstelling
minus 3°C.
• Wanneer het LC display niets weergeeft betekent dit dat de timerfunctie gedeactiveerd
is en het verwarmingselement niet in gebruik is. De bijbehorende punt knippert bij de
instelling.
71
NL
Wanneer u de toets een tweede keer indrukt geeft het LC display “2” weer, dat dinsdag
betekent.
Let op! U kunt deze toets maximaal zeven keer indrukken om de temperatuurinstelling
voor de hele week te programmeren. Wanneer u de toets een achtste keer indrukt
verlaat u het menu en laat het beeldscherm de instellingen voor de actuele weekdag
zien.
Activeren van de timerfunctie
Wanneer u de timertoets indrukt wordt de timerfunctie geactiveerd.
• Wanneer u de toets de eerste keer indrukt geeft het beeldscherm weer en de
indicator voor de timer licht groen op.
• Wanneer u de toets opnieuw indrukt verdwijnt het symbool van het
beeldscherm en de indicator voor de timer gaat uit.
• Na activeren van de timerfunctie oriënteert deze zich aan de heersende
temperatuurinstellingen.
• Het LC display laat de ingestelde parameters zien:
:
Let op! Wanneer u de instellingen voor tijd, week en timer wilt wijzigen moet u de
timer een keer aanzetten en uitschakelen, zodat de nieuwe gegevens opgeslagen
worden. Wanneer het apparaat de nieuwe gegevens heeft ontvangen piept het
eenmalig.

72
NL
Open raam detectie
• Wanneer u deze toets een keer indrukt laat het beeldscherm het symbool zien
en de indicator voor de open raam detectie licht geel op.
• Wanneer u de toets opnieuw indrukt verdwijnt het symbool van het beeldscherm en
de indicator gaat uit.
• Wanneer op deze toets wordt gedrukt piept het apparaat eenmalig.
Na het activeren van de open raam detectie controleert het apparaat of de
verwarmingselementen op dat moment actief zijn. Wanneer de verwarmingselementen
actief zijn slaat het programma de actuele ruimtelijke temperatuur op en meet die
vervolgens om de 12 minuten opnieuw.
• Wanneer binnen 30 minuten een temperatuurdaling van meer dan 4°C wordt
geconstateerd deactiveert het programma automatisch de verwarmingselementen
daar het apparaat vermoedt dat er een raam openstaat. De open raam indicator
op het apparaat knippert.
• Nadat de verwarming gedurende 70 minuten is gedeactiveerd begint het
programma opnieuw om te controleren of het raam is gesloten. De open raam
indicator knippert langzaam.
• Het apparaat verwarmt nu om de 30 minuten gedurende 6 minuten met 1900 W.
Wanneer de temperatuur in deze periode met meer dan 2°C stijgt wordt het raam
als gesloten beschouwd en de open raam indicator op het apparaat stopt met
knipperen.
73
NL
INSTRUCTIES VOOR AFVOER
Wanneer in uw land een wettelijke regeling geldt voor het
afvoeren van elektrische en elektronische apparaten, wijst
het hiernaast afgebeelde symbool, op het product zelf of op
de verpakking, erop dat het betreffende product niet met het
huisvuil afgevoerd mag worden. In plaats daarvan dient het
naar een centraal depot voor het recyclen van elektrische en
elektronische apparaten te worden gebracht. Door het afval
volgens de voorschriften af te voeren beschermt u het milieu
en de gezondheid van uw medemensen tegen de negatieve
consequenties. Informatie over recycling en de afvoer van dit
product ontvangt u van uw gemeente of van uw plaatselijke
grondstoffen- en afvaldienst.
Dit artikel bevat batterijen. Wanneer in uw land een wettelijke
regeling geldt voor het afvoeren van batterijen, mogen deze
niet met het normale huisvuil worden weggegooid. Informeer
naar de plaatselijke regelgeving inzake de gescheiden afvoer
van batterijen. Door de batterijen volgens de voorschriften af
te voeren beschermt u het milieu en de gezondheid van uw
medemensen tegen de negatieve consequenties.
FABRIKANT & IMPORTEUR (UK)
Fabrikant:
Chal-Tec GmbH, Wallstraße 16, 10179 Berlijn, Duitsland.
Importeur voor Groot-Brittannië:
Chal-Tec UK limited
Unit 6 Riverside Business Centre
Brighton Road
Shoreham-by-Sea
BN43 6RE
United Kingdom