Loading ...
Loading ...
Loading ...
12
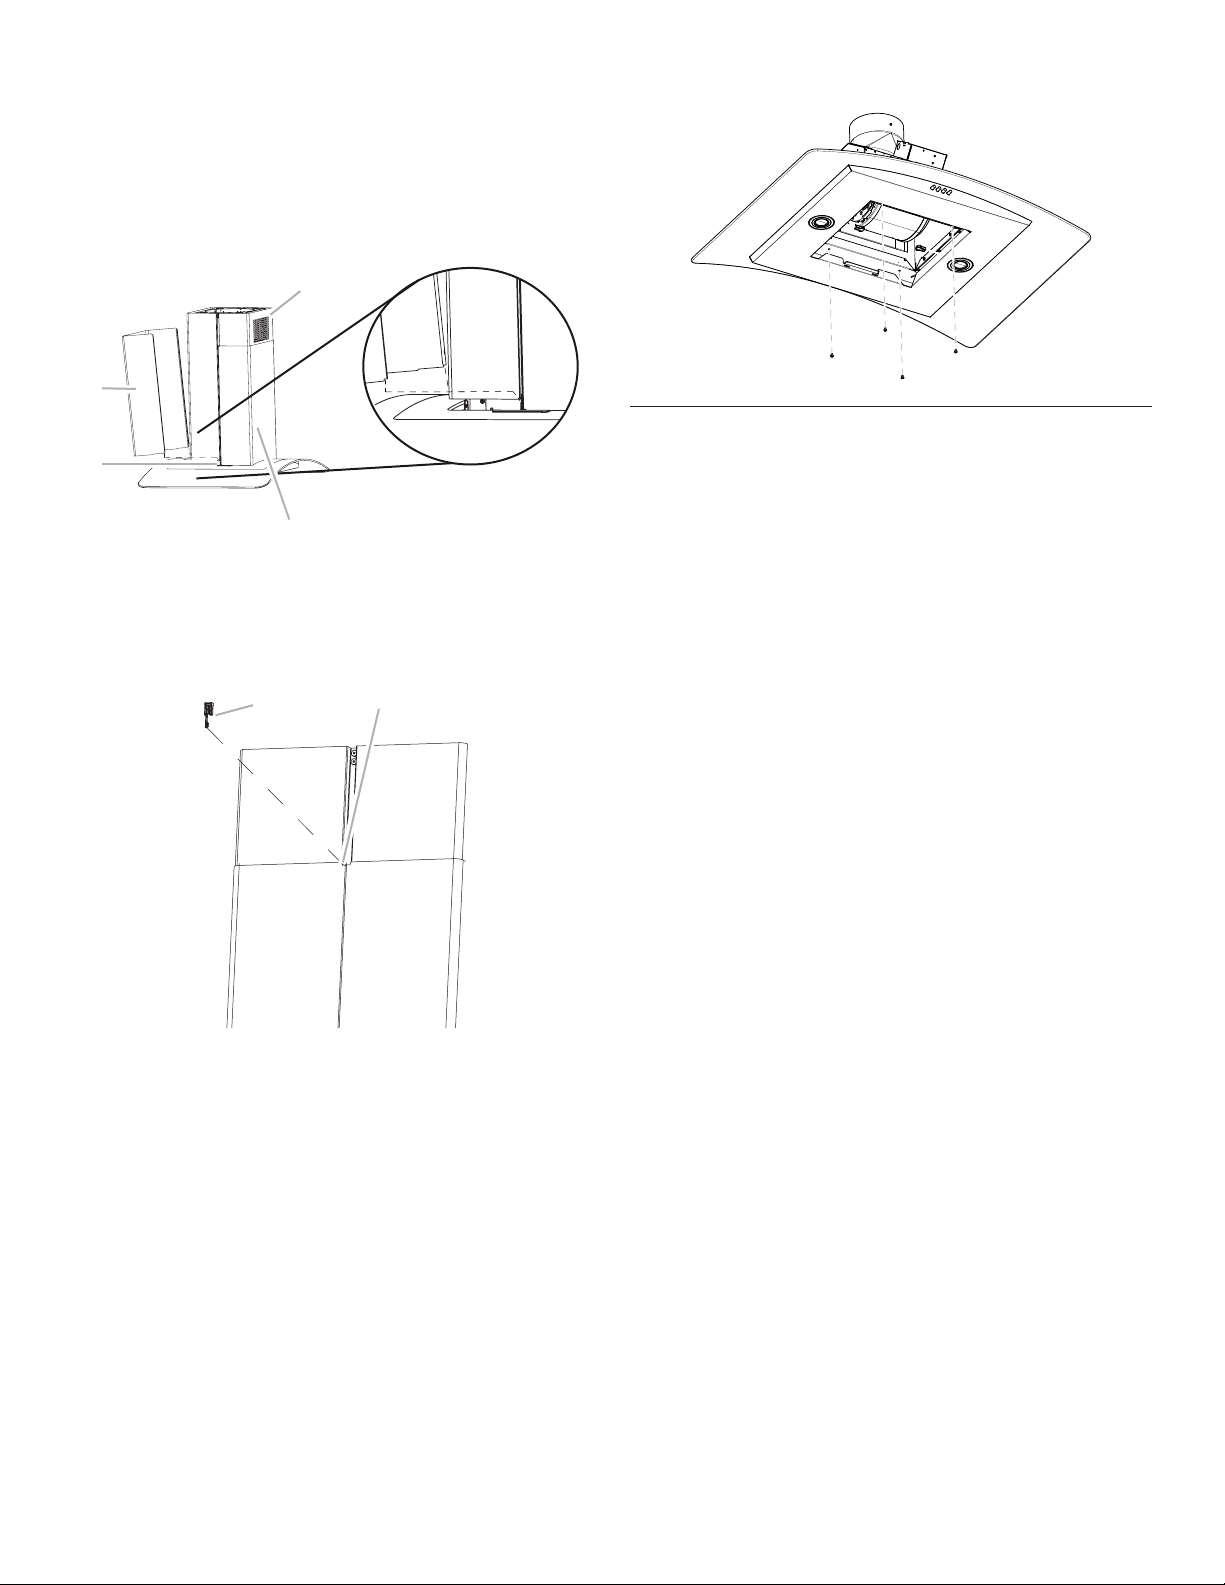
6. Install the lower duct cover (rear) to the range hood canopy.
Spread the lower duct cover opening slightly and position it
over the upper duct cover. Set the lower duct cover in place.
Position so the anges of the lower duct cover set into the
anges of the upper duct cover. Make sure the front and rear
lower duct covers mate properly.
NOTE: When assembling the rear lower duct cover to the
front lower duct cover, the ange (both sides) must be placed
over the plastic clip to secure the lower duct covers together
at the bottom.
A
B
D
C
A. Lower duct cover (rear)
B. Plastic clips
C. Lower duct covers
D. Upper duct covers
7. Secure the lower duct covers together at the top using 2
plastic clips. Use one plastic clip on each side.
A
B
A. Plastic clips (2)
B. Lower duct covers top clip area
8. Secure the lower duct cover to the range hood canopy using
4 - 4.2 x 8 mm screws.
Complete Installation
1. For non-vented (recirculating) installations only, install
charcoal lters over metal grease lter. See the “Range
HoodCare” section.
2. Install metal lters. See the “Range Hood Care” section.
3. Check the operation of the range hood blower and light.
Seethe “Range Hood Use” section.
If range hood does not operate, check to see whether a
circuit breaker has tripped or a household fuse has blown.
NOTE: To get the most efcient use from your new range hood,
read the “Range Hood Use” section.
Loading ...
Loading ...
Loading ...