Loading ...
Loading ...
Loading ...
FEATURES AND ASSEMBLY
FEATURES & ASSEMBLY
8 9
D
C
F
B
E
A
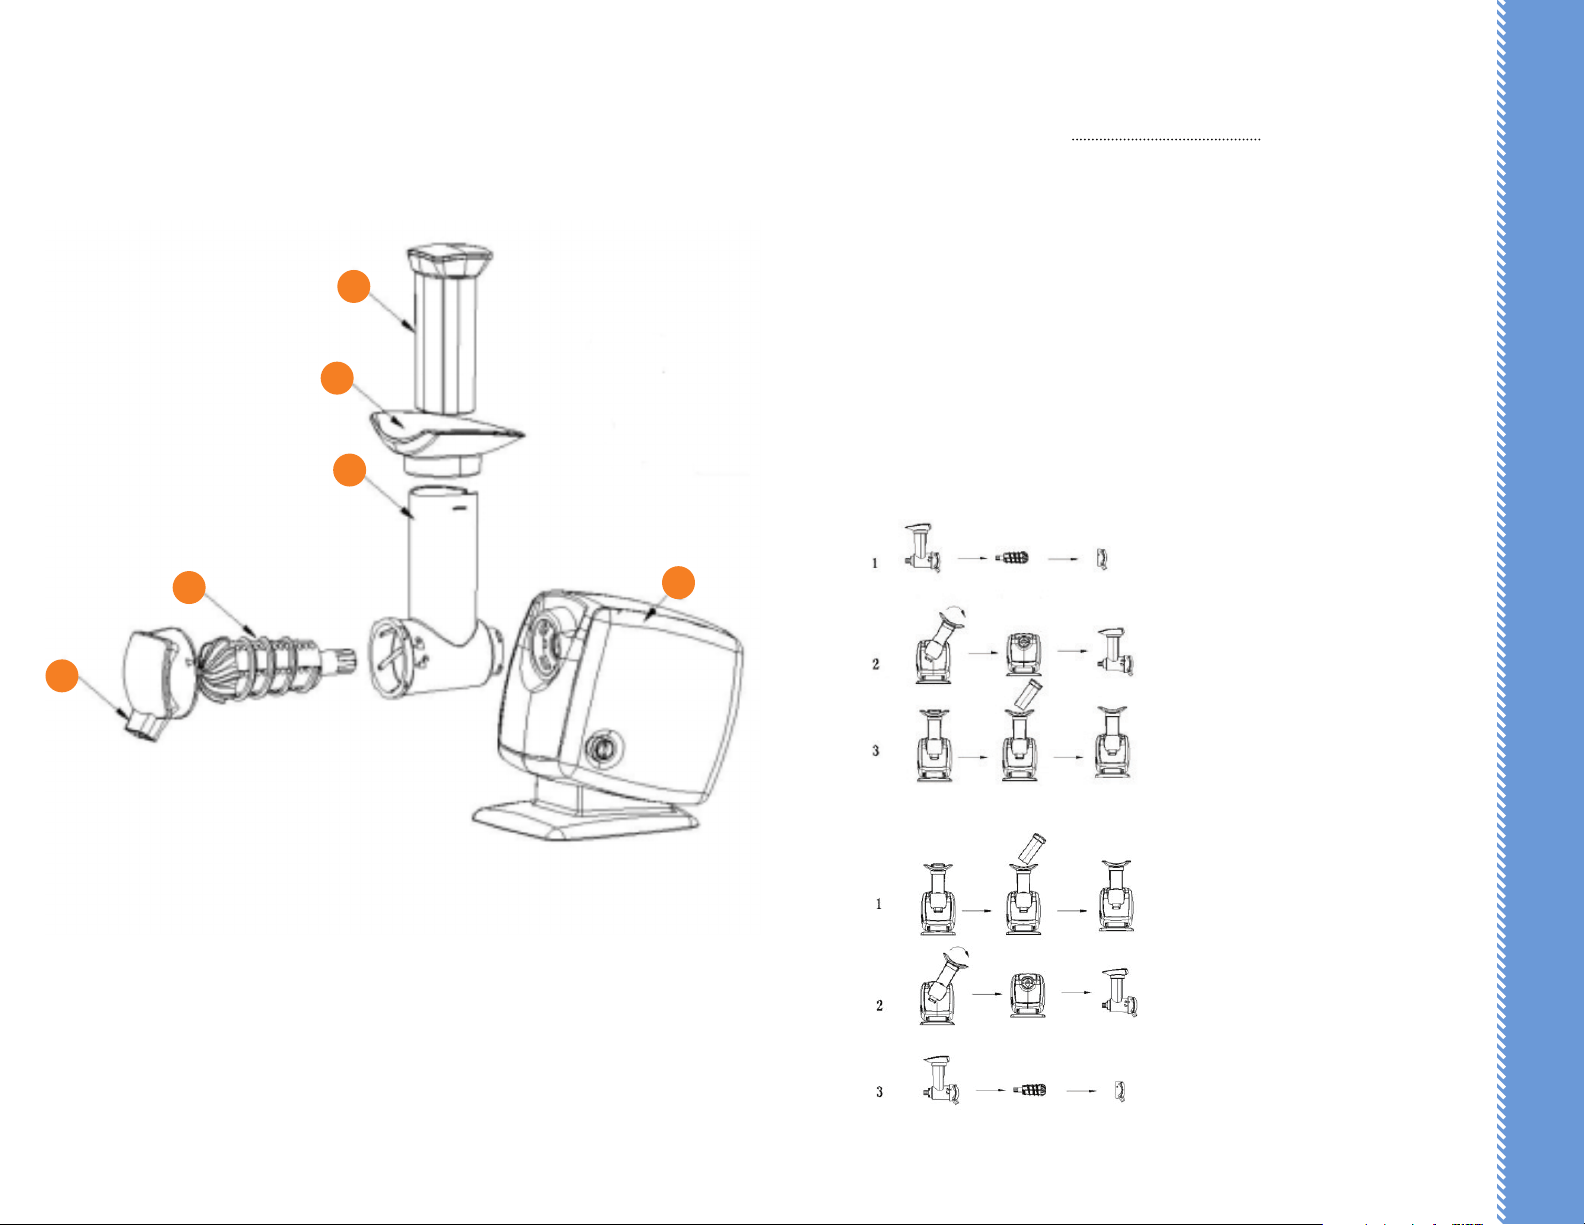
A. Dispenser
B. Grinder
C. Chute
D. Plunger
E. Housing
F. Tray
1. Put the tray on top of the chute
securely and lock into place. Insert
the grinder into the chute. Be sure
the gasket is properly placed inside
the dispenser. Then ax the
dispenser to the chute by placing
on the front and turning
counterclockwise to lock.
2. Insert the tip of the grinder into
the housing. Turn counterclock
wise to lock the chute assembly in
place.
3. Insert the plunger into the chute.
1. Switch o and unplug the device,
then take out the plunger out of
the chute.
2. Remove the chute assembly by
turning clockwise from the
housing.
3. Remove dispenser from chute
assembly by turning clockwise.
Then take out the grinder from
the chute and remove the tray
from chute top.
ASSEMBLY
DISASSEMBLY
Loading ...
Loading ...
Loading ...