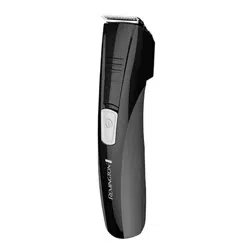
Before using your Personal Groomer for the first time, charge the unit for 4 hours
for optimal performance:
• Once fully charged, the groomer wiill run for up to 70 minutes.
1. Ensure the product is turned off.
2. Connect the Power Adaptor cord to the product. Plug into electrical outlet. The
indicator light illuminates when charging. The light stays on when fully charged.
IMPORTANT SAFETY
INSTRUCTIONS
When using an electrical appliance, basic precautions should always be
observed, including the following.
READ ALL INSTRUCTIONS BEFORE USING
THIS APPLIANCE.
DANGER
To reduce the risk of electric shock:
■ Do not reach for an appliance that has fallen into water. Unplug it immediately.
■ Do not use while bathing or in the shower.
■ Do not place or drop into water or other liquid.
■ Do not place or store this appliance where it can fall or be pulled into a tub or sink.
■ Except when charging, always unplug this appliance from the electrical outlet
immediately after using.
■ Unplug this appliance before cleaning it.
WARNING
To reduce the risk of burns, fire, electric shock or injury to persons:
■ This appliance is for household use only.
■ An appliance should never be left unattended when it’s plugged in, except when
charging a rechargeable appliance.
■ Close supervision is necessary when this appliance is used by, on, or near
children or persons with special needs or certain disabilities.
■ Use this appliance only for its intended use as described in this manual.
■ Do not use attachments not recommended by Spectrum Brands, Inc.
■ Keep the cord away from heated surfaces.
■ Never operate this appliance if it has a damaged cord or plug, if it is not
working properly, if it has been dropped or damaged, or if it has been dropped
into water.
■ Never drop or insert any object into any of the appliance’s openings.
■ Do not use outdoors or operate where aerosol (spray) products are being used,
or where oxygen is being administered.
■ Always store this appliance and cord in a moisture-free area. Do not store it in
temperatures exceeding 140°F (60°C).
■ Do not use this appliance with a damaged or broken cutter unit, as injury may
occur. Always make sure blades are aligned properly.
■ Always attach plug to appliance, then adapter to outlet. To disconnect, turn all
controls to OFF, then remove adapter from outlet, then detach power cord from
the clipper for storage.
■ Do not use an extension cord or a voltage converter with this appliance.
■ Do not wrap the cord around the appliance.
SAVE THESE INSTRUCTIONS
Product Features Before Using
What Attachments to Use
Beard x x
Beard line x x
Ear x
Eyebrow x
Mustache x x
Nape of neck x x
Nose x
Sideburns x x x
Body x x
Back x
Hair length
combs
Arc
detail
Nose/ear
trimmer
30mm wide
trimmer
Body hair
trimmer
Register Your New Product Today!
By registering your new Remington
®
product, you will receive these important benefits:
Proof of Ownership • Product Protection • Product Registration • Special Offers
Register online at: RemingtonProducts.com
Use and Care Guide
1
2
3
4
5
7
6
8
9
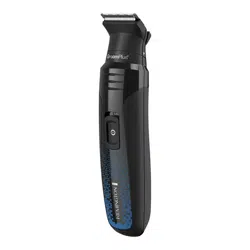
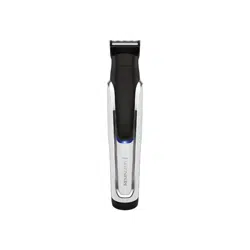
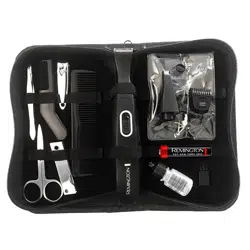
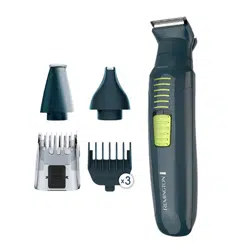
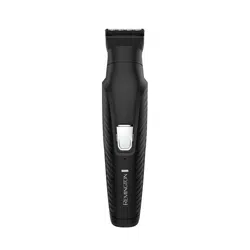
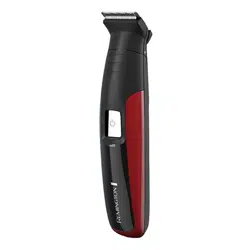
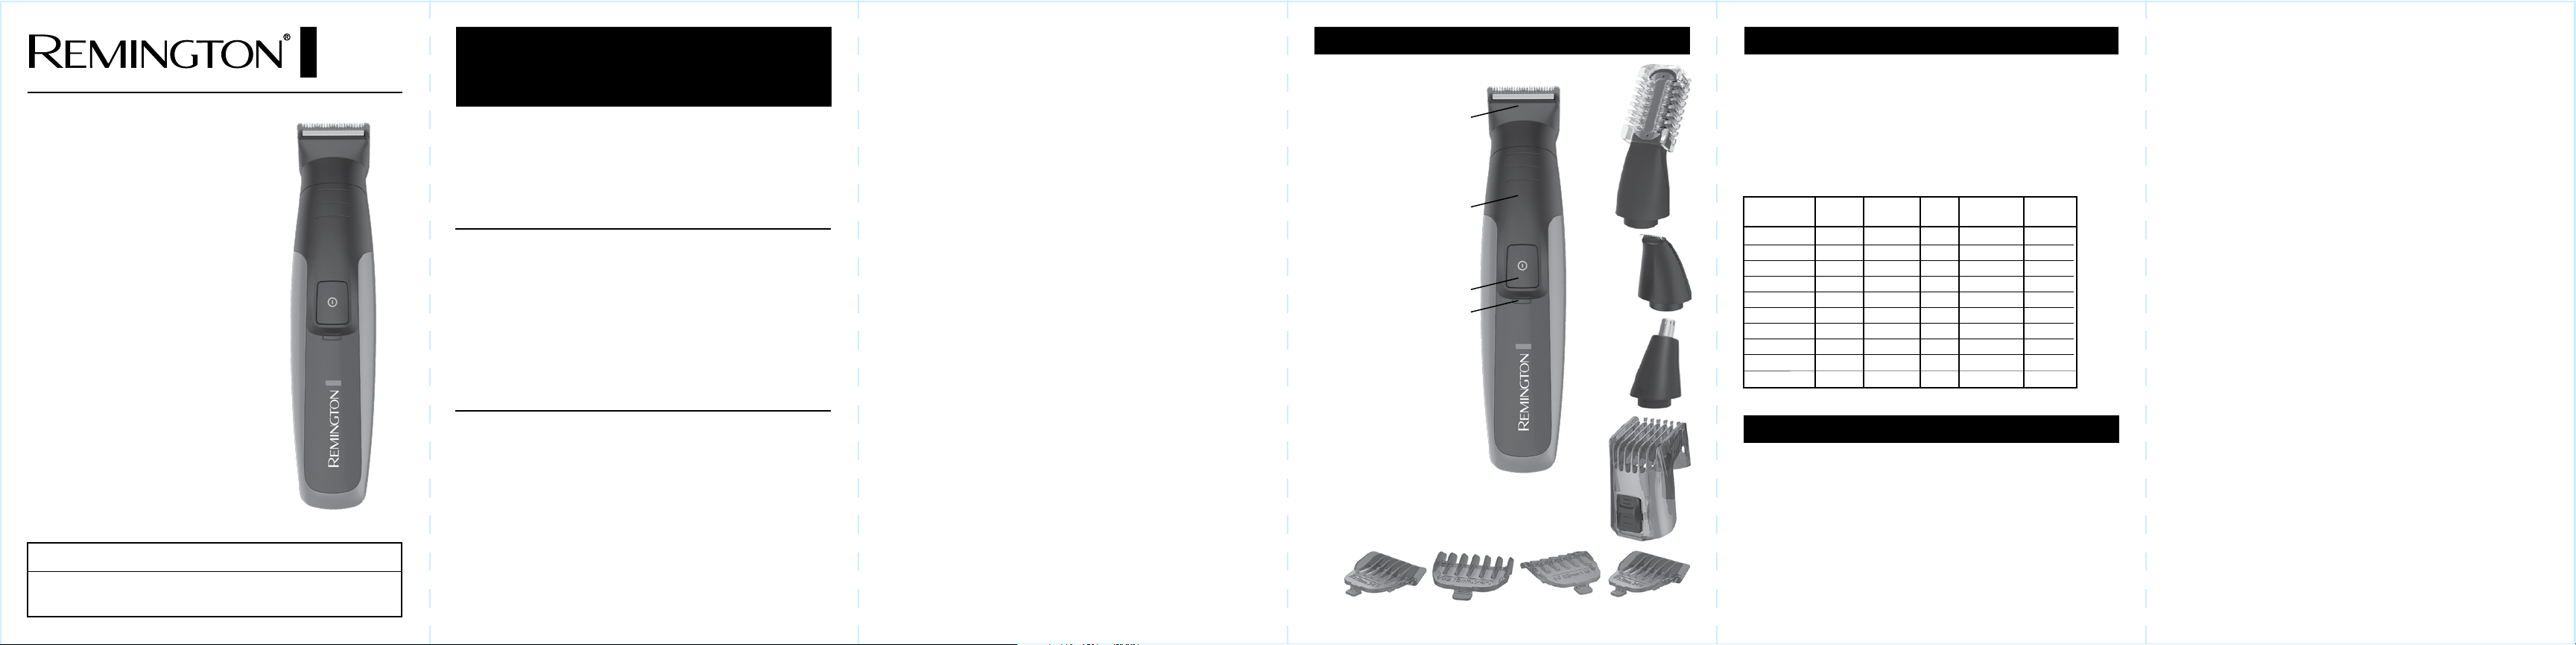
1. Full-Size Trimmer
2. Groomer Body
3. On/Off Switch
4. Charging Indicator Light
5. Beard and Stubble Combs
1.5mm, 3mm, 6mm, 9mm
6. Body Hair Trimmer with
Comb
7. Arc Detail Trimmer
8. Nose, Ear, and Eyebrow
Trimmer
9. 10-Length Adjustable Comb
10. Adaptor (not shown)
NOTE: The Adjustable Comb
Attachments have various
length settings. When first
becoming familiar with the
Personal Groomer, begin with a
higher numbered setting.
Adjust cutting length, as desired.
Note: this product is for cordless use only.
• Switch the product on by pressing the on/off switch.
TO ATTACH AND REMOVE THE TRIMMING ATTACHMENTS
Note: Always ensure the groomer is switched off before changing any attachments.
• To attach, place the desired trimming head on top of the groomer and rotate
clockwise to lock into place.
• To remove, rotate the trimmer head counter-clockwise until it unlocks and then
lift off the groomer.
ATTACHING AND REMOVING FIXED GUIDE COMBS ON THE WIDE TRIMMER BLADE
To Attach
• With the trimmer blade facing away from you, hook front of comb onto blade
teeth and push back end down until it clicks into position.
To Remove
• With the trimmer blade facing away from you, carefully push the tab on the
back of the guide comb upwards and away from the trimmer blade.
ATTACHING AND REMOVING ADJUSTABLE COMB ON THE WIDE TRIMMER BLADE
• To attach line up the comb rails and slot on the groomer until firmly secured.
Pressing the adjustment button on the back of the comb will alter the cutting
length increment, this is indicated on the comb.
• To remove press and hold the adjustment button and push the comb up and
off the groomer.
BEFORE YOU BEGIN
• Comb facial hair with a fine comb before you start trimming.
• Hairs should be dry and without any waxes or lotions before using the groomer.
TO THIN AND TAPER THE BEARD/MOUSTACHE
• Attach the wide trimmer blade.
• Place either the adjustable comb or a fixed comb on the trimmer blade, select
the desired length and switch on.
• Start trimming under the chin, following the jawbone line. Work toward the ear
and upper beard line using an upward motion.
TO TRIM EDGE OF BEARD OR MOUSTACHE
• Attach the trimmer blade.
• Hold the groomer with the cutting blade facing you.
• Start with edge of beard/moustache line, and with the cutting blades resting
lightly against your skin, use slow movements to create a beard/moustache line.
TO TRIM SIDEBURNS
• Hold the groomer with the cutting blade facing you.
• Select the desired length on the adjustable comb or select the desired guide combs.
• Use light pressure and well-controlled movements to trim hair.
How To Use
Face, Head, and Body
Lithium Grooming Kit
PG6155

NOTE: Always recycle or properly dispose of batteries according to Local and
State requirements.
1. Unplug groomer from outlet to avoid risk of electrical shock.
2. Remove rear groomer cover by first prying the rubber panel
from the product with a flat head screwdriver.
3. Next, pry the back panel from the product with a flat head
screwdriver. This will expose the batteries.
4. With wire cutters, clip the wires leading to the batteries.
5. Remove the batteries from the product. Contact your local
authorities for proper disposal.
Product Disposal
Troubleshooting
Q: WHAT IF THE CUTTERS DON’T MOVE WHEN TURNED ON?
A: The cutting unit may be dirty or clogged. Clean and lubricate the groomer as
described previously.
Q: WHAT IF THE GROOMER DOESN’T WORK AT ALL WHEN TURNED ON?
A: The groomer might simply need charging. Follow instructions for charging
as described previously. Should charging prove unsuccessful, contact
customer service at 1-800-736-4648 in the U.S. or 800-268-0425 in
Canada for assistance.
Q: WHAT IF THE GROOMER FAILS TO HOLD A CHARGE?
A: Fully discharge the groomer by running until completely stopping. Next,
follow recharging instructions described previously. If time between
recharging cycles fails to increase, the battery might require replacement.
Contact customer service at 1-800-736-4648 in the U.S. or 800-268-0425
in Canada for assistance.
NOTE: Always clean Grooming System attachments regularly to ensure maximum
performance and a proper operating life.
CLEANING ATTACHMENTS WITH WATER
1. Remove attachment.
2. Rinse ONLY the attachment under warm running water. Do NOT use hot water
as this might cause damage. Do NOT rinse trimmer body.
CLEANING ATTACHMENTS WITH BRUSH
■ After first removing attachment, thoroughly brush and blow out hair clippings
from cutting system, attachment, and top of power handle.
OILING BLADES AND CAUTIONS
■ Rinsing attachments under water (above) requires lubricating the cutting blades
1x monthly. Using only light-grade oils (e.g. sewing machine oil), simply spread
1–2 drops lightly over cutters with fingertip. Wipe away all excess.
■ Periodically oil the blades for optimal performance.
■ Use only light-grade oils as these will not evaporate nor slow down speed of
cutting blades.
■ Do not use hair oil, grease, nor any oil mixed with kerosene or solvent, as
these too will evaporate.
Cleaning, Care and Maintenance
CAUTION: THIS LITHIUM BATTERY MUST BE RECYCLED OR DISPOSED OF IN
ACCORDANCE WITH STATE AND LOCAL REGULATIONS.
Do not burn or mutilate, as they may burst or release toxic materials. Do not short-
circuit, as this may cause burns.
Spectrum Brands, Inc. is a proud participant in the EPA-approved Rechargeable
Battery Recycling Call2Recycle
TM
, which collects and recycles these batteries
at the end of their useful life when taken out of services in the United States or
Canada. The RBRC
®
program provides a convenient alternative to placing used
LiFePO4 batteries into the trash or the municipal waste stream, which may be
illegal in your area. Please call 1-800-8-BATTERY
TM
or visit www.call2recycle.org
for information on LiFePO4 battery recycling and disposal bans/restriction in your
area. Spectrum Brands, Inc.'s involvement in this program is part of our commit-
ment to preserving our environment and conserving our natural resources.
TRIMMING THE NAPE OF YOUR NECK
• Attach the trimmer blade.
• Use your fingers to lift the hair at the base of your head up off the neck. Your
index finger should be covering the roots of the hairs you are lifting to prevent
accidental removal by trimmer.
• Using your other hand, hold the trimmer to the base of your neck with the
cutting unit facing up, and move the trimmer up the length of the neck until it
touches your finger covering the hair roots at the base of your head.
• Be sure to move the unit slowly when performing this operation and to keep
the hair roots at the base of your head out of the way of the trimmer.
TO REMOVE HAIR FROM NOSE AND EAR
• Attach the nose, ear, and eyebrow trimmer.
• Insert the groomer’s cutting unit gently into the nostril or ear.
• Gently move the groomer in and out of the nostril or ear and at the same time
rotate the groomer.
• Avoid inserting the cutting unit more than 6mm into your nostril.
TO TRIM HAIR ON THE BACK AND BODY
• The Body Hair Trimmer is designed to quickly trim hair over large areas such
as chest and back.
• The Guide Comb can be used in any of the three length settings by sliding the
comb in the grooves on the trimer, or the comb can be removed for a close trim.
TO REMOVE HAIR FROM EYEBROWS
• Attach the nose, ear, eyebrow attachment.
• Gently guide the cutting unit to stray, unwanted hairs along the eyebrow line or
protruding from the eyebrow itself.
• To remove the hairs completely lower onto the skin and move over desired area.
• Use short, well-controlled movements.
USING THE DETAIL ATTACHMENT
• Hold the groomer with the cutting blade facing you.
• Rest cutting blades lightly on the skin.
• Use for more precise trimming of stray hairs or smaller areas.
TIPS FOR BEST RESULTS
• Comb your hair in the direction that it grows so that the hairs are at their
maximum height and facing in the same direction.
• Since all hairs do not grow in the same direction, you may want to try different
trimming positions (i.e. upwards, downwards or across) for better results.
Warranty
Limited Two-Year Warranty
Spectrum Brands, Inc. warrants this product against any defects that are due
to faulty material or workmanship for a two-year period from the original date
of consumer purchase. This warranty does not include damage to the product
resulting from accident or misuse.
If the product should become defective within the warranty period, we will
replace it free of charge. Return your product and sales receipt with your name,
address and day time phone number to: Remington Returns Center, 507 Stokely
Dr., P.O. Box 1, Deforest, WI 53532. For more information call 800-736-4648 in the
U.S. or 800-268-0425 in Canada or visit www.RemingtonProducts.com.
KEEP ORIGINAL SALES RECEIPT AS PROOF OF PURCHASE FOR WARRANTY PURPOSES.
This warranty does not cover products damaged by the following:
■ Accident, misuse, abuse or alteration of the product
■ Servicing by unauthorized persons
■ Use with unauthorized accessories
■ Connecting it to incorrect current and voltage
■ Wrapping cord around appliance causing premature wear and breakage
■ Any other conditions beyond our control
No responsibility, obligations, or liability is assumed for the installation or
maintenance of this product.
SPECTRUM BRANDS, INC. SHALL NOT BE RESPONSIBLE FOR ANY INCIDENTAL,
SPECIAL OR CONSEQUENTIAL DAMAGES RESULTING FROM THE USE OF THIS
PRODUCT. ALL IMPLIED WARRANTIES, INCLUDING BUT NOT LIMITED TO IM PLIED
WARRANTIES OF FITNESS AND MERCHANTABILITY, ARE LIMITED IN DURATION
TO TWO YEARS FROM DATE OF ORIGINAL PURCHASE.
This warranty gives you specific legal rights and you may also have other rights
which vary from state to state or province to province. Some states do not allow
the exclusion or limitation of incidental, special or consequential damages.
Spectrum Brands, Inc. Money-back Offer
If within 30 days after you have purchased your Remington
®
branded product,
you are not satisfied and would like a refund, return it with the sales slip
indicating purchase price and date of purchase to the retailer from whom it was
purchased. Spectrum Brands, Inc. will reimburse all retailers who accept the
product within 30 days from the date of purchase. If you have any questions
concerning the money-back guarantee, please call 800-736-4648 in the U.S. or
800-268-0425 in Canada or visit www.RemingtonProducts.com.
Remington Guarantees Satisfaction After 30 Days!
Remington Men’s Shave and Groom 60-Day Money Back Guarantee*
If within 60 days after purchasing any Remington
®
branded Men’s Shave and
Groom product, you are not completely satisfied and would like a refund, return
it with the original dated sales receipt directly to Remington and receive a full
refund.** For questions concerning the money-back guarantee, please call 800-
736-4648 in the US or 800-268-0425 in Canada.
*Applies to US and Canadian customers’ returns only.
**Terms and conditions apply.
Terms and Conditions
1. Refund will be in the form of a check issued in US Dollars and will be provided
only if all Terms and Conditions are met.
2. The following items must be returned to Remington and postmarked no later
than 60 days after purchase of the Remington
®
branded Men’s Shave and
Groom product:
a. The Remington
®
product;
b. The original sales receipt indicating price and date purchased; and
c. The completed 60-day money back guarantee form located at
RemingtonProducts.com/60day.
3. In addition, Remington, in its discretion, must determine that the returned product
was used in accordance with the instruction booklet (included with the product
at the time of purchase).
4. Returns should be mailed prepaid (no collect returns accepted) to:
Remington 60-Day MBG
507 Stokely Drive, Box 1
DeForest, WI 53532
5. Refund does not include postage costs for the return of the product, but will
include applicable taxes paid by customer, if any.
6. No responsibility will be accepted for late, lost, stolen, misdirected or damaged
product.
7. Please allow 4-6 weeks to receive your refund by check.
Questions or comments: Call 800-736-4648 in the US or 800-268-0425 in
Canada
or visit RemingtonProducts.com.
Dist. by: Spectrum Brands, Inc., Middleton, WI 53562
Dist. by: Spectrum Brands Canada Inc.
255 Longside Drive, Unit 101
Mississauga, ON L5W 1L8
® Registered Trademark of Spectrum Brands, Inc.
© 2016 Spectrum Brands, Inc. 10/16 16637-00
Made in China.
T22-0004674-A
Contains a
listed adaptor