Loading ...
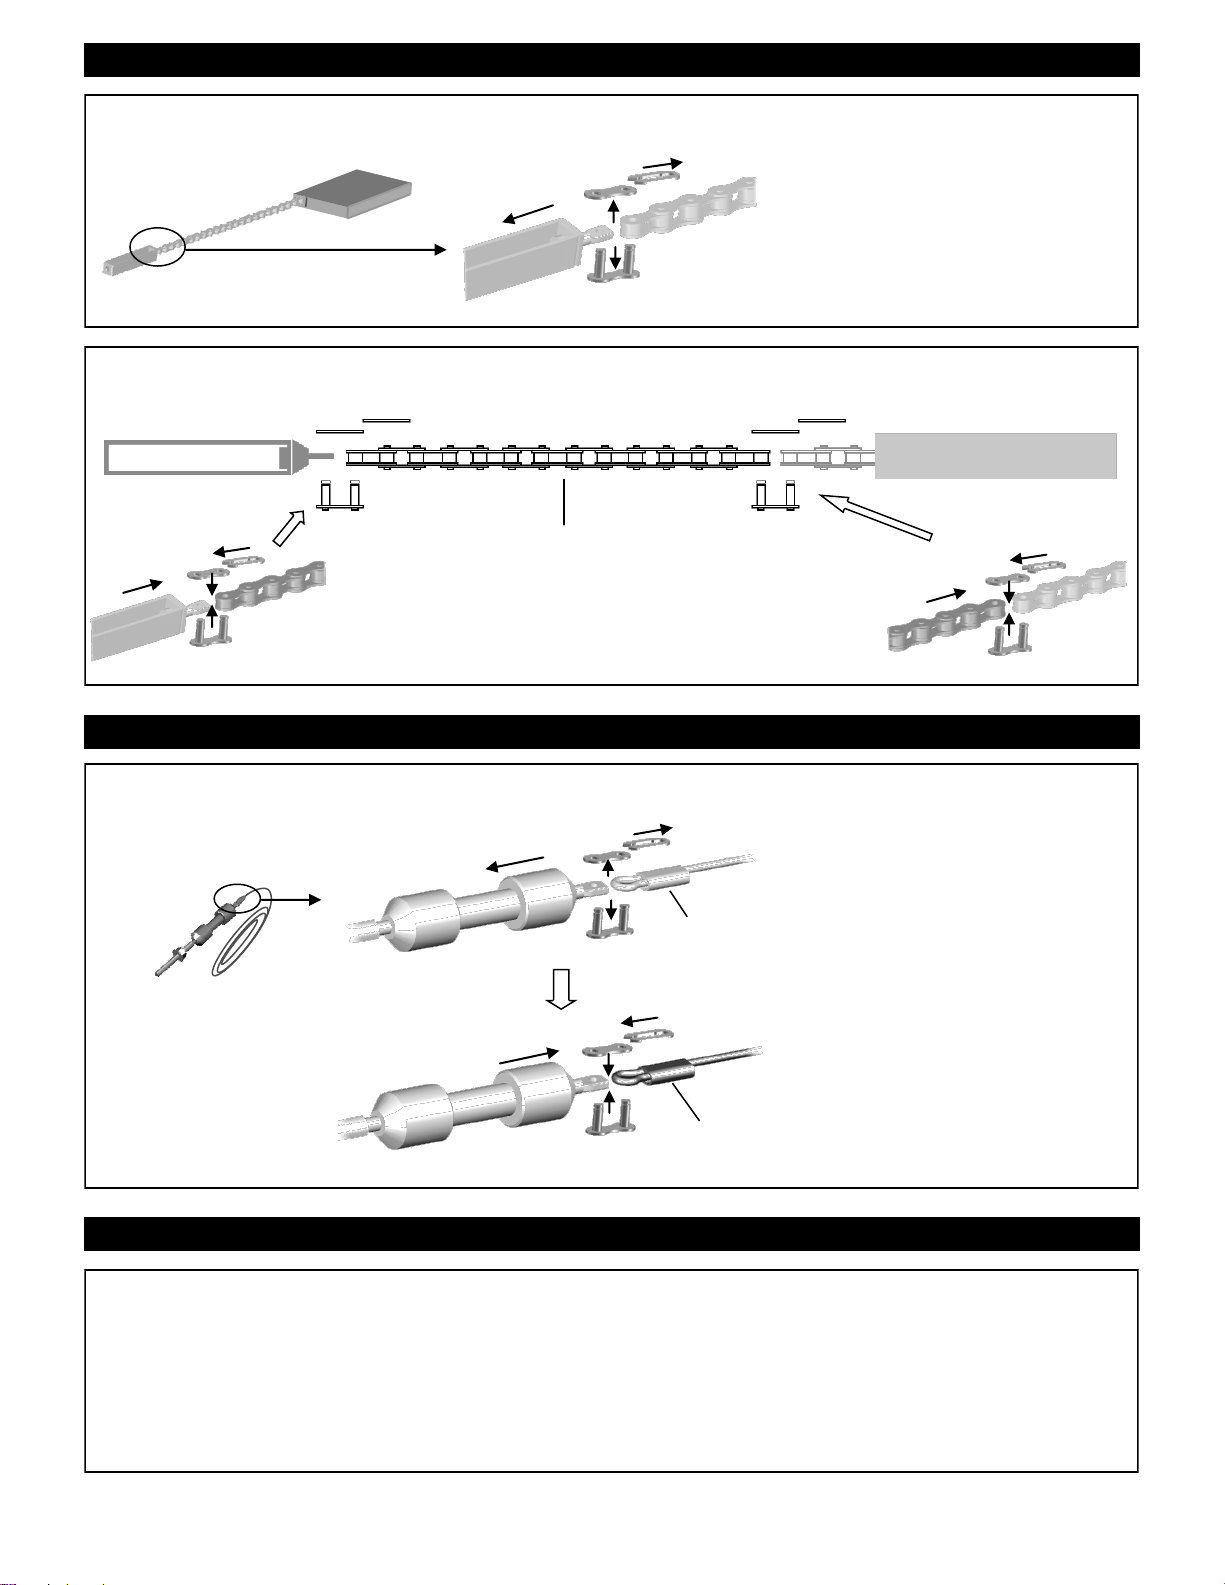
Step 2. Extending the Chain
2
2. To Connect “Extended Chain Segment” to Chain
Connect the “Extended Chain Segment” between
the “Chain-to-Cable Connector” and the original
chain by using two master link sets.
Original chain pack
Chain-to-Cable Connector
Extended Chain Segment (17-1/3 inch)
Replace the original cable with the “Extended Cable”
I. Disconnect the “Trolley Shaft” from
the original cable by removing the
master link.
Discard the original cable.
Original Trolley Shaft and Ca-
ble from Opener inventory
Original cable
(to be discarded)
II. Align the “Trolley Shaft” to one of
the RED eyelets of the “Extended
Cable”, connect them together
using the master link set.
1. To Disconnect “Chain to Cable Connector” from the Original Chain
Disconnect the “Chain to Cable Con-
nector” from the original chain by
removing the master link.
Keep all the hardware in this step.
Original chain pack
Chain-to-Cable Connector
Master link
Step 3. Extending the Cable
I
II
RED cable eyelet
from Extended Cable
(121-1/2 inch)
The Rail Assembly Extension with has now been finished.
The Rail Assembly consists of extended rail middle segment, chain segment and cable with RED eyelets.
ONE piece of original rail middle segment and original cable are discarded.
Please proceed installation of opener starting with “Rail and Trolley Assembly” in Owner’s Manual.
Step 4. Proceeding with Installation of Opener