
Loading ...
Loading ...
Loading ...
Page 12
OPERATION
2. Hit utility lines. If the tree touches
utility lines, immediately tell the utility
company.
3. Cause losses in property.
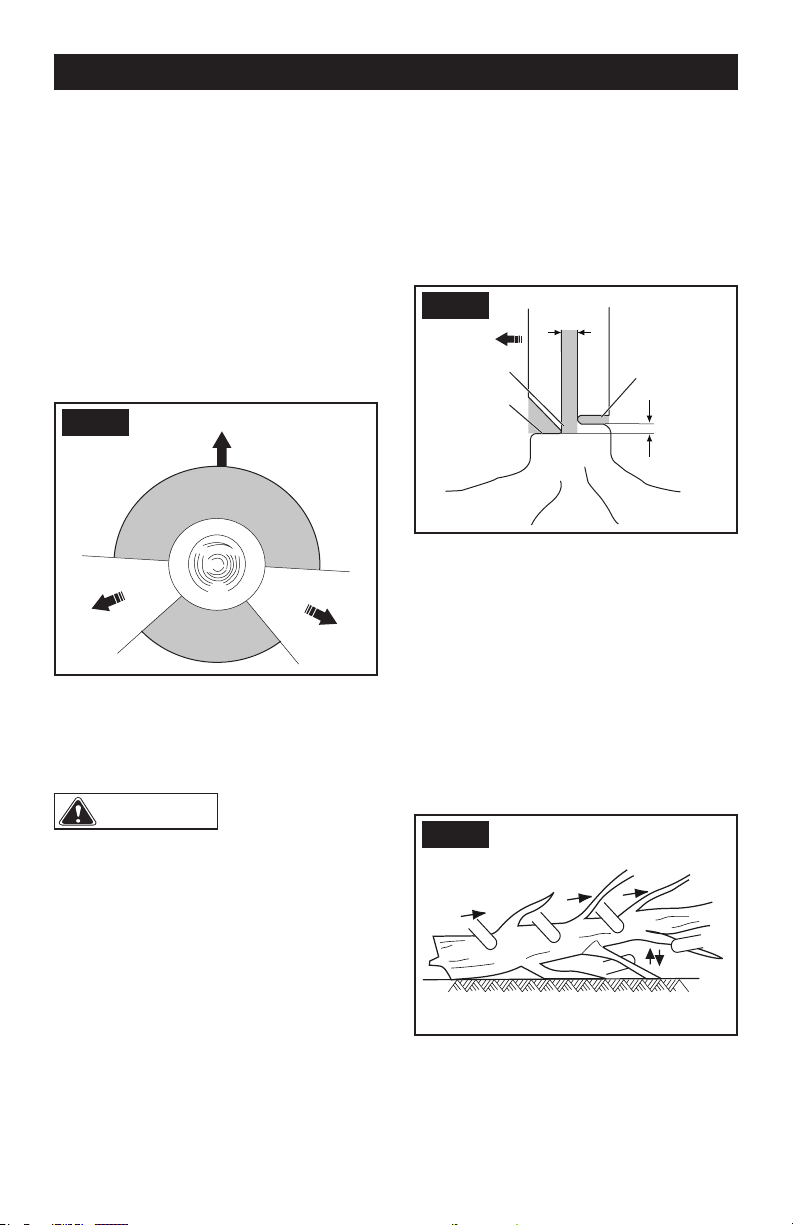
• The user is not in the danger area (B), for
example, the downhill side of the area.
• The escape paths (C) that extend back and
diagonally behind the felling direction (A)
are clear. The felling direction is controlled
by
1. The natural lean of the tree.
2. The location of larger branches.
3. The wind direction.
• Ensure there is no dirt, stones, loose bark,
nails, and staples on the tree.
1. Make a lower level notching cut (D). Make
sure that this cut is
• 1/3 wide of the diameter of the tree.
• Perpendicular to the felling direction.
CAUTION
The level notching
cut helps prevent pinching of the saw chain
or the guide bar when you make the second
notch.
2. Make the felling cut no less than 2 in. (50
mm) and higher than the level notching cut.
Make sure that this cut
• Is parallel to the level notching cut.
• Keeps sufcient wood to become a hinge
(F) which prevents the tree from twisting
and felling in the wrong direction.
When the felling cut (E) gets near the hinge
(F), the tree falls. Stop the felling cut if the
tree
• Does not fall in the correct direction or
• Moves backwards, causing the cutting bar
and chain to become stuck in the cut.
3. Use felling wedge to open the cut and let
the tree fall in the correct direction.
4. When the tree starts to fall,
• Remove the chainsaw from the cut.
• Stop the machine.
• Put the machine down.
• Move away from the tree via the escape
path (C). Always keep watching the tree
to see it's direction of fall, be careful with
overhead branches and your footing.
LIMB A TREE
Limbing is the removal of the branches from a
fallen tree.
• Keep the larger lower branches to hold the
log off the ground (H).
• Remove the small limbs (G) in one cut.
• Limb the branches with tension from the
bottom to top.
• Keep the larger lower branches as a
support until the log is limbed.
A
B
B
C
C
FIG. 6
2’’(50mm)
2’’(50mm)
D
E
F
FIG. 7
G
H
FIG. 8
Loading ...
Loading ...
Loading ...