Loading ...
Loading ...
Loading ...
12
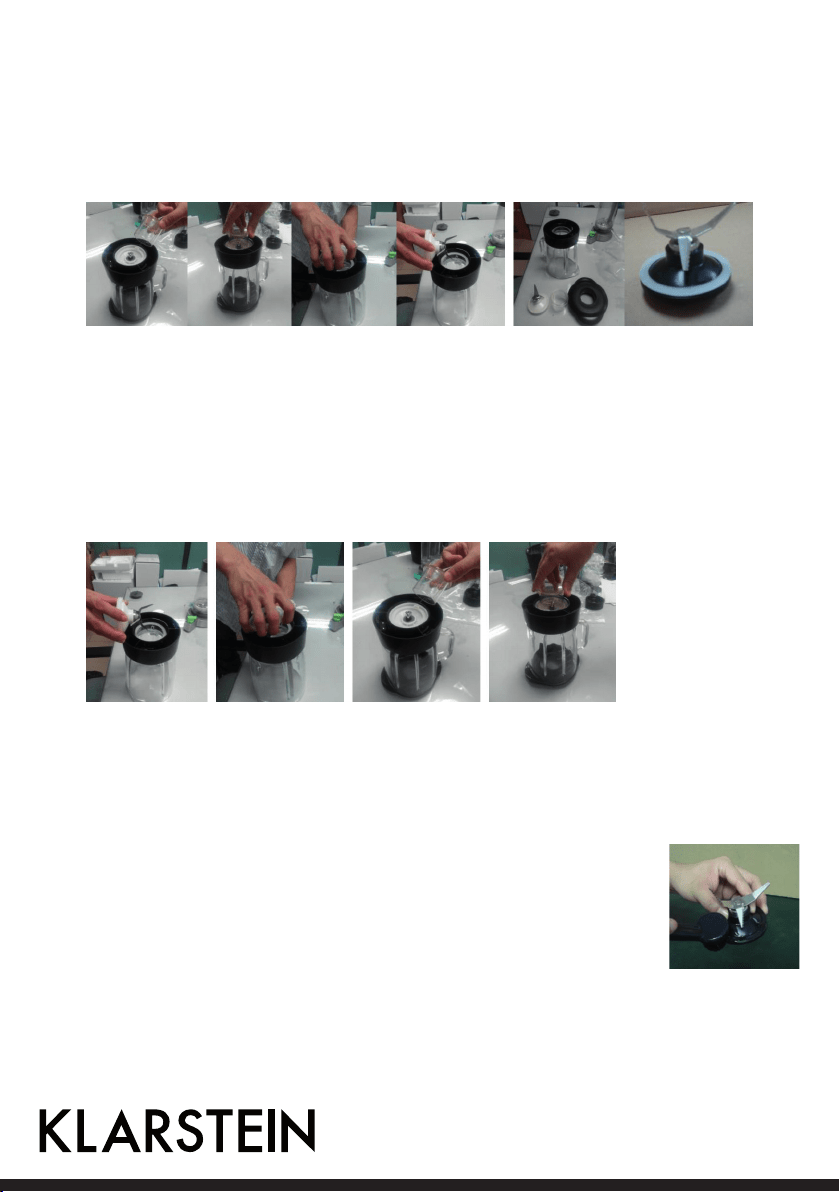
Blade Assembly Removal
• IMPORTANT: Do not remove blade assembly unless absolutely necessary!
• To removal the blade assembly, rotate the Jar collar carefully counter-clockwise as shown in the following
figure.
• Carefully removal the blade assembly by placing a thick cloth over the blade assembly and pulling straight out.
• Hint: place jar on a flat surface to facilitate removal.
• Use caution when handling the blades, they are very sharp.
• The way to removal the smoothie cup same like this.
Blade Assembly Replaycement
• When inserting the sealing and the blade assembly into the jar bottom, align the flat sides of the blade
assembly with the flat sides of the jar opening.
• Insert the Jar collar first , then hand tighten and turn clockwise until tight.
• The way to replace the smoothie cup same like this.
• Note : if the blade assembly is not tight enough , you will notice increased.
Blade Assembly Cleaning
• Wash on the blade assembly up surface in soapy water . Do not soak or use abrasive
cleaners. If necessary, scrub lightly with a soft bristle brush to removal any residue
left on the blades or nut.
• Rinse the blade assembly up surface under running water. Dry thoroughly with a
clean cloth (do not wash the bottom in water or any other liquid). Do not place the
blade assembly in the dishwasher.
Loading ...
Loading ...
Loading ...