Loading ...
Loading ...
Loading ...
4
ASSEMBLY
INSTRUCTIONS
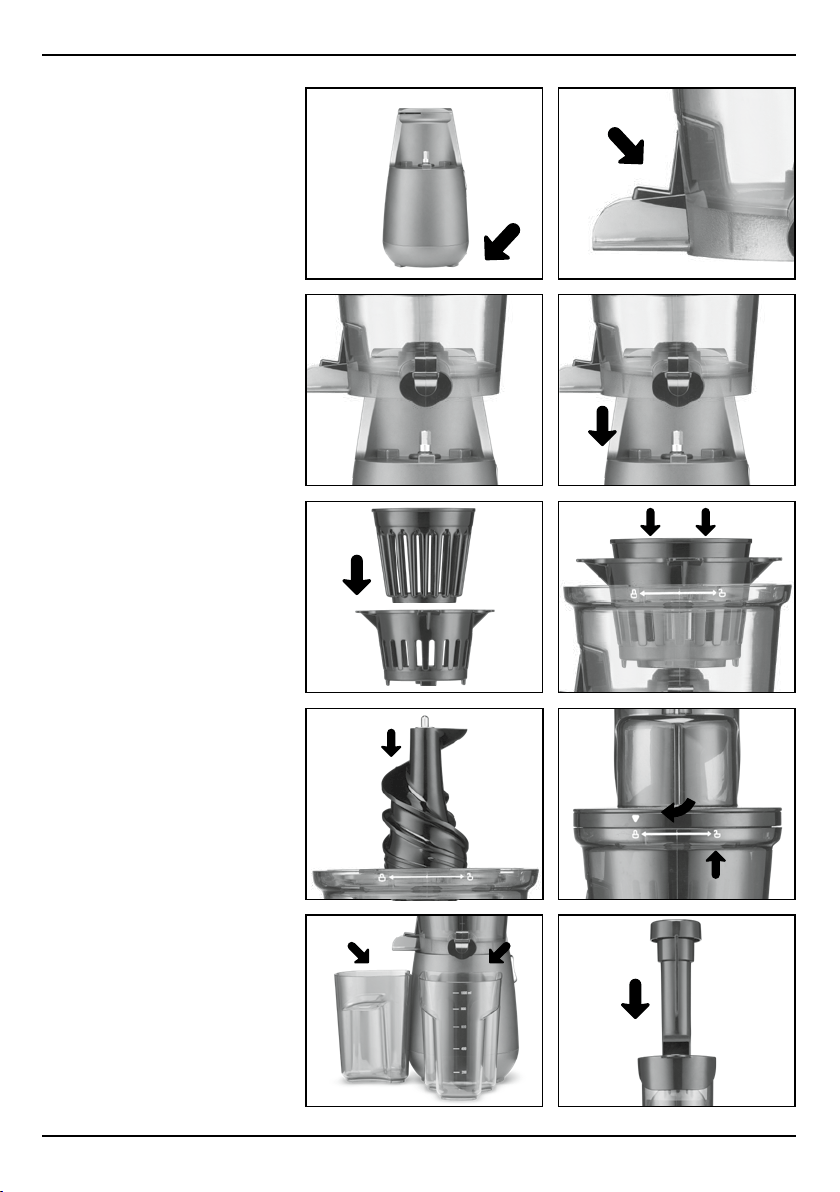
Assembling the Slow Juicer
1. Place motor base on a clean,
flat surface. Make sure the motor
base is unplugged from the
power outlet (not shown).
2. Close the pulp spout. Cap will
be securely closed when you
hear a click.
3. Place the juicing bowl by lining
up the fixed columns on the
juice container.
4. Insert the juicing bowl into the
fixed point of the housing.
5. Place the inner juice strainer into
the outer juice strainer, together
this is referred to as the juice
strainer assembly.
6. Insert the juice strainer assembly
firmly into the juicing bowl by
pressing down on rim of the
assembly, so it nests securely in
place.
7. Place the auger into the juice
strainer assembly by pressing
down firmly, so it nests securely
in place.
8. Install the cover onto the juicing
bowl. Line up the arrow on the
cover with the unlock symbol on
the bowl. The cover should be
seated evenly on the juicing
bowl. Twist the cover clockwise
until locked in place.
9. Place the juice container next to
the unit under the juice spout,
and place the pulp container
under the pulp spout.
10. Insert the food pusher into the
feed tube by aligning the groove
in the food pusher with the small
indent on the inside of the
feed tube.
1.
3.
5.
7.
9.
2.
6.
8.
10.
4.
Loading ...
Loading ...
Loading ...