Loading ...
Loading ...
Loading ...
12. Next stage is to remove the door closure
device fitted on each door handle.
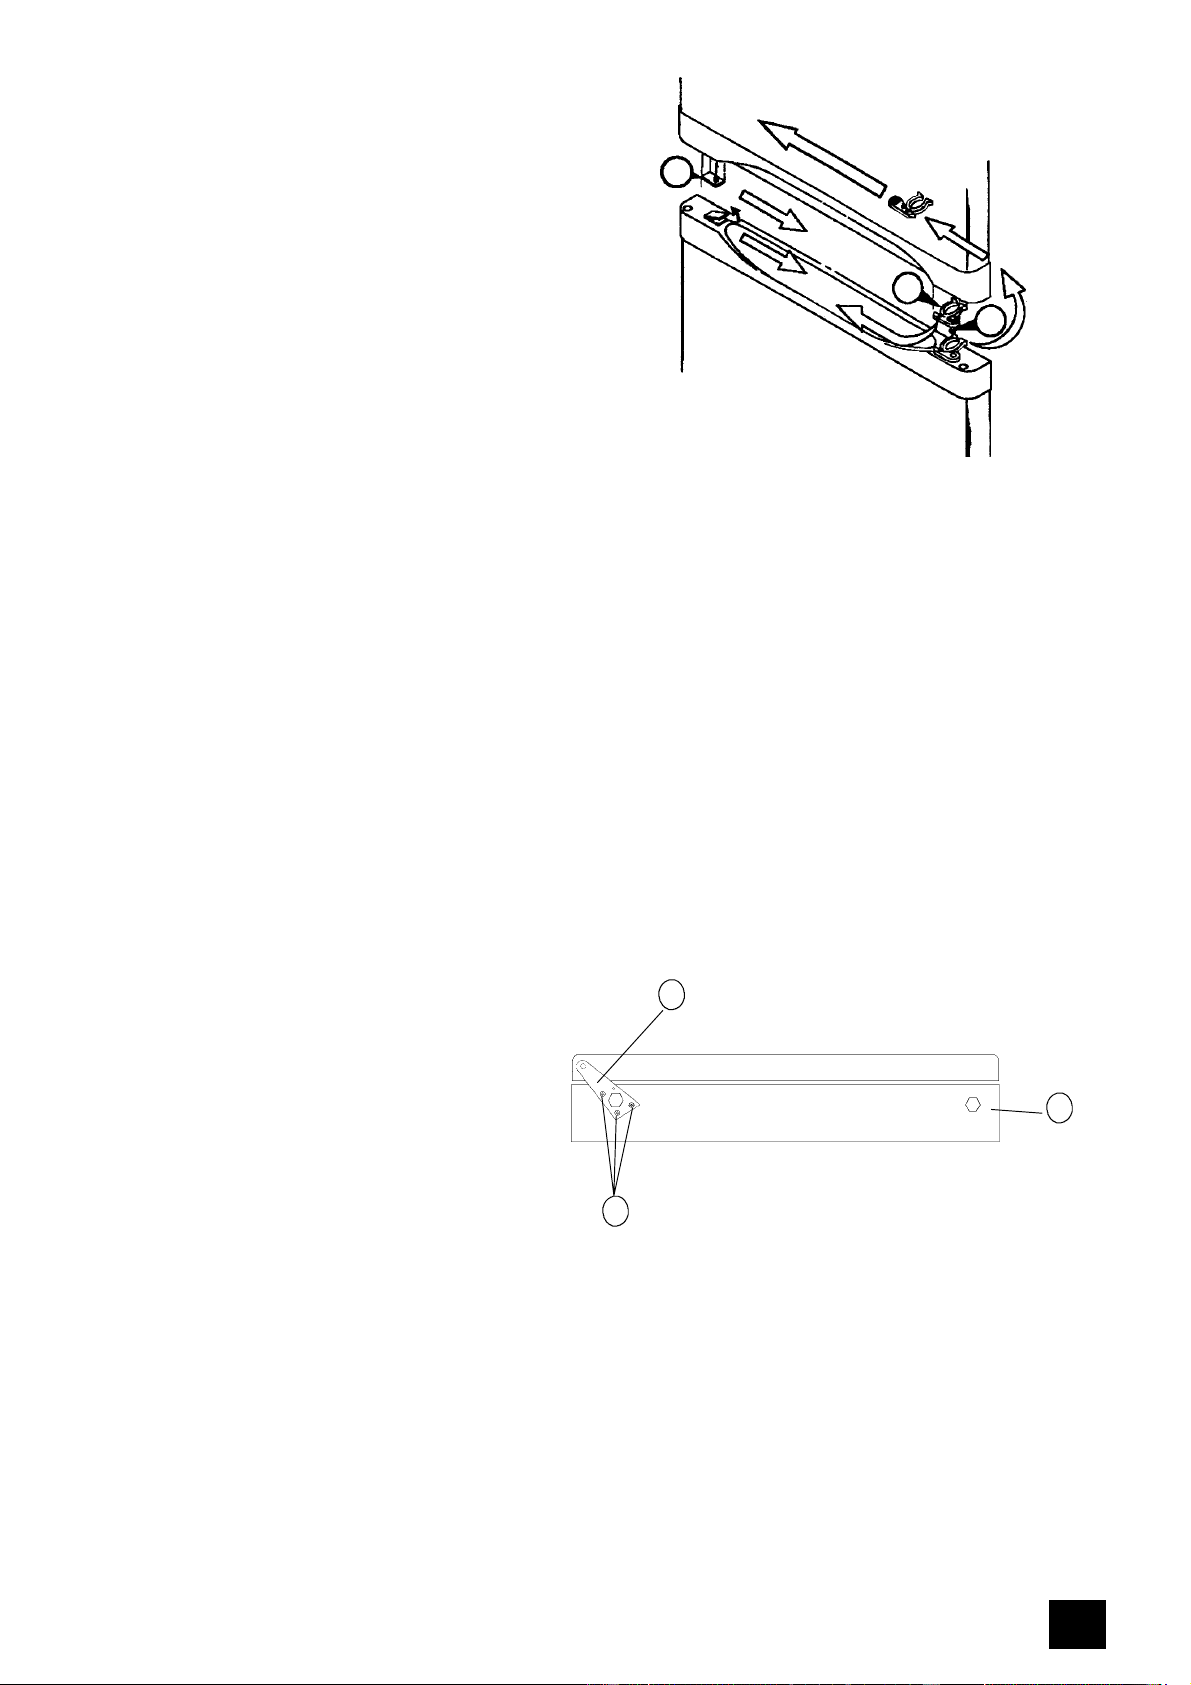
Remove blanking plug (N) on each door
handle by using a flat bladed screwdriver.
Remove door closure device (R) by removing
screw (S) on both doors and fit to opposite
side of door. Note that the door closure device
is handed so when transferring it to the
opposite side the device which was on the
bottom of the top door will now be fitted to the
top of the bottom door and visa versa.
Now replace blanking plug (N) in the opposite
side of each door.
Refit the top door by carefully sliding it onto
the upper hinge pin (P).
13. Refit the top door by carefully sliding it
onto the upper hinge pin (P).
14.Turn the centre hinge (H) around from its
illustrated position and transfer it to the
opposite side. Gently press the centre hinge
up into the door being careful to retain the
door closure clip (L).
To secure the centre hinge to the cabinet,
refit screw (J). Ensure the top door is
correctly aligned before fully tightening the
screws (J) and (G). This can be achieved
by sideways movement of the centre hinge.
The base of your product should now be in
line with the diagram.
15. Refit the bottom door by sliding it onto
the centre hinge pin. Take the bottom
hinge foot assembly (B) and transfer
it over to the opposite side of the
cabinet being careful to retain any
spacing washer fitted onto the bottom
hinge pin. Push the hinge foot
assembly (B) into the door bearing
using the pin of the foot for location.
Three holes will then line up with the
hinge foot and screws (C) should be
used to secure the hinge. Refit level
adjuster and spacer (A) in the opposite
side of the cabinet.
16. The base of your product should now be in
line with the diagram.
17. Stand the appliance upright.
21
N
R
S
A
B
C
Loading ...
Loading ...
Loading ...