Loading ...
Loading ...
Loading ...
Auto Activity Start: Allows your device to create and save
timed activities automatically when the Move IQ feature
detects you have been walking or running for a minimum time
threshold. You can set the minimum time threshold for
running and walking.
Custom Stride Length: Allows your device to more accurately
calculate the distance traveled using your custom stride
length. You can enter a known distance and the number of
steps it takes to cover the distance, and Garmin Connect can
calculate your step length.
Daily Floors Climbed: Allows you to enter a daily goal for the
number of floors to climb.
Daily Steps: Allows you to enter your daily step goal. You can
use the Auto Goal option to allow your device to determine
your step goal automatically.
Move Alert: Allows your device to display a message and move
bar on the time of day screen when you have been inactive
for too long. The device also beeps or vibrates if audible
tones are turned on.
NOTE: This setting decreases battery life.
Move IQ: Allows you to turn on and off Move IQ events. The
Move IQ feature automatically detects activity patterns, such
as walking and running.
Pulse Ox Sleep Tracking: Allows your device to record up to
four hours of pulse oximeter readings while you sleep.
Set as Preferred Activity Tracker: Sets this device to be your
primary activity tracking device when more than one device is
connected to the app.
Weekly Intensity Minutes: Allows you to enter a weekly goal
for the number of minutes to participate in moderate to
vigorous intensity activities. The device also allows you to set
a heart rate zone for moderate intensity minutes and a higher
heart rate zone for vigorous intensity minutes. You can also
use the default algorithm.
User Settings
From your Garmin Connect device menu, select User Settings.
Personal Information: Allows you to enter your personal
details, such as birth date, gender, height, and weight.
Sleep: Allows you to enter your normal sleep hours.
Heart Rate Zones: Allows you to estimate your maximum heart
rate and determine custom heart rate zones.
General Settings
From your Garmin Connect device menu, select General.
Device Name: Allows you to set a name for the device.
Wrist Worn On: Allows you to customize which wrist the device
is worn on.
NOTE: This setting is used for strength training and gestures.
Auto Upload Activities: Enables or disables your device to
automatically send your saved activities and daily activity
tracking data to your Garmin Connect account.
Time Format: Sets the device to display time in a 12-hour or 24-
hour format.
Date Format: Sets the device to display the date in a month/day
or day/month format.
Language: Sets the device language.
Units: Sets the device to display the distance traveled in
kilometers or miles.
Device Information
Specifications
Battery type Rechargeable, built-in lithium-polymer battery
Battery life Up to 7 days
Operating temperature
range
From -20º to 50ºC (from -4º to 122ºF)
Charging temperature
range
From 0º to 45ºC (from 32º to 113ºF)
Wireless frequencies/
protocols
2.4 GHz @ 0 dBm nominal
• ANT+ wireless communications protocol
• Bluetooth wireless technology
Water rating Swim*
*The device withstands pressure equivalent to a depth of 50 m.
For more information, go to www.garmin.com/waterrating.
Viewing Device Information
You can view the unit ID, software version, and regulatory
information.
1
Press to view the menu.
2
Select > .
3
Swipe to view the information.
Charging the Device
WARNING
This device contains a lithium-ion battery. See the Important
Safety and Product Information guide in the product box for
product warnings and other important information.
NOTICE
To prevent corrosion, thoroughly clean and dry the contacts and
the surrounding area before charging or connecting to a
computer. Refer to the cleaning instructions in the appendix.
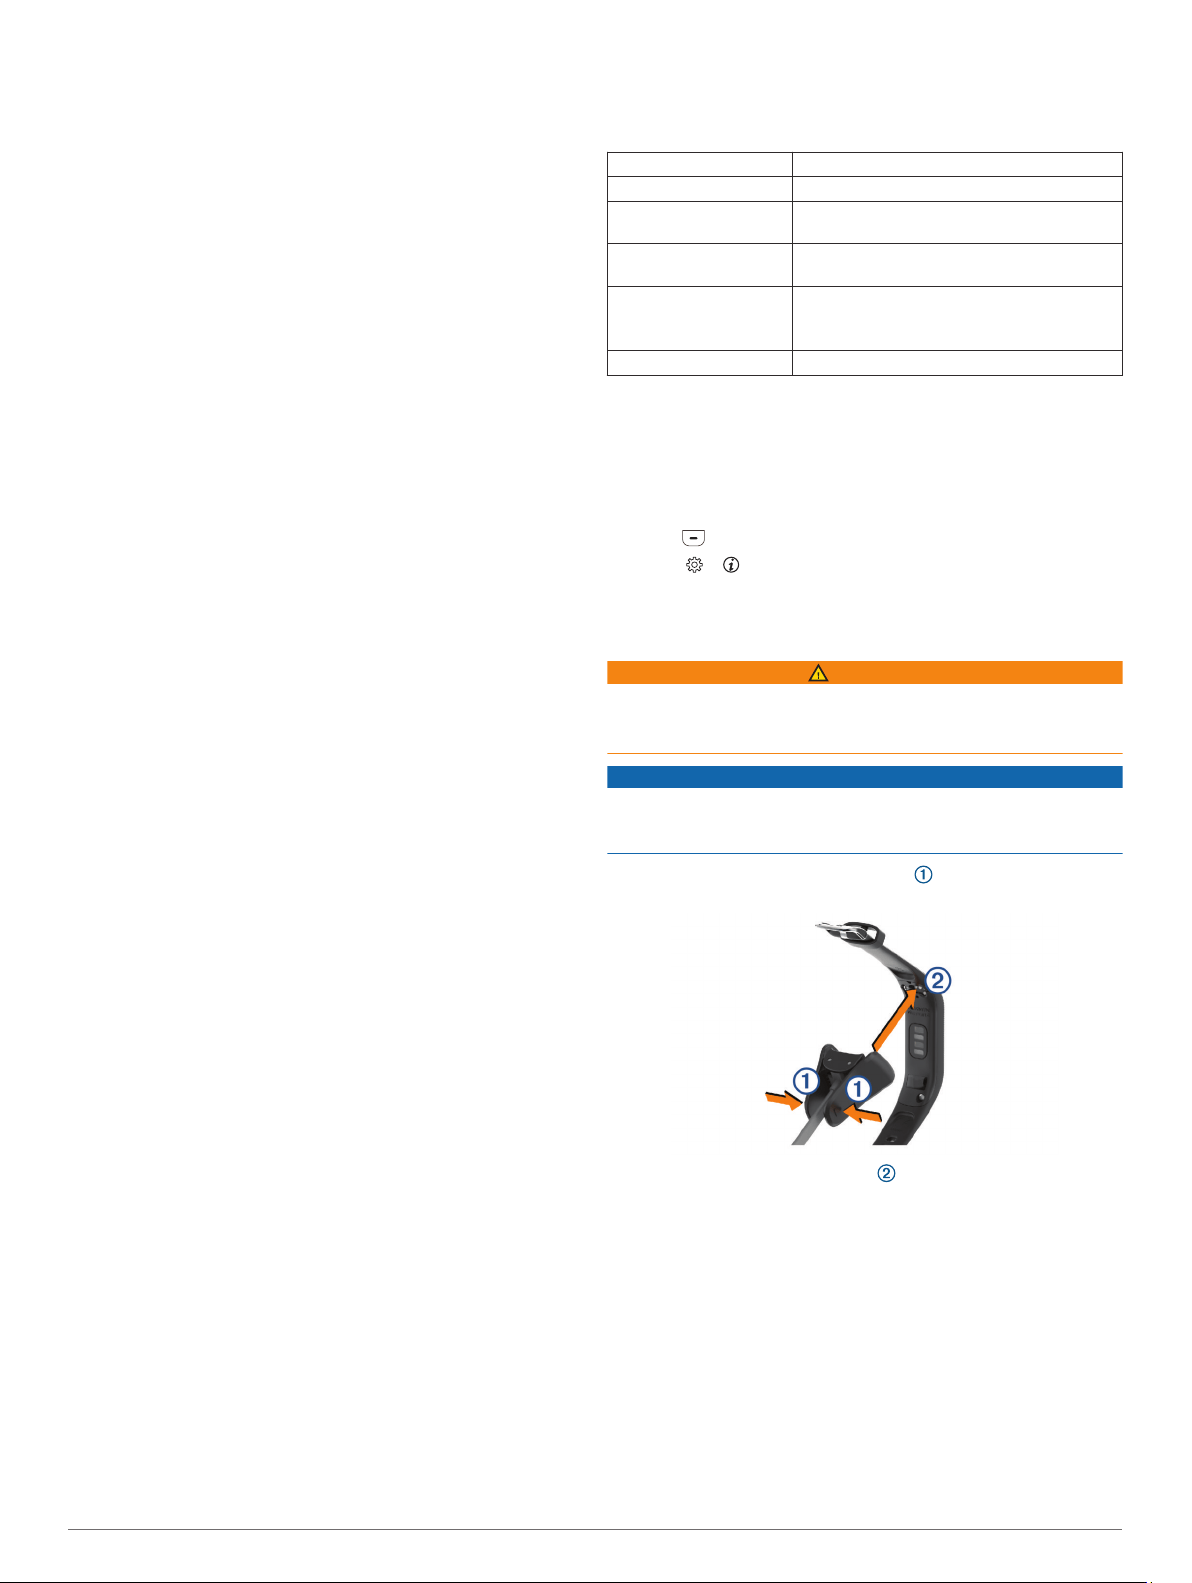
1
Pinch the sides of the charging clip to open the arms on
the clip.
2
Align the clip with the contacts , and release the arms of
the clip.
3
Plug the USB cable into a power source.
4
Charge the device completely.
Tips for Charging Your Device
• Connect the charger securely to the device to charge it using
the USB cable (Charging the Device, page 9).
You can charge the device by plugging the USB cable into a
Garmin approved AC adapter with a standard wall outlet or a
USB port on your computer.
• View the remaining battery graphic on the device information
screen (Viewing Battery Power, page 1).
Device Information 9
Loading ...
Loading ...
Loading ...