TCL 10L - T770B Android Smartphone
Product's Documents
Below are documents related to this product, you can read online or download:
- Owner's manual - (English) Read Online | Download pdf

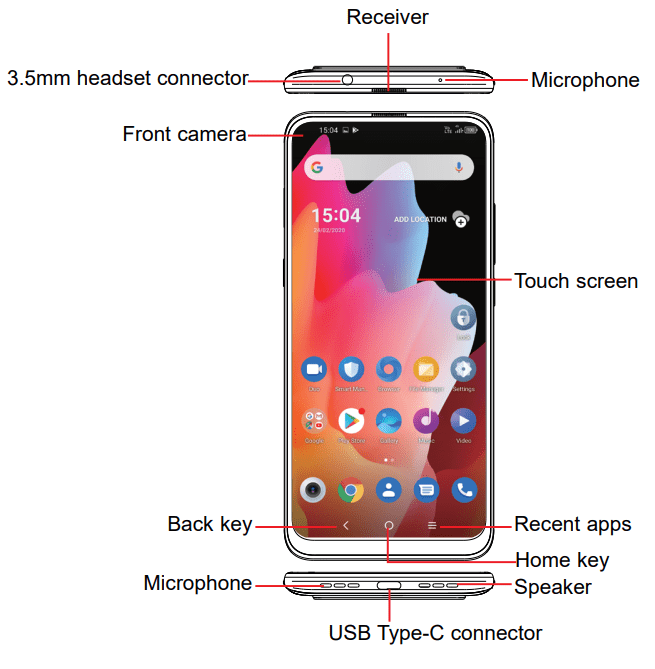
 | Smart key (left of the device)
|
 | Back key
|
 | Home key
|
 | Recent apps
|
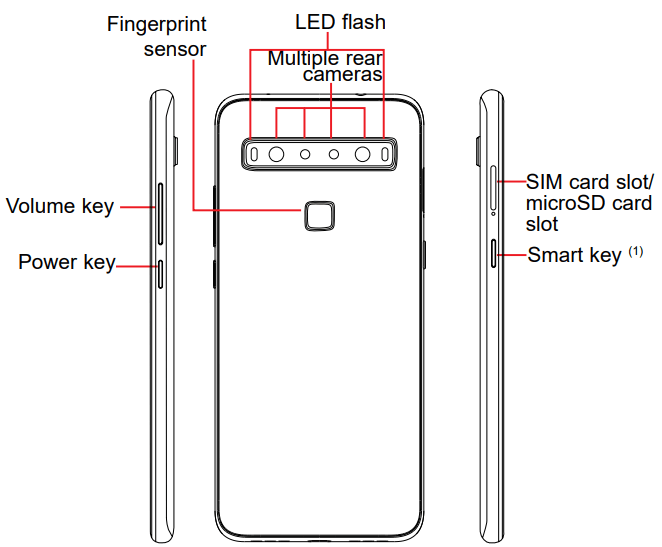
 | Power key (right of the device)
|
 | Volume Keys
|
Setting up
Inserting or removing the SIM/microSD card
Note: microSDTM cards are sold separately. Only use Nano SIM cards with your phone.
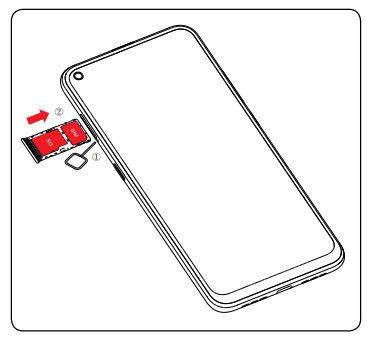
You must insert your SIM card to make phone calls. You do not need to power off your phone before inserting or removing the SIM card as this phone supports hot swap.
\ Your phone only supports nano-SIM cards. Do not attempt to insert other SIM types; otherwise this may cause damage to your phone.
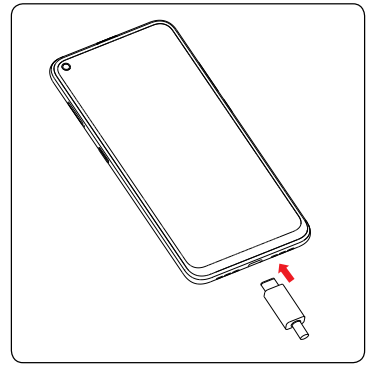
You are advised to fully charge the battery (  ). Charging status is indicated by a percentage displayed on screen while the phone is powered off. The percentage increases as the phone is charged.
To reduce power consumption and energy waste when the battery is fully charged, disconnect your charger from the plug; switch off Wi-Fi, GPS, Bluetooth or background-running applications when not in use; reduce the backlight time, etc.
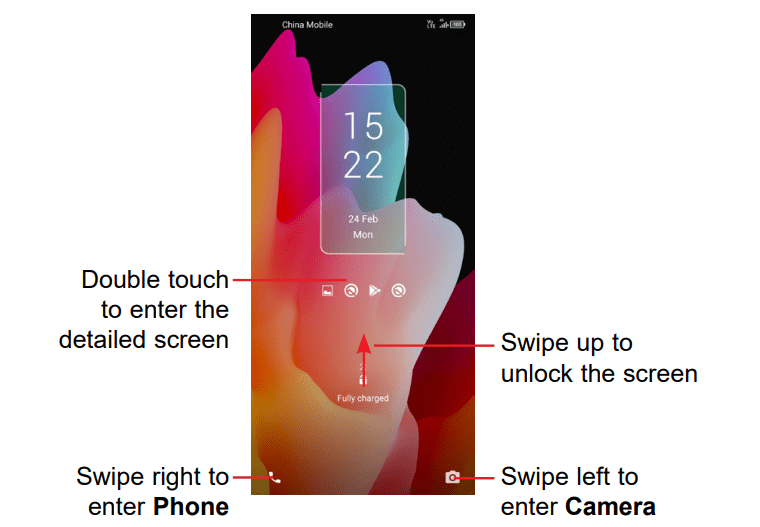
Hold down the Power key until the phone powers on, unlock your phone (Swipe, PIN, Password, Pattern, Fingerprint or Face) if necessary and confirm. The Home screen is displayed.
If you do not know your PIN code or forget it, contact your network operator. Be sure to keep your PIN code secure.
Press and hold the Power key until options appear, then select Power off.
You can bring all of the items that you use most frequently (applications, shortcuts, folders) to your Home screen for quick access.
Tapping Home  always takes you back to the main Home screen.
The Home screen is provided in an extended format to allow more space for adding applications, shortcuts etc. Slide the Home screen horizontally left and right to get a complete view.
Touch
To access an application, touch it with your finger.
Long press
To enter the available options for an item, long press the item. For example. Select a contact in Contacts and long press it. An options list will then appear.
Drag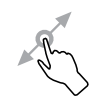
Place your finger on the screen to drag an object to another location.
Slide/Swipe
Slide the screen to scroll up and down the applications, images, and web pages. You can slide the screen horizontally too.
Flick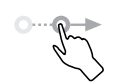
Similar to swiping, but flicking makes it move quicker.
Pinch/Spread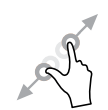
Place two fingers on the screen surface and draw them apart or together to scale an element on the screen.
Rotate 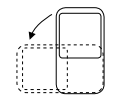
Automatically change the screen orientation from portrait to landscape by turning the phone sideways to have a better screen view.
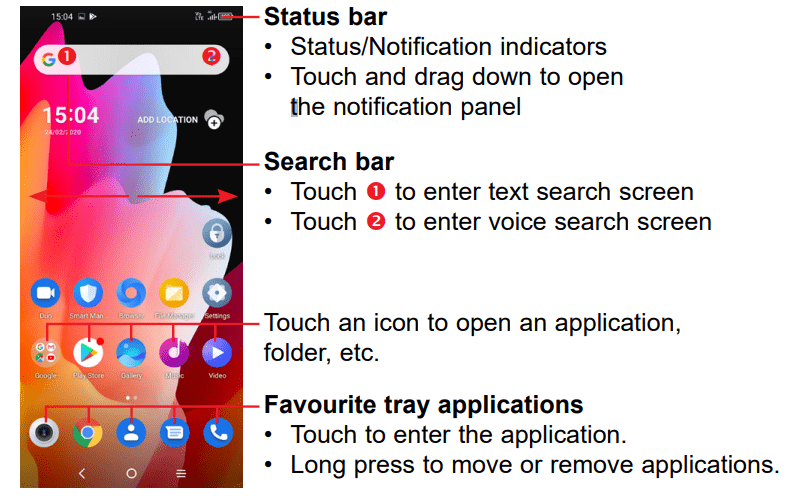
From the status bar, you can view both phone status (on the right side) and notification information (on the left side).
Drag down the status bar to view notifications and drag again to enter the quick settings panel.
Touch and drag up to close it. When there are notifications, they can be accessed by touching them.
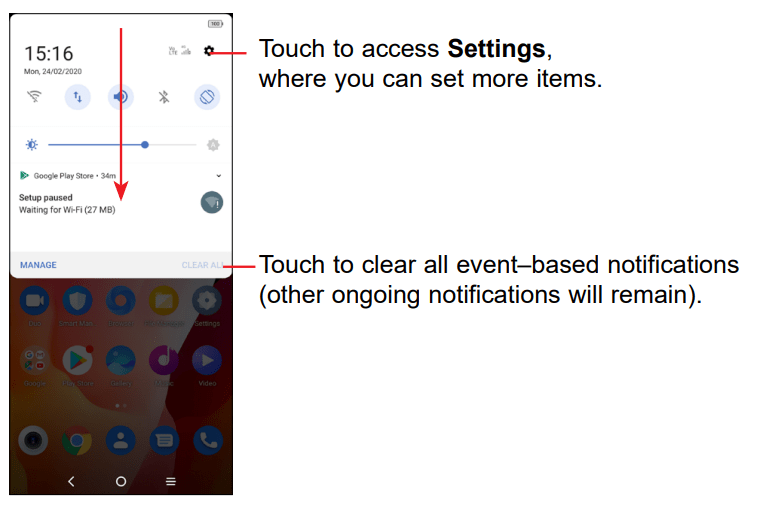
Notification panel
When there are notifications, touch and drag down the Status bar to open the Notification panel to read more detailed information.
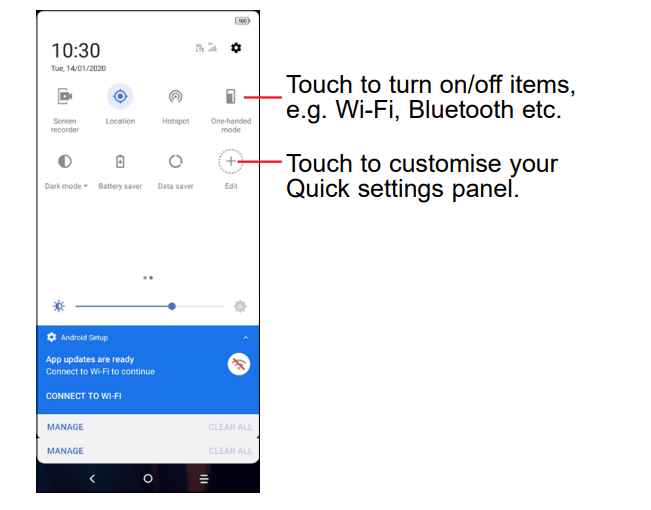
Quick settings panel
Touch and drag down from the top of the screen once using two fingers, or twice using one finger to open the Quick settings panel.
You can enable or disable functions or change modes by touching the icons.
Touch the Edit icon  to customise your Quick settings panel.
To protect your phone and privacy, you can lock the screen with a pattern, PIN, password, fingerprint or face.
To create a screen unlock pattern, touch Settings > Security > Screen lock.
To lock phone screen
To unlock the phone screen
Press the Power key once to light up the screen, swipe up and unlock the screen with the method you have set.
Enter a password to unlock the screen
Once the screen is turned on, swipe up from any position on the screen to display the password input panel. Then enter your lock screen password.
Use pattern unlock
Draw the same pattern you have set to unlock the screen.
Use Face unlock
Use Fingerprint unlock
Touch the fingerprint sensor with an enrolled finger to unlock the screen.
Add
You can long press a folder, an application or a widget and drag the item to your preferred Home screen.
Reposition
Long press an item and drag it to the desired position and then release. You can move items both on the Home screen and the Favourite tray. Hold the icon on the left or right edge of the screen to drag the item to another Home screen.
Remove
Long press the item and drag it up to the top of the  remove icon, and release after it turns red.
Create folders
To improve the organisation of shortcuts or applications on the Home screen and the Favourite tray, you can add them to a folder by stacking one item on top of another. To rename a folder, open it and touch the folder’s title bar to input the new name.
Wallpaper customisation
Long press an empty area on the Home screen, then touch Wallpapers to customise wallpaper.
Consult widgets
Long press the empty area in the Home screen, then touch Widgets to display all widgets.
Touch the selected widget and slide it to move to your preferred screen.
Consult recently used applications
To consult recently used applications, touch the Recent apps key. Touch a thumbnail in the window to open the application.
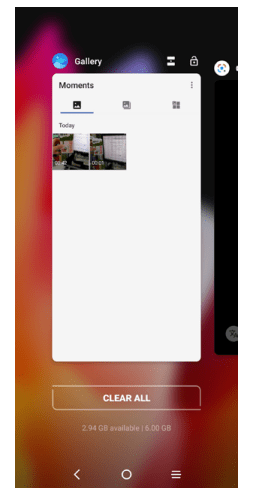
Touch one thumbnail and slide it up to close the application, slide it right/left to switch the applications.
Touch Clear all at the bottom of the screen to close all the running applications.
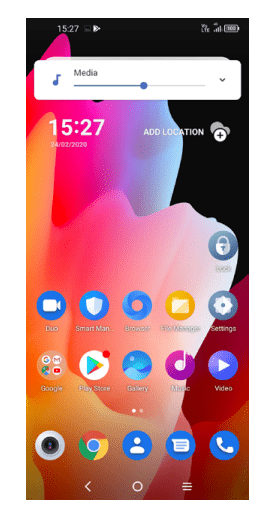
Press the Volume key to adjust the Media volume.
Touch the icon to adjust Alarm, Ring and Notification volume.
Onscreen Keyboard settings
Touch Settings > System > Language & input, touch the Virtual keyboard you want to set up and a series of settings will become available.
Adjust the Onscreen Keyboard orientation
Turn the phone sideways or upright to adjust the onscreen keyboard orientation. You can adjust it by changing the settings (Touch on/off Settings > Display > Auto-rotate screen).
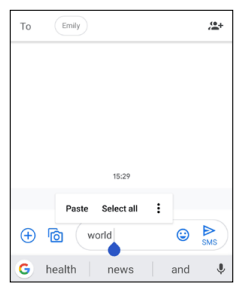
Android keyboard
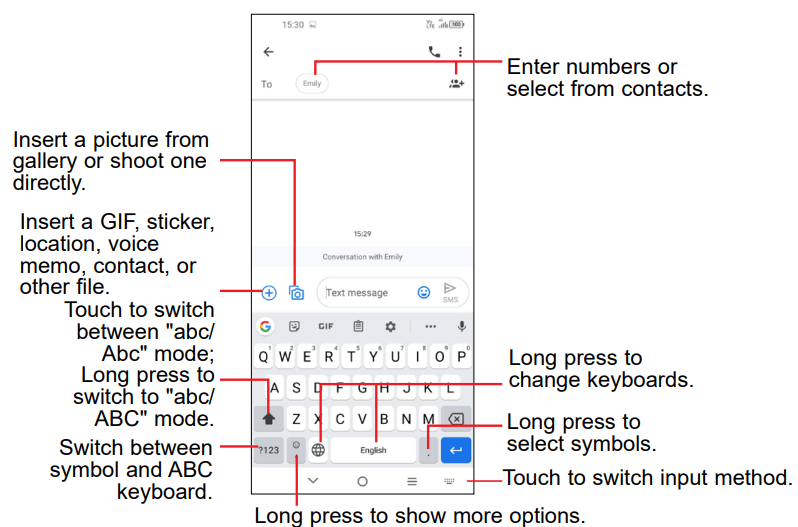
You can edit text which you have entered.
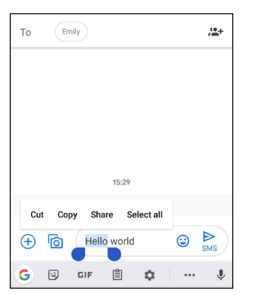
You can also insert new texts if preferred
To connect to the internet with this phone, you can use 2G/3G/4G networks or Wi-Fi, whichever is most convenient.
2G/3G/4G
The first time you turn on your phone with your SIM card inserted, it will automatically configure your network service: 2G, 3G or 4G.
If the network is not connected, you can turn on mobile data in Settings > Network & internet > Cellular network.
To check the network connection you are using, touch Settings > Network & internet > Cellular network > Access Point Names or Network operators.
To create a new access point
A new 2G/3G/4G network connection can be added to your phone with the following steps:
 and enter the required APN information.
 > Save.
To enable data roaming
 .
.To set preferred network mode
Wi-Fi
You can connect to the internet when your phone is within range of a wireless network. Wi-Fi can be used on your phone even without a SIM card inserted.
To turn Wi-Fi on and connect to a wireless network
 .
.To add a Wi-Fi network
When Wi-Fi is on, you may add new Wi-Fi networks according to your preference.
To forget a Wi-Fi network
The following steps prevent automatic connections to networks which you no longer wish to use.
Bluetooth is a short-range wireless communication technology that you can use to exchange data, or connect to other Bluetooth devices for various uses.
To turn on Bluetooth
.Your device name and other available devices will appear on screen.
To rename your device
To pair/connect your phone with a Bluetooth device
To exchange data with another device, you need to turn Bluetooth on and pair your phone with the Bluetooth device with which you want to exchange data.
To unpair from a Bluetooth device
 beside the device you want to unpair.
Super Bluetooth
Your device can connect with up to 4 audio devices (1) simultaneously and once connected, it can calibrate each one to provide a richer listening experience.
With the USB cable, you can transfer media files and other files between your phone and computer.
To connect your phone to the computer
Use the USB cable that came with your phone to connect the phone to a USB port on your computer. You will receive two notifications Charging this device via USB and USB debugging connected.
Open the Notification panel and touch Android system, then, in the next dialogue, choose the way in which you want to transfer files. By default, Charge this device is selected.
 Before using MTP (Media Transfer Protocol), make sure that the driver (Windows Media Player 11 or higher version) has been installed.
 Will decrease to 2 audio devices when connected to Wi-Fi 2.4GHz network.
You can share your phone's mobile data connection with a single computer via a USB cable (USB tethering) with Bluetooth (Bluetooth tethering) or up to eight devices at once via Wi-Fi (mobile hotspot).
The functions below may incur additional network charges from your network operator. Extra fees may also be charged in roaming areas.
To share your phone's data connection via USB and Bluetooth, or as a mobile hotspot
To rename or secure your mobile hotspot
When mobile hotspot is activated, you can rename your phone's Wi-Fi network (SSID) and secure its Wi-Fi network.
Mobile hotspot.
Virtual private networks (VPNs) allow you to connect to the resources inside a secured local network from outside that network. VPNs are commonly deployed by corporations, schools, and other institutions so that their users can access local network resources when not inside that network, or when connected to a wireless network.
To add a VPN
The VPN is added to the list on the VPN settings screen.
 Before adding a VPN, you should set a screen lock for your phone.
To connect/disconnect to/from VPN
To connect to a VPN:
To disconnect from a VPN:
To edit/delete a VPN
To edit a VPN:
 beside the VPN you want to edit.
To delete a VPN:
beside the VPN you want to delete, then touch FORGET to delete it.
To go to Settings, touch from the app drawer.
Wi-Fi
Using Wi-Fi you can access the internet without using your SIM card whenever you are in range of a wireless network. The only thing you have to do is to enter the Wi-Fi screen and configure an access point to connect your phone to the wireless network.
For detailed instructions on using Wi-Fi, refer to “6.1.2 Wi-Fi”.
Cellular network
You can set Data roaming, Preferred network type, Network and Access Point Names etc. in this menu.
Data saver
By enabling Data saver, you can reduce data usage by preventing some apps from sending or receiving data in the background.
Cellular data
If you do not need to transmit data on mobile networks, turn off Cellular data to avoid incurring significant charges for data use on local operator mobile networks, particularly if you do not have a mobile data agreement.
Data usage is measured by your phone, and your operator may count differently.
Hotspot & tethering
This function allows you to share your phone's mobile data connection via USB or as a portable Wi-Fi access point (refer to Sharing your phone's mobile data connection”).
SIM cards (1)
Touch to choose SIM 1 or SIM 2 for connecting to the network, making calls and sending SMS messages.
VPN
For more information on VPN, refer to “6.5 Connecting to virtual private networks”.
Airplane mode
Turn on Airplane mode  to simultaneously disable all wireless connections including Wi-Fi, Bluetooth and more. However, Wi-Fi and Bluetooth can still be enabled manually later if needed.
Private DNS
Touch to select private DNS mode.
Bluetooth
Bluetooth allows your phone to exchange data (videos, images, music, etc.) within a small range with another Bluetooth supported device (phone, computer, printer, headset, car kit, etc.).
For more information on Bluetooth, refer to “6.2 Connecting to a Bluetooth device”.
NFC
Turn on to enable NFC.
The function allows data exchange when the phone touches another device.
Cast
You can use Cast to display your device's screen on your TV, and display content like TV shows, movies, photos, games, and websites from supported apps.
USB
You can use USB to charge this device, transfer files or transfer photos (PTP).
Printing
Touch Printing to activate print services. You can select your Default print service or choose Add print to select another service.
Status bar
With this menu, you can set the style of the status bar, select whether notification icons are folded and how the battery percentage is displayed.
Hole-punch display
Turn on for full screen apps to get the best experience on the phone.
Full screen apps
Most applications installed on the phone will automatically adapt to the full screen display without setting them manually.
For the applications which do not automatically adapt to the full screen display, you can go to Settings > Display > Full screen apps to set.
Brightness level
Adjust screen brightness manually.
Dark mode
Your screen will become black in this mode, which makes it easier to look at your screen or read in dim light.
Eye comfort mode
Eye comfort mode can effectively reduce blue light radiation and adjust the colour temperature to relieve eye fatigue. You can also create a custom schedule to turn on it.
Adaptive brightness
Adjust screen brightness automatically.
Auto-rotate screen
Select whether the screen rotates automatically or not.
Sleep
Set screen timeout.
In Display, you can also set Font size, Screen saver, Ambient display, and etc.
Visual enhancement
Toggle the switch to enable. Automatically adjust contrast, sharpness and saturation to make the screen image clearer, with a richer depth of detail and improved brightness for dark scenes when viewing photos or playing videos and games. Only works in ‘Vivid’ Screen colour mode.
SDR to HDR
This is only available after enabling visual enhancement.
Enhance the colour, contrast and depth of detail of streaming video from any source to provide HDR-quality viewing.
Reading mode
Reading mode reproduces a physical book reading experience on your screen. You can set individual apps to use this mode by clicking Manage apps menu.
Screen color
The device allows you to change the range of display tones according to the display content. When choosing Vivid, you can adapt the screen's colour temperature according to the ambient light.
With this menu, set your home apps, choose your favourite wallpapers, theme styles, and etc.
Use the Sound settings to configure many aspects of call ringtones, music, and other audio settings.
Do Not Disturb preferences
If you do not want to be disturbed by your phone or information ringtones during work or rest, you can set the Do Not Disturb mode.
Swipe down the Status bar twice to access the Quick Settings panel and tap to turn on Do Not Disturb.
Phone ringtone
Select or add ringtone for your phone.
Default notification ringtone
Set the default sound for notifications.
Default alarm ringtone
Set your alarm ringtone.
Other sounds and vibrates
Set dial pad tones, screen locking sounds, tap sounds, etc.
System navigation
Select your favourite navigation button layout.
App Cloner
App Cloner will duplicate one app on your Home screen and you can enjoy both of them respectively at the same time.
Screen Recorder
Set the video resolution and sound. To activate Screen Recorder, touch the  icon in the Quick Settings panel.
Gestures
To set some gestures for convenient use, such as flip to mute, 3 fingers screenshot, split screen, and etc.
One-handed mode
Reduce the display area of the screen and operate your phone with one hand. The function could access in the Quick Settings panel by touching the  icon.
icon.
Game mode
In this mode, you could set DO NOT DISTURB while in game, prevent accidental touches, and optimise game performance.
Driving Mode
A series of settings in Driving mode makes it easier and safer to handle incoming calls when you are driving. To view more instructions, tap in Settings >Advanced features > Driving mode.
Smart key(1)
You can customise a variety of powerful features to make the use of the phone more convenient.
Touch Single press, Double press or Long press, then set Action as Open an app or Open a feature, and then set a shortcut for an App or a feature.
Switch Phone
Switch Phone helps you to transfer content from an old phone to a new one, tap the  icon to view Q & A.
Smart Manager
Smart Manager ensures your phone is operating in top form by automatically scanning and optimising data usage to preserve battery levels, manage storage and protect against security threats.
Restricting auto-start apps can make the system run faster and extend battery life.
You can also do some manual settings for further optimisation.
Screen lock
Select one method such as Swipe, Pattern, PIN, Password, or Fingerprint to unlock the screen.
Fingerprint sensor
Use your Fingerprint to unlock the screen or clear notifications, take a photo/video, pick up a call, and etc.
Access Settings > Security > Fingerprint sensor to activate these functions.
Face key
Face key allows you to unlock your device with your facial data. Set it according to the on-screen steps.
Ensure that you are facing the phone screen when using face recognition.
NOTE: you need to set a pattern, PIN, or password before using face key.
Smart Lock
Smart Lock keeps your device unlocked when it's safe with you and locked when it detects that it's been put down.
Apps lock
Apps lock can effectively protect your privacy by locking some apps with a pattern or fingerprint. Go to Settings > Security > Apps lock to set the lock format, lock time and choose the apps you want to lock.
Others
You can also set Emergency service, SIM card lock, Screen pinning, and etc. in Settings > Security.
Tap to set whether to allow an app to access your device's location.
You can set allowing all the time, or only while the app is in use.
To protect your privacy, you can set an app to be allowed or forbidden to access your location, SMS, phone, etc. Also whether or not to show passwords or choose the activities and info that you want to Google to save.
Touch to view details about the applications installed on your phone, to manage their data usage or force them to stop.
In the App permissions menu of an application, you can grant permissions for the app, such as allowing the app to access your Camera, Contacts, Location, etc.
Use these settings to monitor the total and available space on your phone.
Touch to add, remove, and manage your email and other supported accounts. You can also use these settings to control how and whether all applications send, receive, and synchronise data according to their own schedules, and whether all applications can synchronise user data automatically.
Touch Add account to add an account for the selected app.
In this menu you can find how much time you have spent on the phone and even on each app. You can customise the time limit for using the phone so that have a healthy and balanced life.
In addition, parents are able to restrict their children's usage time to manage their browsing habits.
Touch to configure your Google account and services settings.
Use the Accessibility settings to configure any accessibility plug-ins you have installed on your phone.
About phone
View basic information for your phone such as model name, CPU, camera, resolution, etc.
You can also check legal information, build number, status and other specs.
System updates
If you want to update the system, touch CHECK FOR UPDATES refer to “11.1 FOTA upgrade”).
Languages & input
Touch to configure language settings, the on-screen keyboard, voice input settings, pointer speed, and etc.
Date & time
Use Date & time settings to customise your preferences for how date and time are displayed.
Backup
Turn on  to back up your phone’s settings and other application data to Google servers. If you replace your phone, the settings and data you’ve backed up will be restored onto the new phone when you sign in with your Google account. If you mark this option, a wide variety of settings and data are backed up, including your Wi-Fi passwords, bookmarks, a list of the applications you’ve installed, the words you’ve added to the dictionary used by the onscreen keyboard, and most of the settings that you configure in the Settings application. If you unmark this option, you stop backing up your settings, and any existing backups are deleted from Google servers.
Reset
Touch to choose Network settings reset (including Wi-Fi, Mobile data & Bluetooth), Reset app preferences, or Factory data reset.
 Factory data reset will erase all of your personal data from the internal phone storage, including information about your Google account, any other accounts, your system and application settings, and any downloaded applications. We recommend you back up your personal data before resetting.
Regulatory & safety
Touch to view product information such as Product model, Manufacturer name, Manufacturer address, IMEI, CU reference, Bluetooth Declaration ID, and etc.
Before contacting the service centre, here are some instructions to help you troubleshoot your device:
 .
.When I select a number from my contacts, the number can't be dialled
I can't connect my phone to my computer
The battery drains too fast
Processor:
Platform:
Memory:
Dimensions (LxWxT):
Weight:
Display:
Network:
GPS:
 Memory depends on markets.
Connectivity:
Camera:
Audio & Video supported formats:
Battery :
Expansion Slot:
(Availability of microSD card depends on market)
The original battery has undergone rigorous safety inspections to meet qualification standards, the use of non-original batteries may be dangerous.
Note: Specifications are subject to change without prior notice.