Loading ...
Loading ...
Loading ...
Function
19
Function
Video Menu Options
* In this manual, the OSD(On Screen Display) may be different from your Projector’s because it is just an example to
help with the Projector operation.
* This operating guide explains operation of RGB(PC) mode mainly.
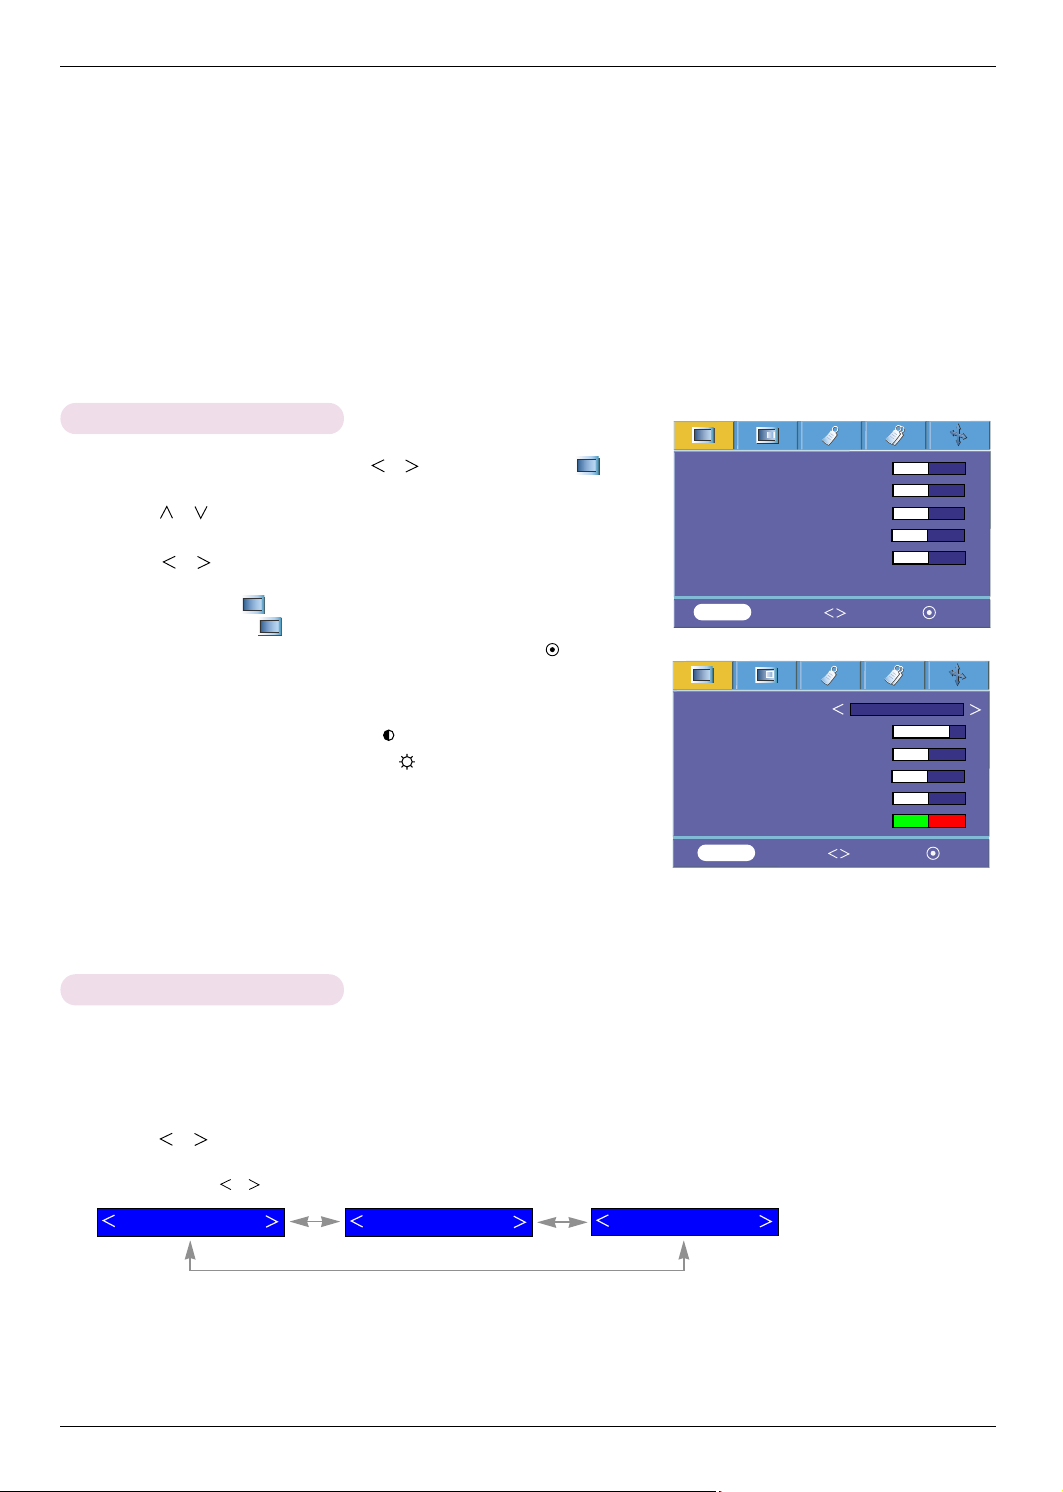
1. Press the MENU button and then use , button to select the menu.
2. Press the
, button to select a video item you want to adjust.
3. Press the , button to adjust the screen condition as you want.
< RGB mode >
< Video mode >
●
Each adjustment of menu options will not affect other inputs.
As required, re-adjust menu options for the input sources.
●
To restore the original image condition after changing it, press OK button
after selecting [Reset] item. (For RGB and HDMI signals only)
●
When receiving an NTSC signal, the picture item Tint is displayed and can
be adjusted.(60Hz only)
●
You can adjust contrast by pressing the button on the remote control.
●
You can adjust brightness by pressing the button on the remote control.
●
Press the MENU button twice or the EXIT button to exit the menu screen.
Adjusting Video
1. Press the MODE button of remote control.
2. Press the
, button to adjust the screen condition as you want.
Picture mode
* Use Picture mode to set the projector for the best picture appearance.
* This function will not work at the RGB and HDMI modes.
●
Each press of the , button changes the screen as shown below.
●
You can use this function through the MENU button.
●
To exit the menu display, press the EXIT button.
Clear
Picture mode
Contrast 80
Brightness 50
Color 50
Sharpness 50
Tint 0
Clear
Contrast 50
Brightness 50
Color R 50
Color G 50
Color B 50
Reset
Soft
User
MENU Exit Move OK
MENU Exit Move OK
Loading ...
Loading ...
Loading ...