Loading ...
Loading ...
Loading ...
Two anti-tip brackets are
recommended for each appliance. For
side-by-side installations 4 brackets are
recommended.Two anti-tip brackets
are recommended for each appliance.
For side-by-side installations 4 brackets
are recommended.
^ Position the anti-tip brackets on the
left and right in the installation niche
so that there is no more than 3/8"
(10 mm) of space between the
brackets and the side walls.
^ Mark the drill holes in the anti-tip
brackets on the back wall and on the
ceiling of the installation niche.
^ Set the brackets aside - they will be
needed again later.
Screws are supplied with the
appliance for various
applications/materials.
If the anti-tip brackets cannot be
attached securely with the screws
supplied, an alternative anti-tip
device can be used.
Assure that there are no electrical
wires or plumbing in the area which
the screws could penetrate-risk of
injury and damage.
^ Now attach the installation niche to
the wall.
Securing an alternative anti-tip
device
If the anti-tip brackets cannot be
attached securely, an alternative
anti-tip device can be used.
Ensure that there is no "give" between
the appliance and the anti-tip device.
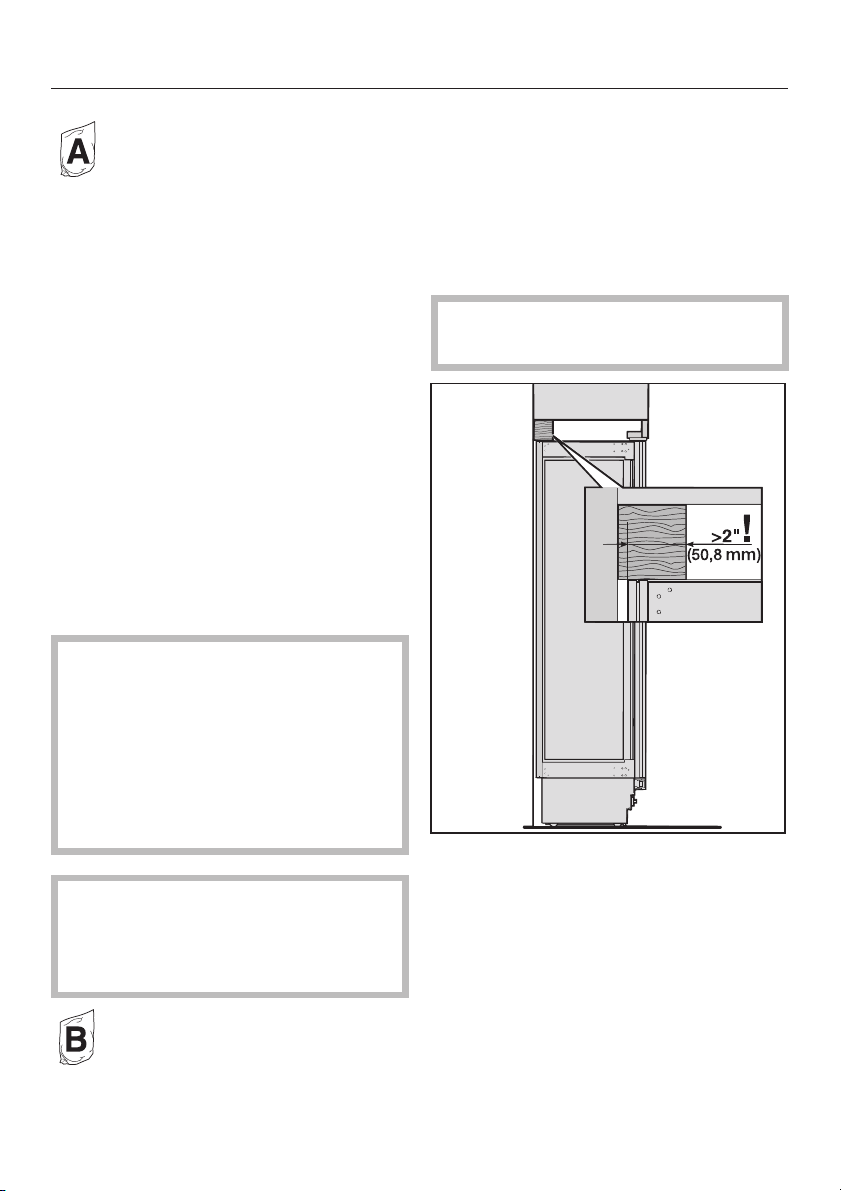
If possible, always screw the
wooden beam to existing studs.
– Cut a wooden beam
(cross section min. 3" x 4"
[75 mm x 100 mm]) to the required
length.
– The length is equal to the width of
the installation niche.
– If the installation cavity is deeper
than the appliance, select a beam
which has a larger cross section, or
attach two beams.
Installation
50
Loading ...
Loading ...
Loading ...