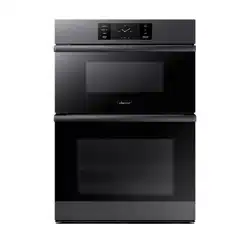
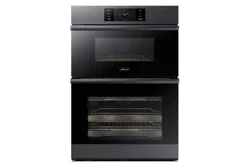
01 Control panel 02 Door latch 03 MWO door 04 Door LED light 05 Oven gasket 06 Oven door 07 LED lamp 08 Convection fan 09 Halogen lamp 10 Water reservoir 11 Rack support
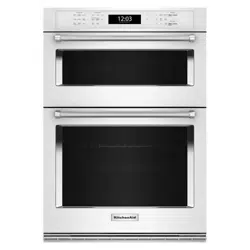
What’s included with your oven
This oven ships with different kinds of accessories that help you cook what you want.
Accessories for the oven
Wire rack
Use these racks in the lower oven when baking and broiling
Gliding racks
These extend completely out of the oven for safe and easy handling and lifting of large/heavy cookware
Temp probe
Lets you cook meat to an exact internal temperature
Accessories for the microwave
Roller ring
Put in the center of the base. It supports the optitray.
Optitray
Put on the roller ring with the center fitting of the coupler. It serves as a cooking base.
Racks
Use as appropriate to cook two dishes simultaneously; a smaller dish on the optitray, and the other on the selected rack.
For Broil, Convection modes only (not for normal microwave use).
Even plate
Put on the optitray; browns food, keeps pastries/pizza crisp.
NOTE
• Do not use the optitray without the roller ring.
• To purchase other accessories, call Dacor Customer Assurance (1-800-793-0093).
Basic operations
Control pane
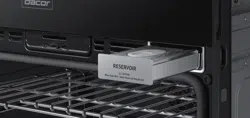
01 MICROWAVE: Touch to display Microwave functions (does not turn the oven on/off). 02 PAUSE/OFF: Touch to pause/cancel cooking in the microwave oven. 03 TIMER: Touch to display the set Timer functions. 04 SETTINGS: Touch to display oven-settings options. (Touch-hold for 3 seconds to disable oven functions.) 05 LOWER OVEN: Touch to display lower-oven functions (does not turn the oven on/off). 06 OFF: Touch to cancel cooking in the lower oven. 07 LIGHT: Touch to turn the lower-oven light on/off. 08 OPEN/CLOSE RESERVOIR: Touch to eject/retract the water reservoir. 09 Display: Swipe to navigate the menus and tap to select a setting.
Microwave
01 Indicator area
• Timer (): When the timer is set, the timer indicator is displayed. When more than 2 timers are set, the number of set timers is shown.
• Door lock (): Displayed when the oven door is locked.
• Wi-Fi (): Shows Wi-Fi signal strength in 5 steps.
• 12-hour energy saving (): Displayed when 12-hour energy saving is turned on.
• Current time: The current time is displayed.
02 Page Indicator: Shows location of current mode.
03 Mode: The current or selected menu appears with a mode description.
04 Cook Time: Cook time appears. Tap this area to display the cooking time.
05 Information area:
• Temp.: The current/selected temperature appears. Tap this area to display the temperature adjustment screen.
• Power: Microwave power level appears. Tap this area to display the power level adjustment screen.
06 +30sec: Add 30 seconds to cook time before/during cooking.
07 START: Tap to start the oven using the displayed settings.
08 View Summary: Tap this area to display upper-/lower-oven cook modes.
09 OVEN MODE: Tap this area to choose the upper oven mode.
Display (Oven)
01 Indicator area
• Timer (): When the timer is set, the timer indicator is displayed. When more than 2 timers are set, the number of set timers is shown.
• Door lock (): Displayed when the oven door is locked.
• Wi-Fi (): Shows Wi-Fi signal strength in 5 steps.
• 12-hour energy saving (): Displayed when 12-hour energy saving is turned on.
• Current time: The current time is displayed.
02 Page Indicator: Shows location of current mode.
03 Mode: The current or selected menu is displayed with a mode description.
04 Temperature: The current or selected temperature is displayed. When you tap this area, the temperature adjustment screen is displayed.
05 Information area
• Temp Probe: The set temperature of the temp probe is displayed. When you tap this area, the Temp Probe screen is displayed.
• Cook Time: The cooking time is displayed. When you tap this area, the cooking time screen is displayed.
• Delay Start: The delay start time is displayed. When you tap this area, the Delay Start screen is displayed.
• InstantHeat™: Indicates if the InstantHeat™ feature is on or off. (Only displayed when you are using the Convection Bake or Convection Roast mode.)
• Steam: The steam level is displayed. When you tap this area, the steam level screen is displayed. (Only displayed when you are using the Steam Bake or Steam Roast mode.)
06 START: Tap to start the oven using the displayed settings.
07 View Summary: When you tap this area, cooking modes of upper and lower oven are displayed.
08 OVEN MODE: When you tap this area, you can choose the lower oven mode.
Control lockout
Control Lockout lets you lock the buttons on the touch pad so they cannot be activated accidently. Control Lock locks only the lower oven door so it cannot be opened. You can only activate Control Lockout when the oven is in standby mode.
How to activate the control lockout feature
1. Cancel or turn off all functions.
2. Touch SETTINGS for 3 seconds.
3. The display will change to the control lock screen and the control lock confirmation will appear at the bottom of the screen.
NOTE
• Control Lockout is available only when the oven temperature is under 400 °F.
• All other functions must be cancelled before you activate Control Lockout.
How to unlock the controls
Touch SETTINGS for 3 seconds.
The control lock confirmation and the lock icon will disappear from the display.
NOTE
It may take up to 10 seconds for the doors to unlock.
Kitchen timer
The kitchen timer serves as an extra timer that will beep when the set time has elapsed. It does not start or stop cooking functions. You can use the kitchen timer with any of the other oven functions. You can set 10 timers maximum simultaneously. Each timer will count down independently of all the other active timers.
How to set the timer
1. Touch TIMER. The display will change to the timer screen.
2. Tap + Add timer.
3. Tap the numbers in the numeric pad to set the timer. (You can set the timer for any amount of time from 1 sec to 23 hr 59 min 59 sec).
4. Tap OK.
5. Tap START.
When the set time has elapsed, the oven will beep and the display will show the Timer has finished.
• You can pause, reset, or delete the timer at any time by tapping the screen.
Note
After you have performed Steps 1 to 5, you can return to Step 2 and set additional timers. You can also name timers so you can identify them separately. See below.
How to change the timer name
You can change the timer name to identify what you are timing, for example, a chicken defrosting.
1. Tap the timer name area.
• The keyboard appears.
2. Enter the new timer name, and then tap OK.
• The display shows the changed timer name.
Maintaining your appliance
Care and cleaning of the oven
Cleaning painted parts and decorative trim
• For general cleaning, use a cloth with hot, soapy water.
• For more difficult residue and built-up grease, apply a liquid detergent directly onto the area and leave for 30 to 60 minutes. Wipe with a damp cloth and dry. Do not use abrasive cleaners on any oven surfaces. They can be scratched.
Cleaning stainless-steel surfaces
1. Shake a bottle of stainless-steel appliance cleaner/polish.
2. Place a small amount of the cleaner/polish on a damp cloth or damp paper towel.
3. Clean a small area, rubbing with the grain of the stainless steel if applicable.
4. Dry and buff with a clean, dry paper towel or soft cloth.
5. Repeat as necessary.
NOTE
• Do not use a steel-wool pad. It will scratch the surface.
• If a mineral-oil-based, stainless-steel-appliance cleaner was used to clean the combi, wash the surface with liquid dish soap and water before using the cleaner again.
Oven racks
• If the racks go through a self-cleaning cycle, they will discolor somewhat and become dull. When the racks have cooled, rub their sides with wax paper or a cloth dabbed with a bit of cooking oil to help them glide more easily on their tracks.
• Gliding racks may be scrubbed with an abrasive cleaner or steel wool. Do not let water or cleaner enter the slides on the sides of rack.
NOTE
• Do not clean the racks in a dishwasher.
• If the rack becomes hard to remove or install, lightly wipe the guides with cooking oil. Do not wipe oil on the slides. (If the rack is still difficult to slide, it may need to be lubricated with graphite.)
1. Remove the rack from the oven. See Using the gliding rack > Removing the gliding rack,
2. Fully extend the rack on a table or countertop. Newspaper may be placed underneath the rack for easy cleanup.
3. If there is debris in the slide tracks, wipe it away using a paper towel. (Any graphite lubricant wiped away must be replaced - See steps 4 through 7.
4.Shake the graphite lubricant before opening it. Starting with the left (front and back) slide mechanism of the rack, place four (4) small drops of lubricant on the two (2) bottom tracks of the slide close to the bearing carriers.
5. Repeat for the right (front and back) slide mechanism of the rack.
6. Open and close the rack several times to distribute the lubricant.
7. Replace the cap on the lubricant and shake it again. Turn the rack over and repeat steps 3, 4, 5, and 6.
8. Close the rack, turn the rack right-side up, and slide it into the oven. (See Installing the gliding rack, pg. 69.)
NOTE
Do not spray the gliding rack with cooking
spray or other lubricant sprays.
Oven door
Use soap and water to thoroughly clean the top, sides, and front of the oven door. Rinse well. You may use a glass cleaner on the outside glass of the oven door. DO NOT immerse the door in water. DO NOT spray or allow water or the glass cleaner to enter the door vents. DO NOT use oven cleaners, cleaning powders, or any harsh abrasive cleaning materials on the outside of the oven door.
DO NOT clean the oven-door gasket. The oven-door gasket is made of a woven material which is essential for a good seal. Care should be taken not to rub, damage, or remove this gasket.
Removing the oven door (Lower oven only)
CAUTION
Follow these instructions carefully to avoid personal injury and property damage. For safety reasons, you cannot remove the door of the upper oven.
1. Prepare a flat, blanket-covered surface to set th edoor on. (You can also use the corner posts from your packing material.)
2. Disconnect the LED's wire harness from the door's bottom-right corner.
3. Open the oven door.
4. In both corners of the door, flip the hinge locks outward to unlock them. The hinge locks must be flipped fully out (see the graphic at left) so you can remove the door properly.
5. Partially close the door to engage the door latch locks. The door will stop at this point.
6. Using two hands, grasp the sides of the oven door. Lift and pull the oven door toward you and remove. You may need to gently shift the door from side to side as you pull.
7. Set the oven door aside on the prepared covered work surface with the oven door resting on its handle.
Replacing the oven door (Lower oven only)
Follow these instructions carefully to avoid personal injury and property damage. For safety reasons, you cannot remove the door of the upper oven.
1. Using two hands, grasp the side edges of the door at the midpoint. Face the oven cavity.
2. Locate the slots on each side of the oven cavity for the door hinge locks.
3. Hold the door at a 45° angle, and then align the door hinges with the slots
in the lower front of the oven cavity. Slowly insert the door, making sure you maintain the 45° angle. You will know the door is engaged in the slot when you feel a slight drop.
4. Fully open the oven door. (If the door does not open 90°, repeat Steps 1 - 3.)
5. Flip the hinge locks in the bottom corners of the oven door toward the oven chamber to lock the hinges. See Step 3(Locked/Unlocked)in the Removing the oven door" procedure.
6. Close the oven door. (If the door is properly installed, there is an even gap between it and control panel; if the gap is fatter on one side, the hinge on that side is improperly installed.)
7. Reconnect the LED's wire harness.
CAUTION
After replacing the door, make sure to reconnect the wires. Push them inward to arrange them as they were before you removed the door. Wires that are not connected or arranged correctly can be caught in the door or damaged by heat.
Changing the oven light (Lower oven only)
The oven light is a standard 40-watt-appliance halogen bulb. It comes on when the oven door is open. When the oven door is closed, touch LIGHT to turn the light on or off. It will not work during a self-cleaning or Green cleaning cycle.
CAUTION
Before changing your oven light, disconnect the electrical power to the oven at the main fuse or circuit breaker panel. Make sure the oven and the halogen bulb are cool.
1. To change the halogen bulb, you must tilt the broil heater down. To do this, turn the circular nut on the support counterclockwise while holding the broil heater. The broil heater should loosen and tilt down. Important: The broil heater is not a removable part. Do not force the broil heater down. Do not let it drop down.
2. Remove the glass cover.
3. Remove the halogen bulb cover.
4. Replace the halogen bulb.
5. When done, replace the glass cover, and then follow Step 1 above in the reverse order to return the broiler to its correct position.
Troubleshooting
If the oven malfunctions or has performance issues, review the tables in this section. If you cannot resolve the issue yourself, call Dacor Customer Assurance, (800) 793-0093.
Control display
Problem
Possible cause
Solution
The display goes blank.
Blown fuse or tripped circuit breaker.
Replace the fuse or reset the circuit breaker.
Touch-controls do not respond to touch.
• Touch model: Moisture on control panel
• Lock function set
• Remove the moisture; try again.
• Release lock function.
For the microwave oven
Symptom
Cause
Action
General
Touch-controls do not respond to touch.
Touch models: Moisture on control panel.
Wipe moisture from exterior.
Child lock activated.
Deactivate Child lock.
The oven does not work.
Power not supplied.
Verify there is power and oven is plugged in; check for blown fuse /tripped circuit breaker.
Door is open.
Close door, and retry.
Door-open safety mechanisms covered in foreign matter.
Remove foreign matter, and retry.
Oven stops during operation
User opened door to turn food.
Turn food; tap Start to resume operation.
Power turns off during operation.
Oven has been on for extended period.
After cooking for an extended period, let oven cool.
Cooling fan not working.
Listen for sound of cooling fan.
No food in oven.
Put food in the oven.
Insufficient ventilation space for oven.
For intake/exhaust vents on front/rear of oven, keep gaps specified in installation instructions.
Several power plugs used in same outlet.
Designate one socket for oven.
Popping sound during operation; oven not working.
Cooking sealed food or using a container with a lid may cause popping sounds.
Remove lids so containers do not burst.
Oven exterior too hot during operation.
Insufficient ventilation space for oven.
For intake/exhaust vents on front/rear of oven, keep gaps specified in installation instructions.
Door not opening properly.
Food residue stuck between door and oven chassis.
Clean area, then open door.
Heating (incl. Warm function) does not work.
Oven may not work, too much food being cooked, or improper cookware used.
Put 1 C water in microwave-safe bowl; run oven 1 min. to verify that water heats; use less food; restart function. Use flat-bottom container.
Thaw function not working.
Too much food being thawed.
Reduce amount of food, and retry function.
The interior light dim or non-functioning.
Door left open for long time.
Interior light may automatically turn off during Eco function operation; close/reopen door, or tap CANCEL.
Interior light covered by residue.
Clean oven chamber, and recheck.
Beeping sound during cooking
If Auto Cook is active, beep means it is time to turn food during thawing.
After turning food, press the START button again to restart operation.
Oven not level.
Oven installed on uneven surface.
Verify surface below oven is even and stable.
Sparks during cooking.
Metal containers are used during oven/ thawing functions.
Do not use metal containers.
When power is connected, oven instantly starts working
Door not closed properly.
Close door and recheck.
There is electricity coming from the oven.
The power or outlet not properly grounded.
Ensure power and outlet are properly grounded.
Water drips. Steam leaves via a door crack. Water in the oven.
There may be water/steam depending on type of food. This is normal.
Let oven cool, then wipe with dry towel.
Brightness in oven varies
Brightness varies depending on power output and selected function.
Power output variations during cooking are not malfunctions.
Cooling fan runs after cooking is done.
To ventilate oven, cooling fan keeps running 3 min. after cooking is done.
No action; this is normal.
Optitray
While turning, optitray derails or stops turning.
Missing/improperly installed roller ring.
Install/fix roller ring, then retry.
Turntable drags.
Roller ring improperly set, food too heavy, or container contacts oven walls.
Remove some food. Use smaller container.
Turntable rattles as it turns.
Food/residue on bottom of oven.
Remove residue.
Broiling
Smoke comes out during operation.
During initial operation, smoke may come from heating elements.
This is normal. After you run the oven 2-3 times, it should stop.
Food is on heating elements.
Let oven cool; remove food from heating elements.
Food too close to grill.
Put food a suitable distance from grill.
Food improperly prepared/arranged.
Prepare and arrange food properly.
Convection
Oven does not heat.
Door is open.
Close door; retry.
Smoke comes out during preheating.
During initial operation, smoke may come from the heating elements.
This is normal. After you run the oven 2-3 times, it should stop.
Food is on the heating elements.
Let oven cool; remove food from heating elements.
Smell of burning or plastic when using oven.
Plastic or non-heat-resistant cookware used.
Use glass cookware suitable for high temps.
Bad smell from inside oven.
Food residue or plastic has melted and stuck to interior.
Run Steam Bake for 1 hr, and wipe with dry cloth. Put in lemon slice to help remove odor.
Oven not cooking properly.
Oven door frequently opened when cooking.
For best results, cook with the door closed.
Oven controls incorrectly set.
Reset oven controls and try again.
Broil heater or other accessories incorrectly inserted.
Correctly insert the accessories.
Wrong size/type of cookware used.
Use suitable cookware with flat bottoms.
For the lower oven
Problem
Possible cause
Solution
Oven will not turn on.
The oven is not completely plugged into the electrical outlet.
Ensure electrical plug is inserted in live, properly grounded outlet.
Blown fuse/tripped circuit breaker.
Replace fuse or reset circuit breaker.
Oven controls improperly set.
See Basic operations, starting on pg.19.
The oven is too hot.
Allow the oven to cool.
Incomplete service wiring.
Call for service.
Power outage.
Check to see if house lights turn on. Call local electric company if needed.
Oven light will not turn on.
The light is loose or defective.
Tighten/replace lamp; call for service if door light will not turn on.
Broken light switch.
Call for service.
Excessive smoke during broiling.
Oven controls improperly set.
See Basic operations, starting on pg.19.
Meat placed too close to element.
Reposition rack; preheat broil element for searing.
Meat was not properly prepared.
Trim excess fat from meat.
Grease buildup on oven surfaces.
Regular cleaning is needed when broiling frequently.
Food not baking/roasting properly.
The oven controls not set correctly.
See Basic operations, starting on pg.19.
Oven rack not properly installed.
See Using the oven racks, pg. 68
Oven thermistor needs adjusting.
See Settings > Temp, pg. 81.
Food not broiling properly
Serving size may be inappropriate.
See Broiling recommendation guide for
serving sizes, pg. 60, and retry.
The rack is improperly positioned.
See Broiling recommendation guide, pg. 60.
Cookware is unsuitable for broiling.
Use suitable cookware.
In some areas, the voltage may be low.
Preheat broiler 10 min.; see Broiling recommendation guide, pg. 60.
Oven temp too hot/too cold.
The oven thermistor needs to be adjusted.
See Settings > Temp, pg. 81.
- Dripping water
- Steam from door seam
- Water remains in oven.
Water/steam may appear depending on food being cooked. This is normal.
Let oven cool; wipe with dry towel.
Boiling water heard during steam cooking
Water is being heated by steam heater.
This is normal function.
The oven will not self-clean.
The oven temperature is too high to start a self-clean operation.
Allow the oven to cool and then reset the controls.
The oven controls have been set incorrectly.
See Self clean, pg. 71.
Self-cleaning cycle cannot start if Oven control lockout is active.
Deactivate Oven control lockout, pg. 33).
Excessive smoking during a self-cleaning cycle.
Excessive soiling in the oven.
Press OFF. Open windows to vent smoke. Wait until self-cleaning cycle is canceled. Wipe up soil, and restart self-cleaning cycle.
Oven door stays shut after self-cleaning.
Oven is too hot.
Let oven cool.
The oven is not clean after a self-cleaning cycle.
Oven controls not set correctly.
See Self clean, pg. 71.
Oven was heavily soiled.
Wipe up heavy spills; start self-cleaning cycle. Heavily soiled ovens may need another or a longer cycle.
Steam comes out of vent.
Convection mode is being used.
This is normal.
More food means more steam emitted.
Burning/oily odor from vent.
This is normal for a new oven and will disappear in time.
To hasten process, set a self-cleaning cycle for at least 3 hrs. See Self clean, pg. 71.
Strong odor.
Odor from insulation around inside of oven is normal for first few times oven is used.
Operate oven empty on bake setting at 400 °F for 1 hr.
Fan noise.
Convection fan turns itself on/off.
This is normal.
Oven racks not sliding easily.
The shiny, silver-colored racks were cleaned in a self-cleaning cycle.
Apply dab of veg. oil to paper towel, then wipe edges of oven racks.
Oven door locked.
Tripped circuit breaker or power outage when oven door was locked.
Activate Control Lockout, then unlock the control. See Oven Control Lockout, pg. 21.
Information codes
OVEN
Displayed code
Possible cause
Solution
C-d0
Occurs if control key is short for 1 min.
Clean screen; ensure no water is on/ around it. Turn off oven and retry. If problem persists, contact a Dacor service center.
C-d1
Occurs if door lock is mispositioned.
Press OFF, and then restart the oven. If the problem persists, disconnect all power to the oven for at least 30 seconds and then reconnect the power. If this does not solve the problem, call for service.
C-F0
Occurs if communication between Main and Sub PBA is interrupted.
C-F2
Occurs if communication between Main and Touch is interrupted.
C-10
The cooking sensor is open when the microwave is operating.
The cooking sensor is short when the microwave is operating.
C-20
The oven sensor is open when the oven is operating.
The oven sensor is short when the oven is operating.
C-21
This code occurs if the internal temperature rises abnormally high.
C-23
The temp probe sensor is short when the oven is operating.
C-30
The PCB sensor is open when the oven is operating.
The PCB sensor is short when the oven is operating.
C-31
This code occurs if the PCB temperature rises abnormally high.
Call for service.
C-70
The steam sensor is open when the oven is operating.
Press OFF, and then restart the oven. If the problem presists, disconnect all power to the oven for at least 30 seconds and then reconnect the power. If does not solve the problem, call for service.
The steam sensor is short when the oven is operating.