Loading ...
Loading ...
Loading ...
OPERATING INSTRUCTIONS
9
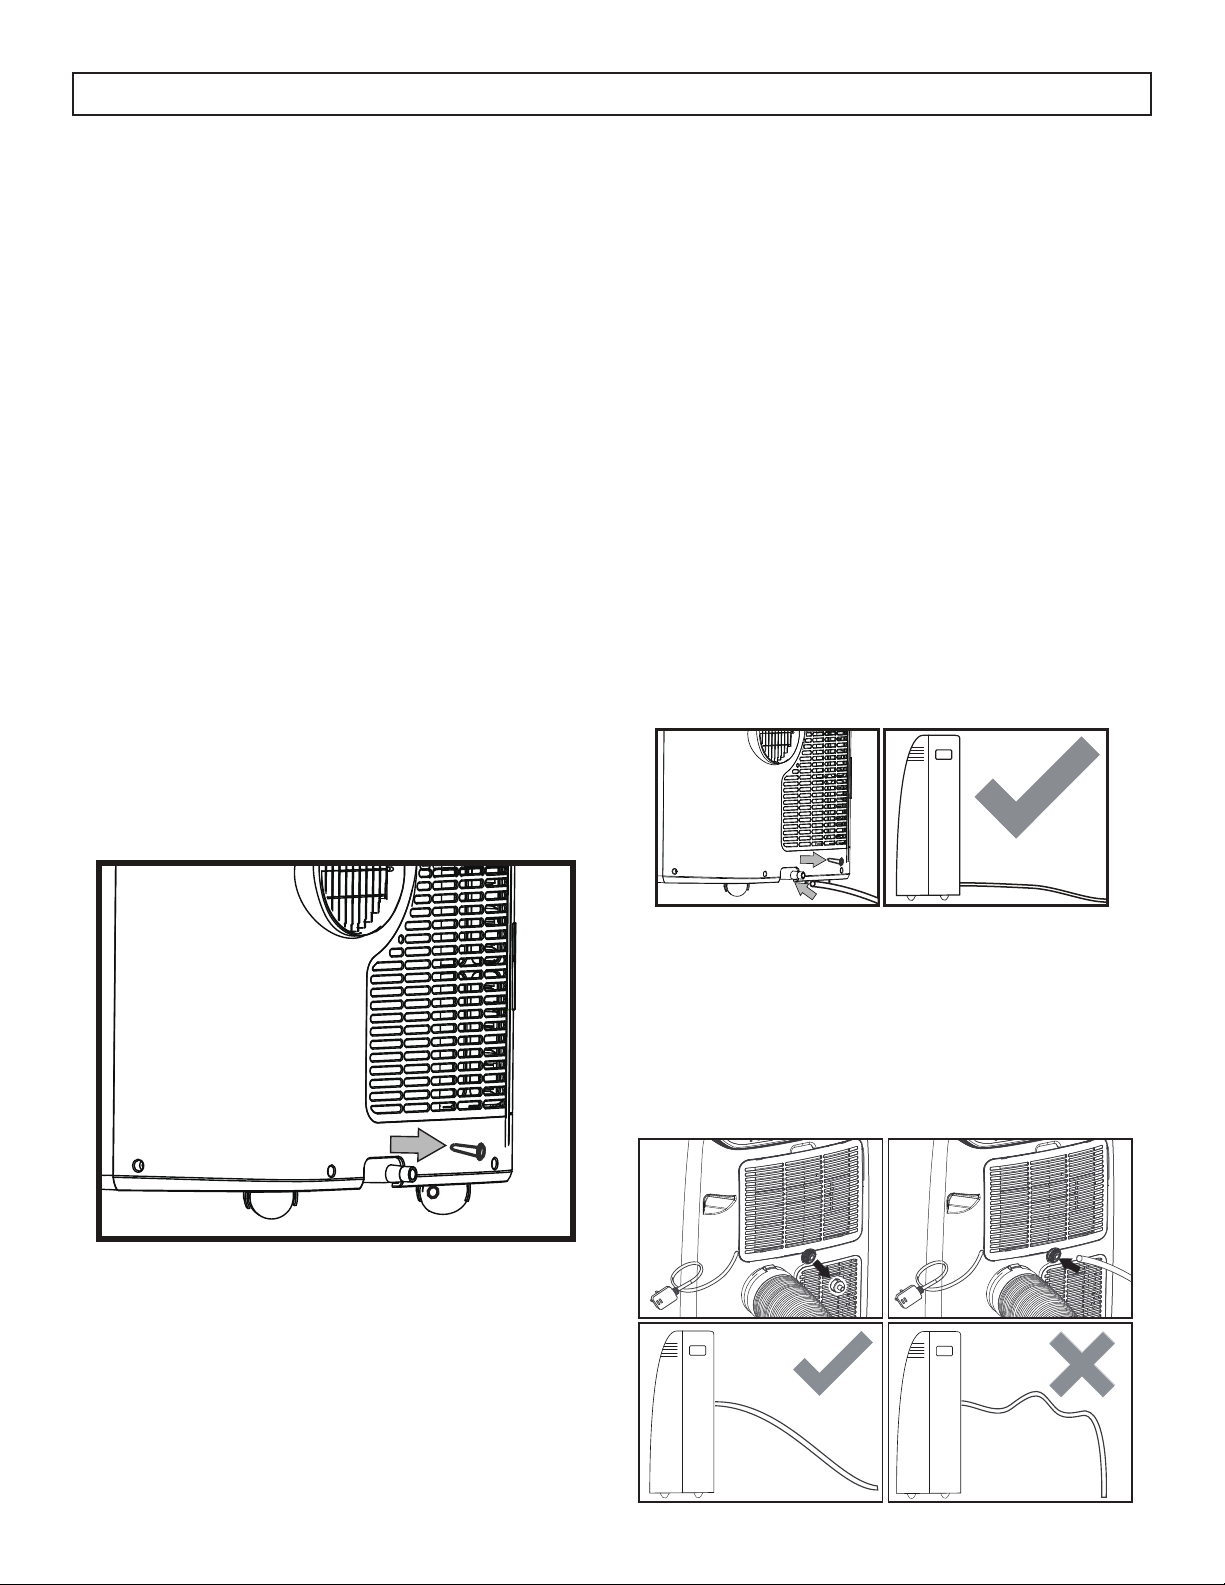
2. Continuous Drain
During the dry mode, you may wish to set up the
continuous drain option so that the appliance will
automatically drain collected water. Ensure that the
appliance is turned off and unplugged from the
power source before setting up the drain hose.
Remove the drain plug and attach the drain hose
that was provided with the appliance. Ensure that
there are no kinks or bends in the drain hose as this
can stop water from draining.
Place the open end of the drain hose over the
receptacle that the appliance will drain into; this
could be a basement fl oor drain, a sink or similar.
Remember that there is no drain pump in this
appliance, the continuous drain is activated by
gravity only. Ensure that the drain hose goes straight
down toward the fl oor from the drain connection.
If the hose is not positioned directly downwards,
water will not drain correctly.
WATER DRAINAGE
When the internal drain pan becomes full the
appliance will stop operating and the display
will show error code “Ft”. The air conditioning or
dehumidifying action will stop but the fan may
continue to operate.
There are two methods to drain water from the
appliance:
1. Drain Plug
1. Turn the appliance off and unplug it from the
power source.
2. Carefully move the appliance to a location
where the water can be drained.
3. Remove the drain plug and allow the water to
completely drain.
4. Replace the bottom drain plug, pressing fi rmly to
ensure a tight fi t and no leaks.
5. The “Ft” error symbol will disappear and the
appliance will resume regular function once
power is restored.
This appliance also includes a secondary drain
in the middle of the back panel. If the hose is not
draining when attached to the lower drain, move
the hose to the middle drain using the same steps
outlined above. The middle drain being higher off
the ground, can provide better draining based on
the pull of gravity.
Loading ...
Loading ...
Loading ...