Loading ...
Loading ...
Loading ...
Installation Instructions
41
INSTALLATION PREPARATION
Remove the packaging.
Flatten the product carton to use as a pad to lay
the dryer down on its side. Continue using the
carton to protect the finished floor in front of
the installation location.
KIT CONTENTS
❒ Right hand bracket
❒ Left hand bracket
❒ 4 rubber pads
❒ 4 #12 x 1″ screws
❒ 4 #8 x 1/2″ screws
TOOLS YOU WILL NEED
❒ Phillips screwdriver
❒ Open-ended wrench
❒ Pliers
❒ Gloves
❒ Level
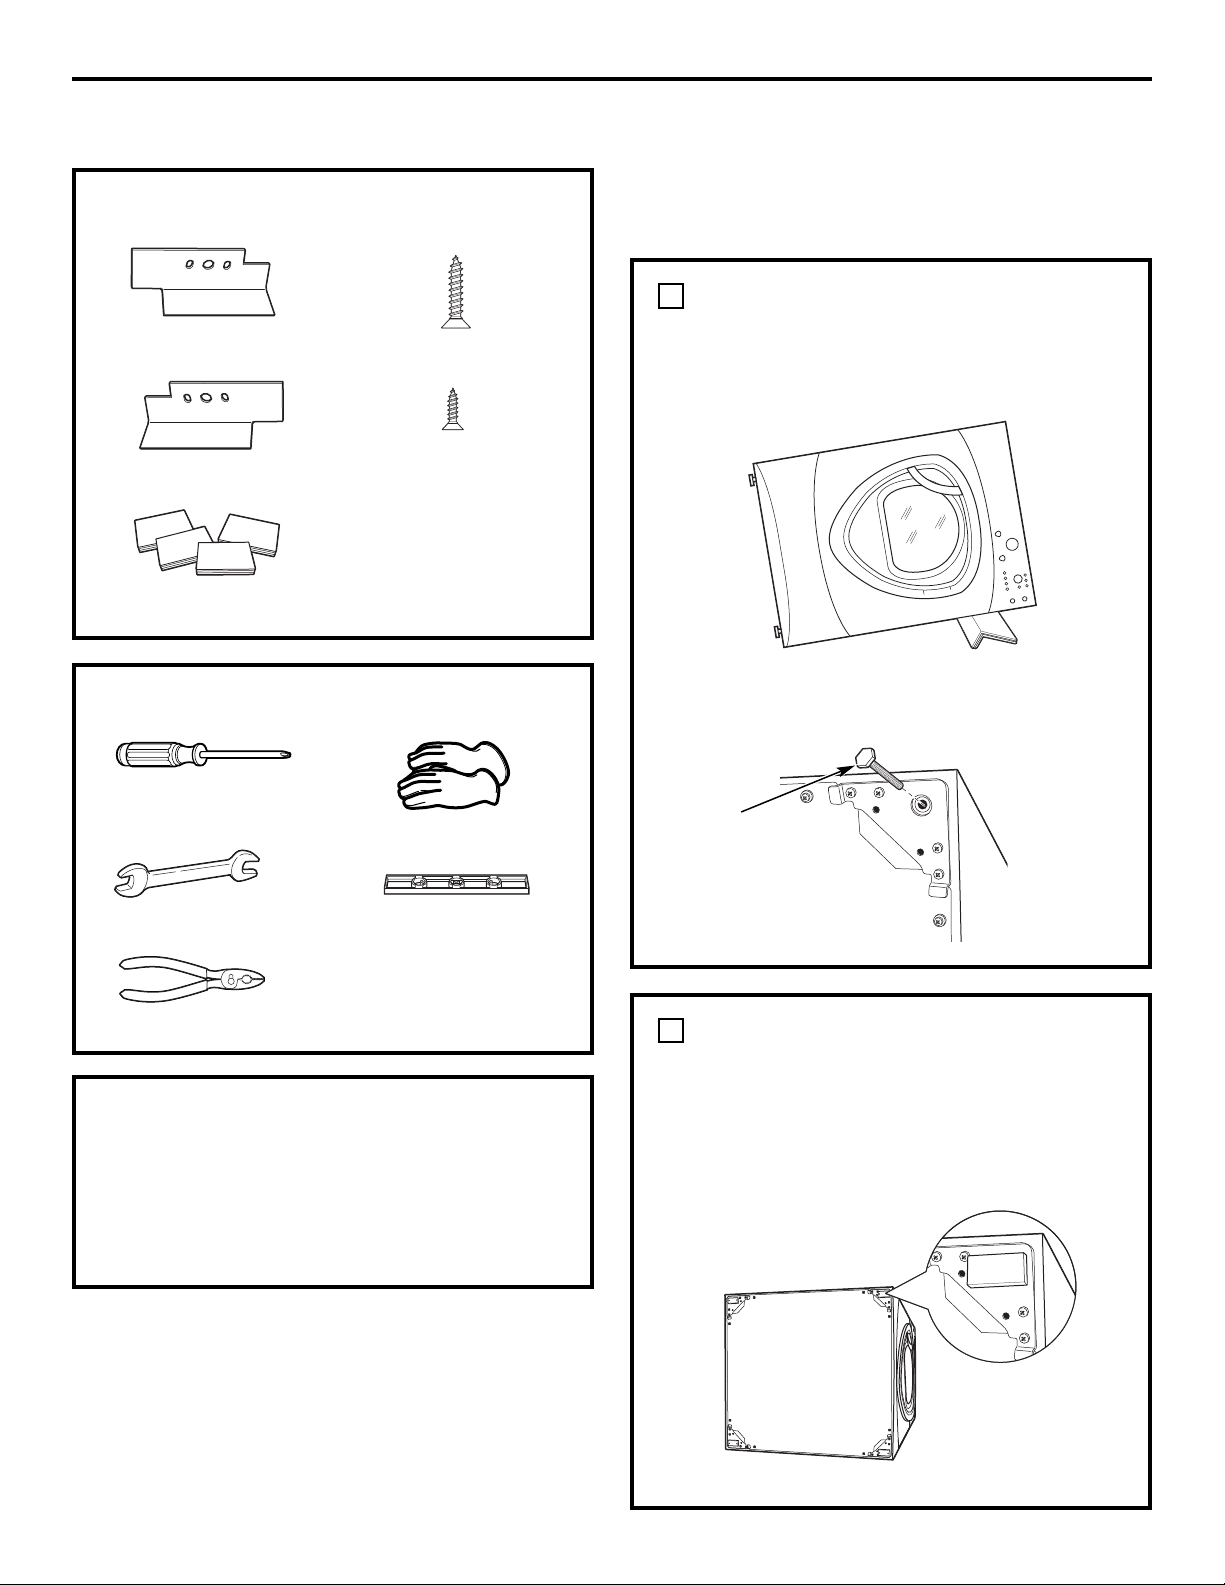
INSTALLING THE STACK
BRACKET KIT
REMOVE THE DRYER LEVELING LEGS
A. Carefully lay the dryer on its side. Use the
packing material so you don’t scratch the finish
on the dryer.
1
B. Use an open-end wrench or pliers to remove
the dryer leveling legs.
Back out and remove
all 4 leveling legs
INSTALL RUBBER PADS
TO DRYER BASE
Locate the 4 rubber pads in the parts package.
Remove the adhesive backing and firmly place
over on the bracket where you removed the
leveling legs.
2
Loading ...
Loading ...
Loading ...