Loading ...
Loading ...
Loading ...
4
ASSEMBLING YOUR COOKTOP
Assembling the Burners
Check your model number. Then refer to the following for
information specific to your burners.
B
C
D
A
WCG51US0D and WCG75US0D
A. SpeedHeat™ burner
B. Standard burner
C. Standard burner
D. Accusimmer
®
burner
B
C
D
E
A
WCG51US6D
A. Standard burner
B. SpeedHeat™ burner
C. Accusimmer
®
burner
D. Standard burner
E. Standard burner
WCG9
A. Standard burner
B. FlexHeat™ burner
C. Accusimmer
®
Plus burner
D. Standard burner
E. Standard burner
B
C
D
E
A
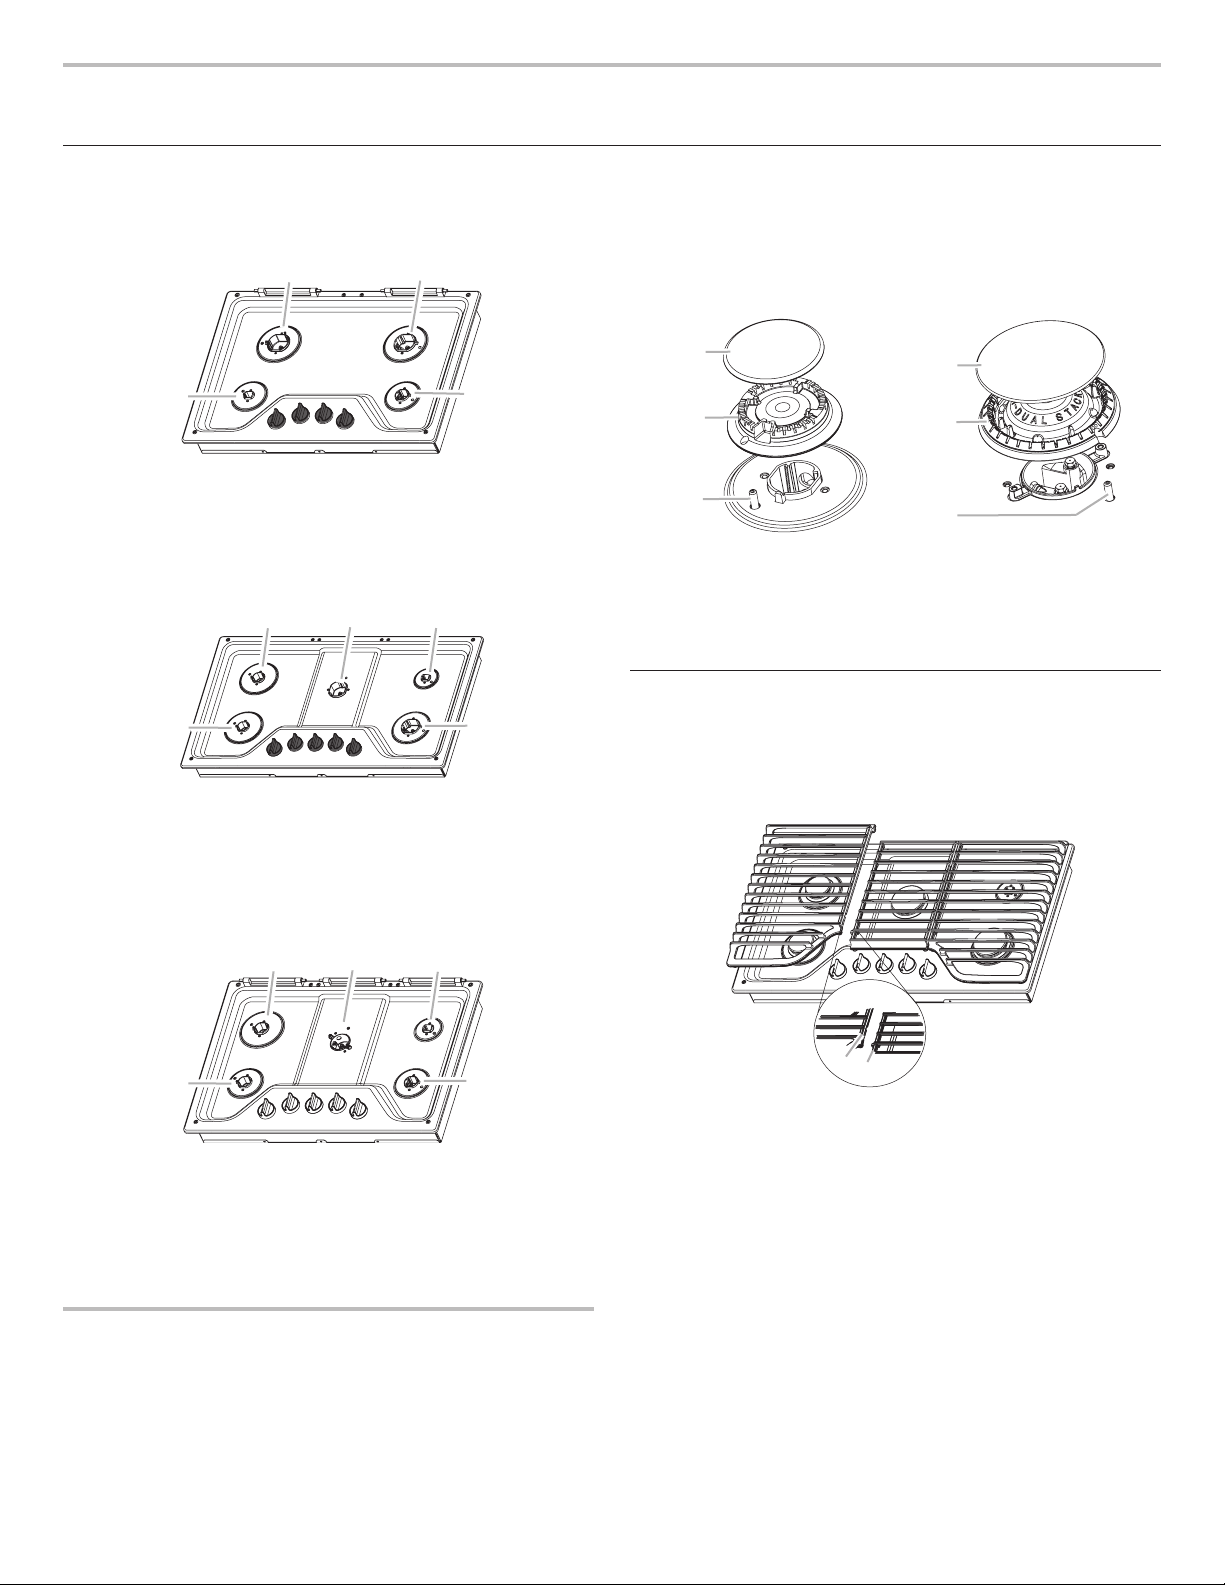
Burner Head Placement
■ Burner caps and heads are included with your cooktop.
■ Always match the burner head size to the cap size.
■ Always line up the hole in the burner head to the electrode.
■ The cooktop comes with an extra Melt cap on WCG9 series
models. This is a large cap with “MELT” and “FOR SMALLEST
BURNER” printed on it. Use this cap over the smallest burner
only.
■ Standard, SpeedHeat™ and FlexHeat™ burners are similar
in assembly. Note that there is no hole in the FlexHeat™ dual
flame burner head to insert the electrode. The FlexHeat™
burner electrode (C) aligns with the semicircle notch in the
head (B).
A
B
C
A
B
C
Standard and
SpeedHeat™ Burners
A.Cap
B. Head
C. Electrode
FlexHeat™ Burner
A. Cap
B. Head
C. Electrode
Grate Placement
To install the grates, align the feet on the center grate with the
indents on the cooktop. Then install the 2 outer grates by aligning
the tabs on the center grate with the slots in the outer grates. Be
sure to line up the slots and tabs for proper grate alignment.
A
B
A.Outer grate slot
B. Center grate tab
Loading ...
Loading ...
Loading ...