Loading ...
Loading ...
Loading ...
10
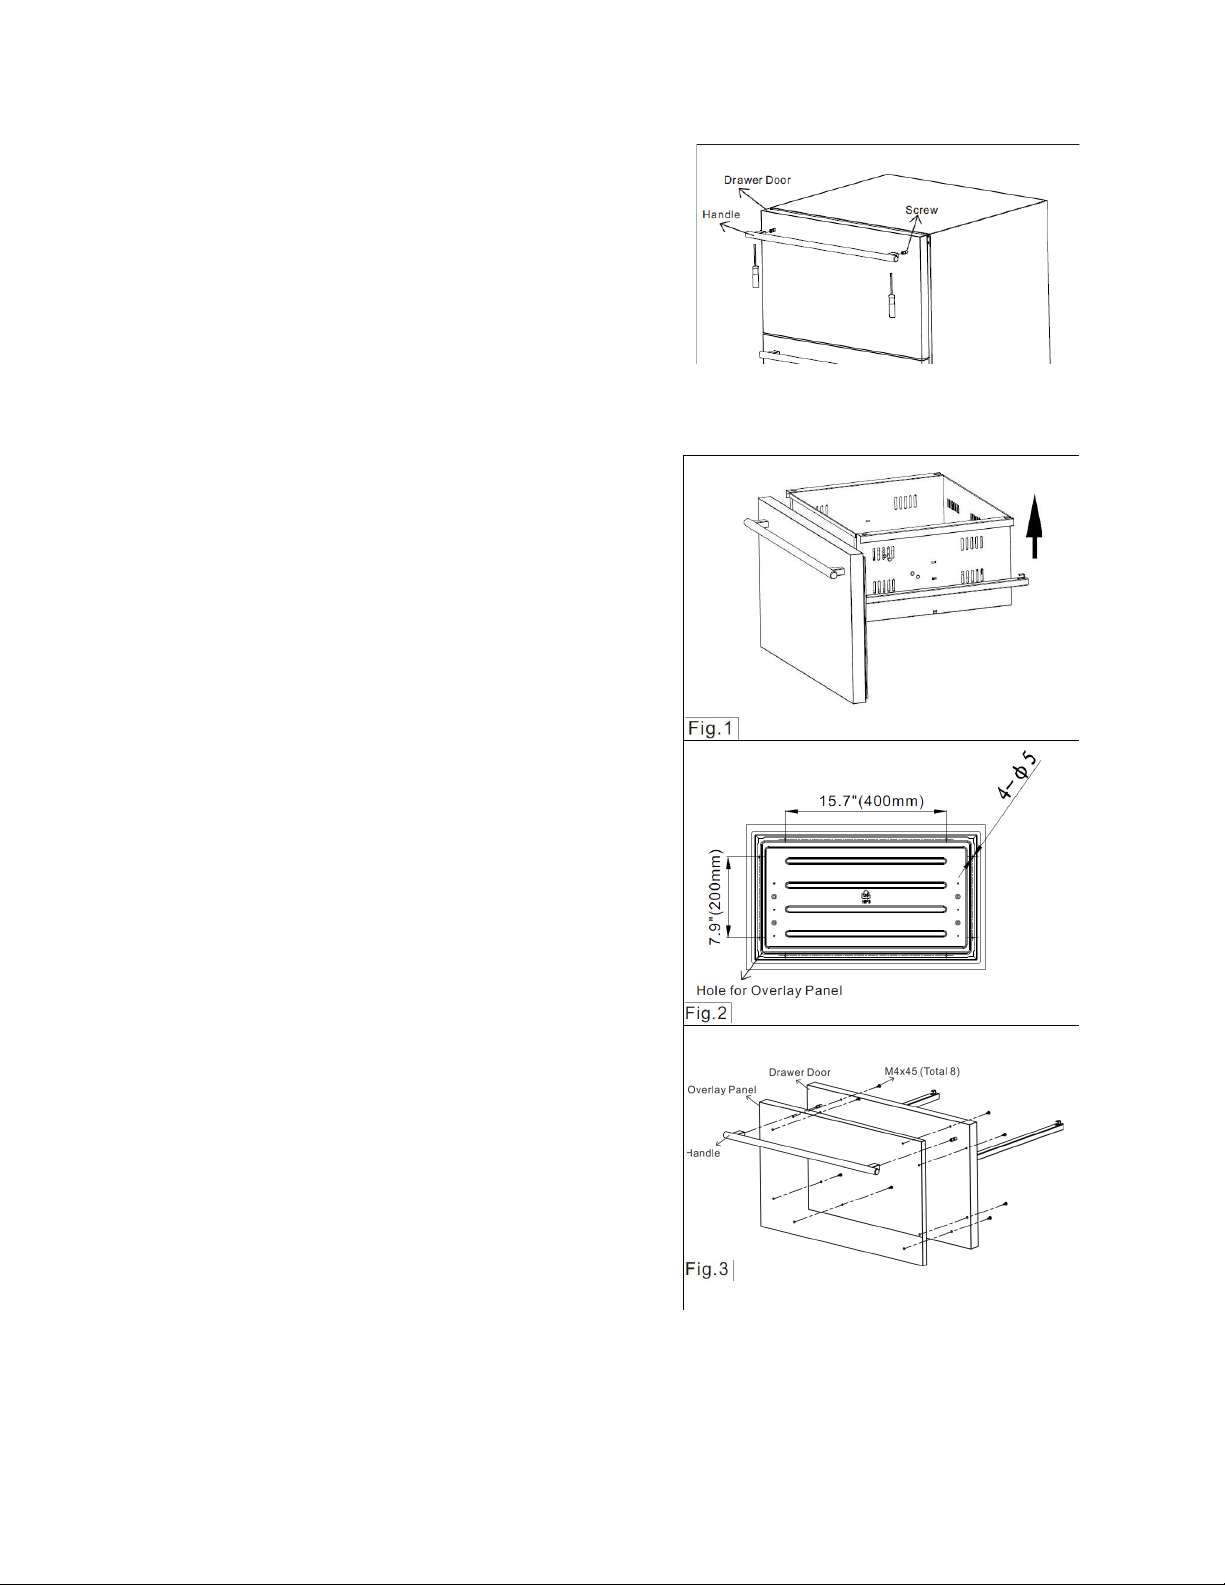
Installing the Stainless Steel Handles
This appliance includes two stainless steel handles that
are not required to operate the appliance. To install the
handles, follow the instructions below:
1. Remove the door gasket.
2. Install the handle with the screws provided. DO NOT
over-tighten as this will cause damage to the
stainless steel door surface.
3. Replace the door gasket.
Full Overlay Panel Installation Instructions (ADRD24)
This model is designed for a field-installed overlay
panel, which can cover the stainless steel to give a
built-in appearance. The overlay panel and appropriate
hardware are not included with the appliance, and you
must install the panel yourself.
Please follow the instructions below for installation:
·
Remove any items stored inside the drawers, and
take the drawers out.
·
Peel off the gasket, and remove the handle by
removing the two screws that attach the handle to
the door.
·
Drill the 8 holes shown by using a 9/50” drill bit on
the 4 sides of drawer door front. (Fig.2)
·
Cut the overlay panels with 3/4” thickness to the
following dimensions: 23.34” x 14.17”(WxH).
·
If reusing the handles that came with the appliance,
drill two holes with diameter 9/50” in the overlay
panel.
·
If user-supplied handles will be used, attach the
handles to the overlay panels by using the flat head
screws and drive the screws flush with the panels.
·
Attach the handle and overlay panel together to the
drawer face using 2 M4x45 screws and through the
2 existing holes on the door face. Then attach the
overlay panel to the drawer face using 8 M4x45
screws and through 8 existing holes inside the door
groove. (Fig. 3)
·
Attach the overlay panel to the drawer face through
the existing holes inside the door groove, using the
8 M4x45 screws.
·
Peel back the gaskets, then align the left and right
side channels with the tracks in the cabinet.
Ensuring an even track engagement on both sides,
gently push the drawer into the cabinet until it
stops.
Loading ...
Loading ...
Loading ...