Loading ...
Loading ...
Loading ...
8
Installation
BUILT-IN CABINET INSTRUCTIONS
These appliances are designed for both built-in or free standing installation. For built-in installation,
ensure proper service access and ventilation, allow at least ¼” (6.35mm) space on each side and at the
top.
ELECTRICAL CONNECTION
This appliance requires a standard 115/120 Volt AC ~/60Hz electrical ground outlet with three-prong. Have
the wall outlet and circuit checked by a qualified electrician to make sure the outlet is properly grounded. The
cord should be secured behind the appliance and not left exposed or dangling to prevent accidental injury.
The appliance should always be plugged into its own individual electrical outlet which has a voltage rating
that matches the rating label on the appliance. This provides the best performance and also prevent over-
loading house wiring circuits that could cause a fire hazard from overheated. Never unplug the appliance by
pulling the power cord. Always grip the plug firmly and pull straight out from the receptacle. Repair or replace
immediately all power cords that have become frayed or otherwise damaged. Do not use a cord that shows
cracks or abrasion damage along its length or at either end. When moving the appliance, be careful not to
damage the power cord.
EXTENSION CORD
Because of potential safety hazards, it is strongly recommended that you do not use an extension cord with
this appliance. However, if you must use an extension cord, it is absolutely necessary that it be a UL/CUL-
Listed, 3-wire grounding type appliance extension cord having a
CABINET OPENING DIMENSIONS (minimum)
BWR-1662SD
Width
24"
Depth
27” + 2” handle
Height
70”
WARNING: Improper use of the grounded plug can result in the risk of electrical shock. If the
power cord is damaged, have it replaced by a qualified electrician or contact Whynter Service
Department
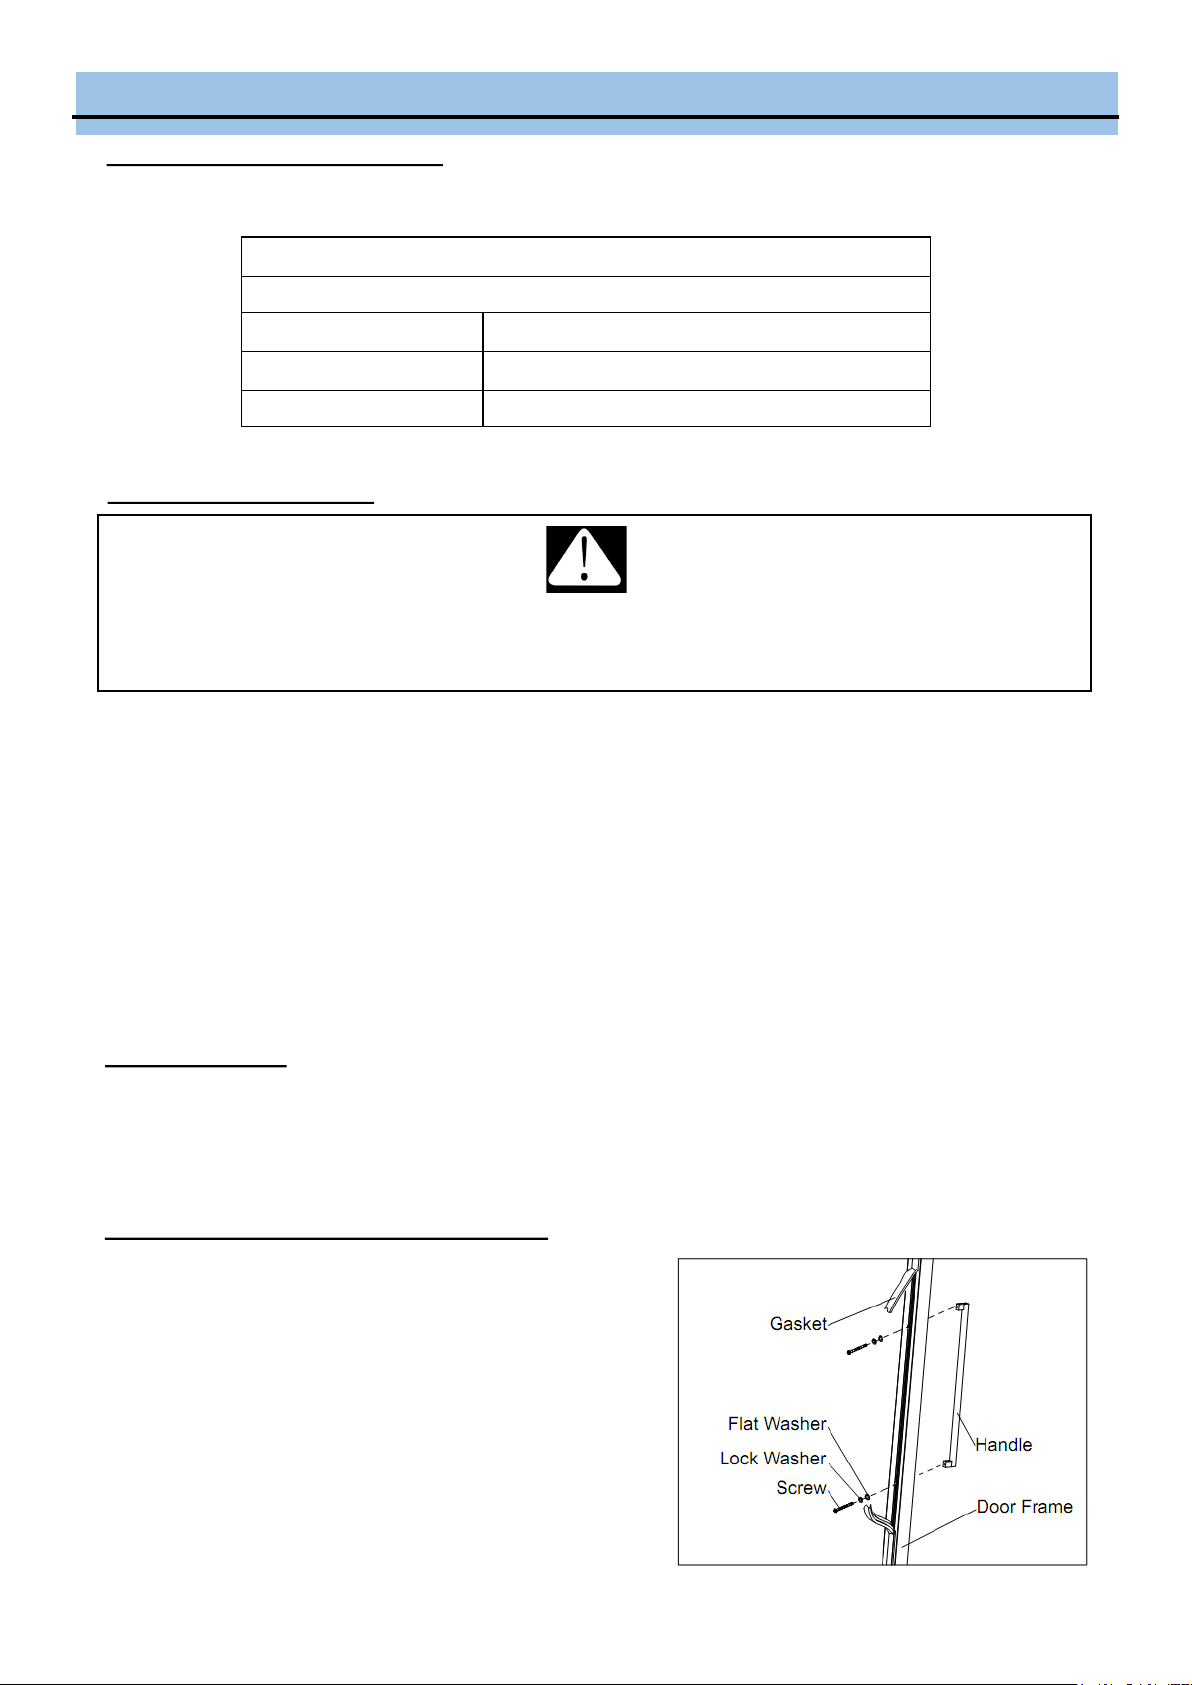
INSTALLING THE STAINLESS STEEL HANDLE
This stainless steel handle that is not required for operation.
To install the handle please follow the below instructions:
1. Remove door gasket. The gasket can be easily displaced
by hand, no tools are necessary.
2. Use a flat-head screwdriver to remove the two pre-installed
decorative screw covers from the back of the door. Some
models have no decorative covers.
3. Install the handle tightly as shown with the two screws,
lock washers and flat washers provided. (DO NOT over
tighten as this will cause damage to the handle and stainless
steel door frame).
4. Replace the door gasket.
Loading ...
Loading ...
Loading ...