
Loading ...
Loading ...
Loading ...
EN
Operation CFX28 – CFX65DZ
24
7.13 Replacing the AC fuse
D
➤ Disconnect the power supply to the device.
➤ Pull off the connection cable.
➤ Pry out the fuse insert (fig. 4 2, page 12) with a screwdriver.
➤ Replace the defective glass fuse with a new one that has the same type and rating
(4 A, 250 V).
➤ Press the fuse insert back into the housing.
➤ Reconnect the power supply to the device.
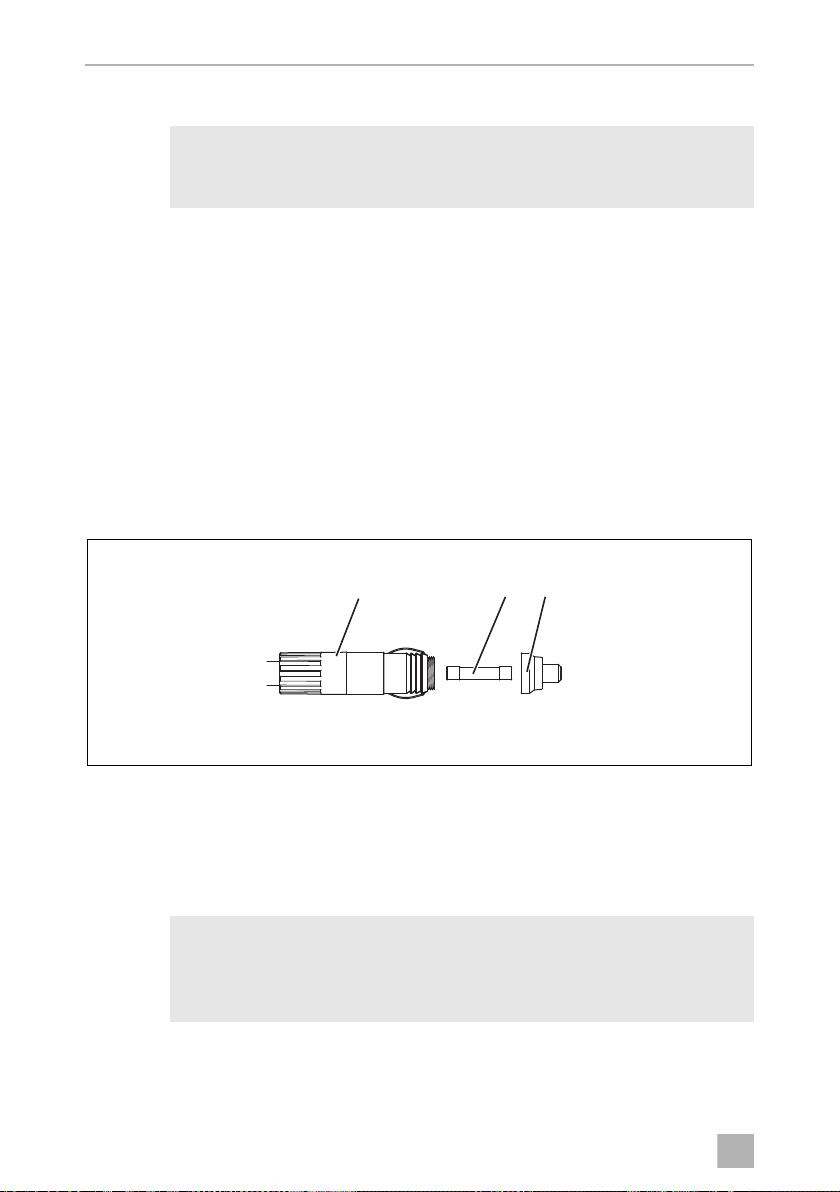
7.14 Replacing the DC plug fuse
➤ Unscrew the contact pin housing (3) from the plug (1).
➤ Replace the defective fuse (2) with a new fuse of the same type and rating (3AG,
Fast Acting, 10 A).
➤ Re-assemble the plug in reverse order.
I
DANGER! Danger of electrocution!
Disconnect the power supply and the connection cable before you
replace the device fuse.
NOTE - Internal DC fuse
There is an additional DC fuse inside the device (Automotive standard
blade fuse, 10 A). This fuse can only be replaced by an authorised repair
centre.
1 2 3
9
CFX-28-CFX-65--O-EN-AUSv2.book Seite 24 Dienstag, 3. April 2018 8:42 08
Loading ...
Loading ...
Loading ...