Loading ...
Loading ...
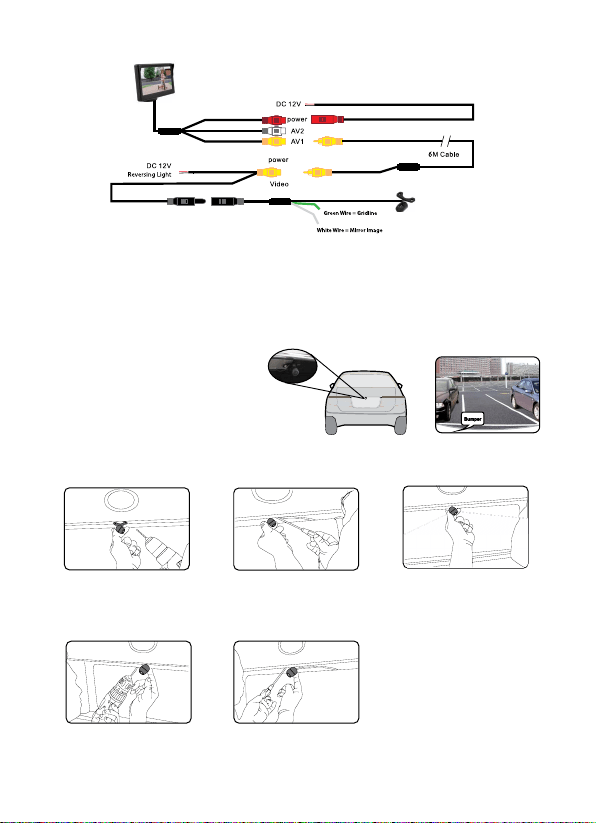
Wiring Diagram:
Installation - Butterfly Mount
1. Select a flat and centred location
near the number plate lamp at the
rear of the vehicle to mount camera.
IMPORTANT: When selecting this location it is highly recommended that the image transmitted
by the camera show the rear bumper and area behind the vehicle.
Front view option: RVK-50 functions as a rear
view camera standard and also supports front
view application. For front view application,
you can cut the thin WHITE wire near the
camera lead and restart power to see the
image reversed.
Grid-line option: RVK-50 comes with parking
grid-lines. To remove the grid-line application,
you can cut the thin GREEN wire near the
camera lead and restart power to show the
removal of grid-lines on your screen.
2. Attach tape to the bracket
of the camera, and drill
a small hole for the first
screw.
3. Use a screw driver to fix
the first screw, but don’t
tighten it yet.
4. Insert camera wire through
newly drilled hole and
mount securely in place.
Suggested location
to mount camera
5. Mark the position suitable
for the second screw and
drill a small hole for it.
6. Fix the second screw and
tighten both screws.
Loading ...