Loading ...
Loading ...
Loading ...
10
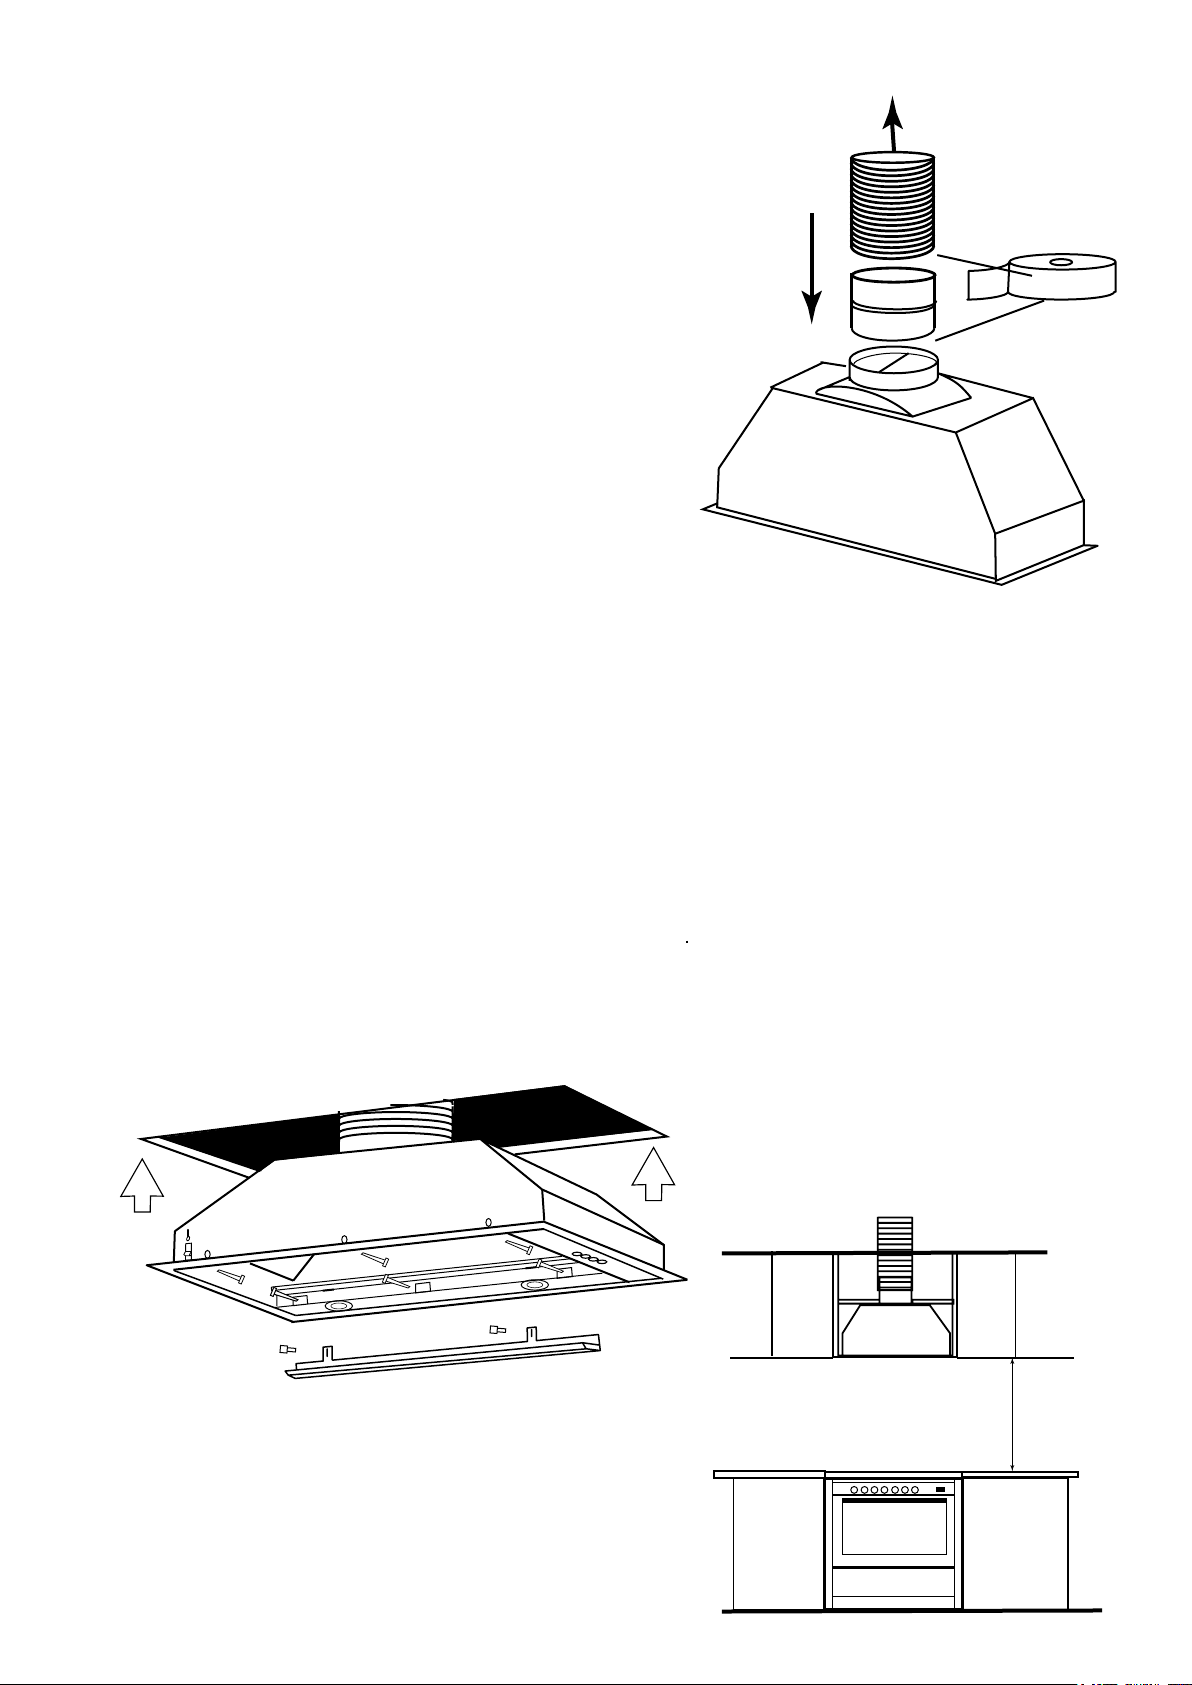
UNDER CUPBOARD RANGEHOOD INSTALLATION
Before beginning installation, to better handle the hood,
we advise removing all plastic lm, lters and the oil
catcher. The oil catcher is held by 2 thumb screws. When
removed there are 3 square cut outs that provide access
to the screw mounting holes.
Attach the black air outlet adapter over the hood. Tighten
it with 4 screws. Snap in the aps.
The ducting must be attached to the rangehood before
installing the hood into the cupboard. FIG 1.
Slide the 150 mm diameter ducting over the sleeve.
Stretch the diameter of the ducting for a snug t. Seal
with duct tape.
Before xing the hood to the cupboard unit, drill a hole of
165mm diameter for the150 mm diameter exhaust duct-
ing in the top of the cupboard and ceiling.
1.
2.
3.
4.
5.
6.
7.
8.
9.
10.
To motor unit connection
FIG 1
Check the position of the power outlet and consider where the power cable will run. A hole might
have to be made in the wall unit to accommodate the plug and cable
On the side of the hood there are 2 spring steel ttings to assist installation. Adjust the height
of the spring steel to match the thickness of the mounting panel. The hood can be slid into the
opening and these springs will take some of the weight while the mounting screws are tted.
Lift the rangehood and t through the opening of the cabinet feeding the ducting up through the
pre drilled holes.
Secure the unit by using 6 long mounting screws, 3 into each side - FIG 2.
Ret the oil catcher. Be careful not to scratch the rangehood. Ret the lters.
Oil Catcher
750 mm for gas
650 mm for electric
Loading ...
Loading ...
Loading ...