Loading ...
Loading ...
Loading ...
6
2. Setting up the monitor
2.2 Operating the monitor
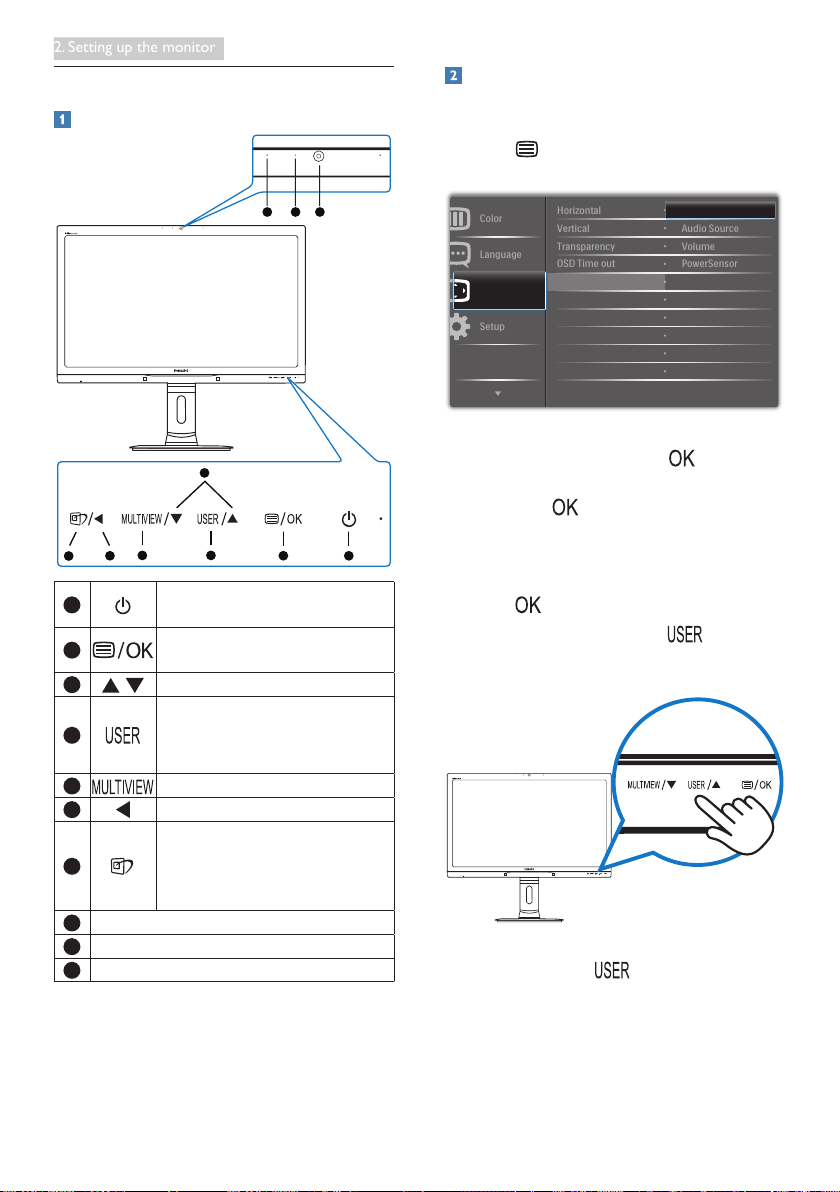
Description of the control buttons
5 4
3
2
1
7
6
10 9 8
1
Switch monitor’s power ON and
OFF.
2
Access the OSD menu
.
Conrm the OSD adjustment.
3
Adjust the OSD menu.
4
User preference key. Customize
your own preference function
from OSD to become the “user
key”.
5
PiP/PbP/Off/Swap
6
Return to previous OSD layer.
7
SmartImage
hot key
. There
are 6 modes to select: Ofce,
Photo, Movie, Game, Economy,
SmartUniformity, Off.
8
2.0 Megapixel Webcam
9
Webcam activity light
10
Microphone
Customize your own “USER” key
This hot key allows you to setup your favorite
function key.
1. Press button on the front bezel to
enter OSD Menu Screen.
2. Press ▲ or ▼ button to select main menu
[OSD Settings], then press button.
3. Press ▲ or ▼ button to select [User],
then press button.
4. Press ▲ or ▼ button to select your
preferred function: [Input], [Audio Source],
[Volume], or [PowerSensor].
5. Press button to conrm your selection.
Now you can press the hotkey directly on
the front bezel. Only your pre-selected function
will appear for quick access.
For example, if you selected [Audio Source] as
the hotkey, press the button on the front
bezel, the [Audio Source] menu appears.
Loading ...
Loading ...
Loading ...