Loading ...
Loading ...
Loading ...
4
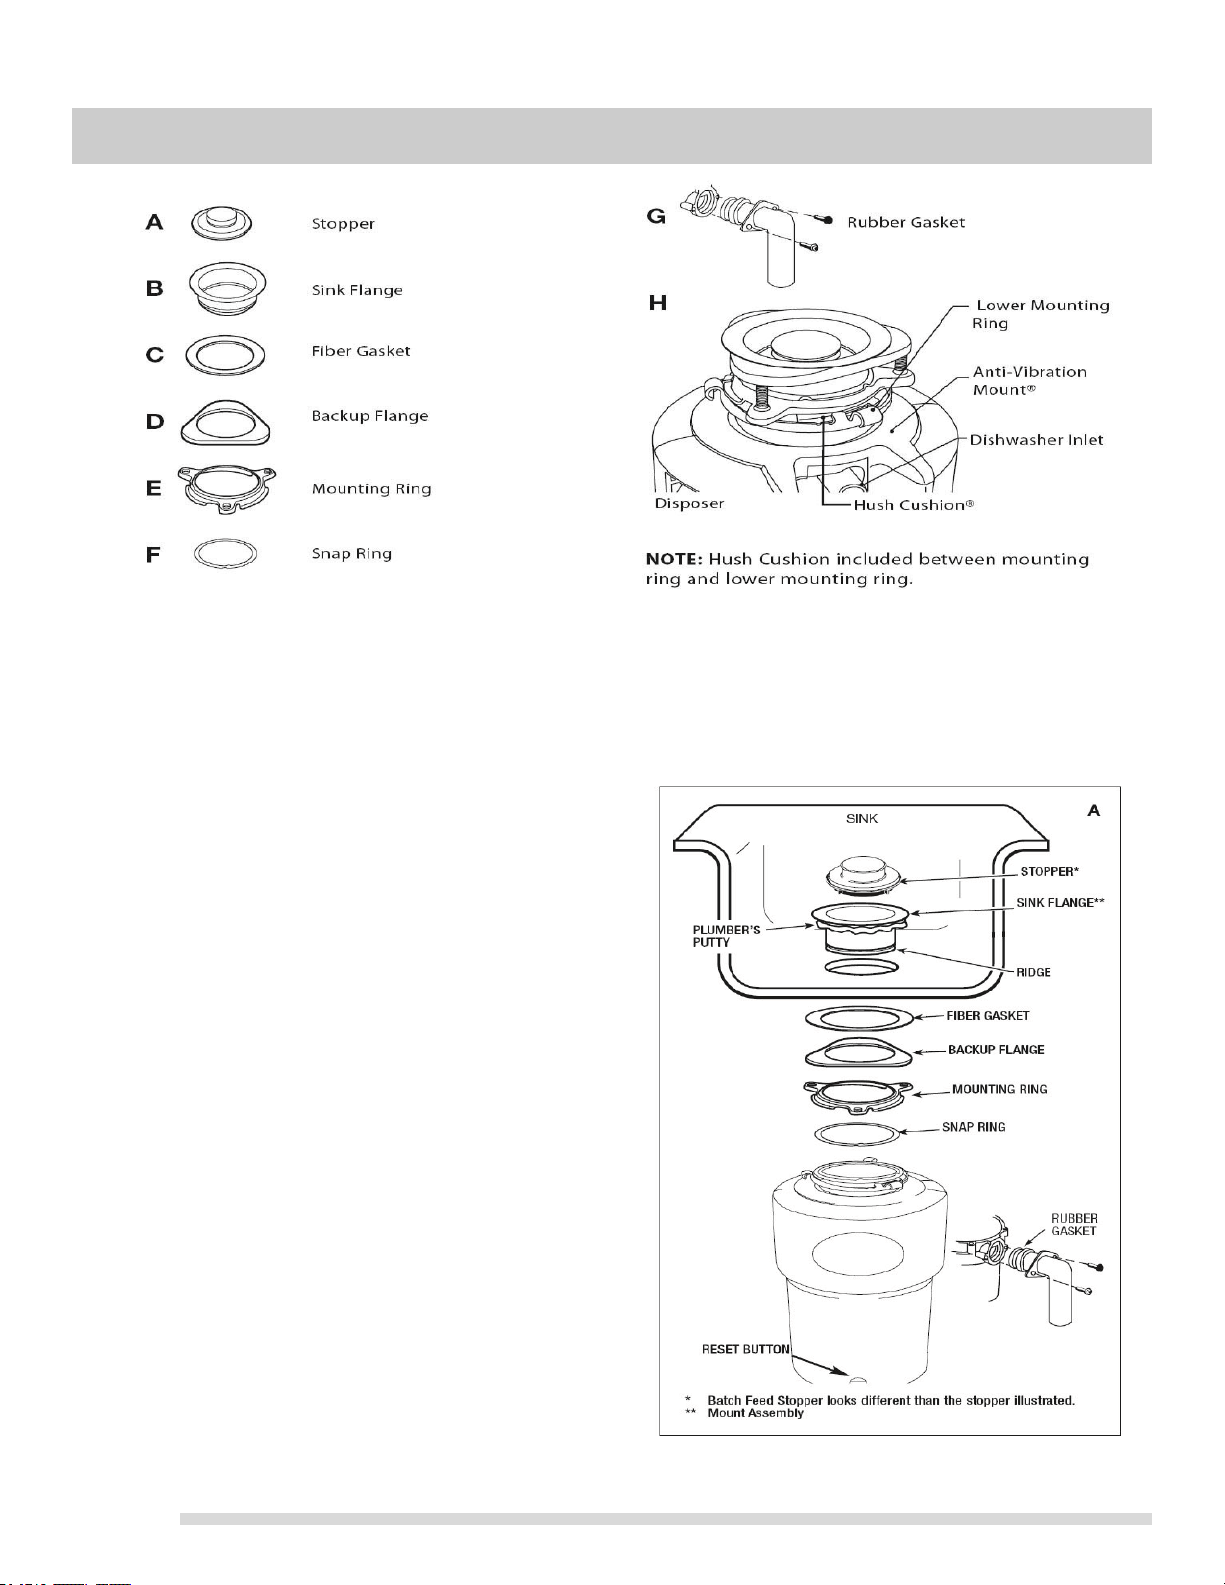
INSTALLATION OF MOUNTING ASSEMBLY
Mount System
READ COMPLETELY BEFORE STARTING
A. Disassemble the mounting assembly, as it has been
shipped, by turning the sink flange assembly until the
projections align with the notches in the lower mount
ring and allow you to pull th sink flange up and out of
the remaining lower mount assembly. Note the
sequence of these parts as they are stacked to identigy
each part. Unscrew the 3 mount screws until the
mounting ring can be moved to the top of the back up
flange. Remove the snap ring with a screw driver.
B. Keep these assembled parts together and set aside.
Before you connect the disposer to the mount
assembly under the sink. Make sure the lower
mounting is in place and teh hush cushion is engaged
properly to the top of the hopper.
C. Be sure your sink is clean. Pack the underside rim of
the sink flange with plumber’s putty. Position the sink
flange so it is centered and readable as you look into
your sink. Push the sink opening to make a good seal.
DO NOT move or rotate the sink flange once seated or
the seal may be broken.
NOTE: Pay close attention to the order of mount assembly parts, as they have been correctly assembled by the factory.
D. Take the remaining portion of the mount assembly, as it
was set aside and make sure that the rubber gasket is
on top of the protector ring. From under the sink, while
holding the sink flange firmly with on hand, line up the
notches in the mount ring with the projections of the
sink flange. Slide the mount assembly up onto the sink
flange. Slide the mount assembly up onto the sink
flange, past the projections
E. Tighten the 3 mounting screws evenly with a
screwdriver (see E). DO NO OVERTIGHTEN! Trim off
excess putty.
Loading ...
Loading ...
Loading ...