Loading ...
Loading ...
Loading ...
4
INSTALLATION INSTRUCTIONS
TOOLS YOU WILL NEED
Flat blade and Phillips
screwdrivers
Pencil
Duct tape
Saw (saber or keyhole)
Electric drill
Metal snips
(in some applications)
Pliers
Tape measure
Wire stripper
Flashlight
Caulking
Level
PLAN THE INSTALLATION
CAUTION: Remove the house fuse or open
the circuit breaker before beginning the installation.
<RXUQHZKRRGZLOOILWDVWDQGDUGswide flush bottom or
recessed bottom, framed or frameless kitchen cabinet which
has a minimum depth of 11s from the face to the inside of the
back wall.
The unit is ducted vertically. To change to horizontal ducting
see the instructions.
For safe operation, the mounted hood must be a minimum of
24s above the cooking surface.
For easiest installation, the range hood should be installed in the
cabinet before mounting the cabinet to the wall.
NOTE: Remove the glass visor from the unit before installing the
hood in the cabinet to protect the visor from damage.
NOTE: Any home ventilation system, such as a ventilation
hood, may interrupt the proper flow of combustion air and
exhaust required by fireplaces, gas furnaces, gas water
heaters and other naturally vented systems. To minimize the
chance of interruption of such naturally vented systems, follow
the heating equipment manufacturer’s guidelines and safety
standards such as those published by NFPA and ASHRAE
When applicable, install any makeup (replacement) air
system in accordance with local building code requirements.
Visit GEAppliances.com for available makeup air solutions.
INSTALL THE HOOD
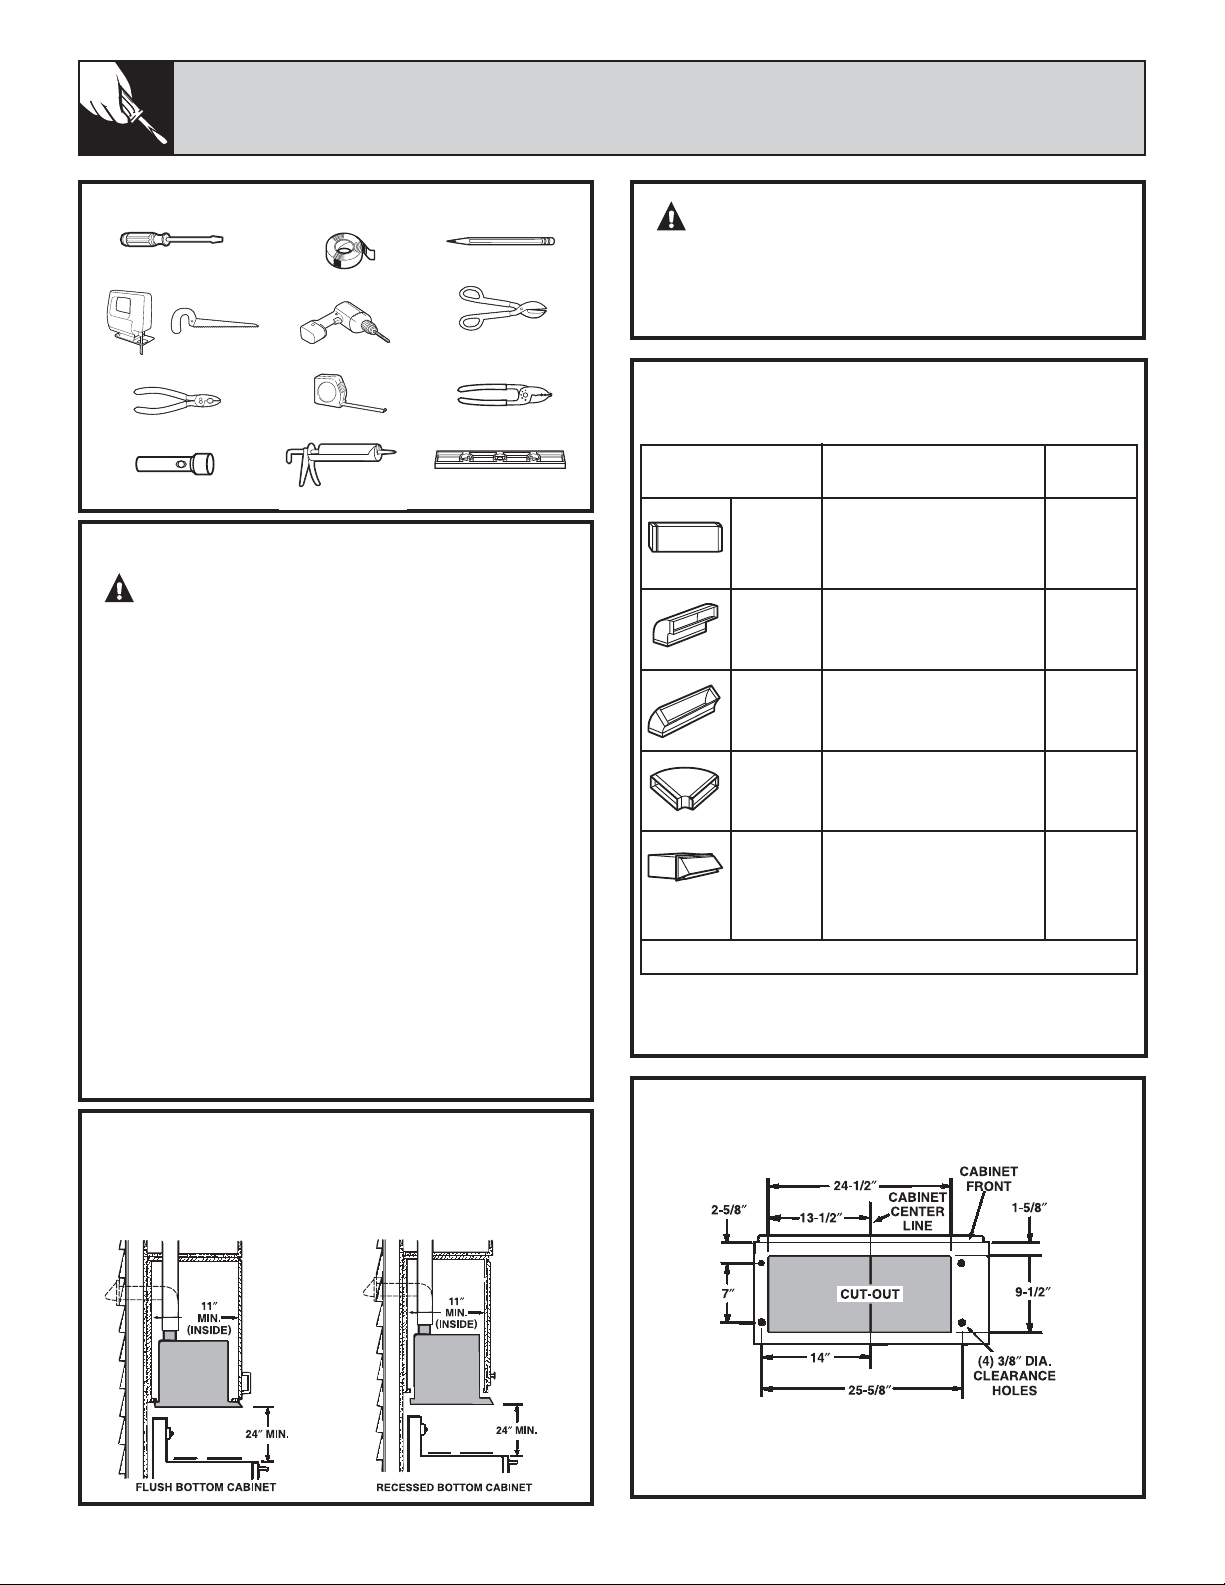
1. Mark and cut out the cabinet bottom.
Prepare the cabinet bottom as shown above. Be sure to
locate the cut-out and four holes from the front of the
cabinet to ensure a flush mount.
DUCT
EQUIVALENT NUMBER
PIECES LENGTH X USED = TOTAL
3
1
ø4s x 10s 1 Ft. x ( ) = Ft.
Rect.,
straight
3
1
ø4s x 10s 14 Ft. x ( ) = Ft.
Rect. 90°
elbow
3
1
ø4s x 10s 8 Ft. x ( ) = Ft.
Rect. 45°
elbow
3
1
ø4s x 10s 33 Ft. x ( ) = Ft.
Rect. 90°
flat elbow
3
1
ø4s x 10s 24 Ft. x ( ) = Ft.
Rect. (18 ft. w/o
wall cap damper) x ( ) = Ft.
with damper
Total ductwork = Ft.
:25.6+((7³&$/&8/$7(727$/
EQUIVALENT DUCTWORK LENGTH
MAXIMUM DUCT LENGTH: For satisfactory air movement,
the total duct length of a 3
1
ø4
s x 10s rectangular duct should
not exceed 65 equivalent feet.
7KLVKRRGFDQHDVLO\EHLQVWDOOHGE\IROORZLQJWKHVHEDVLFVWHSV
• Mark and cut out the cabinet bottom.
• Secure the hood to the cabinet.
• Mount the cabinet on the wall.
• Connect the ductwork and the power cable.
WARNING – TO REDUCE THE RISK
OF FIRE AND TO PROPERLY EXHAUST AIR, BE SURE
72'8&7$,52876,'(³'21279(17(;+$867$,5
INTO SPACES WITHIN WALLS OR CEILINGS OR INTO
ATTICS, CRAWL SPACES OR GARAGES.
Loading ...
Loading ...
Loading ...